
Google MyMaps is a very useful tool for people, who want to create their own map and base it on the Google Maps interface. Personally, I use it quite often, especially when planning some journey or placing some interesting objects across the World or some region. An important thing is to refer the stuff, prepared in our document to a particular location on the map and another way around. To link up some text or element in our document with the rough location on the map is not a difficult thing. On the contrary, making it in the reverse sequence can be sometimes quite tricky, especially when you don’t have basic software to help you with it. However, in this article, I am going to show you roughly how it works from both sides. Let’s go then!
- LINK THE TEXT OR OBJECT TO THE MAP
In most of the software used for writing, calculations, or drawing issues you have a hyperlink option. It obviously enables you to link up the text or particular object to the desired destination. In our case, this destination will be an interactive map created in Google MyMaps.
First of all, we should know what elements the Google MyMaps link includes. Basically, there are 2 link sections, which should draw our attention if we want to set our location properly (Pic. 1). There are:
– coordinates section,
– zoom factor.
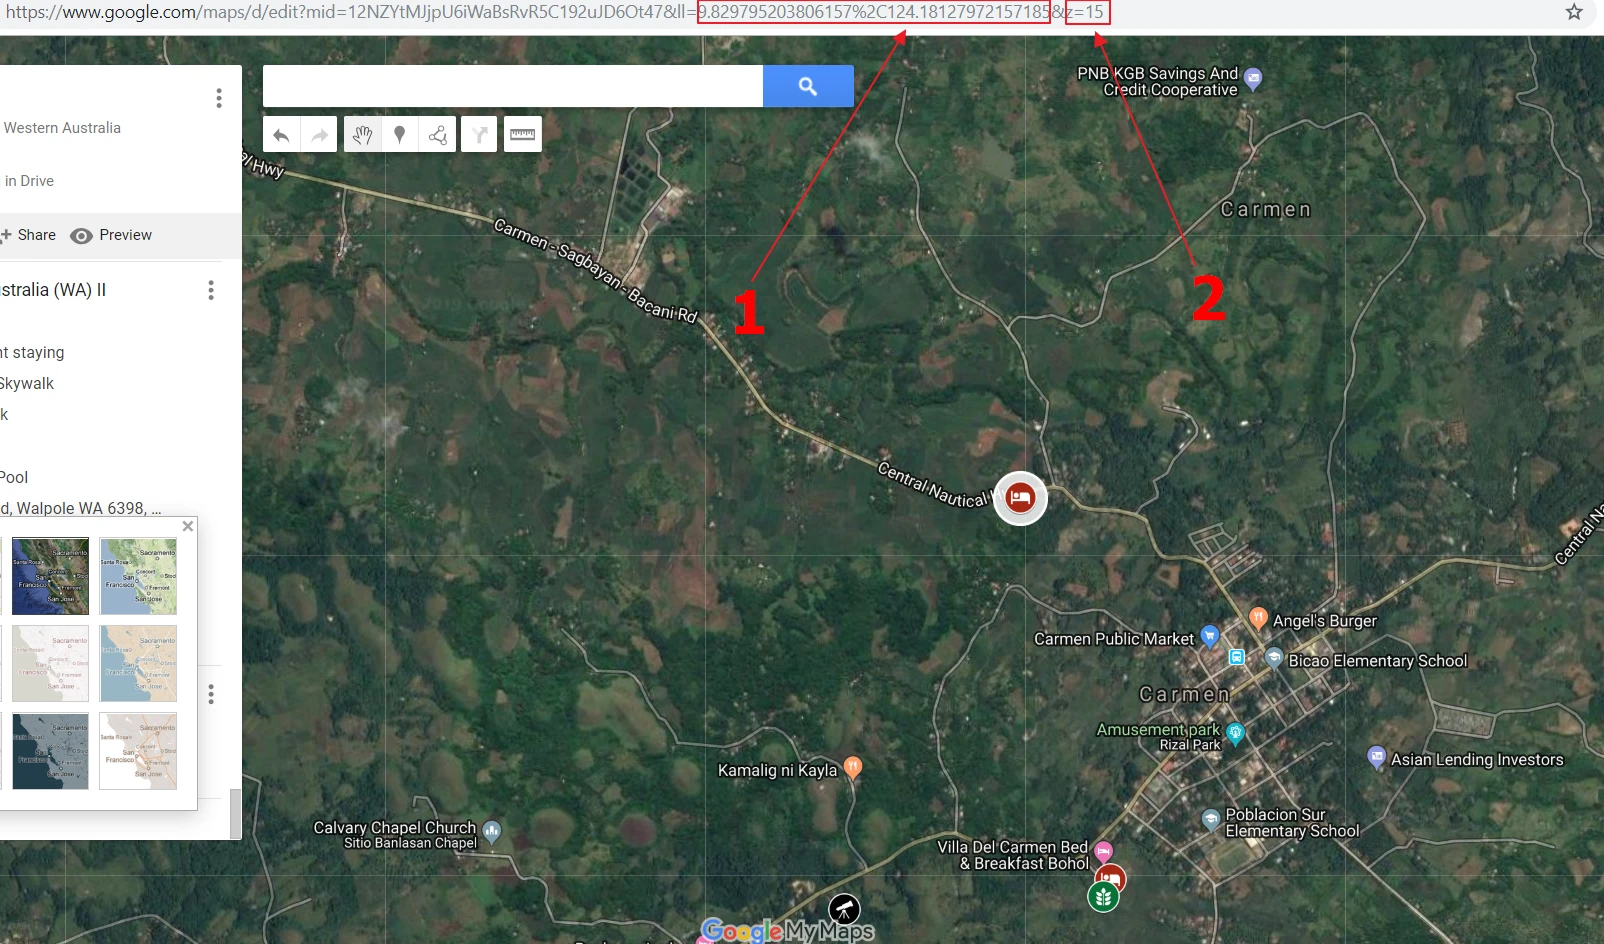
Apart from these, there are another 3, which we should know only out of interest for our purpose (Pic.2): user page, map mode (viewer or editor), and map ID.

When you start to drag your map a bit, you will see that the link path with the coordinates section changes instantly. The coordinates value refers to the middle point of your map.
We can use this quite long URL to hyperlink some stuff in your document. For example in MS Excel (Pic. 3,4). We must choose the “Link” option and input our URL address. Don’t worry if it’s longer than an input frame. It will work.
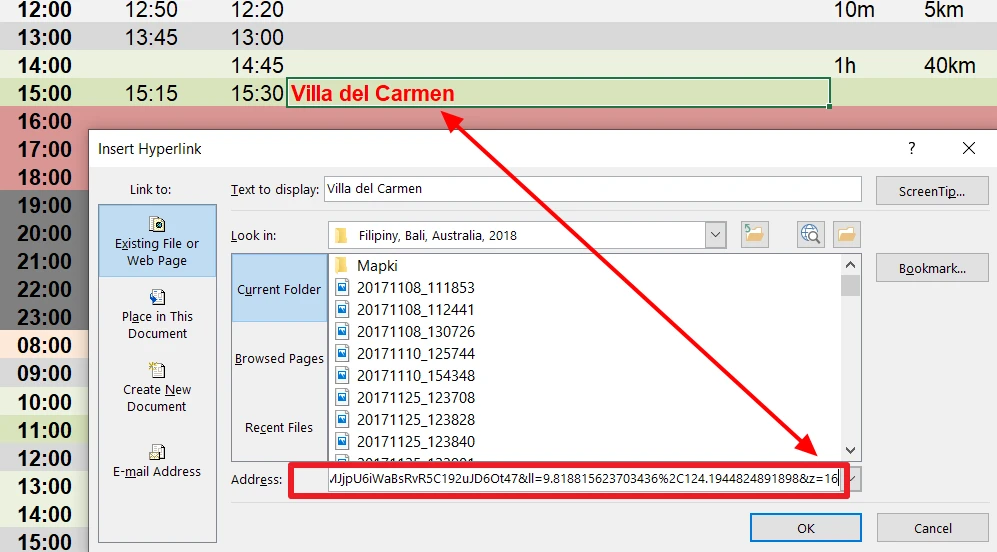
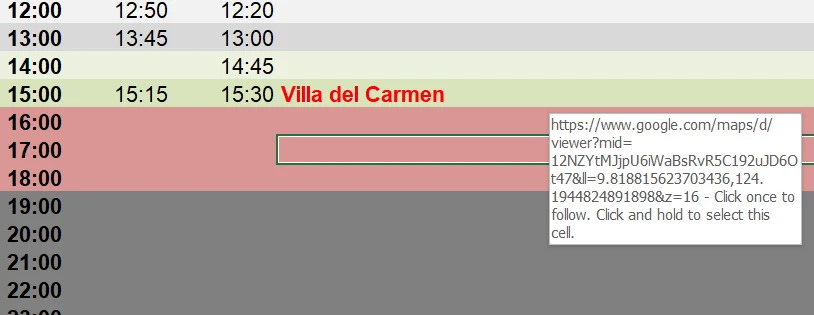
Once you hyperlink your document to the particular location on your map, it will open in the default browser in the future (Pic.5).

Unfortunately, the link doesn’t switch you to the object directly, so you must click on the placemark located in the middle, however in my point of view is a minor thing.
Using hyperlinks from documents to Google MyMaps such as this is a very convenient way to pop out on the proper location. Furthermore, if your map is public, then everyone who is sharing your document can take a glimpse of the location, also in the mobile version. This is for sure the easiest and the quickest way to hyperlink your work to the map, wherever the hyperlink option is available (MS Office, GIS software, AutoCAD, etc.), also after saving the file in PDF version (Pic. 6).

2. LINK THE TEXT OR OBJECT TO THE KML FILE
Unlike Google MyMaps, linking our work to a particular .kml file, a default format for Google Earth software can be a bit tricky task. Firstly, the difference lies in the file location. When linking to Google MyMaps you don’t need the tool to open it, except the internet browser, installed by default. The .kml file must have a Google Earth to be open. Otherwise, you won’t see the location, even when the hyperlink refers to some .kml file located on the server. However taking into account, that Google Earth is free software and widely common I can assume, that most people interested in GIS, geography, or tourism have this application on their computers.
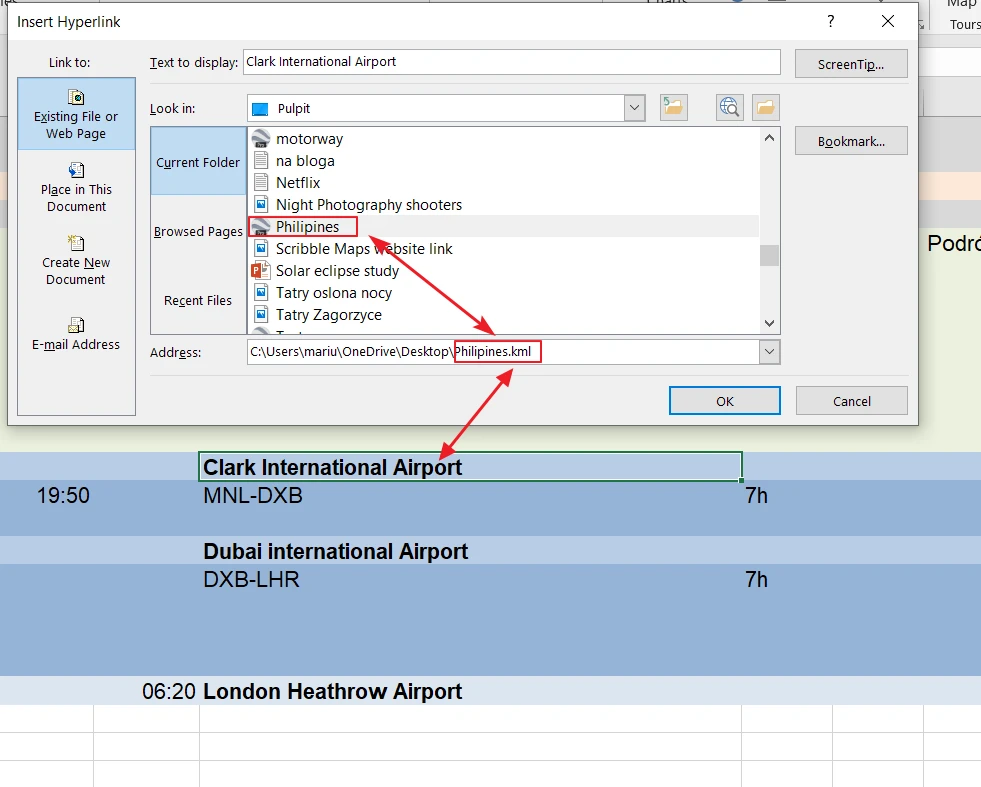
Basically, the hyperlink from some document to the .kml file is straightforward, likewise a link to the map described above. Here we’ve got an option to hyperlink our .kml stuff offline, directly from our disk (Pic. 6).

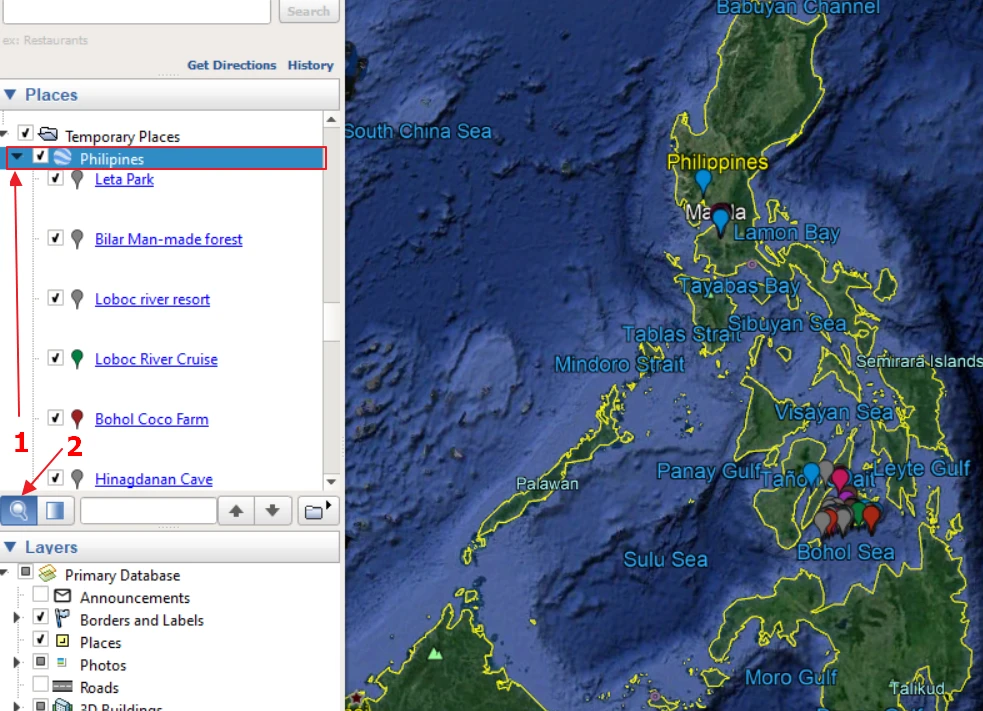
The only gripe is, that usually, our .kml file includes more than one object (placemark) based in its directory. If you want to gain a rough location for your MS Excel cell or some object in your document (in my case it was one of the points of my honeymoon journey), then the easiest way will be an extraction of the object from the .kml file. You can do it on Google Earth. When loading your main .kml file you must open its content and find a specific placemark, which you need (Pic. 7).
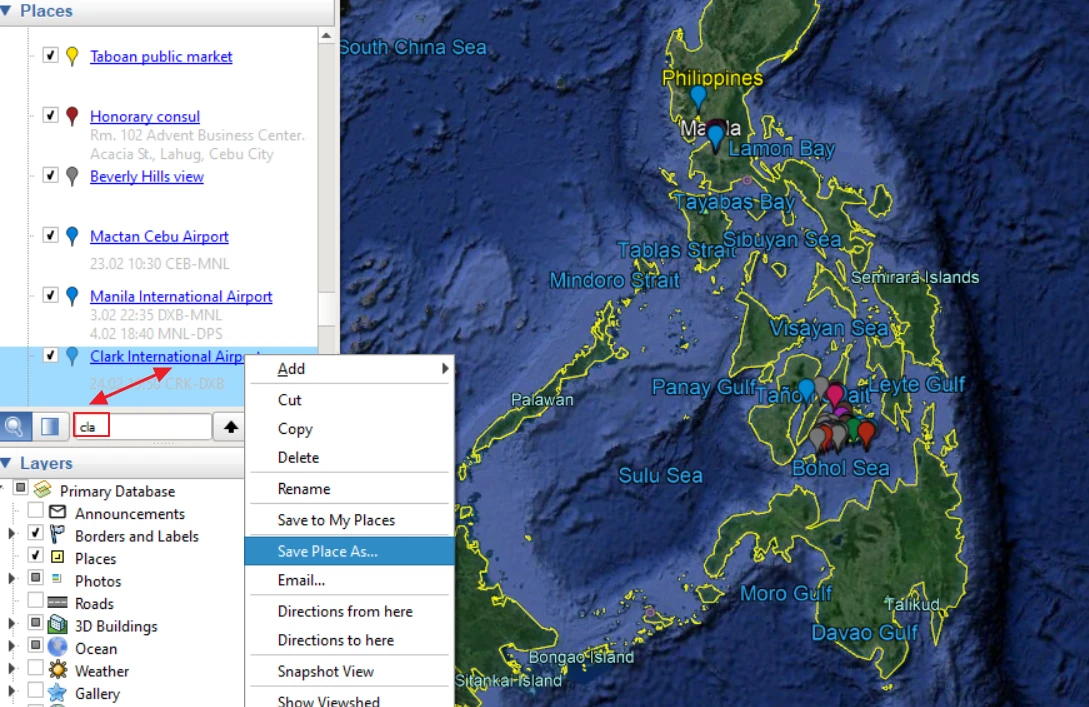
Once we find our placemark (Pic 8), we can download it to our private directory after right click and next hyperlink it to our document.
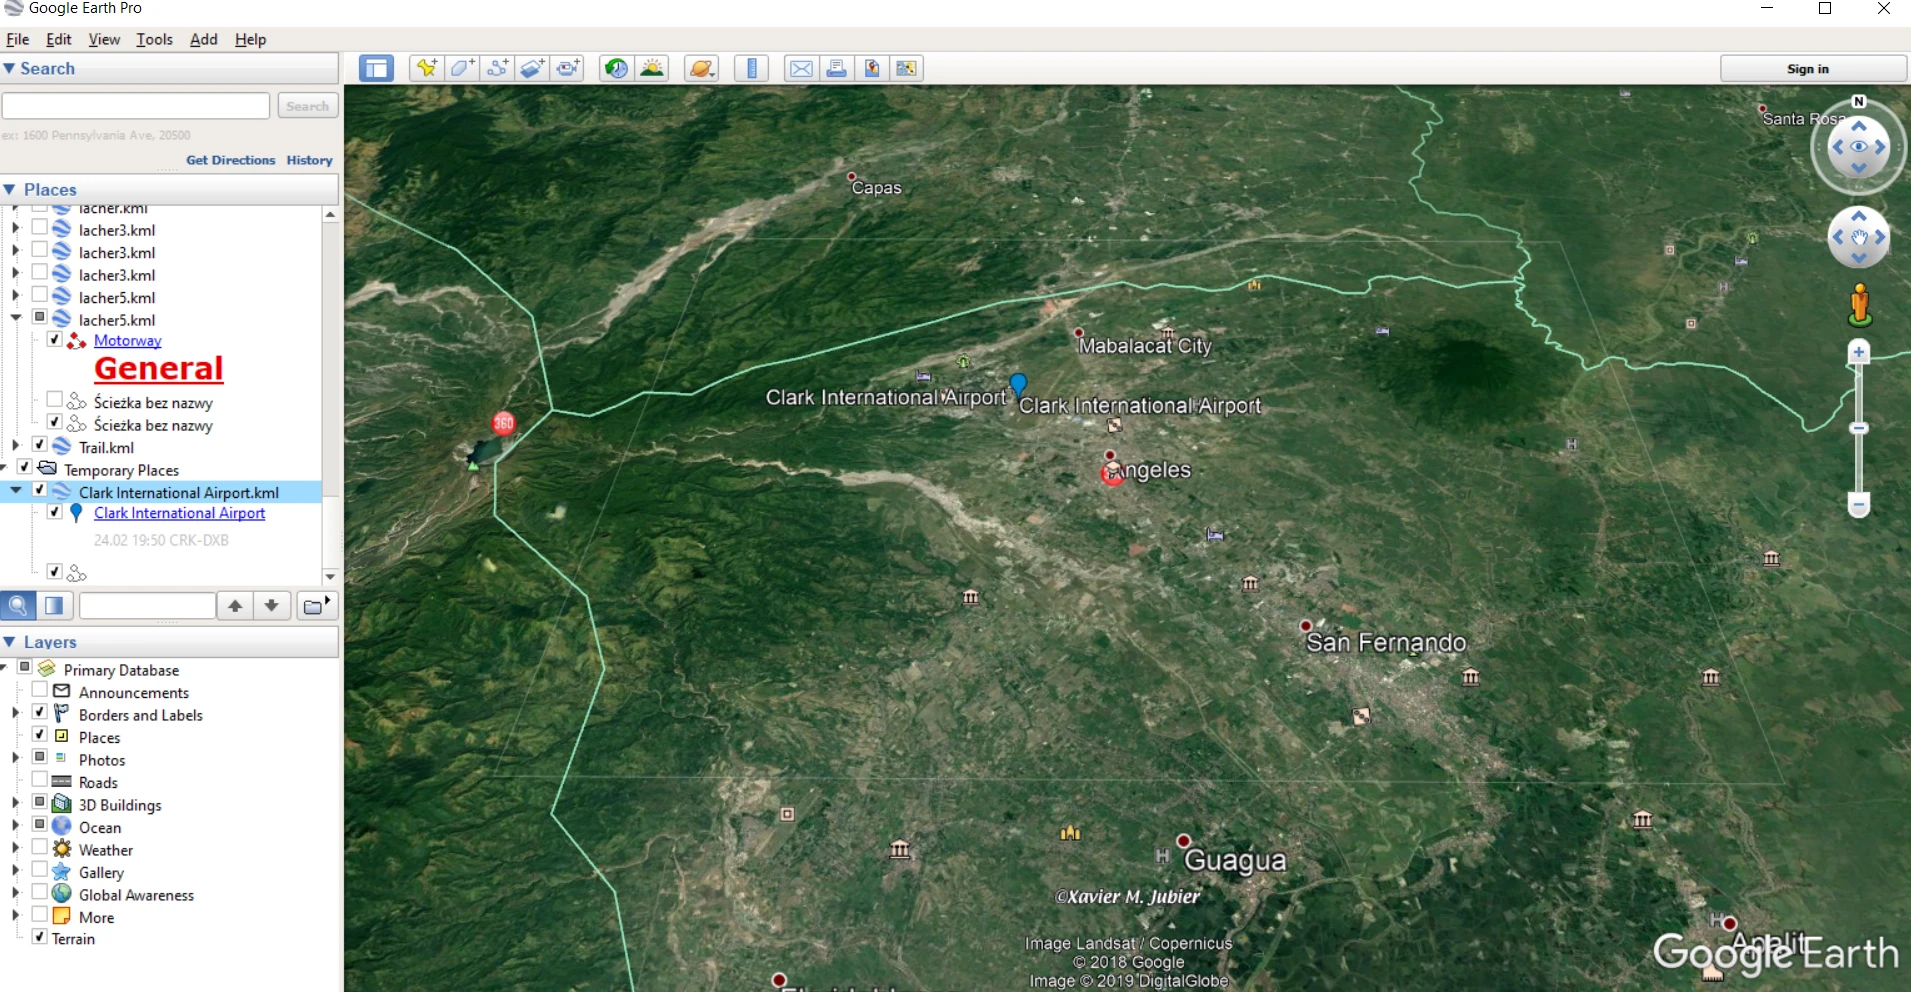
Afterward, you will be redirected directly to the location on Google Earth (Pic. 10).
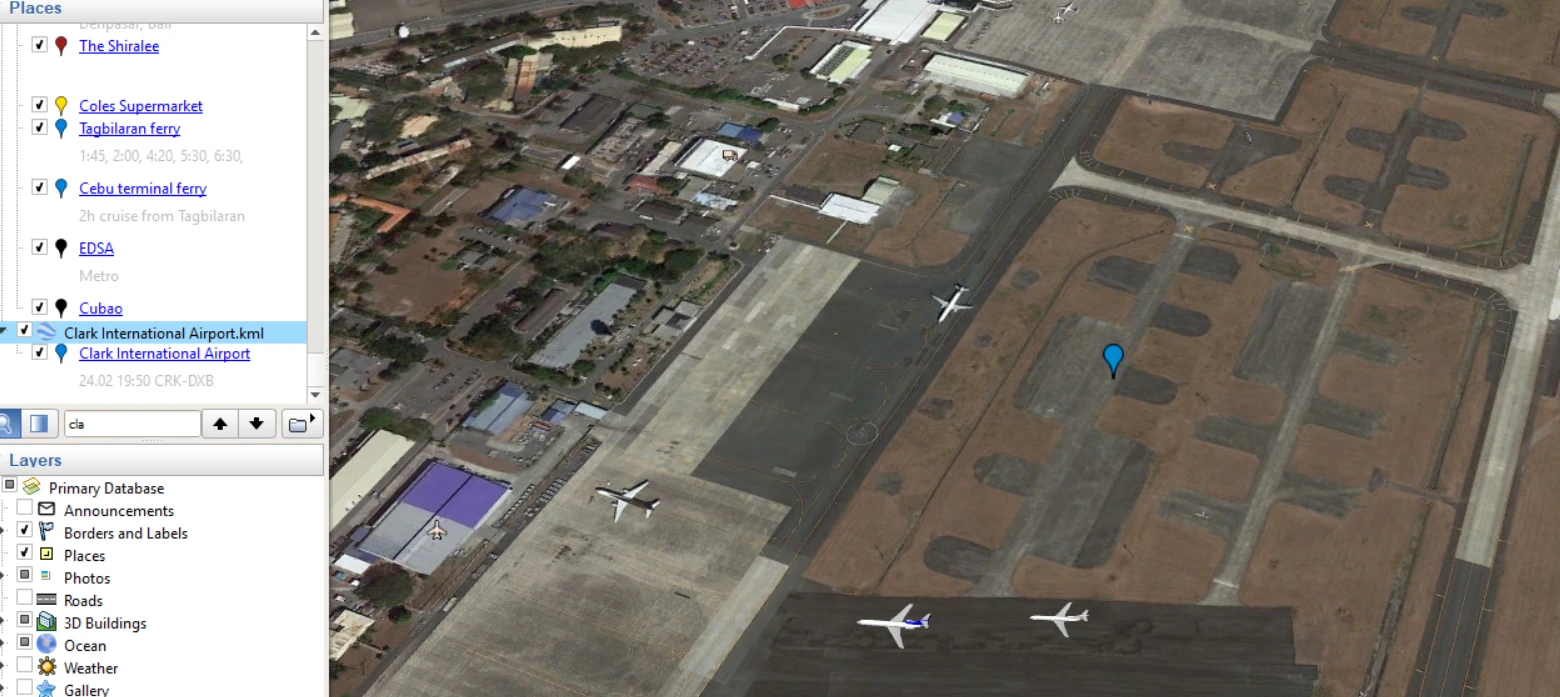
The only demerit here is obviously the scale. Google Earth zoom after loading is set to a maximum value, which closes up our object as much as possible. This is nothing bad, although sometimes we would like to get around the area and make sure, that we are hyperlinked to the right place. Unfortunately, the .kml files are not equipped with a zoom factor at the XML code stage, and only what you can do here is zoom out via Google Earth. Alternatively, you can start to work with regions, where through the command you can the coordinate borders for your point as per below (Pic. 11, 12).

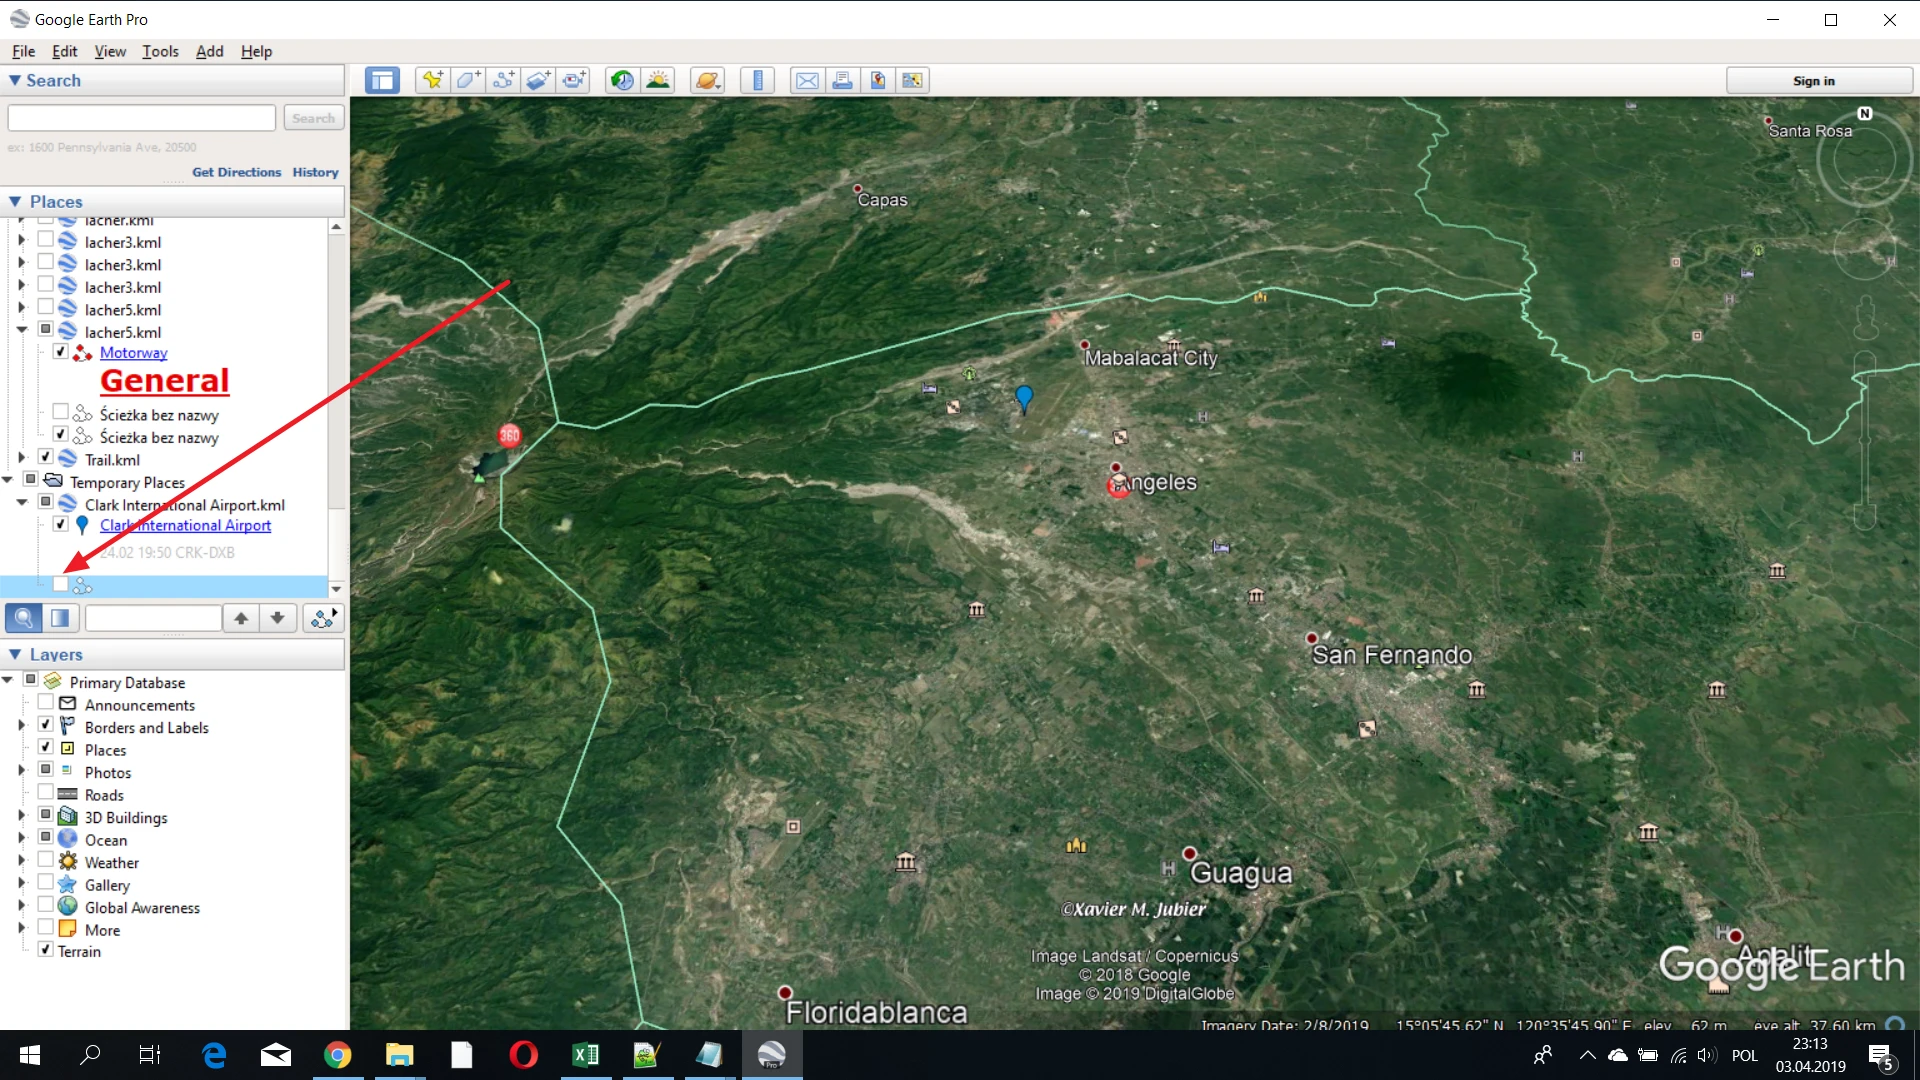
After these small alterations to your .kml file, you can save it and open it in Google Earth again (Pic. 13).
So great! You have got your placemark with an optional enlargement, where you can instantly make sure, that the surrounding area is correct. However, there is still one issue, which can annoy a user a bit. This is obviously a thin gray rectangle, that frames our region selected previously in XML code. To get rid of it we can simply thick off this element in our .kml file directory at the sideline toolbar (Pic. 14).
Remember, that this solution refers only to the situation when your file comes from the computer directory. I believe, that more often nowadays the .kml files are based on the web, i.e. in Google Spreadsheet. There you can also link your document to the specified placemark included as a whole .kml directory (Google Spreadsheet mapping), which was explained in detail here.
You can also set your zoom level only in the situation when your .kml file is based on the web. In this case, for example, the Google spreadsheet the process has been described in detail here. Another option is to set your own map based on Google Maps Javascript API, which is explained roughly here. Frankly speaking, the XML option is an alternative for someone, who is not clued up enough with programming skills. Truth be told more stuff and advice is available for the Google Maps JavaScript API, which I explain in the future.
3. LINK THE GOOGLE MY MAPS OBJECT TO THE DOCUMENT
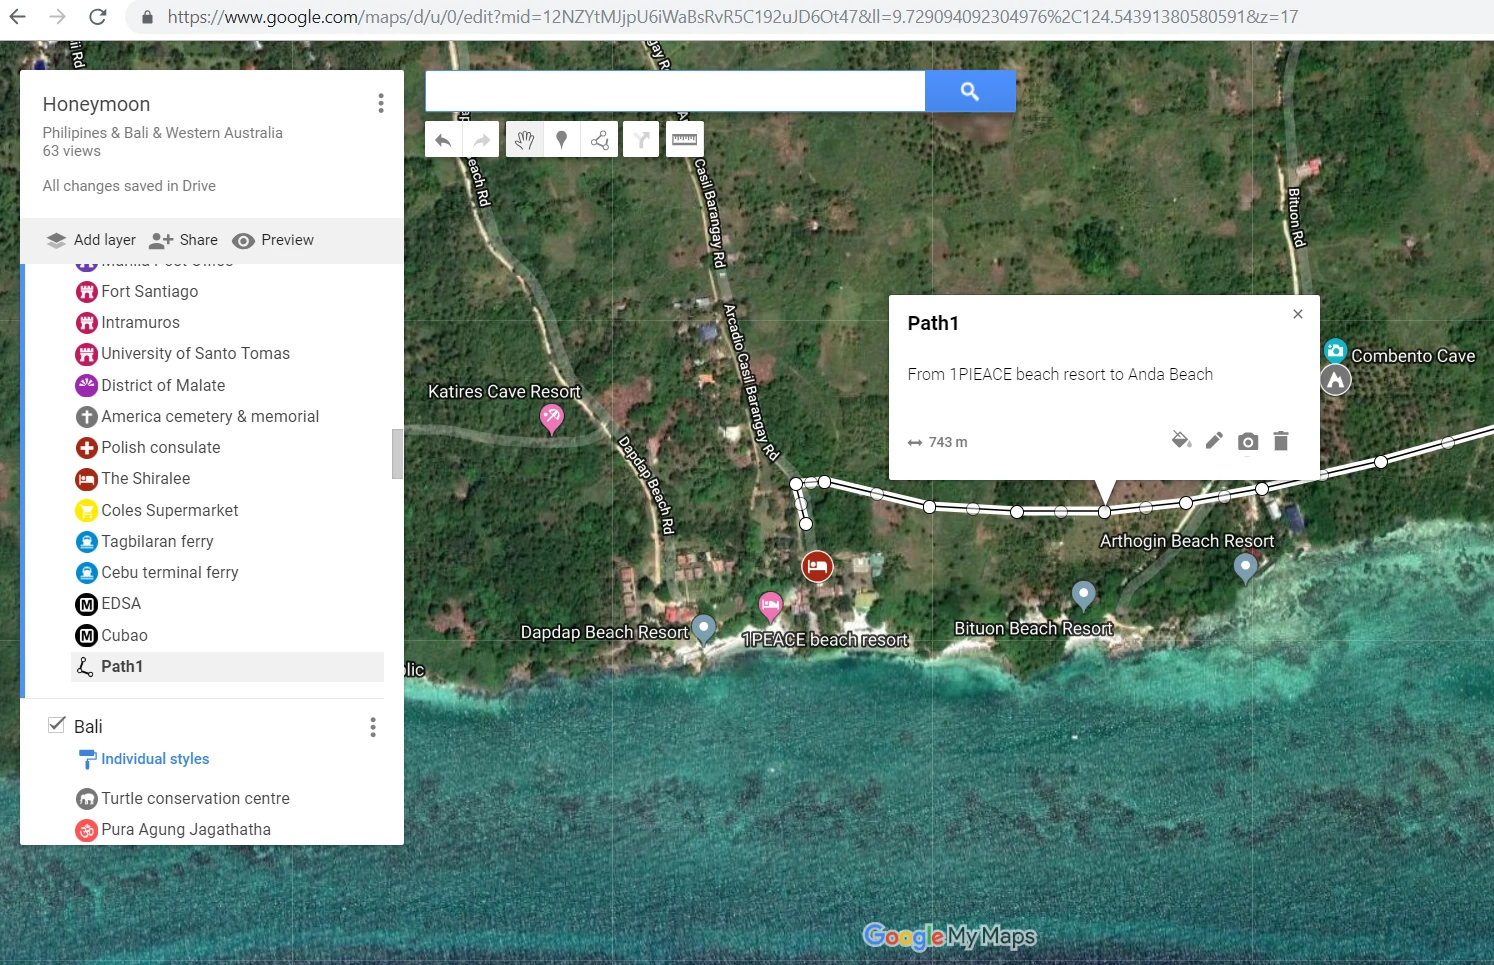
Link some object (placemark) created in GoogleMyMaps is, unfortunately, a tricky issue. First of all, GoogleMyMaps doesn’t support a hyperlink directly from the interface neither for point nor for linear objects (Pic. 15). Using at least a different interactive map builder will be beneficial if you don’t want to fight with XML code.
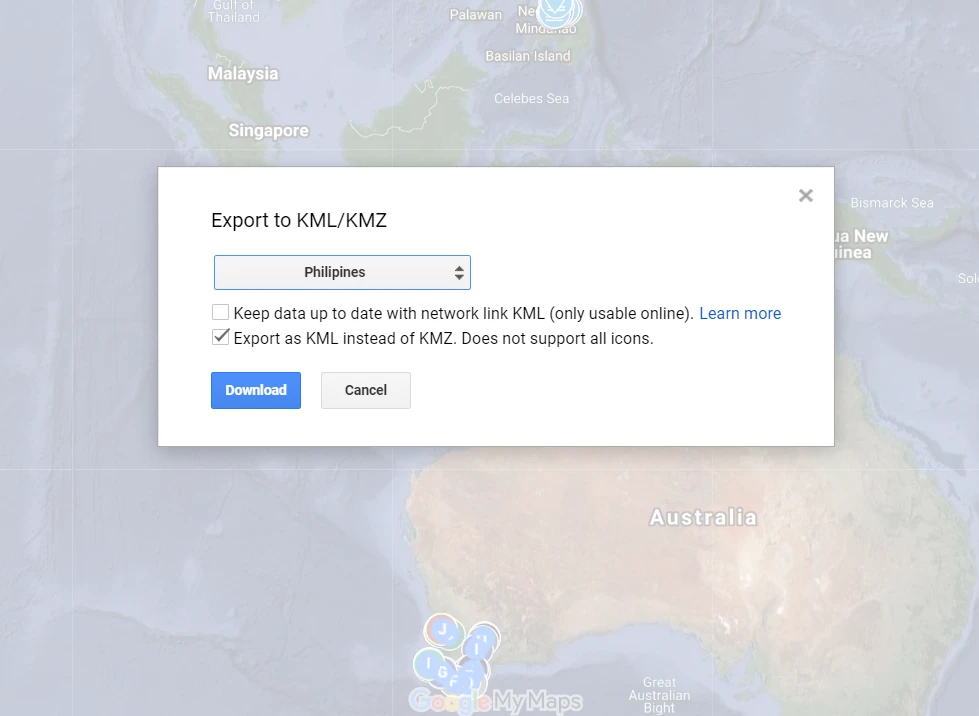
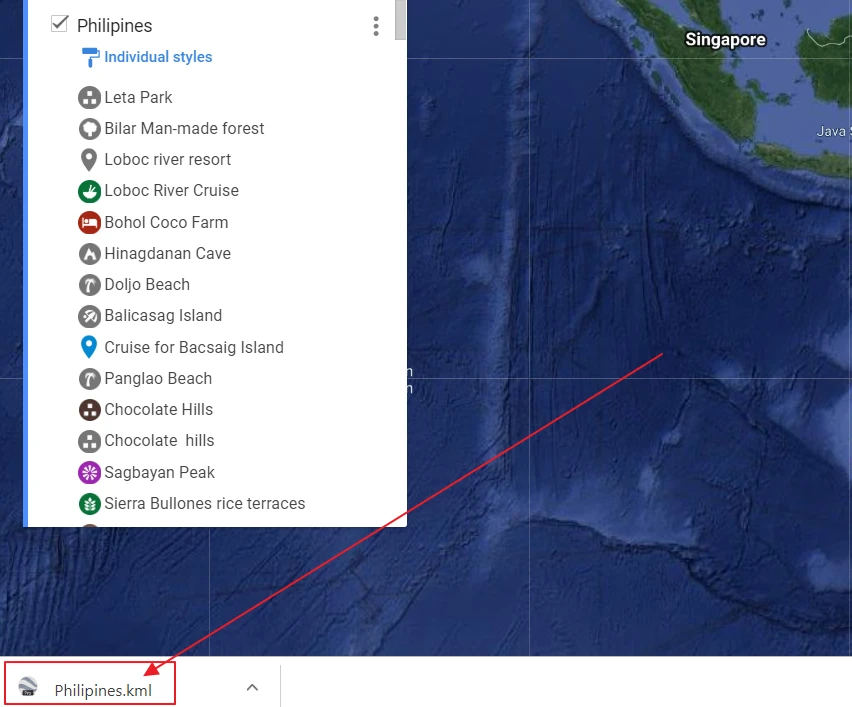
The best for this purpose I believe is the Scribble Maps interactive map builder, which is widely common among another dozen or so similar platforms. If you wish to have all placemarks linked, then you must generate the .kml file from your Google MyMap (or some single layer, when applicable)(Pic. 16, 17) and save it somewhere in your directory (Pic. 18).

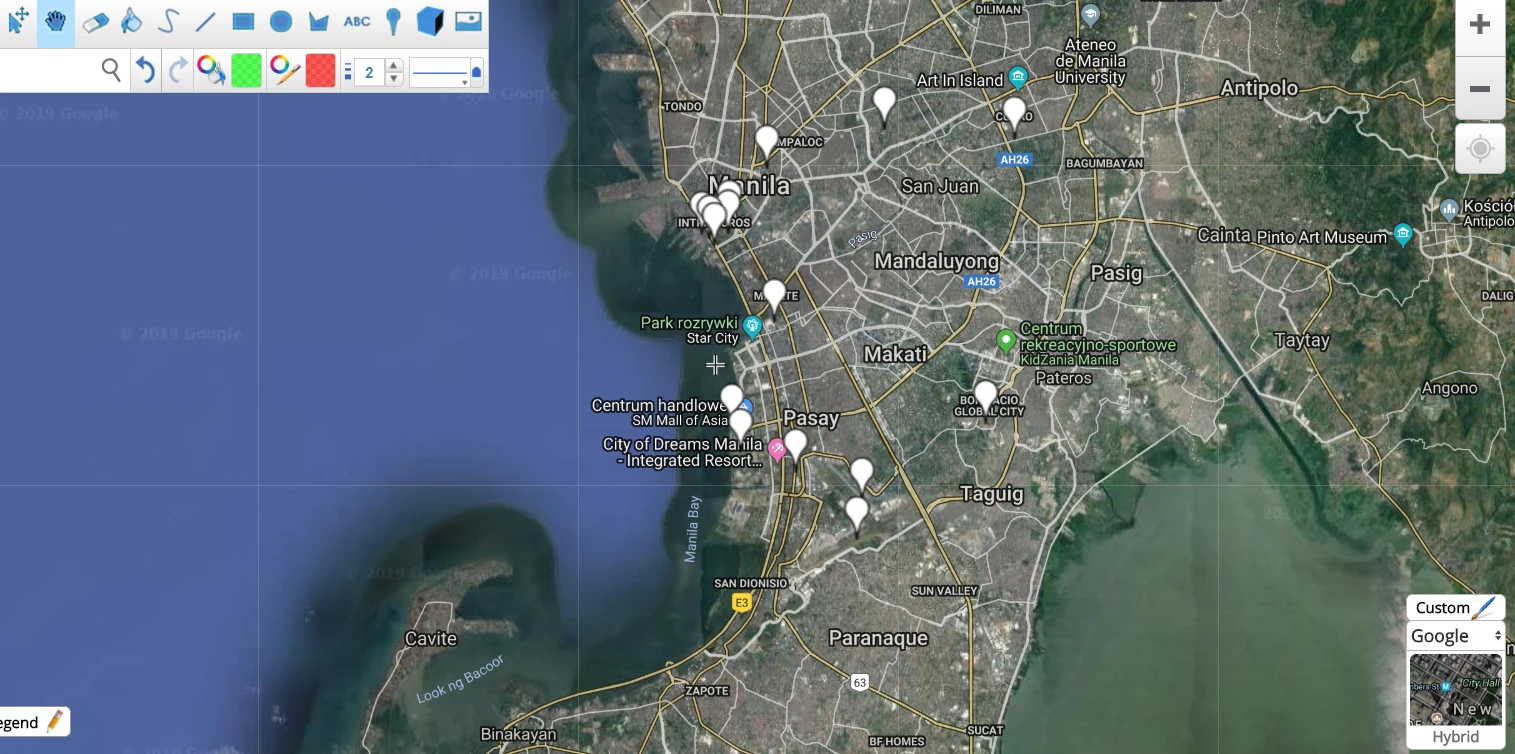
After this, you should import your file into a new Scribble Map, which will open automatically after loading (remember to drag to your placemark locations!). At first glance, your placemark group won’t look fine. This is because Scribble Maps doesn’t support icons from Google MyMaps (Pic. 19), although don’t worry about it, because when you do the saving and uploading in reverse sequence, then you retrieve all icons in Google MyMaps again.
Having your .kml embedded in the Scribble Map interactive builder you can start to edit every single placemark, adding a link to the description.
In the new, single example I will show you how to do it effectively.
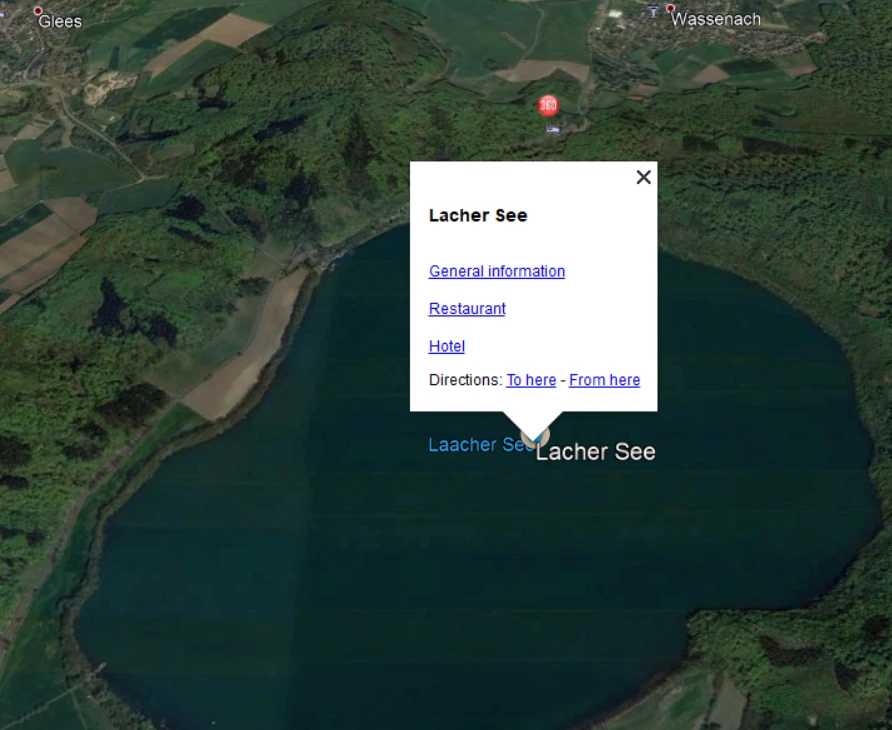
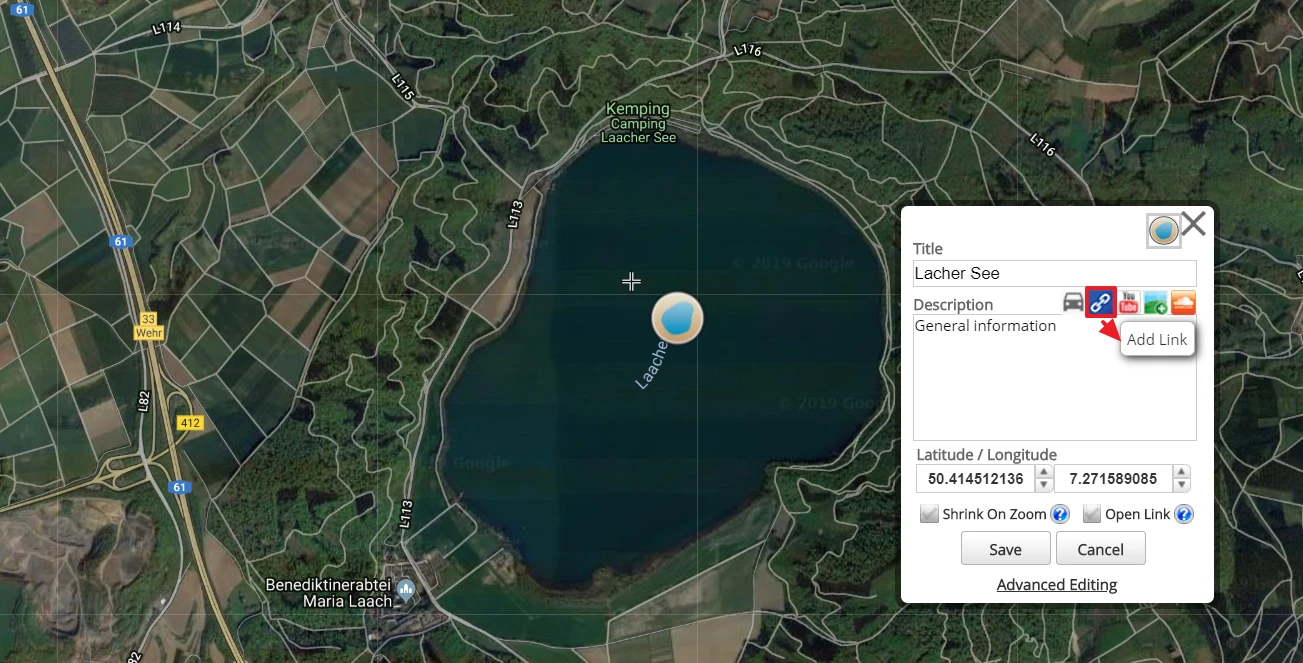
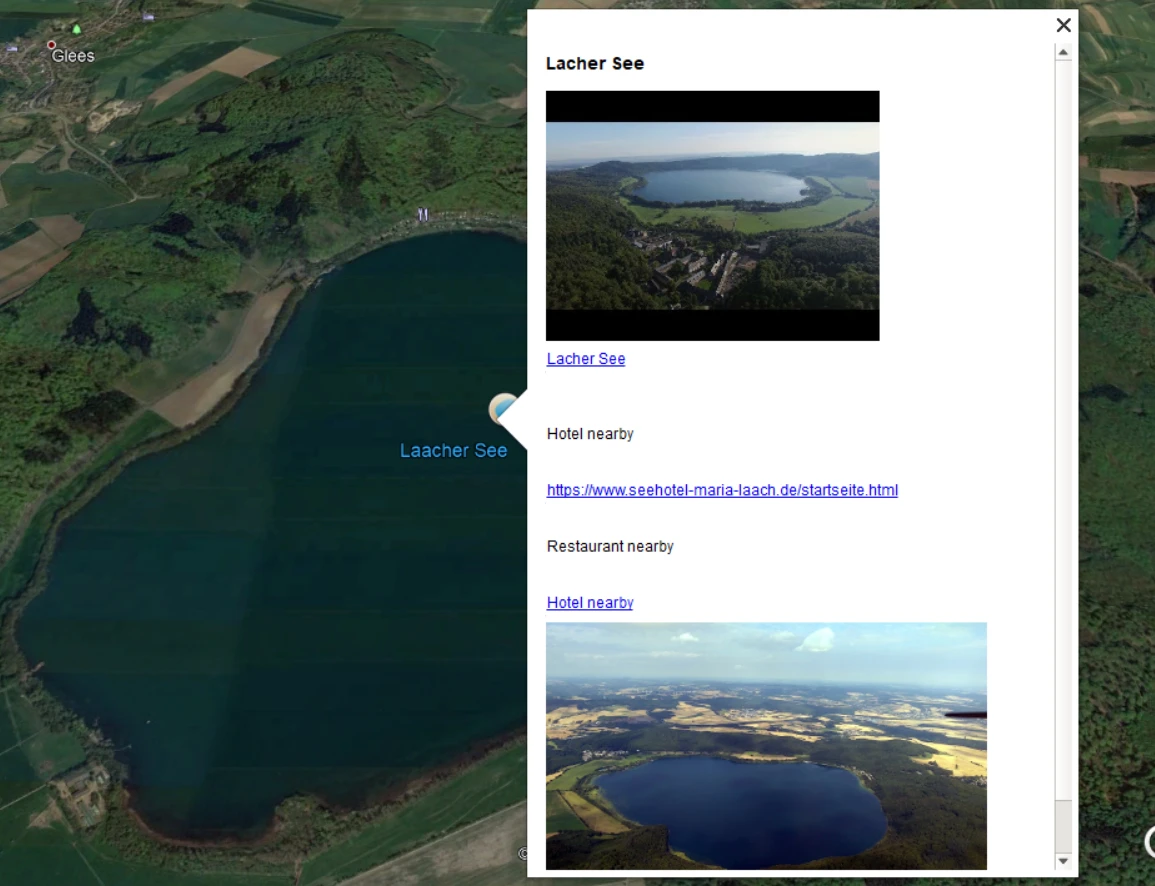
Well, I have created a single placemark, which is called a Lacher See (a volcanic lake in West Germany). Now, after opening its editor I have a few options to input a link i.e. pictures, Youtube, etc. For us, the most important is an anchor-looking signature (Pic. 20) called “Add link”.
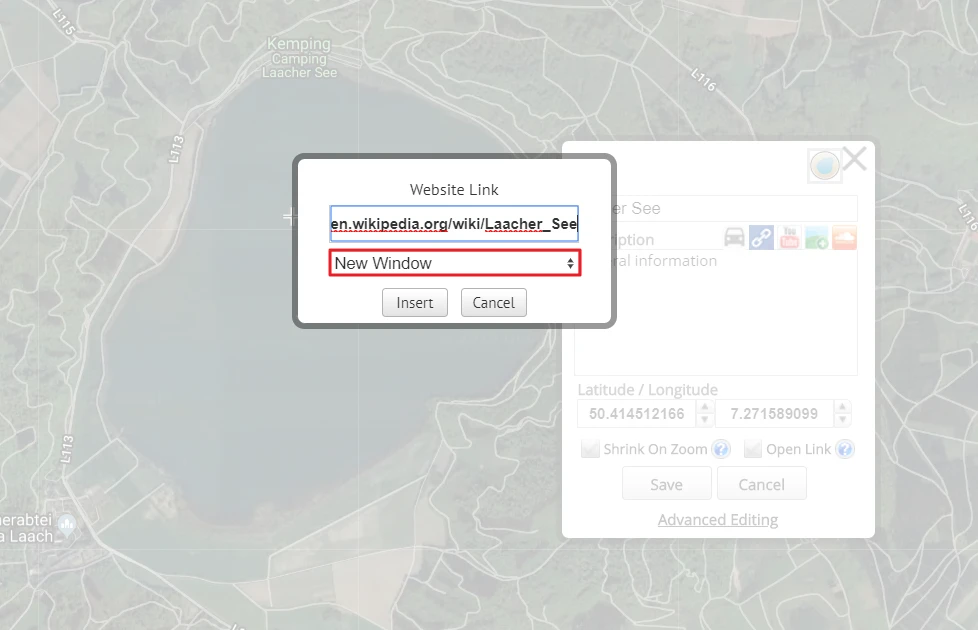
Let’s input some random URL path, let that be some informative website about this place, which for instance Wikipedia. Obviously, don’t forget to set an “Open in new window” option (Pic. 21).
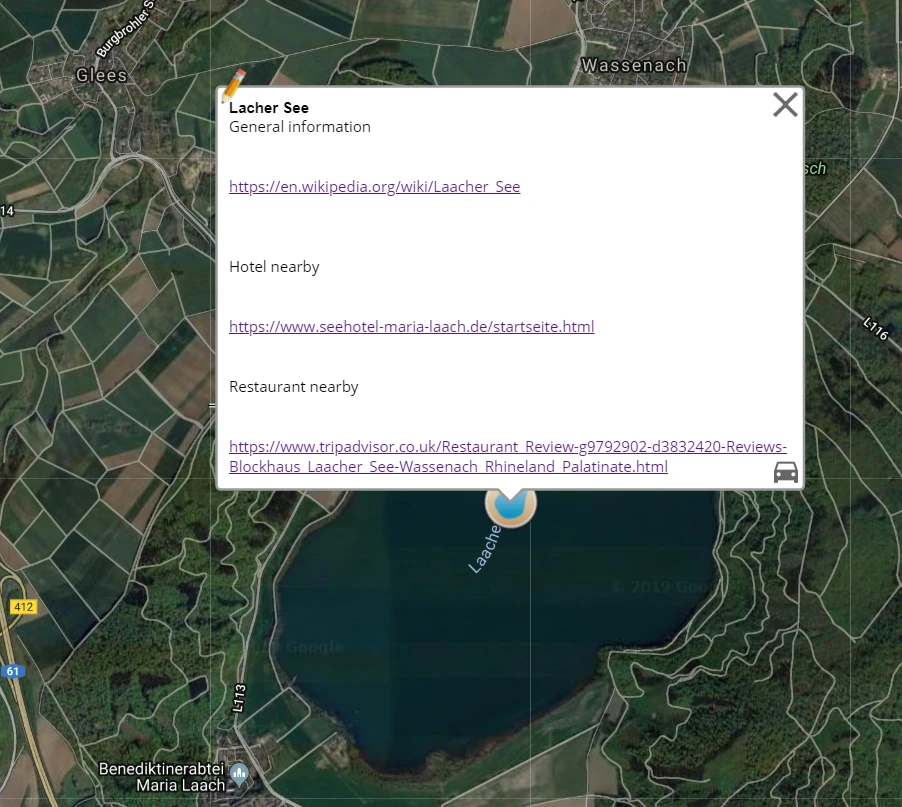
We can add up more, than 1 link to a specified website, attaching, for example, a restaurant and hotel nearby (Pic. 22).
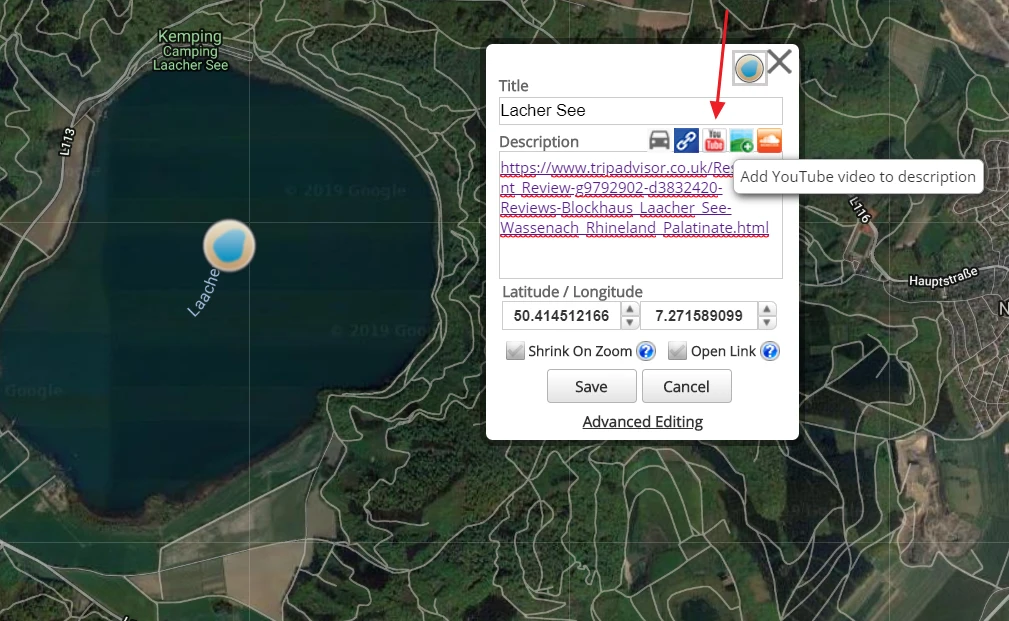
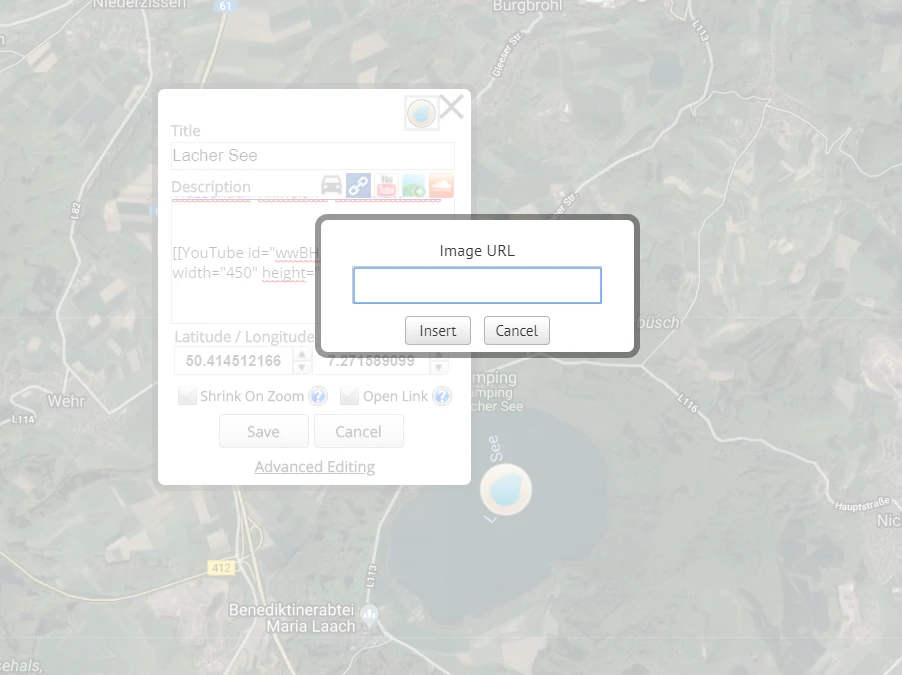
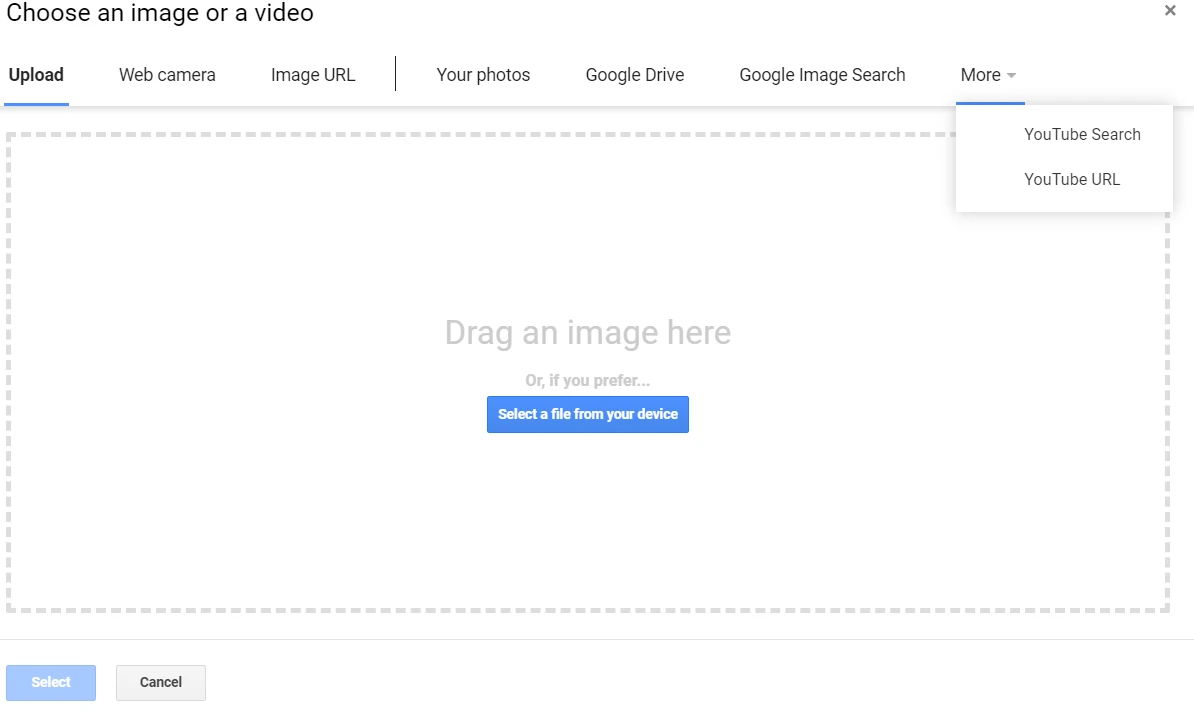
Apart from a link only, you can embed both a YouTube movie or picture (Pic. 23). Think about adding a picture as a link through the Scribble Map, because this builder requires the URL to the picture (Pic. 25), which not always work (Pic. 26). It will be better to fill up in Google MyMaps later (Pic. 27), alternatively, your picture has been already attached before you made a .kml file.
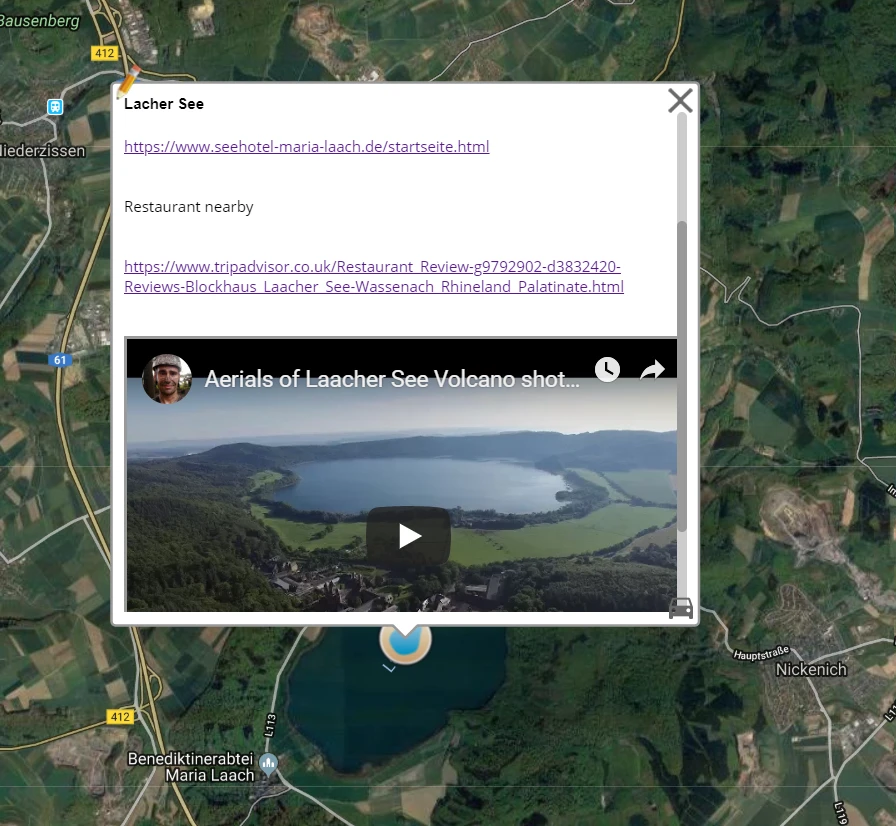
Both your YouTube and image files either in Google MyMaps or Scribble Maps should be loaded automatically, showing you a graph miniature inside the placemark description (Pic. 24). Then you can be sure, that everything is fine with your link.

Returning to the image issue and their disappearance in Google Earth, we can use Google MyMaps to check if our link is supported by GoogleUserContent at all. If so, you should have a graph loaded, if not, then you receive info like this (Pic. 27).
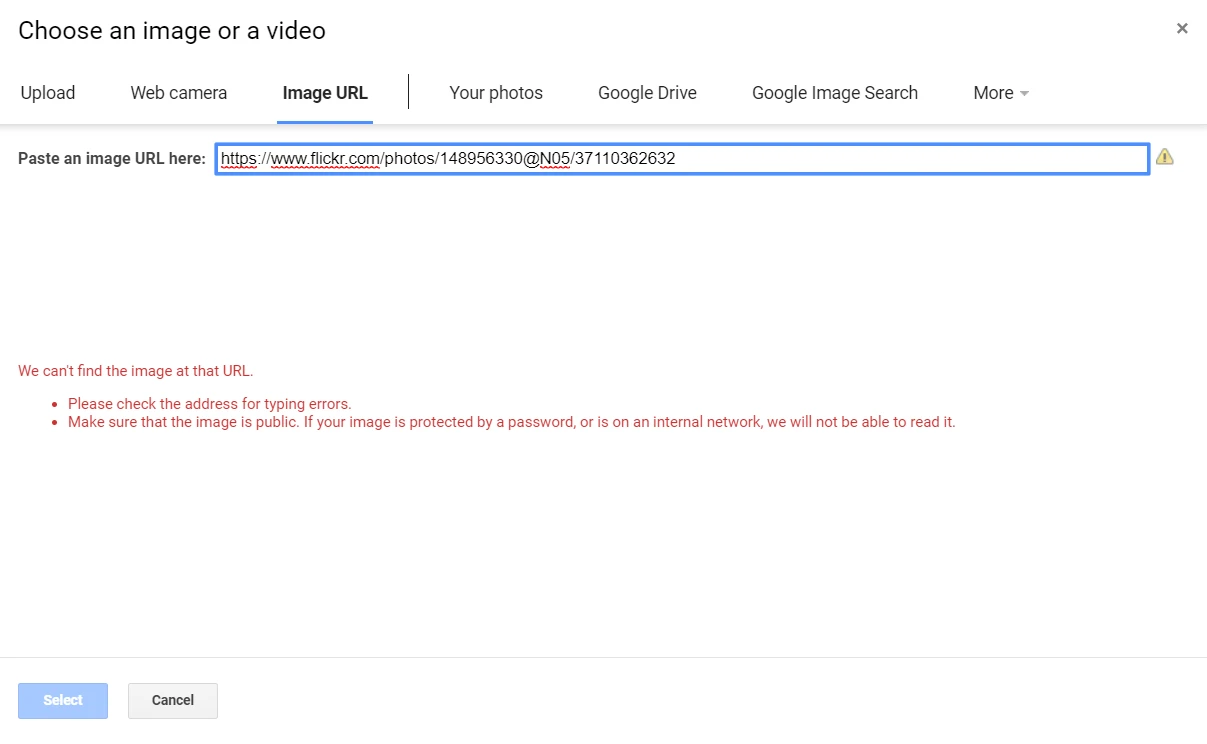
In general, links like Flickr or Wikimedia are not supported. In this case, it better is to download your picture first to the computer and then upload it to Google MyMaps from your drive.
When you add up everything, then you can generate a .kml file in Scribble Maps, download it, and upload it to Google MyMaps. A basic demerit is, that every single .kml file in Google MyMaps is treated as a separate layer, which really restricts our work there because Google MyMaps provides 8 layers only. At the outcome, you are able to import 8 single .kml files only. Much better is, when your .kml file includes all placemarks, that you need, unlike my example provided.
Anyway, the link should be clearly visible in your Google MyMap now (Pic. 28-30).


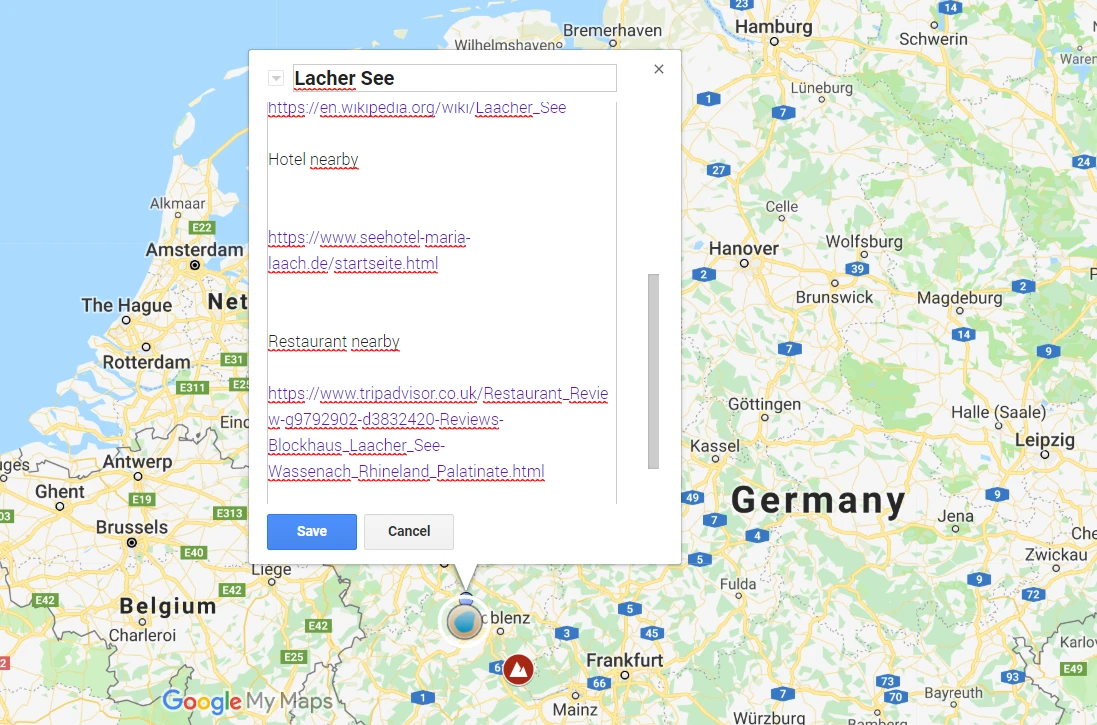
As you may have noticed, the hyperlinks are available, however, did we really want them in a form such as that? We would rather have the main text hyperlinked instead of having these long hypertexts underneath.
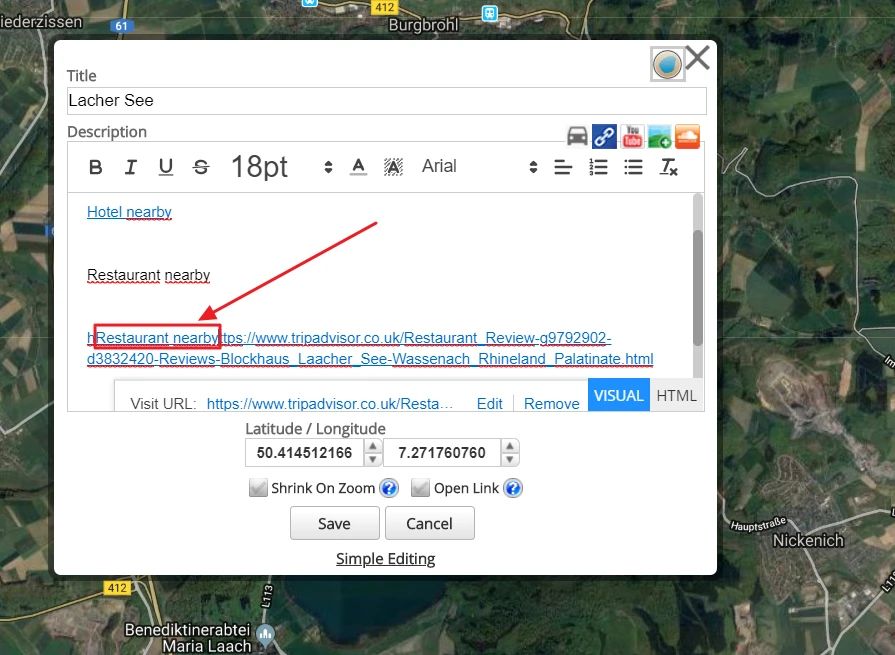
So we can somewhat do this in Scribble Maps. However, we cannot write the text outside our link, because it won’t work. We cannot also select our text and mar as a hyperlink. One thing, that we can do is start writing our text inside the existing hyperlink (Pic. 31) and remove not needed pieces as shown below.
Ok, when you prepare your hyperlinked text, then save your placemark, create the .kml file, and import it to Google MyMaps. Unfortunately, Google MyMaps doesn’t support solutions like this, although your information will still look better, than previously (Pic. 32).
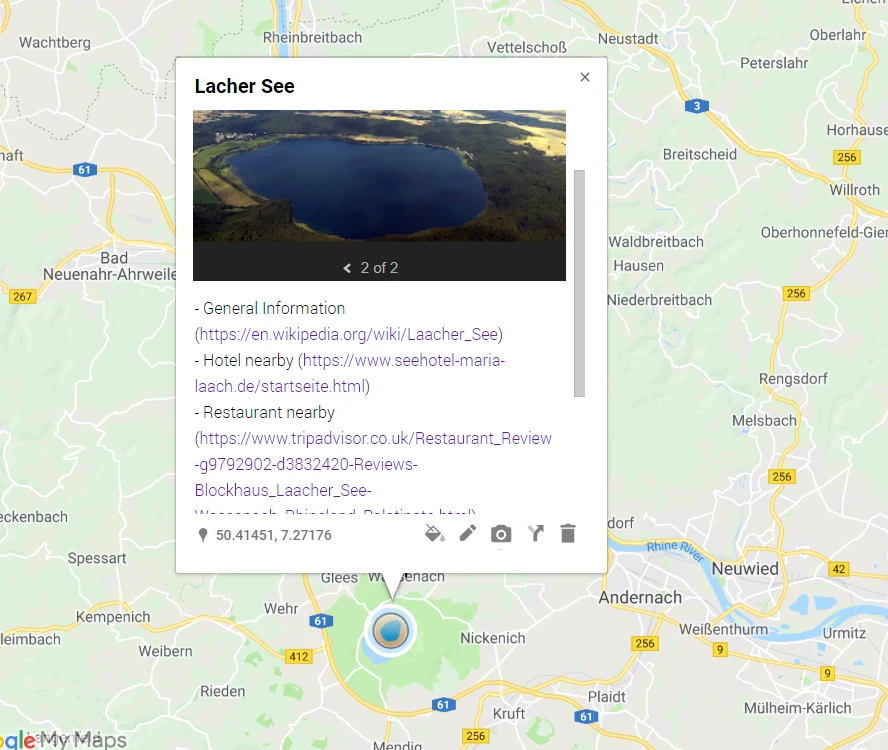
As a result of the manual hyperlink edition in Scribble Maps, you should get a solution in Google MyMaps as above. Your text won’t be linked, as you would like, although the form with a bracketed link path can be accepted in general.
At the finish of the link issues in Google MyMaps, I would like to show link options supported by this platform (Pic. 33).
Fortunately, Google Earth reads our hyperlink properly (Pic. 34).

4. LINK THE .KML FILE TO THE DOCUMENT
Another important element is a link to the .kml file, placed in Google Earth to the document. A basic placemark with one or more hyperlinks looks as per in the picture above (Pic. 34), where you can see linked information inside the description. These links can redirect both to URLs and to some particular documents, placed on your hard drive.
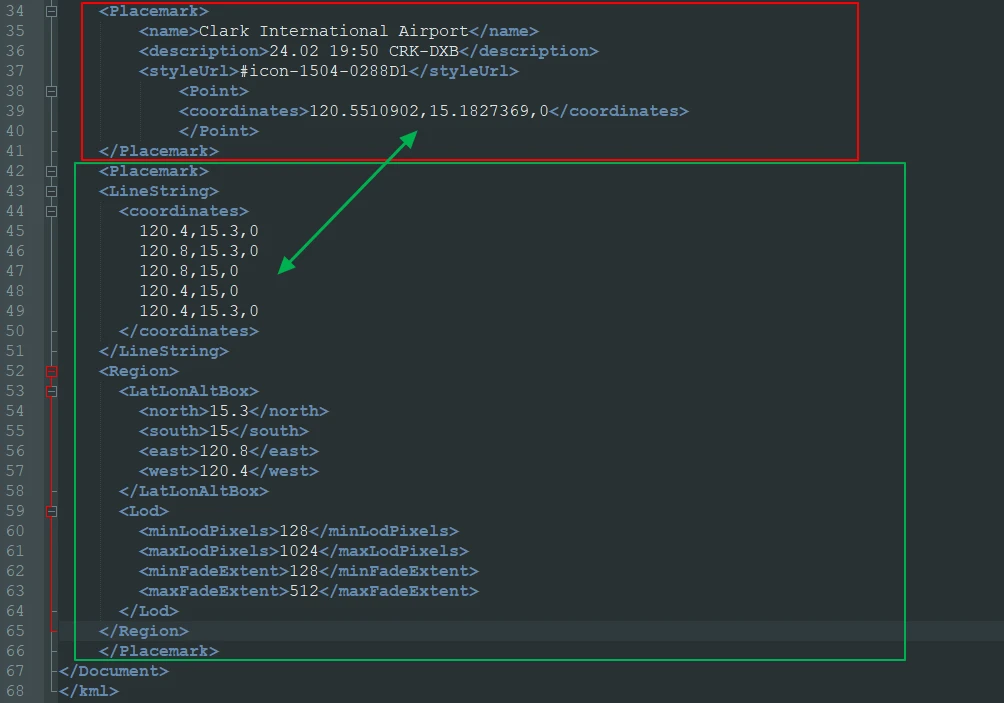
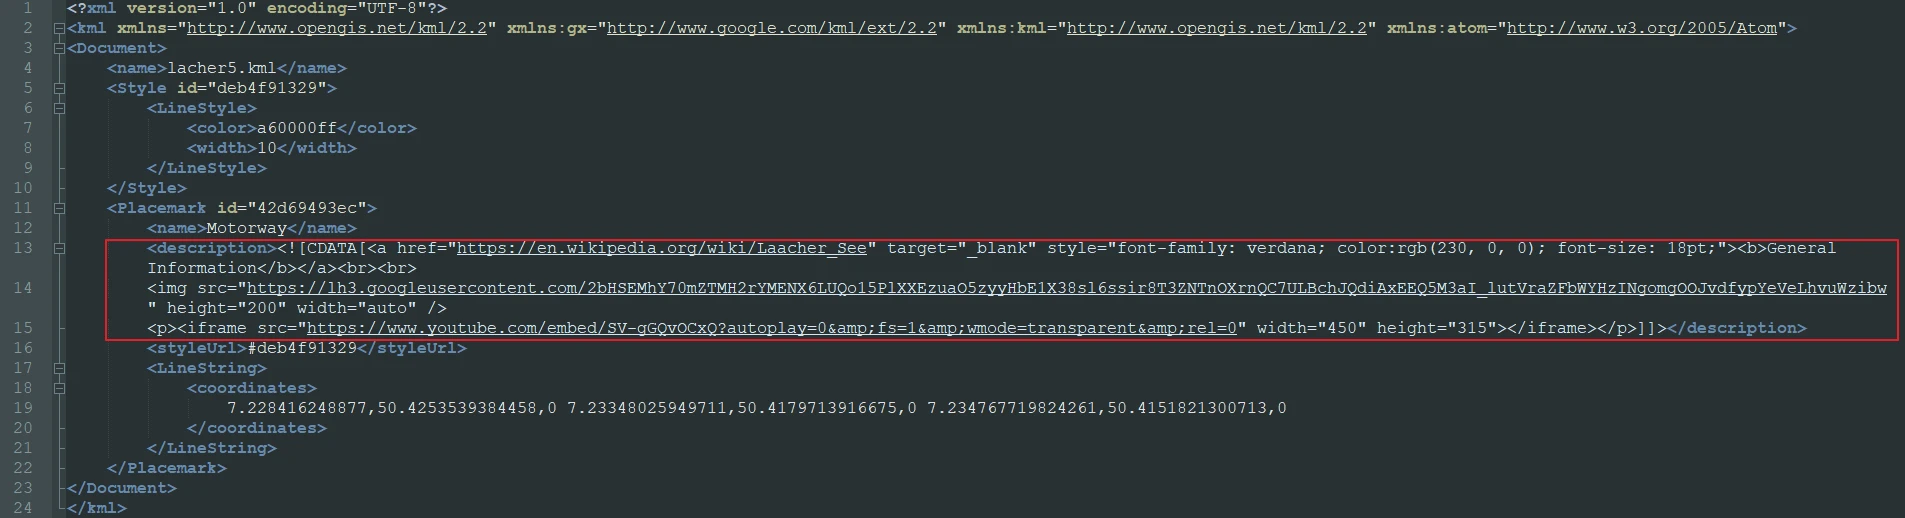
If we would consider taking a look at our link structure in XML code, then it could look like this (Pic. 35).
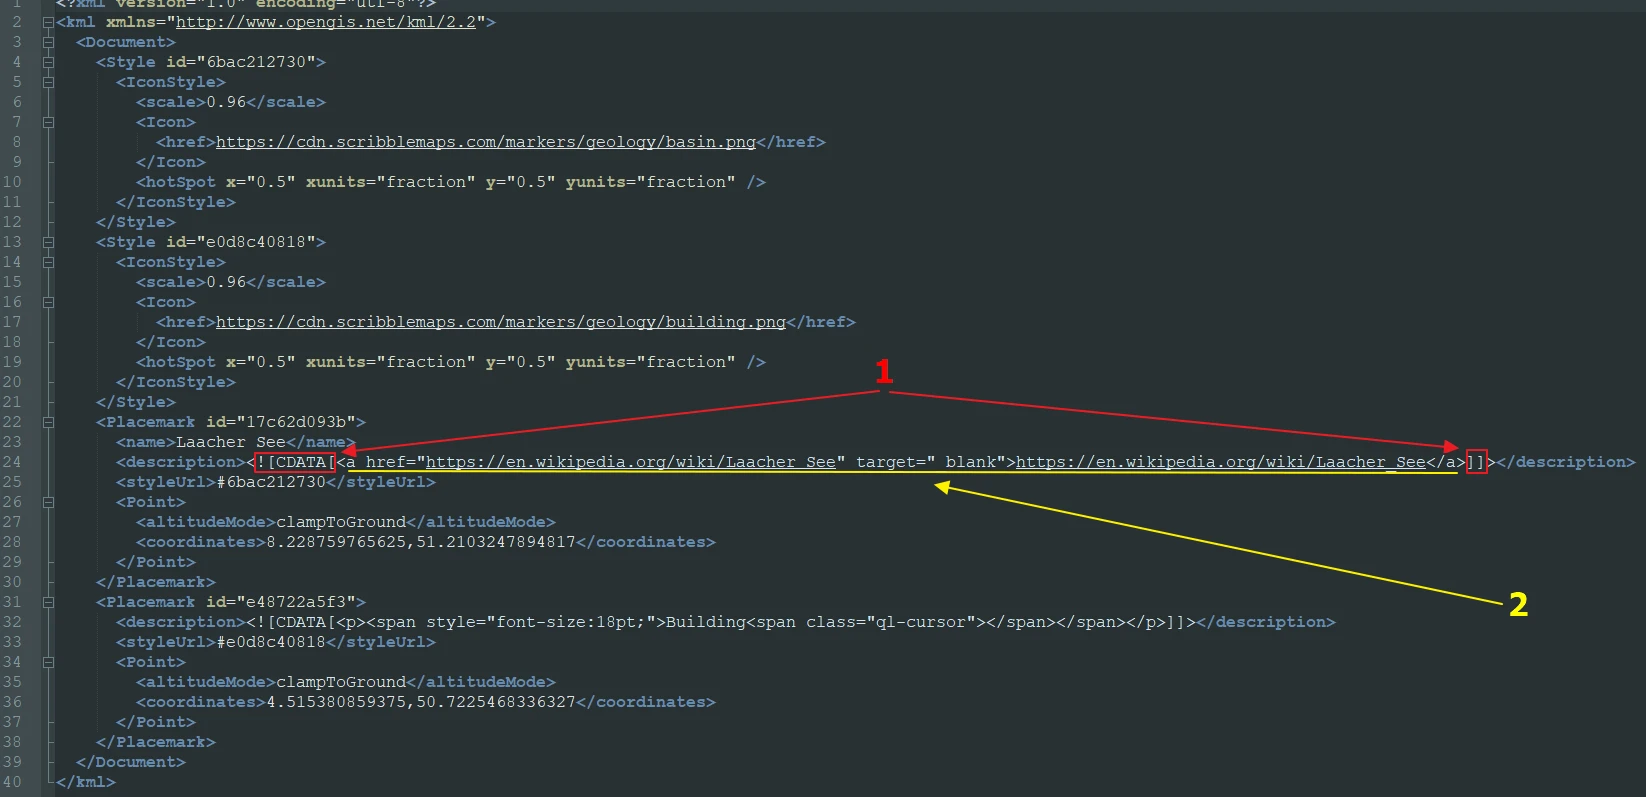
The most important is ![CDATA[…]] command, which enables us to input an HTML or CSS code inside. Then we can both create a link to some document or URL, directly from the .kml file, or style the .kml description, which will be discussed in the future.
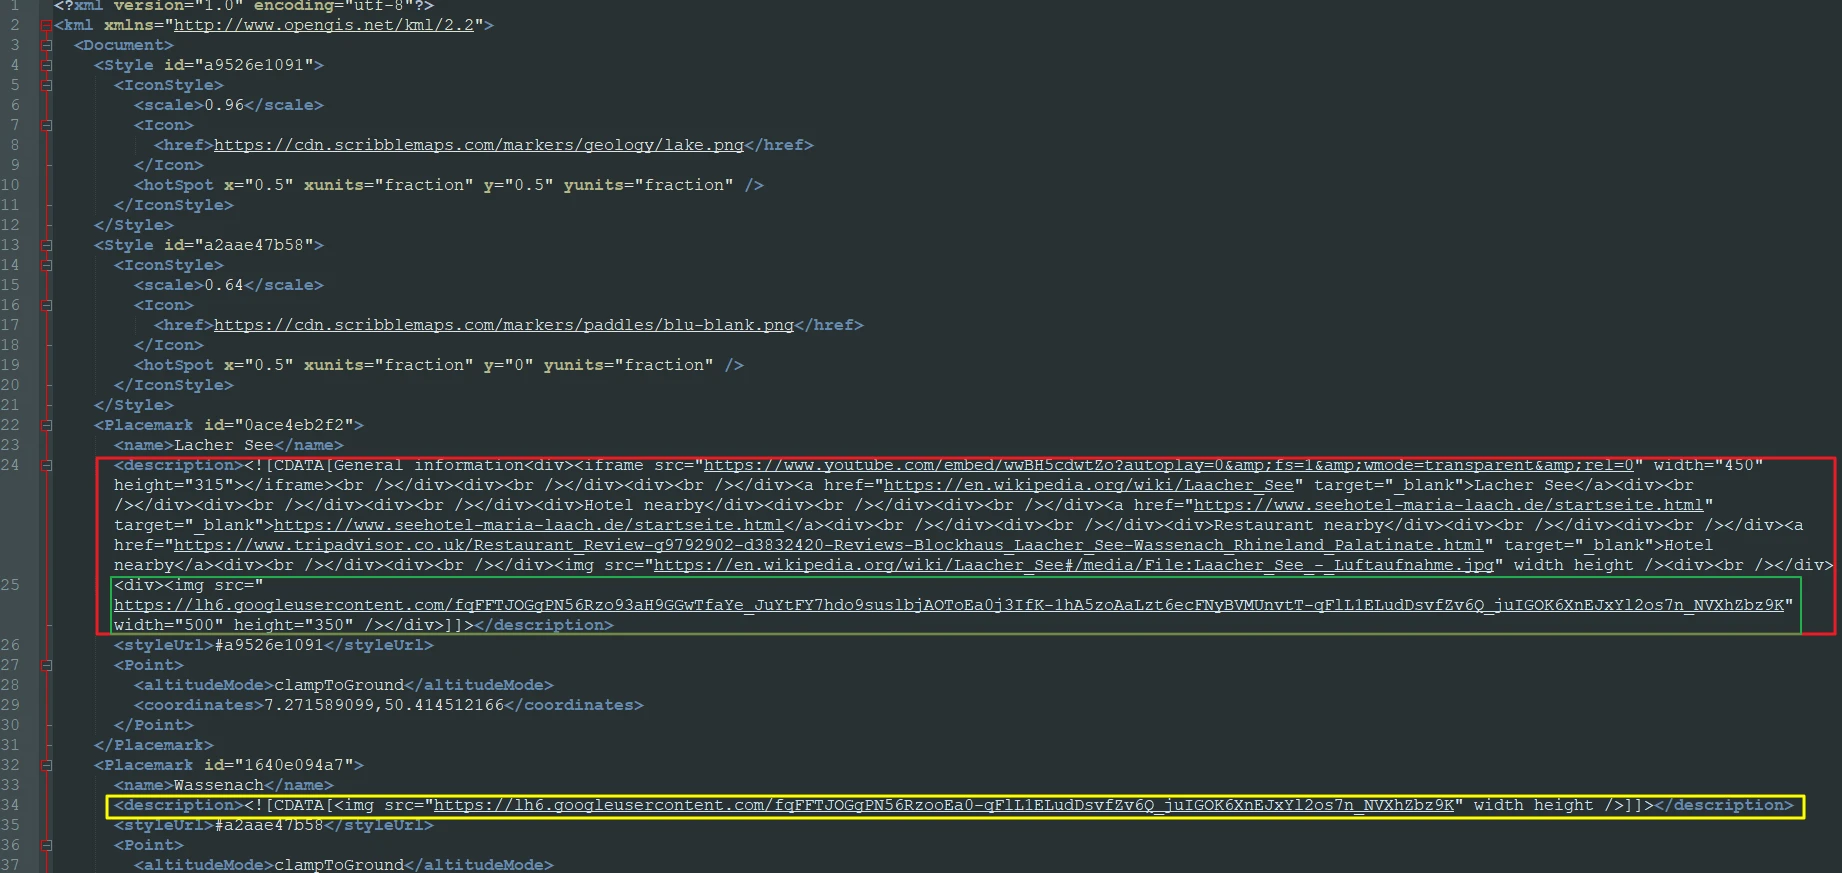
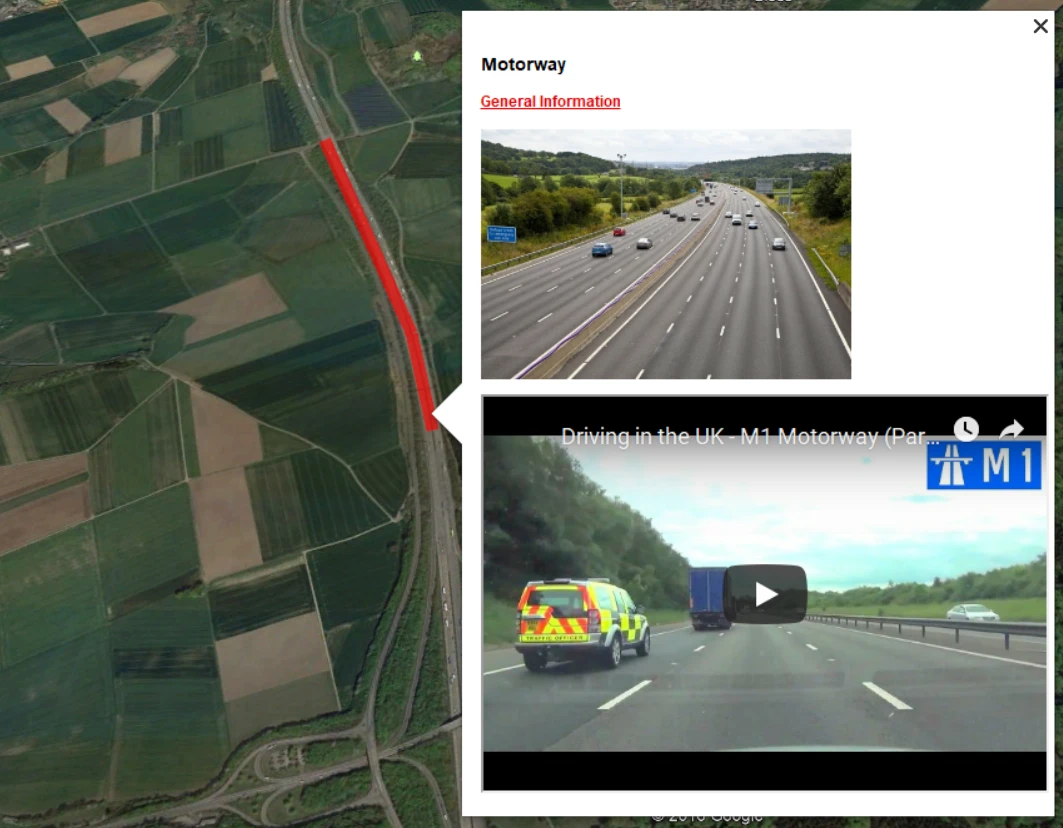
The picture above shows us all the links used by myself for the purpose of this article (red frame). This is a simple HTML code with content and tags, dividing our description correctly. As you can see, you have another placemark included in your .kml file with a similar ([CDATA![…]]) description, as shown underneath (yellow frame). In Google Earth, our file will look as per in the picture below (Pic. 37).
Now we have got everything, that we need: a Youtube link, text link, and image link. Remember, that there are some troubleshoots with image links in Scribble Maps, which has been mentioned earlier. Frankly speaking, some image URL links are not supported in that interactive image builder and it better is to input them manually in the XML code, as above (Pic. 36, 37).
Our .kml file may include also linear objects along with placemarks. However, in this case, we cannot rely on Scribble Maps at all, because this interactive platform features the text and link editor for point objects only. As far as we know, the description of the linear object is also possible, at least in the Google MyMaps platform (Pic, 15), which unfortunately doesn’t support a text link editor.
In this case, we must resort to the XML code again and implement the object features manually (Pic. 38).
Afterward, we can see a nice effect in Google Earth (Pic. 38).
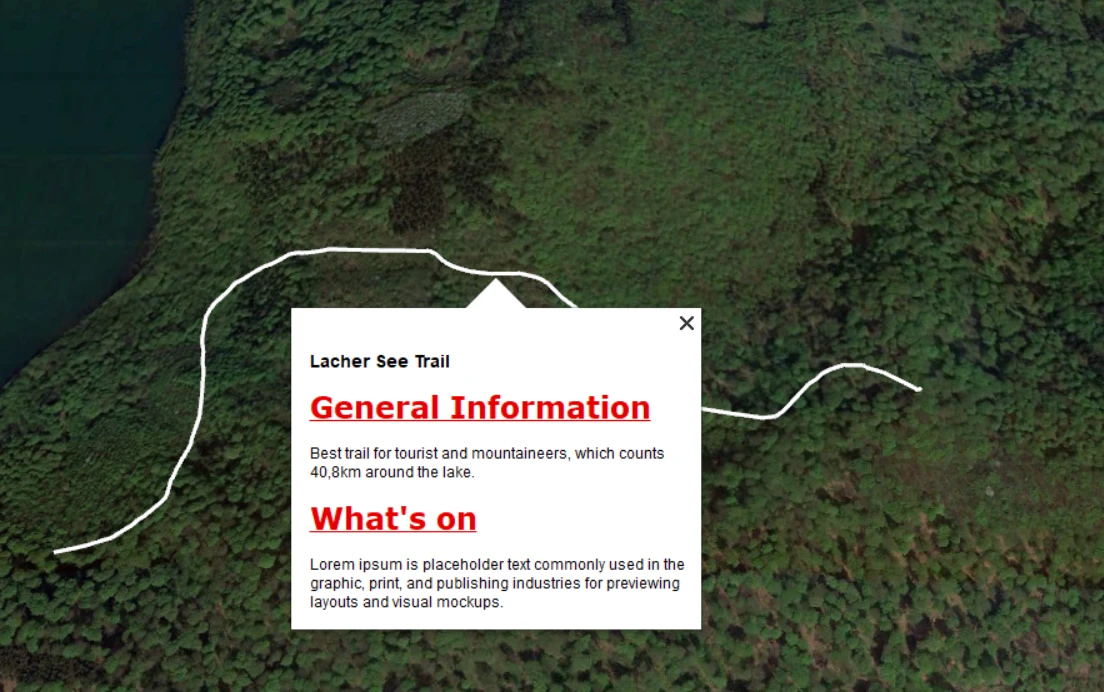
Probably spotted, that I input something special into this code. I decided to spice it up a bit and bring some CSS style codes inside in order to change the hyperlink text from a thin blue to a strong red. This stuff will be better explained in a separate article in the future.
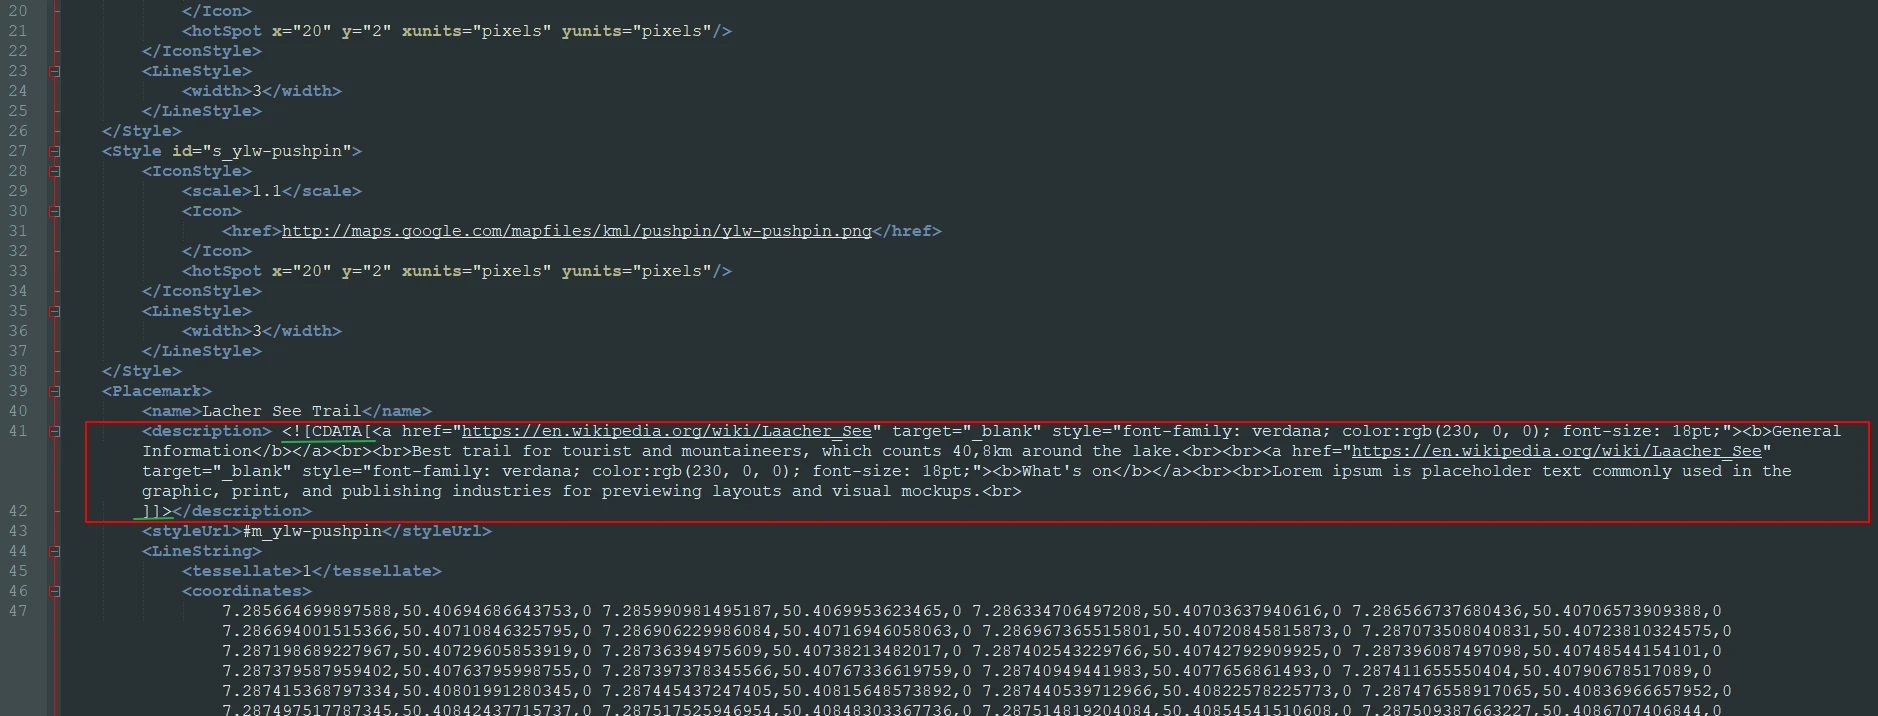
An analogous work should be done for some path or trail, which is also a linear object (Pic. 40, 41).
I hope, that all this information will be helpful to you. As you have seen, the link management in .kml files can work in two different ways. One of them is interactive map builders, which are the easiest and quickest way to manipulate. However in some cases, using the XML code in external software, like Notepad++ can be also required. It obviously doesn’t change the fact, that the link management in all .kml files is a relatively simple issue.
Another kind of link, which can be used in .kml files is network links. Network links play an important role when you would like to make your placemark more dynamic. It means, that you can input links straight to another .kml file, placed somewhere in the server i.e. Dropbox, and keep your placemark content most up-to-date. Moreover, by network links, you can include large datasets into your .kml file More about the effective use of network links you can read this documentation or watch the video below.
Mariusz Krukar
References:
1. Gibson R., Erle S., 2006, Google Maps Hacks, O’Reilly Media Inc, North Sebastopol, CA
Links:
- Google Earth outreach: Mapping from a Google spreadsheet
- https://gokml.net/
- Keyhole Markup Language standard
- KML 2.1 tutorial
- KML reference
- XML managing data exchange – Google Earth
- Customize maps with JavaScript API
- Using Google Sites to host your KML
- Adding images to a Google Earth placemark
- Using .kml network links effectively
Forums:
- Hyperlinking placemarks within a KML file
- Opening a kml file with Google Earth at a specific placemark
- Network Linked KML to a Folder of KMLs
- How do I link to internal files in a KMZ file?
- Creating Links to PDF’s of boring logs in Google Earth
- Set zoom after loading KML layer
- Setting zoom level in KML/KMZ file?
- Working HREF inks in KML files stop working when zipped into a KMZ files
- Google Maps zoom gets overridden when using a KML file
Youtube: