Nikon D5300 test 2 – RAW (NEF) images processing

This is the first camera, which gives me the possibility to run the RAW process. Nikon has his own filename extension for RAW files – NEF images.
A camera RAW image file contains minimally processed data from the image sensor of the digital camera. RAW files are named so because they are not processed yet.
RAW files contain the full resolution (typically 12- or 14-bit) up to 16-bit while the best JPEG files contain only 8-bit resolution. When you shoot in a format like JPEG image information is compressed and lost. Once you use the RAW format, no information is compressed, thereby you are able to produce higher-quality images.
When you shoot the RAW, you are able to make photo processing and make decisions on how the image should look like. This topic isn’t brand new and groundbreaking. It has been described on the web a couple years before.

I am aimed to show you the RAW processing features provided by Nikon D5300 Digital Lens Sensor Camera. Prior to this article, I wrote about processing JPEG images in the D5300 model.

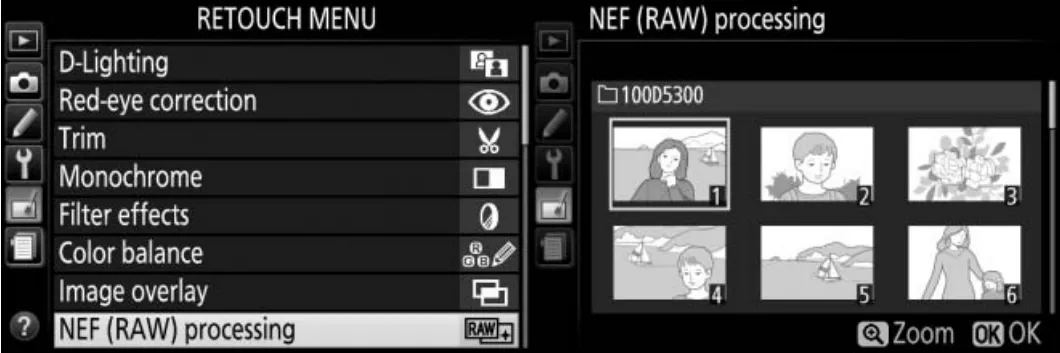
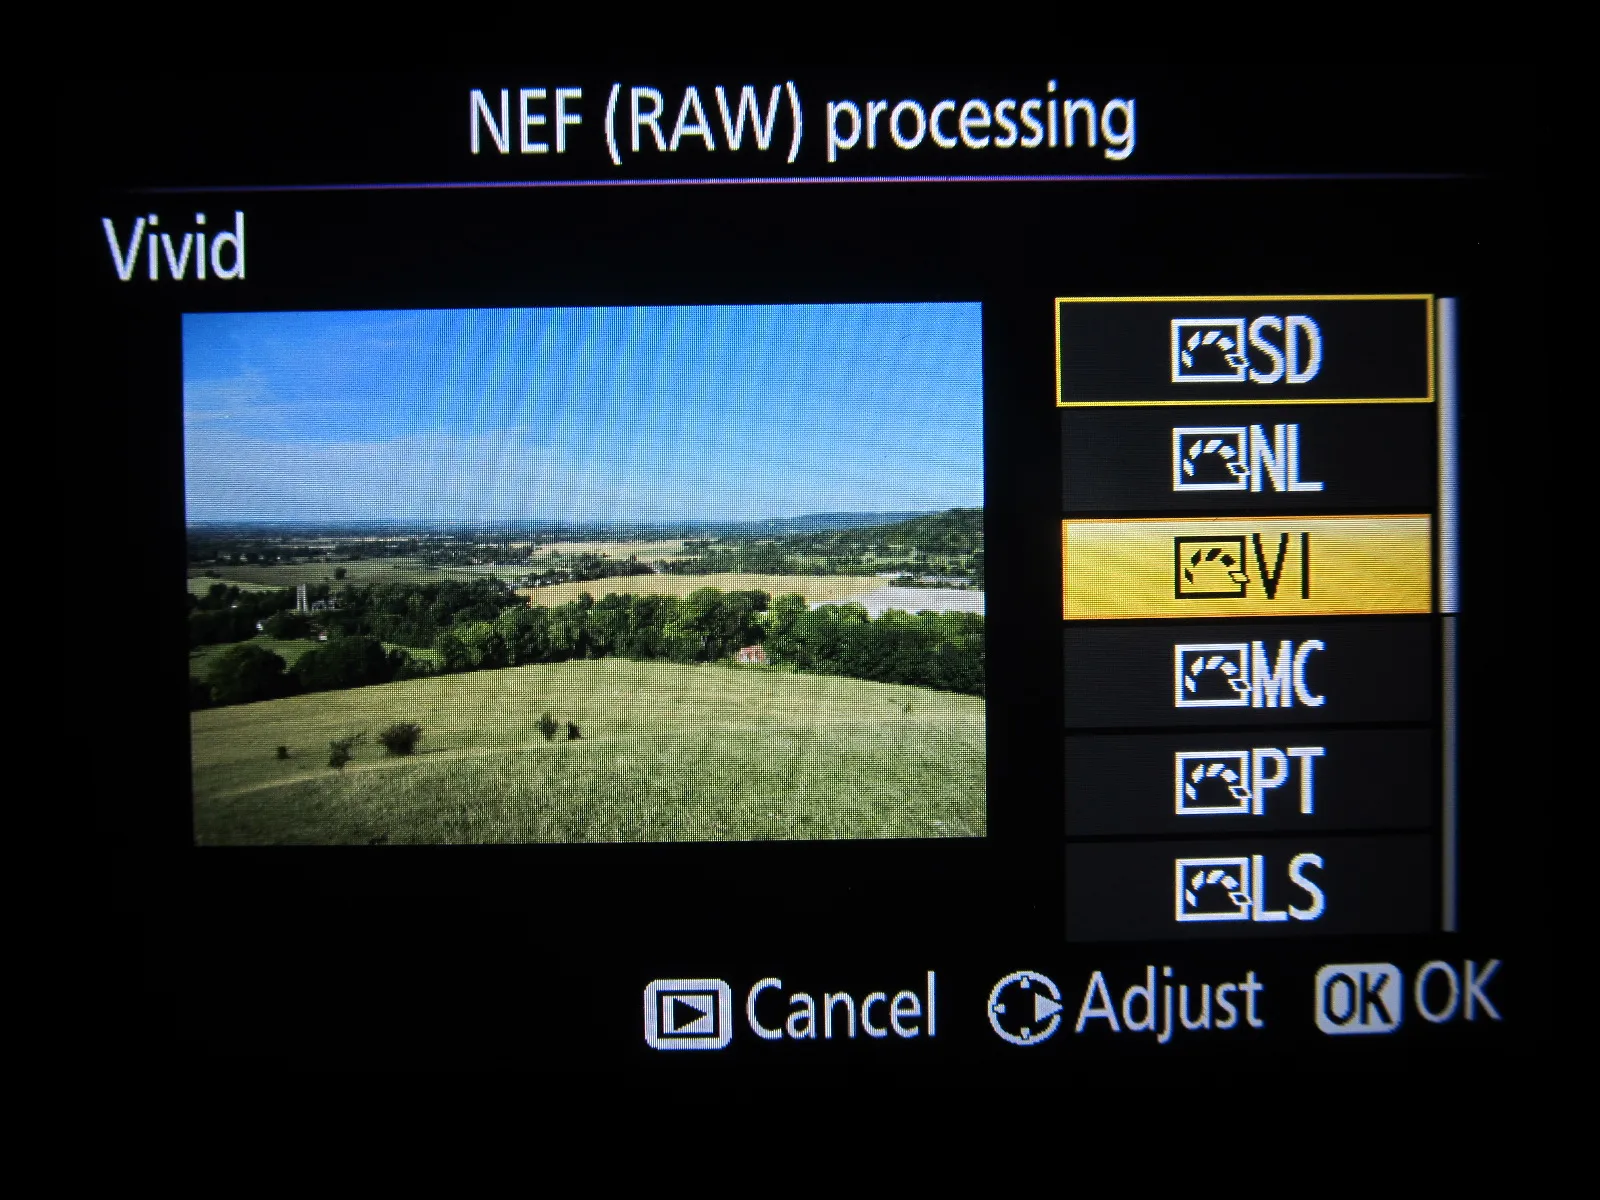
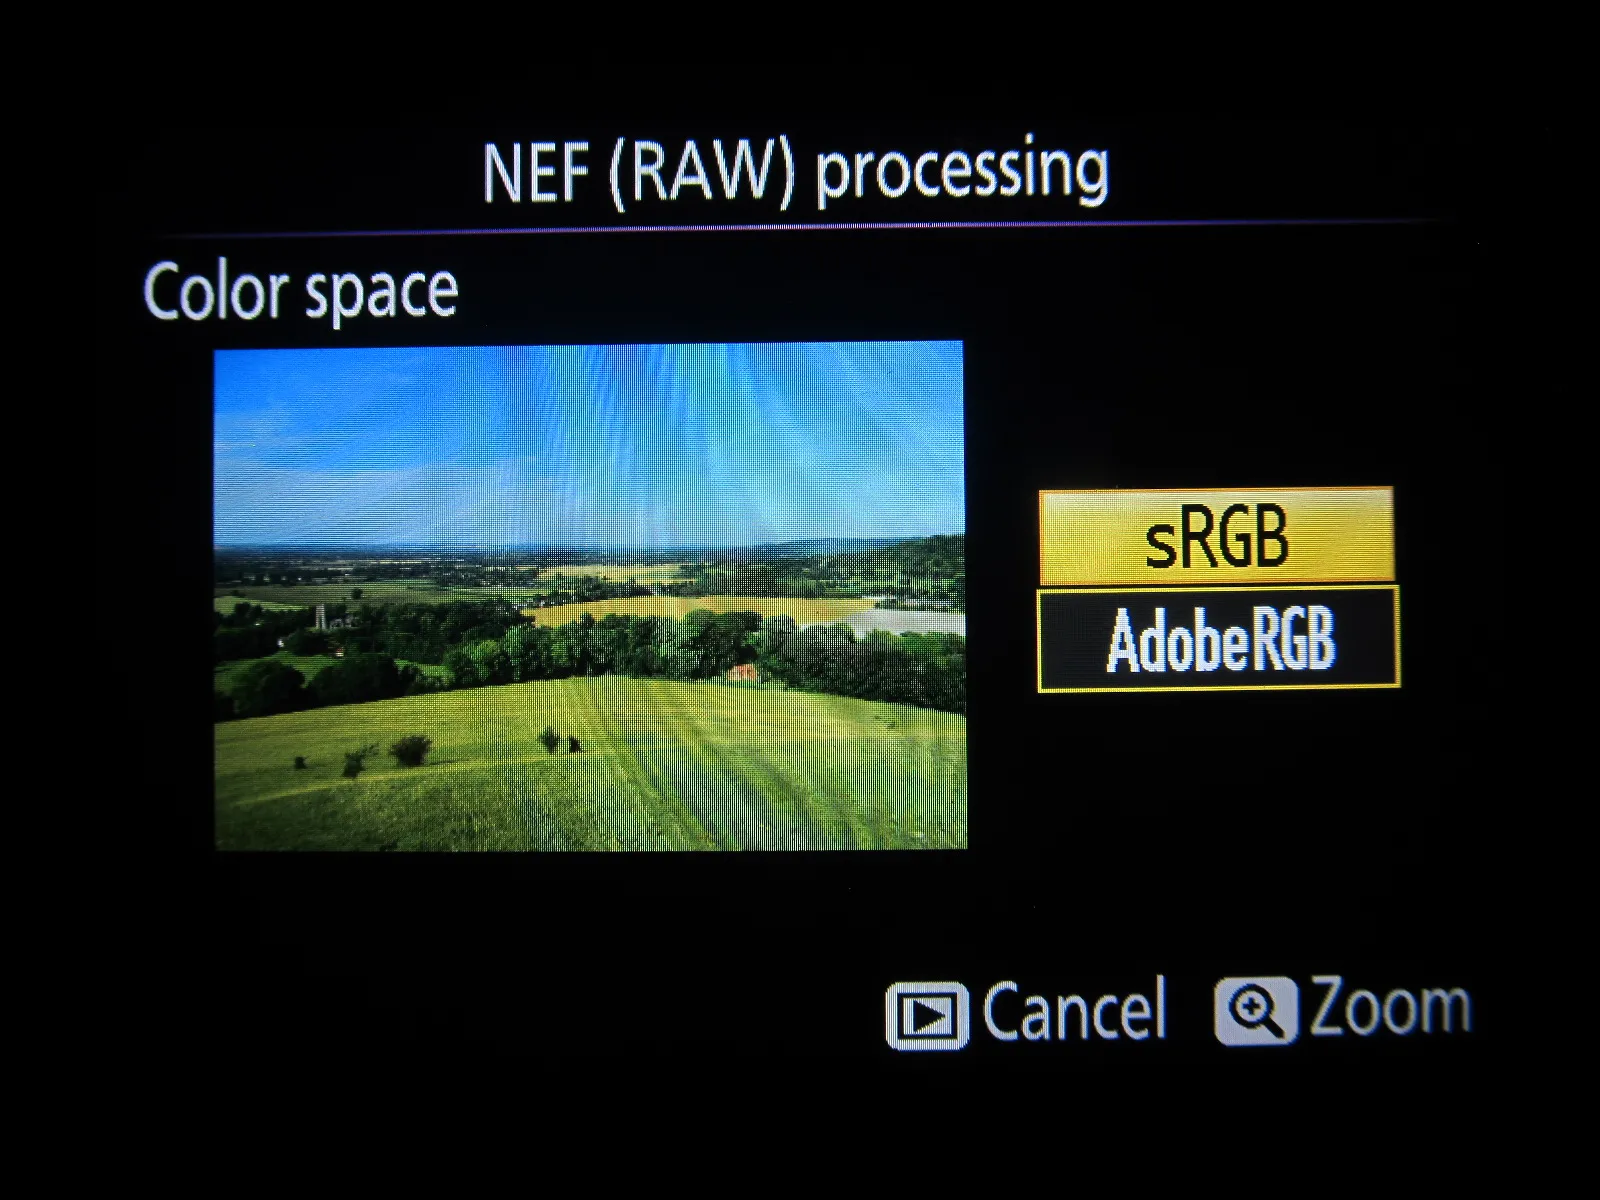
To start RAW image processing you must choose NEF (RAW) processing from RETOUCH MENU (Pic.1) and next pick up the photo from your current SD card folder (Pic.1).

Nikon D5300 reference manual NEF and RAW processing

Pic. 1 NEF (RAW) Processing in the Retouch Menu on the left, Choice of the photo from the folder on the right, (Nikon D5300 Reference Manual).

You can adjust the settings listed (and described) below:

a) Image qualityfine, normal or basic. Record JPEG fine images are at a compression ratio of roughly 1:4, accordingly 1:8 for normal and 1:16 for the basic quality.

b) Image size – You can save your output photo in 3 basic image sizes (Pic.2).

Nikon D5300 reference manual, basic image sizes

Pic. 2 Basic image sizes in the D5300 model. A print size column shows approximate size when printed at 300 dpi (Nikon D5300 Reference Manual)

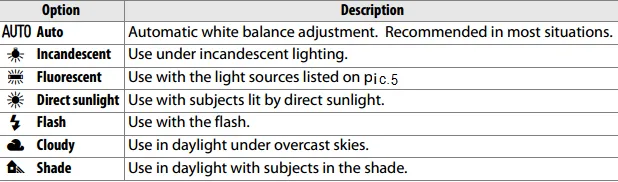
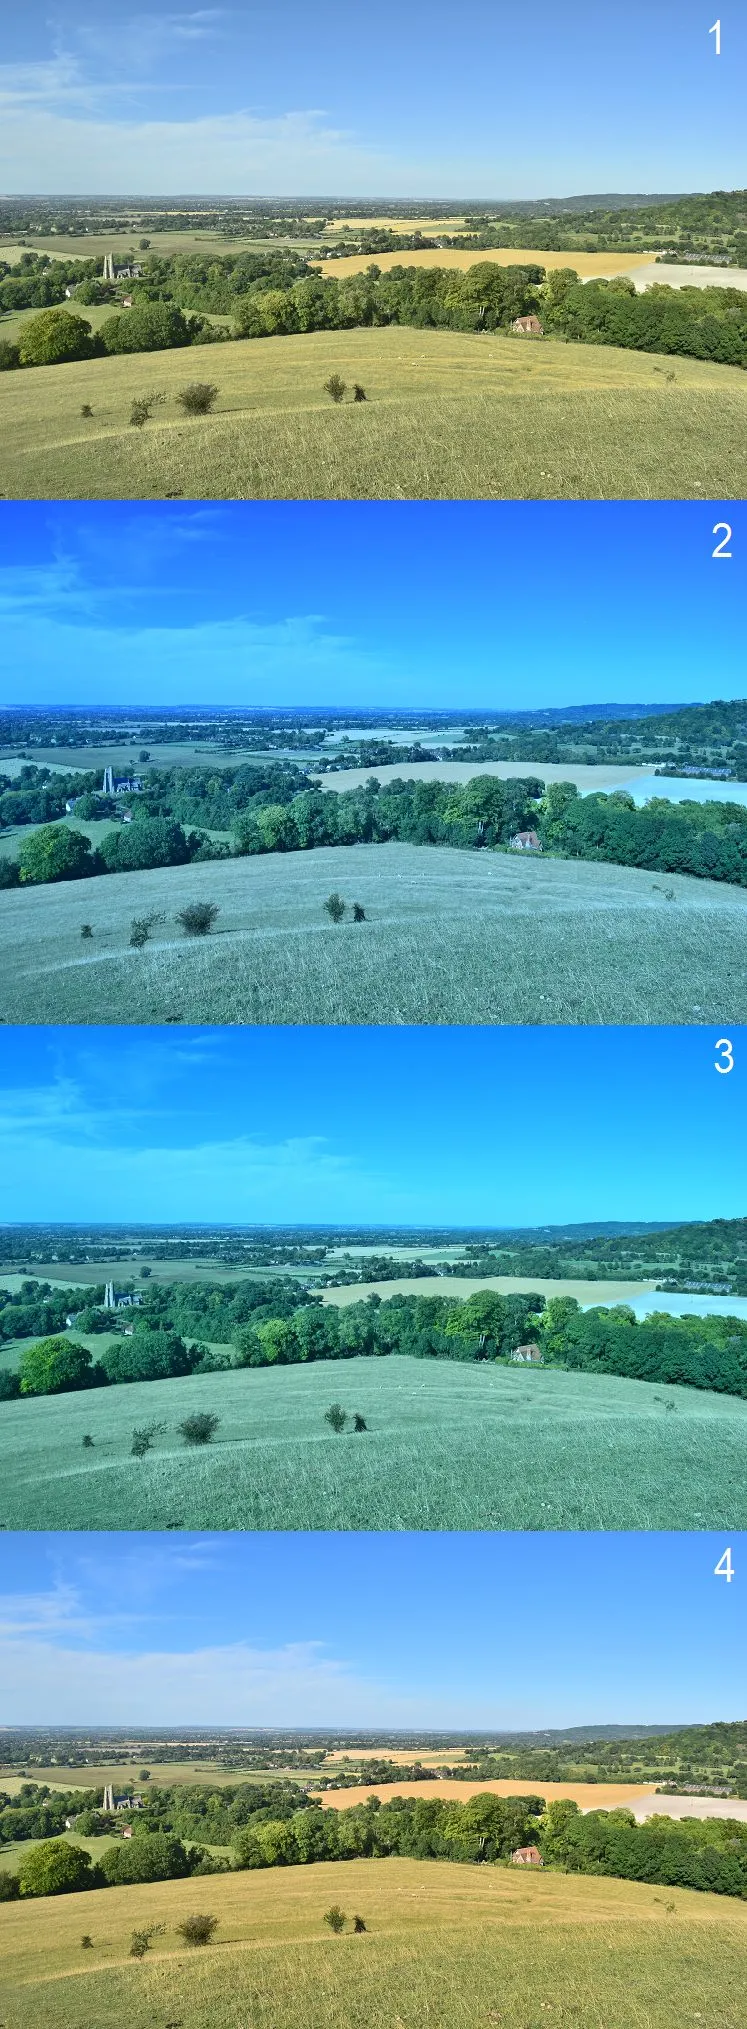
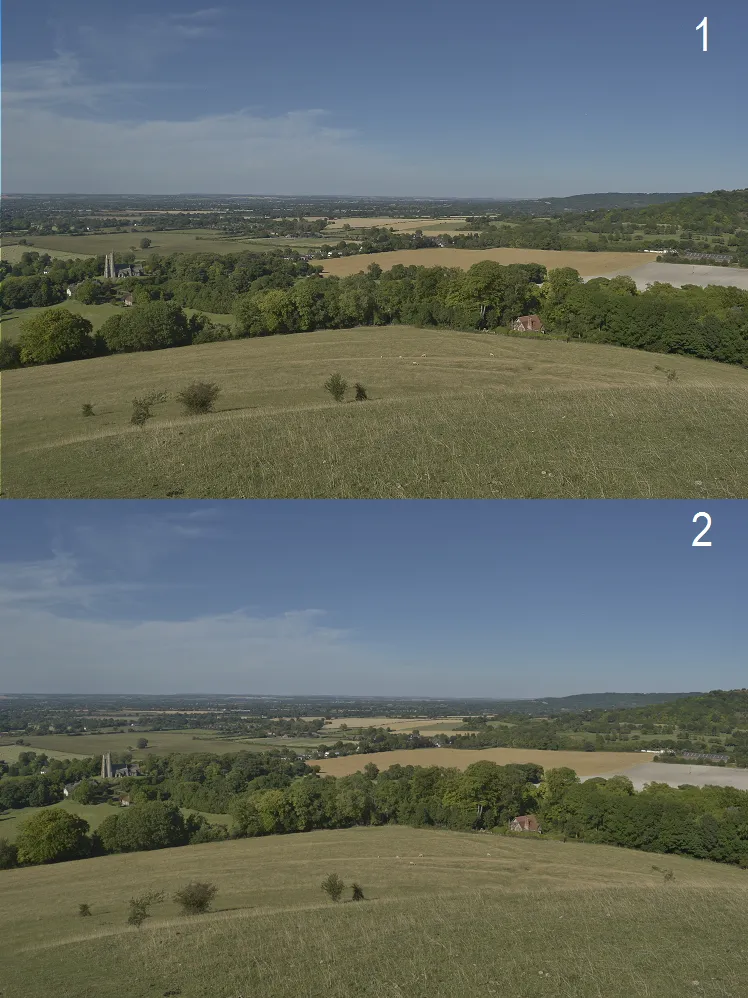
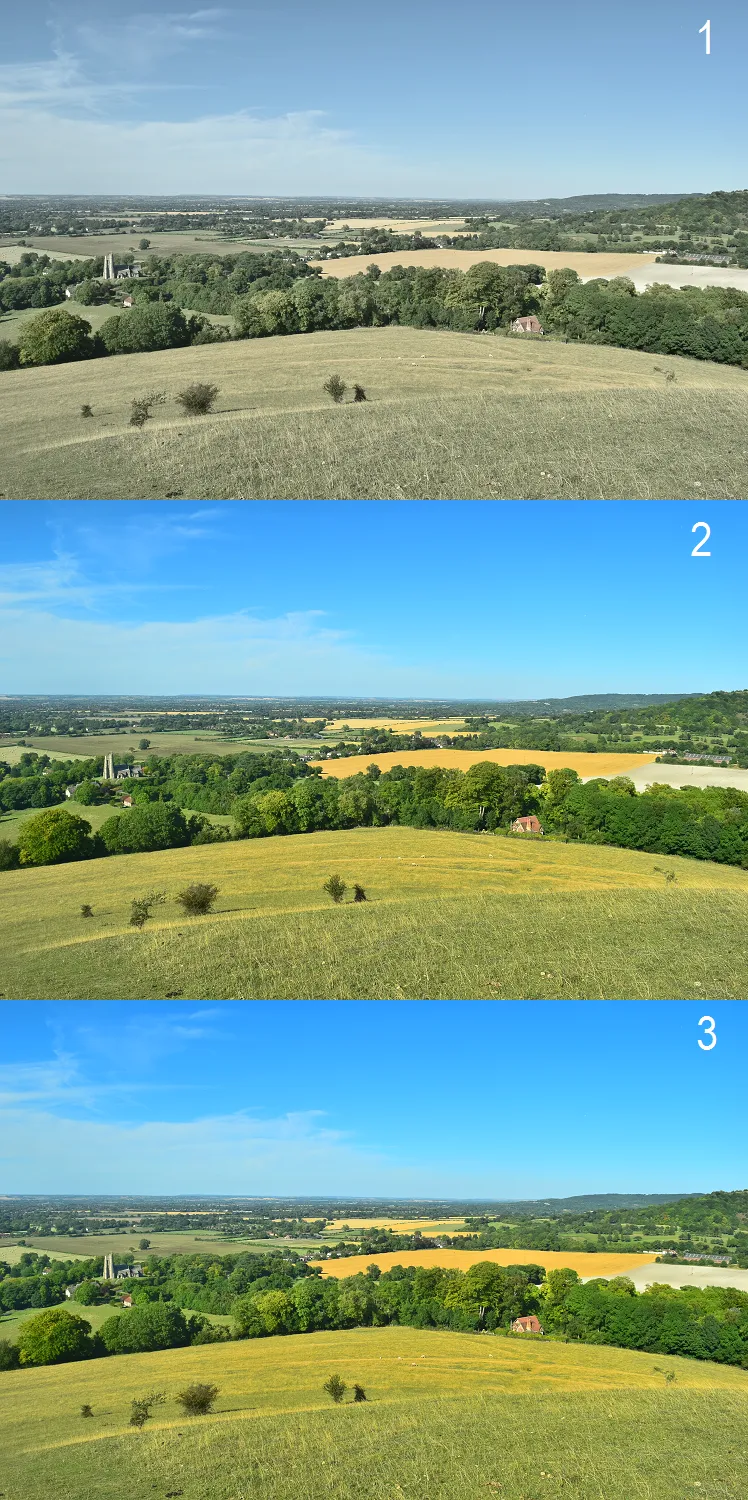
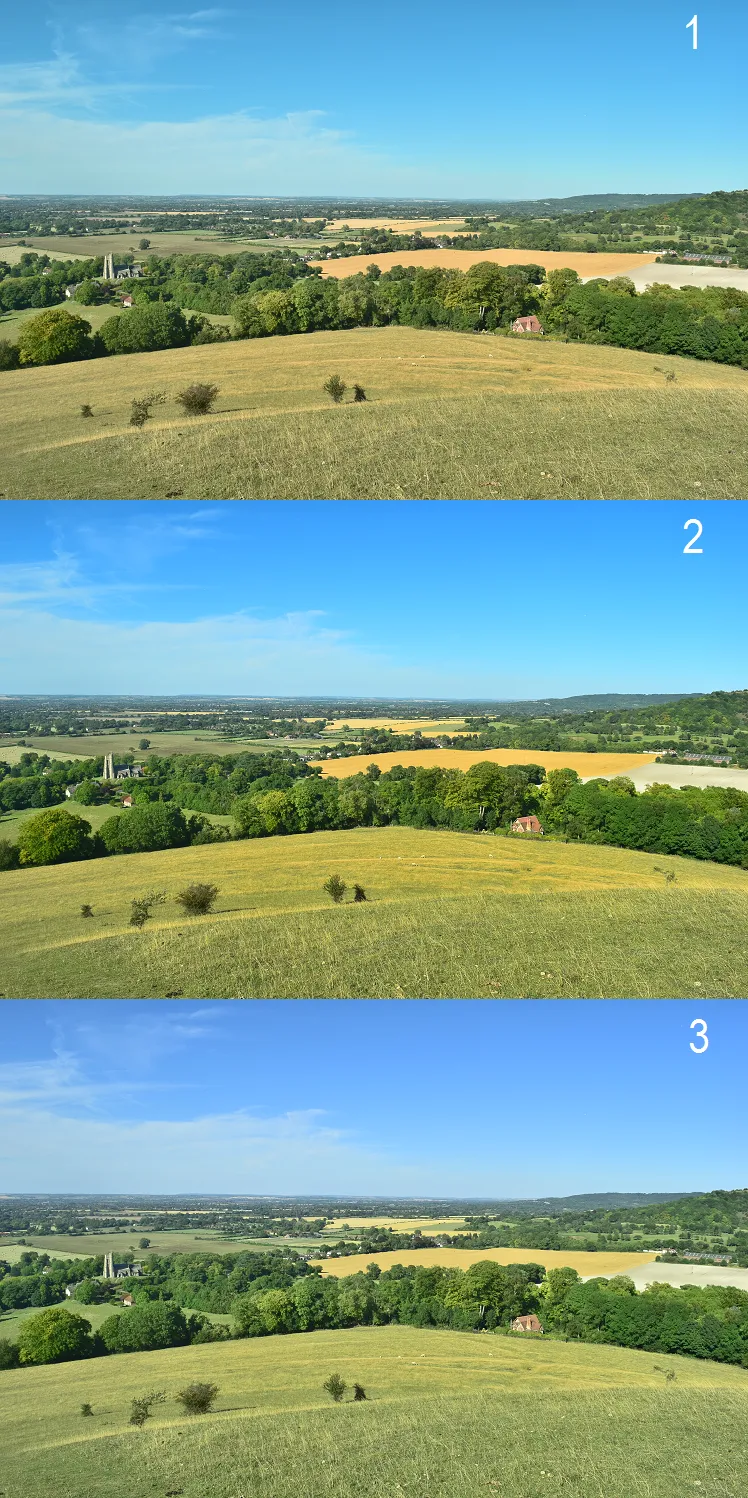
.c) White balance – ensures, that colors are unaffected by the color of the light source. You have the choice of the following (Pic.3):

Nikon D5300 reference manual, white balance

Pic. 3 The White balance list (Nikon D5300 Reference Manual).

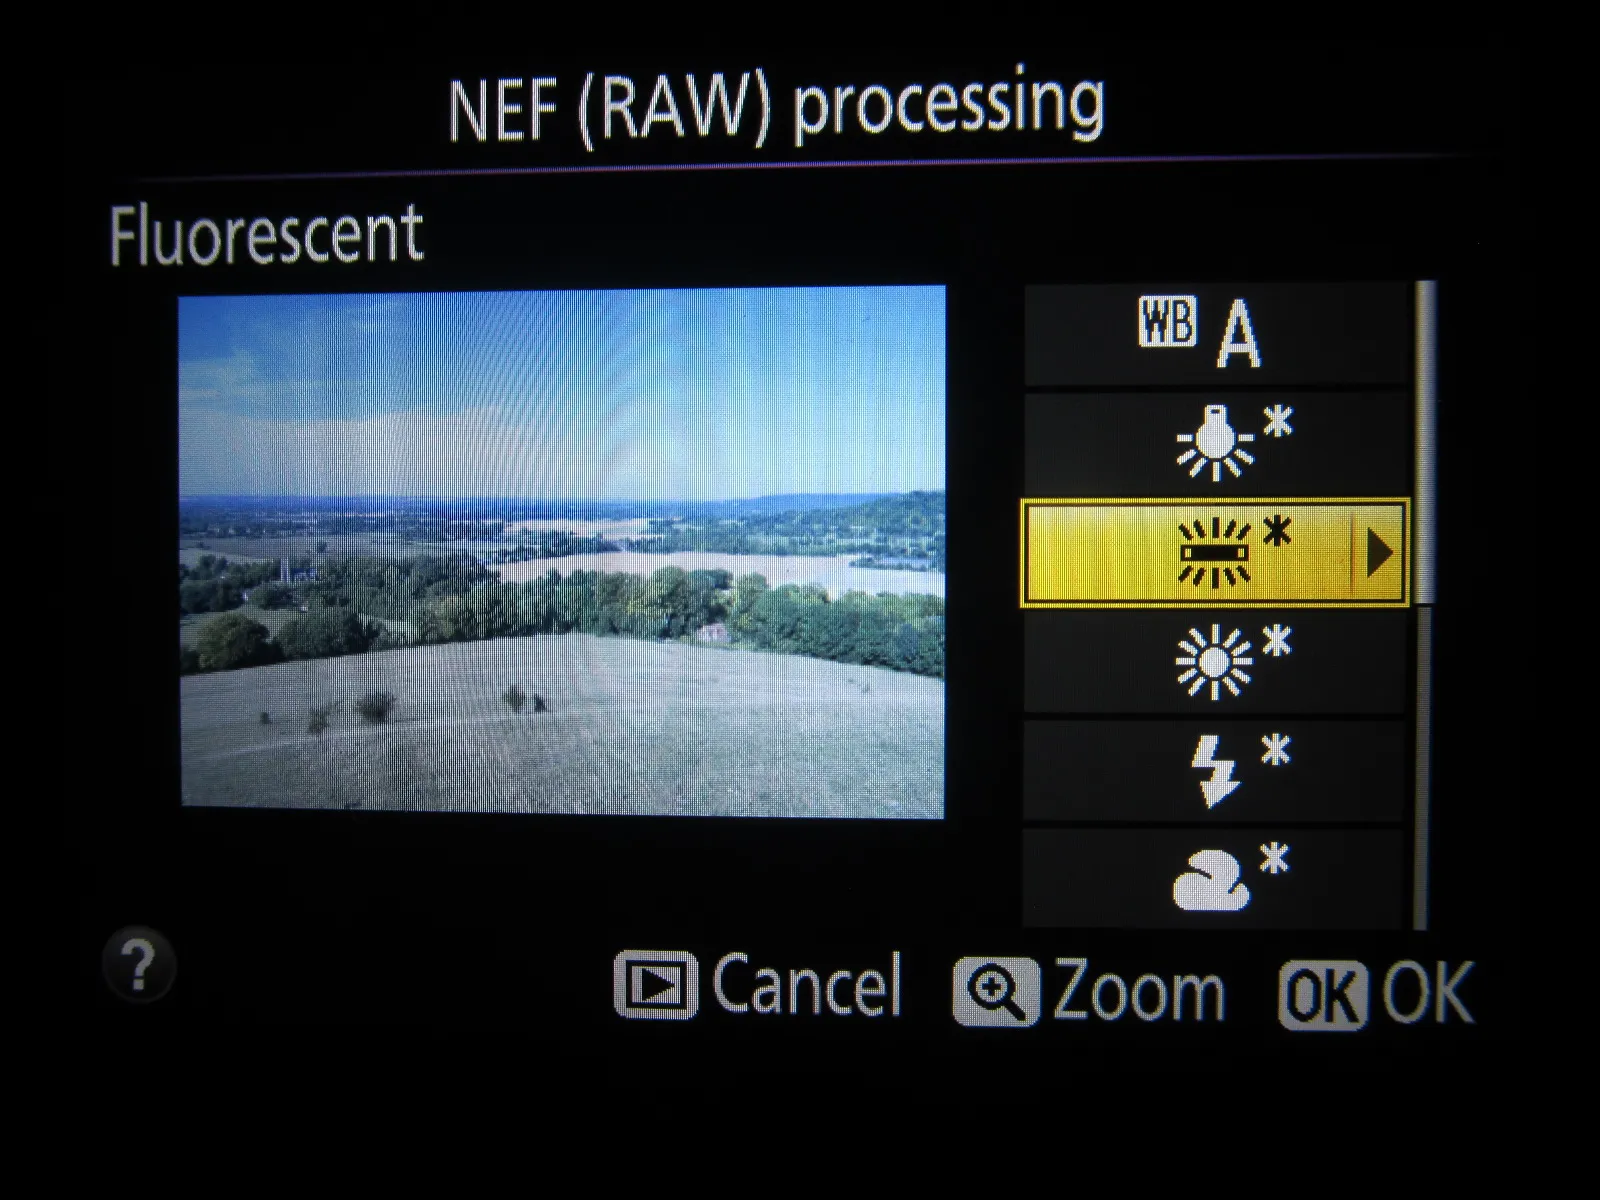
Picture 4 shows the example of choice – Fluorescent. Once you decided to use the fluorescent light balance you will have another choice of the following: (Pic.5)

Nikon D5300 fluorescent white balance options

Pic.4 The Fluorescent White Balance options.

Nikon D5300 fluorescent white balance options 2

Pic. 5 The Fluorescent White Balance example – Warm-white fluorescent.

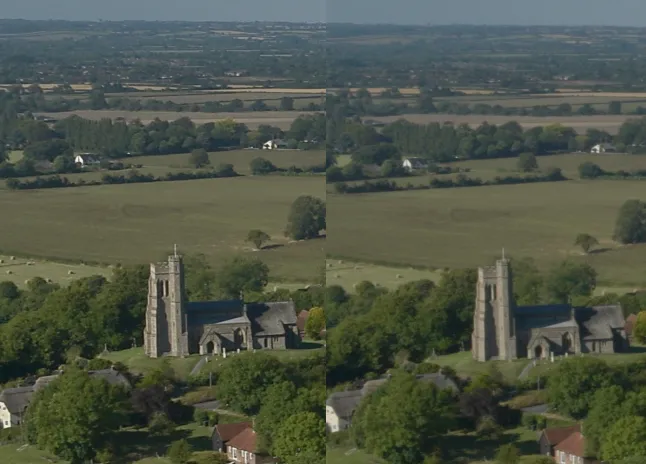
The color temperature (Pic.6) is very important in adjusting your photos. It is an objective measure of the color of a light source, defined with reference to the temperature to which an object would have to be heated to radiate light in the same wavelengths. Light sources with a higher color temperature appear bluer.

Nikon D5300 reference manual, colour temperature scale

Pic. 6 The Colour Temperature scale (Nikon D5300 Reference Manual).

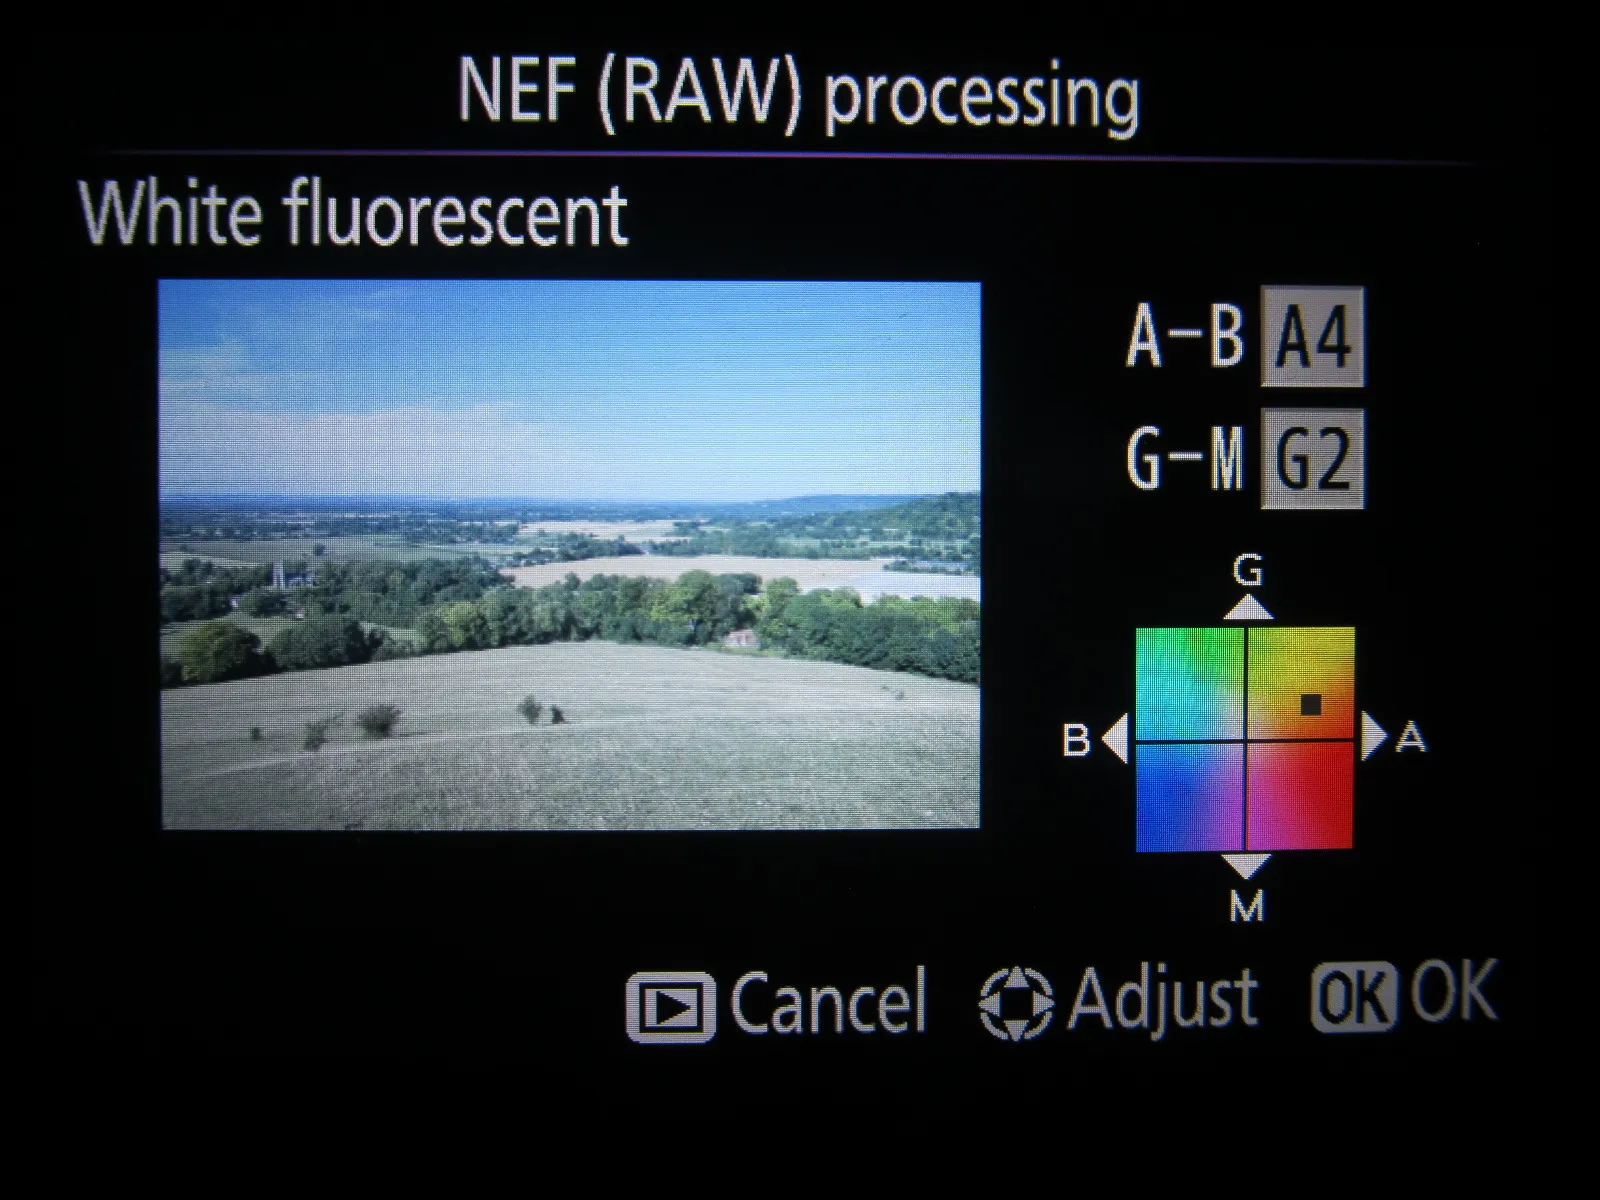
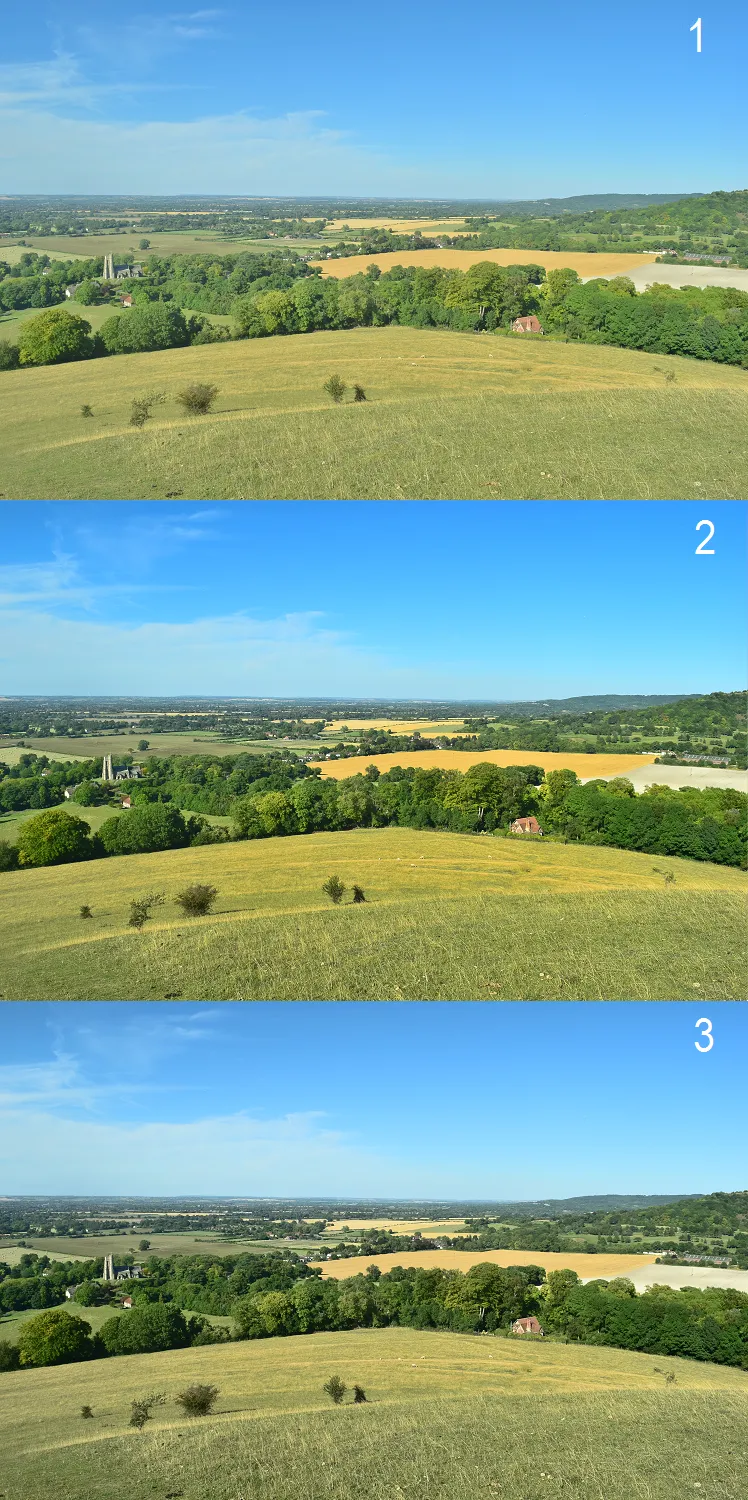
After the choice of the color temperature, you may modify the color balance also, as in the JPEG image (Pic.7).

Nikon D5300 fluorescent white balance options 3

Pic. 7 The White Fluorescent White Balance color balance options.

See the examples below: (Pic.8 – 12).

Nikon D5300 white balance examples, Chiltern Hills

Pic. 8 White Balance examples: 1 – Starting RAW image, 2 – Indascent red, 3 – Sodium vapor lamps, 4 – White fluorescent.

Nikon D5300 white balance examples, Chiltern Hills 2

Pic. 9 White Fluorescent color balance options: 1 – Yellow, 2 – Pink, 3 – Blue, 4 – Red, 5 – Green.

Nikon D5300 white balance examples, Chiltern Hills 3

Pic. 10 High-Temperature Vapor Colour Balance: 1 – Starting RAW Image, 2 – Red, 3 – Pink, 4 – Green, 5 – Blue.

Nikon D5300 white balance examples, Chiltern Hills 4

Pic. 11 The Direct Sunlight color balance: 1 – Yellow, 2 – Starting RAW image, 3 – Green.

Nikon D5300 white balance examples, Chiltern Hills 5

Pic. 12 High-temperature white balance: 1 – Starting RAW image, 2 – Flash, 3 – Cloudy, 4 – Shade.

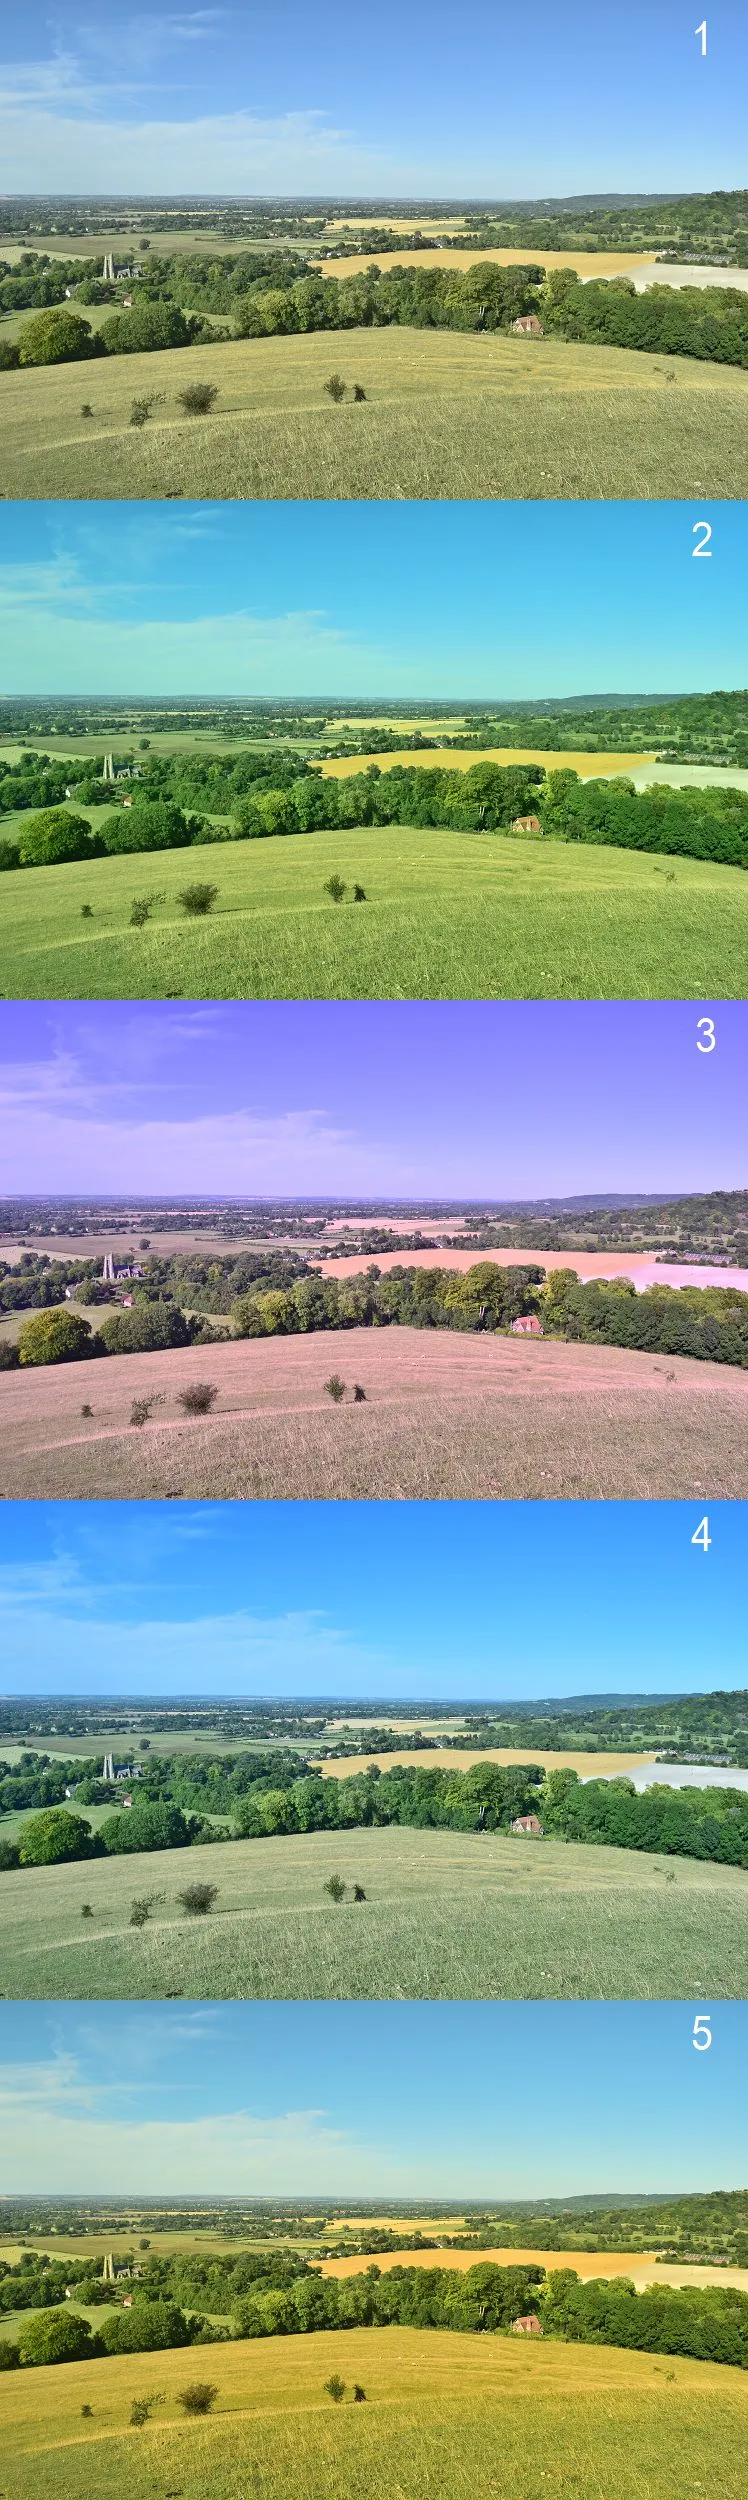
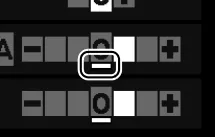
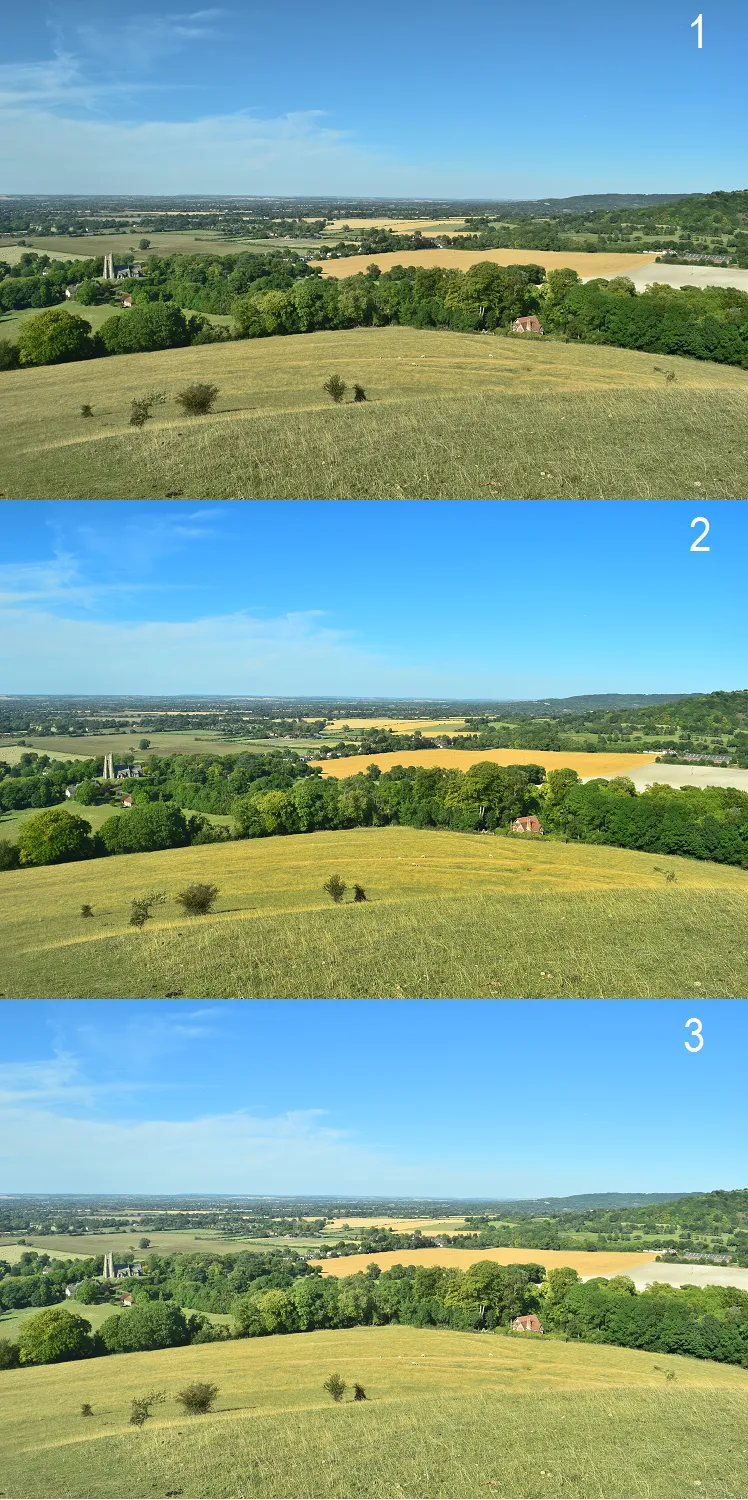
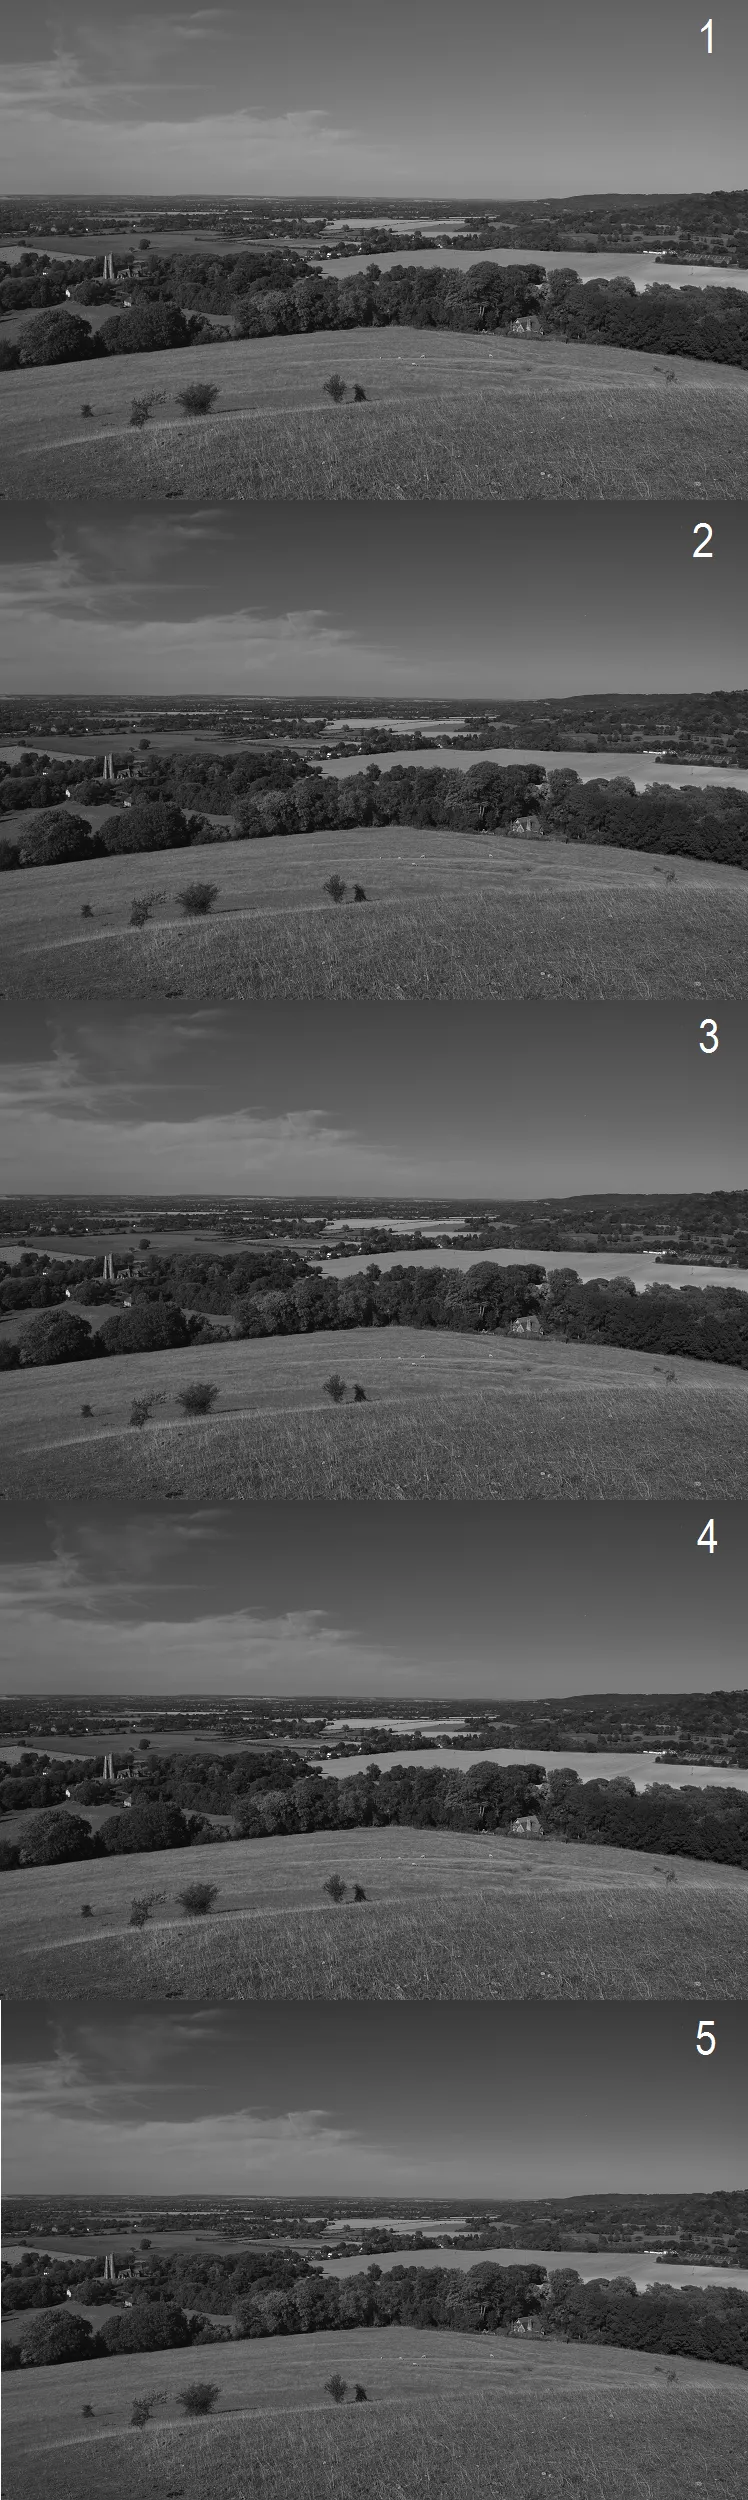
d) Exposure Compensation – is used to make the pictures brighter or darker (Pic.13 -16).

Nikon D5300 Exposure compensation range

Pic. 13 The Exposure Compensation range.

Nikon D5300 Exposure compensation photo examples, Chiltern Hills in UK

Pic. 14 The Exposure Compensation: 1 – -2EV, 2 – -1EV, 3 – 0EV, 4 – +1EV, 5 – +2EV.

Nikon D5300 white balance examples, Chiltern Hills, Beacon Hill

Pic. 15 The Exposure Compensation: 1 – +2EV, 2 – +1EV, 3 – -1EV, 4 – -2EV.

Nikon D5300 white balance examples, Chiltern Hills 2

Pic. 16 The Exposure Compensation: 1 – +2EV, 2 – +1EV, 3 – 0EV, 4 – -1EV, 5 – -2EV.

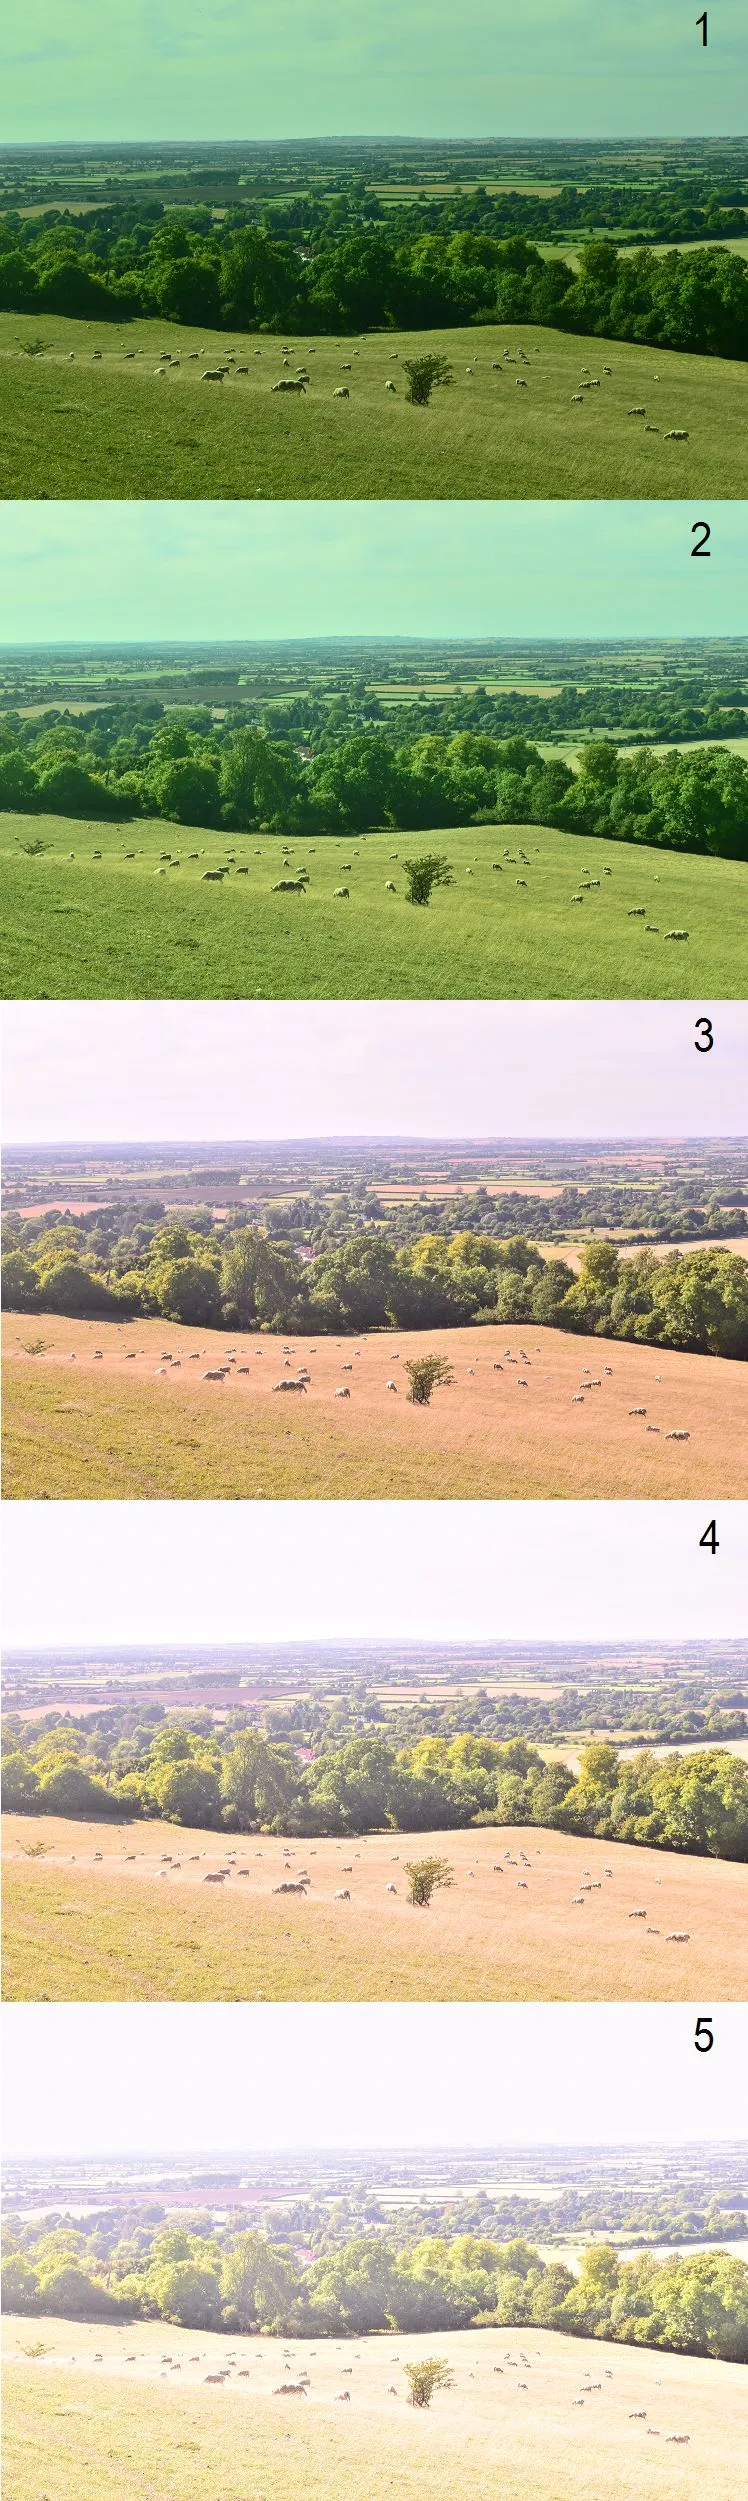
As you notice, some pictures are greener. You can adjust your photo by more features at the same time!

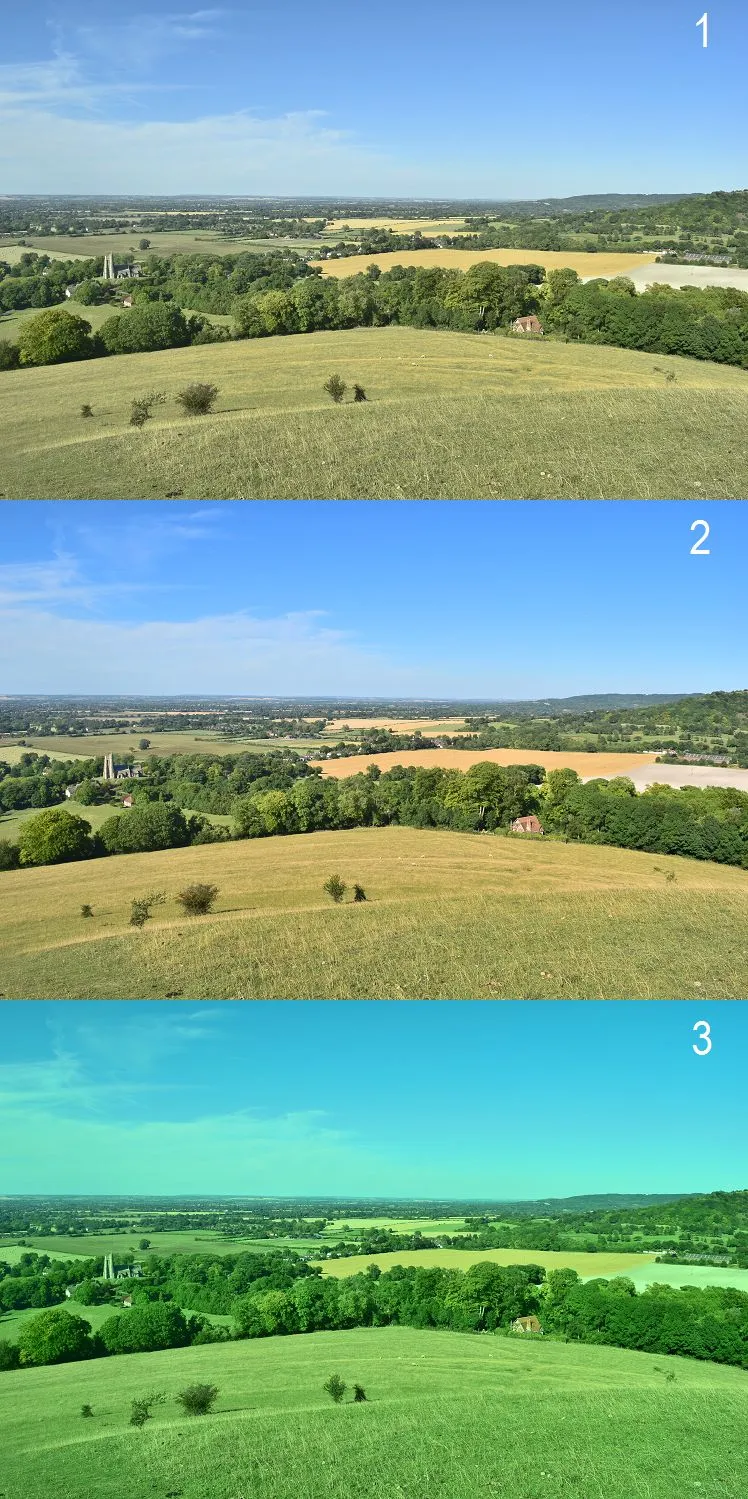
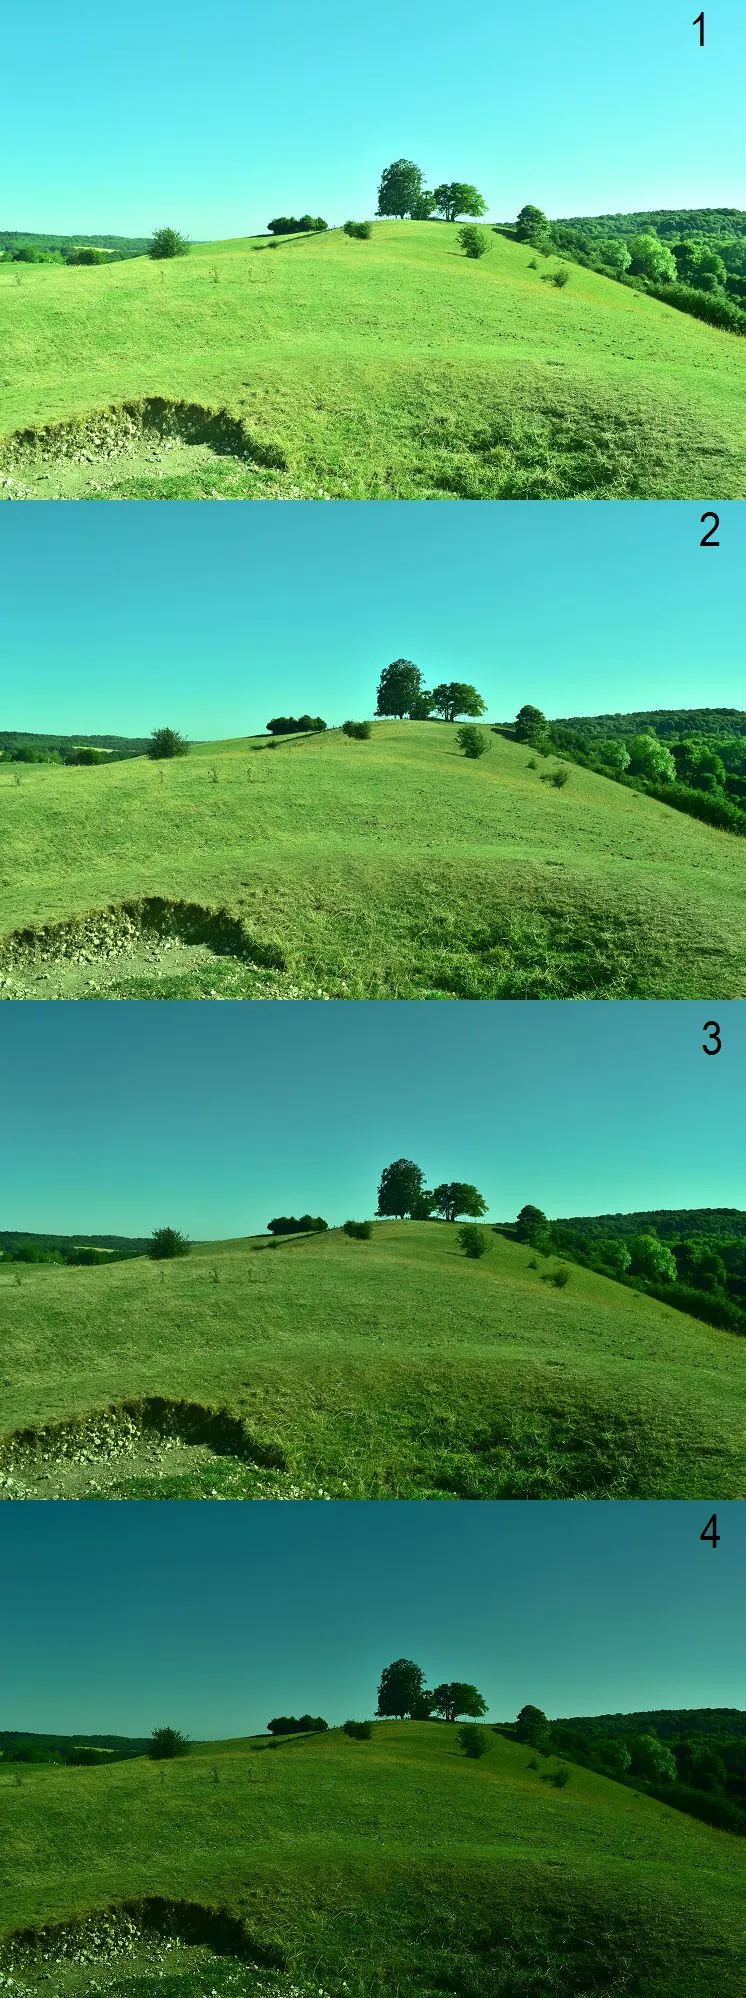
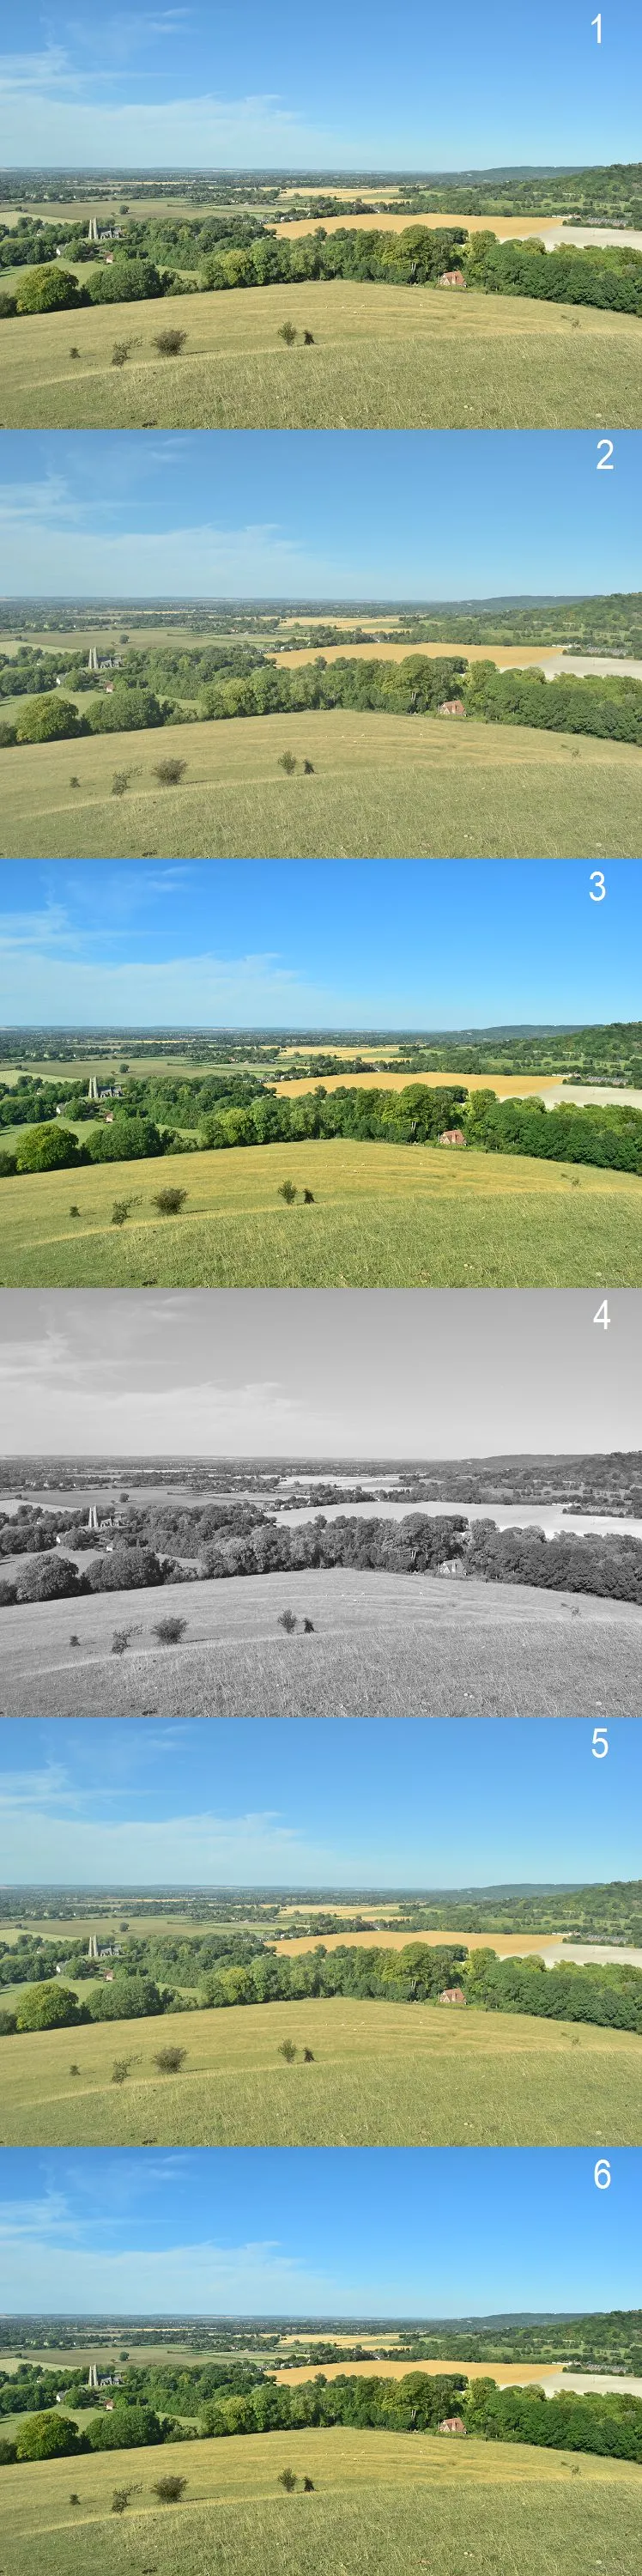
e) Picture control – in D5300 is quite big. You have a dozen or so options for processing your RAW image (Pic.17,18).

Nikon D5300 picture control

Pic. 17 D5300 Picture control basic interface.

Nikon D5300 picture control adjustment settings

Pic. 18 D5300 Picture control adjust settings.

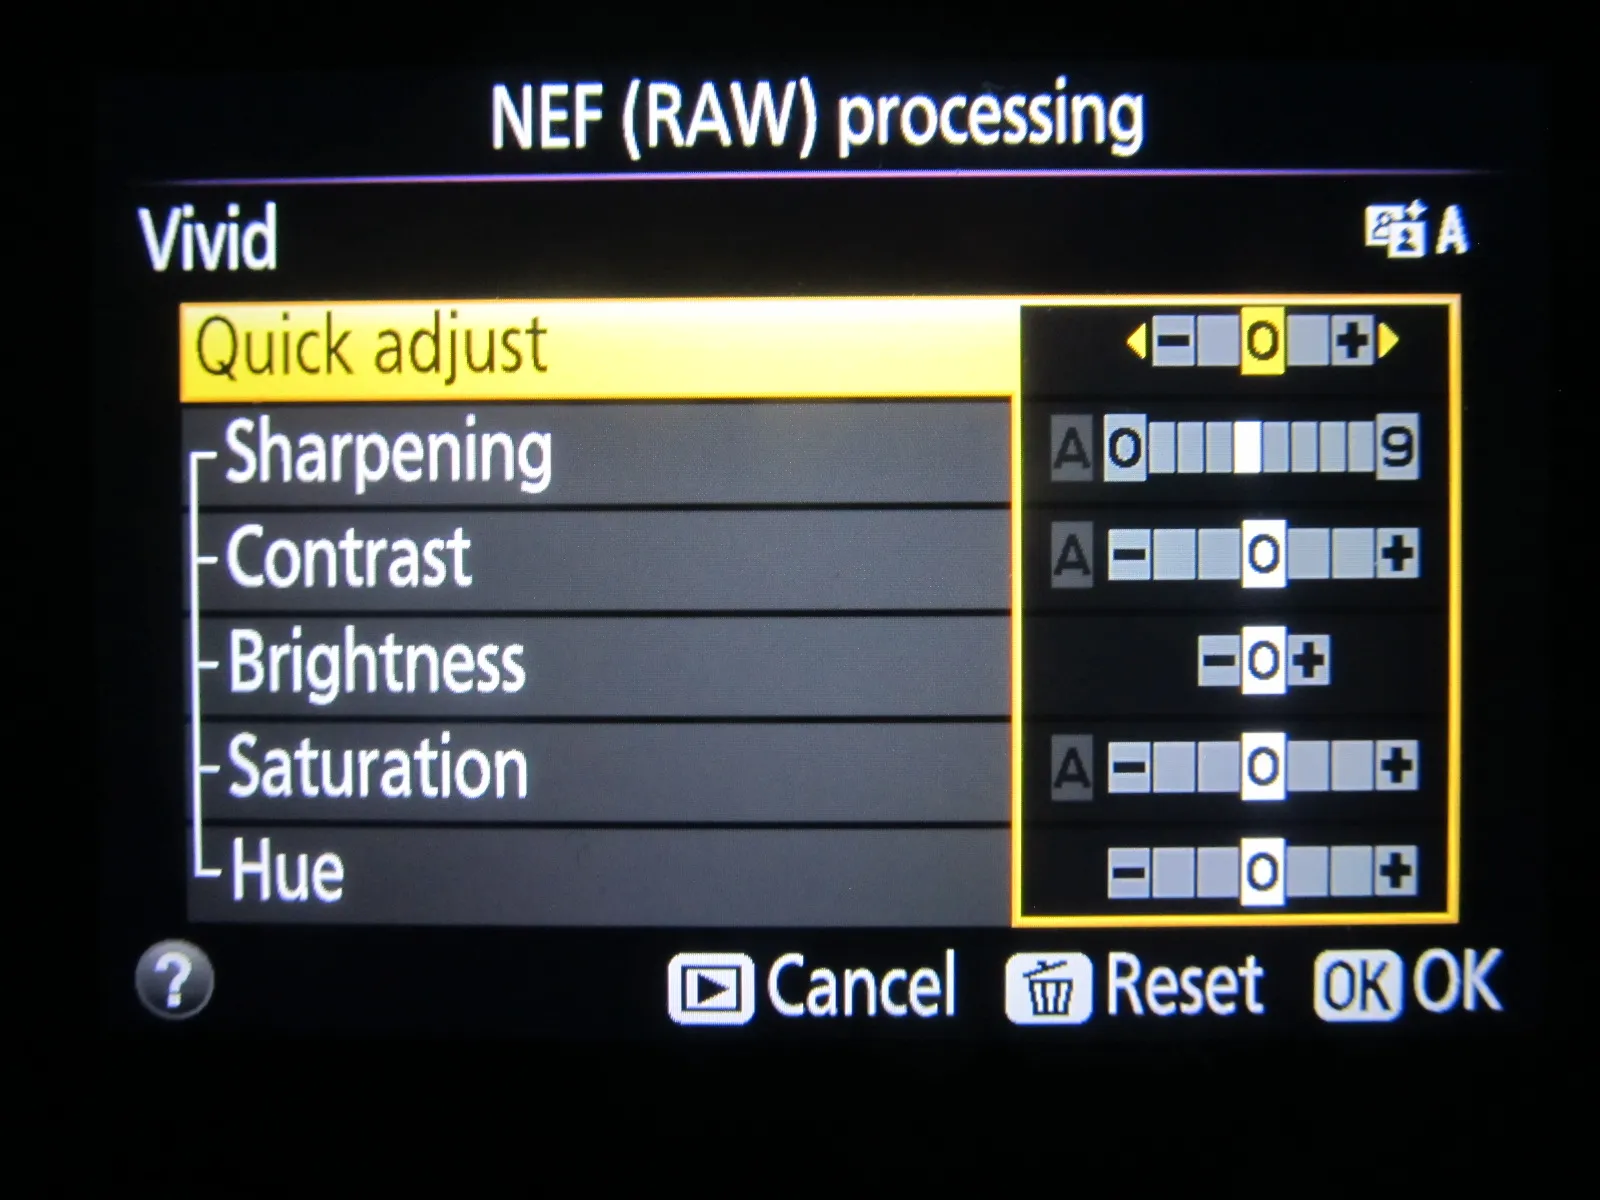
When you selected a proper picture control you can adjust settings (Pic.18). To make a quick amendment you can select QUICK ADJUST to choose a preset combination of settings. When you need more accurate adjustments then highlight the desired setting and choose a proper value (Pic.19).

Nikon D5300 reference manual, toggle adjustment value

Pic.19 (D5300 Reference Manual).

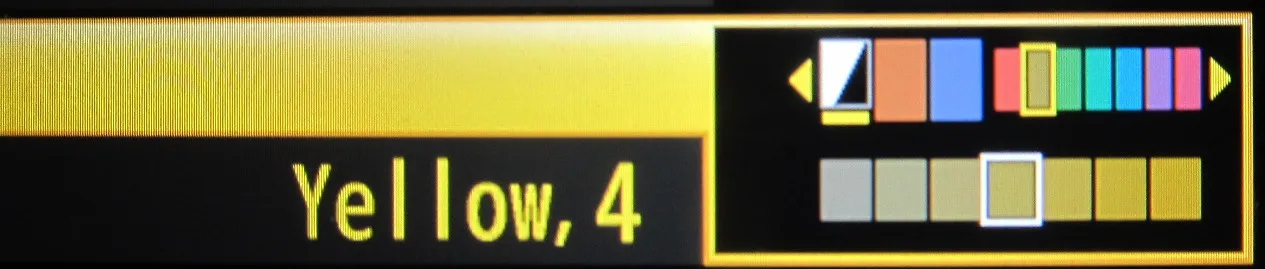
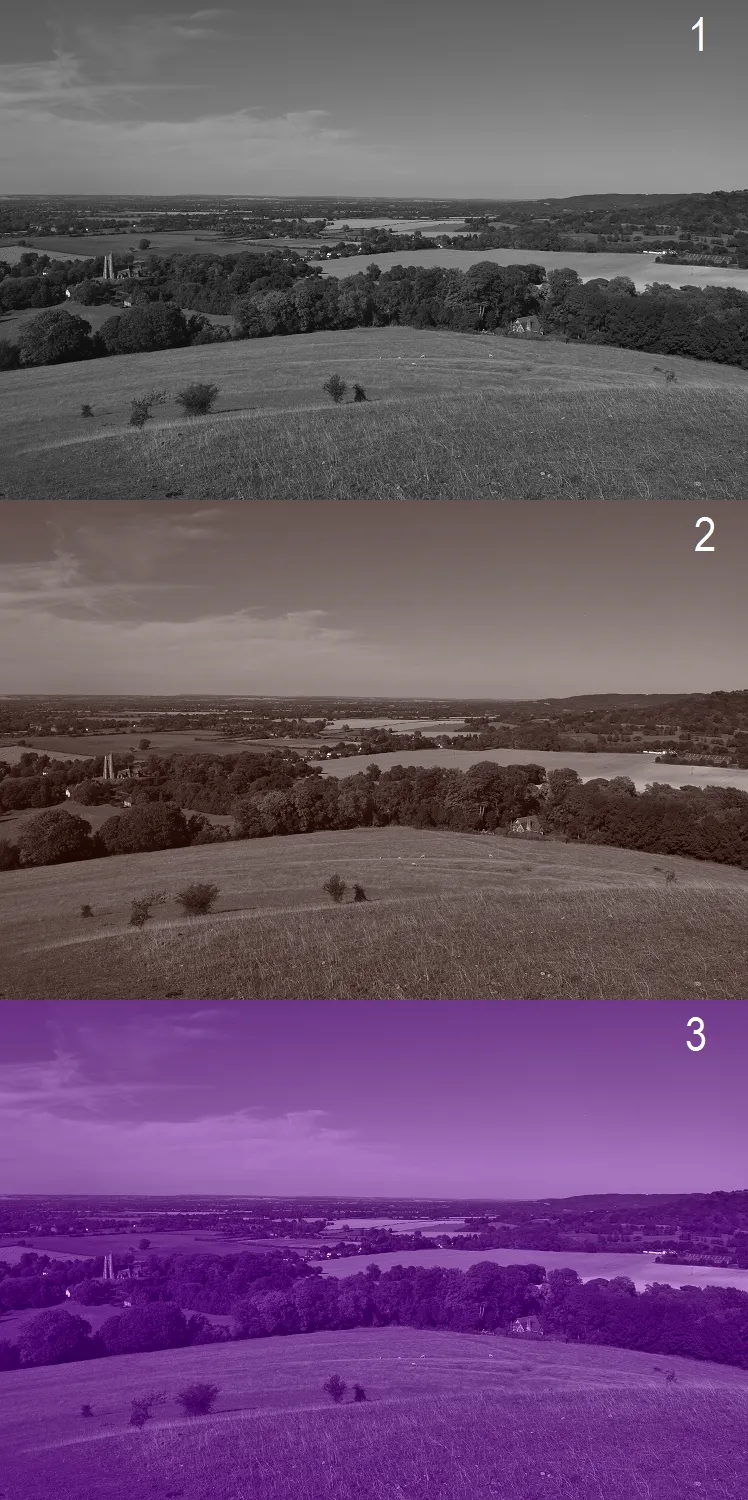
For every picture control the adjust interface is the same except for Monochrome, where you can adjust filter effects and tone (Pic.20,21) instead of saturation and hue. Remember that you can use the filter effects to enhance contrast, tone down the brightness of the sky in landscape photographs (Yellow, Orange, Red) or too soft skin tones (Green).

Nikon D5300 monochrome adjust settings

Pic. 20 Monochrome adjust settings.

Nikon D5300 monochrome toning settings

Pic. 21 Monochrome Toning settings.

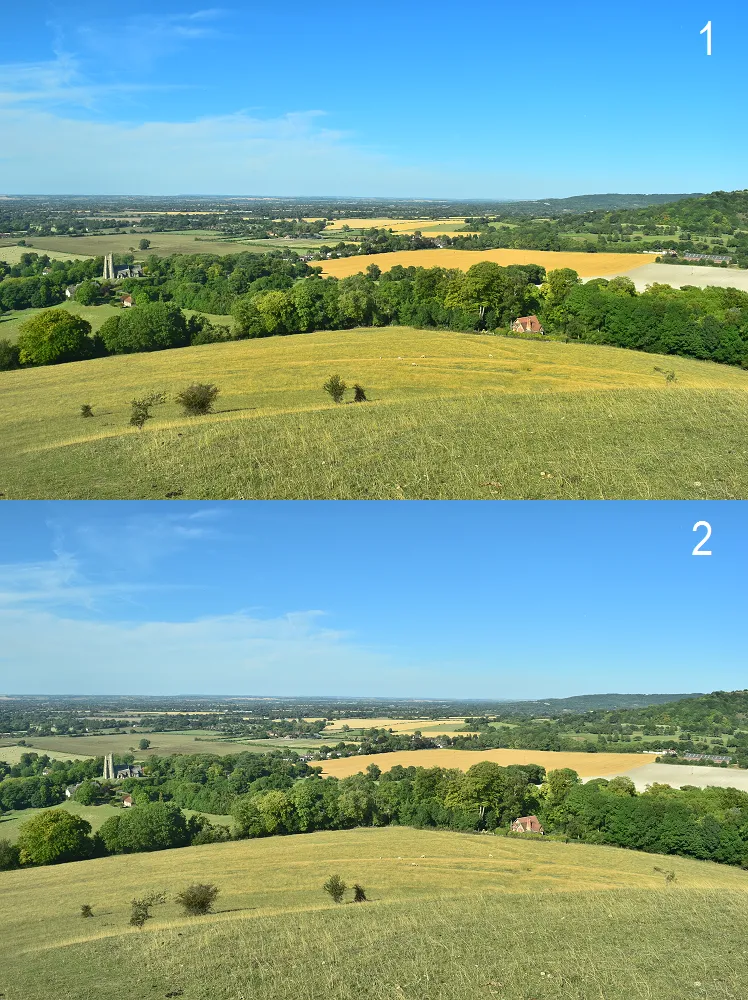
See the examples below (Pic. 22-31):

Nikon D5300 picture control photo example, Chiltern Hill in UK

Pic. 22 The Picture Control basic options: 1 – Standart, 2 – Neutral, 3 – Vivid, 4 – Monochrome, 5 – Portrait, 6 – Landscape.

Nikon D5300 picture control photo example after quick adjust, Chiltern Hill in UK

Pic. 23 Quick-Adjust: 1 – Before, 2 – After.

Nikon D5300 picture control photo example after quick sharpness adjust, Chiltern Hill in UK

Pic. 24 Sharpness value: 1 – 9 (max), 2 – 0 (min).

Nikon D5300 picture control photo example after quick sharpness adjust, Chiltern Hill in UK, cropped

Pic. 25 Sharpness details: 1 – 9 (max), 2 – 0 (min).

Nikon D5300 picture control photo example after quick contrast adjustments, Chiltern Hill in UK

Pic. 26 Contrast settings: 1 – Max low, 2 – Default, 3 – Max high.

Nikon D5300 picture control photo example after quick brightness adjustments, Chiltern Hill in UK

Pic. 27 Brightness settings: 1 – Max low, 2 – Default, 3 – Max high.

Nikon D5300 picture control photo example after quick saturation adjust, Chiltern Hill in UK

Pic. 28 Saturation Balance: 1 – Max low, 2 – Default, 3 – Max high.

Nikon D5300 picture control photo example after quick hue adjustments, Chiltern Hill in UK

Pic. 29 Hue balance: 1 – Max low, 2 – Default, 3 – Max high.

Nikon D5300 pictures with monochrome effects, Chiltern Hill in UK

Pic. 30 Monochrome filters: 1 – Off, 2 – Yellow, 3 – Orange, 4 – Red, 5 – Green.

Nikon D5300 monochrome tone settings, Chiltern Hills in UK

Pic. 31 Monochrome tone settings: 1 – Starting monochrome image, 2 – Min red tone, 3 – Max purple tone.

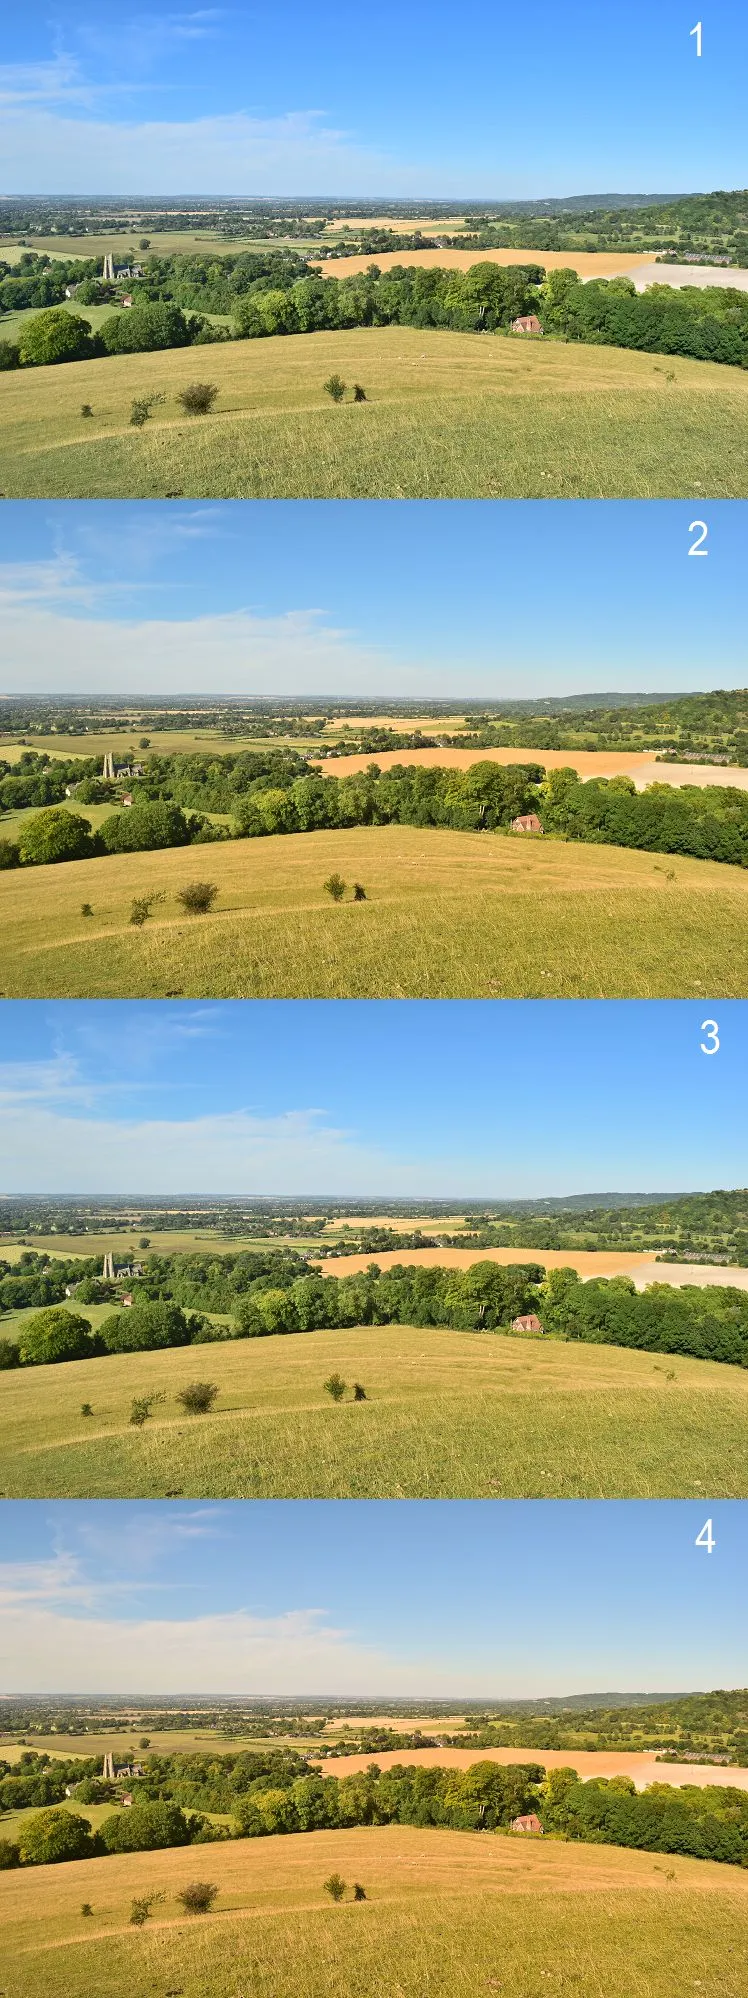
f) ISO Sensitivity – a measure of the camera’s ability to capture the light. In D5300 you have the choice between ISO 100 and ISO 12800 with an extension to 25600. Every RAW image may be modified within 4 levels of ISO sensitivity: AUTO (OFF), LOW, NORMAL and HIGH.

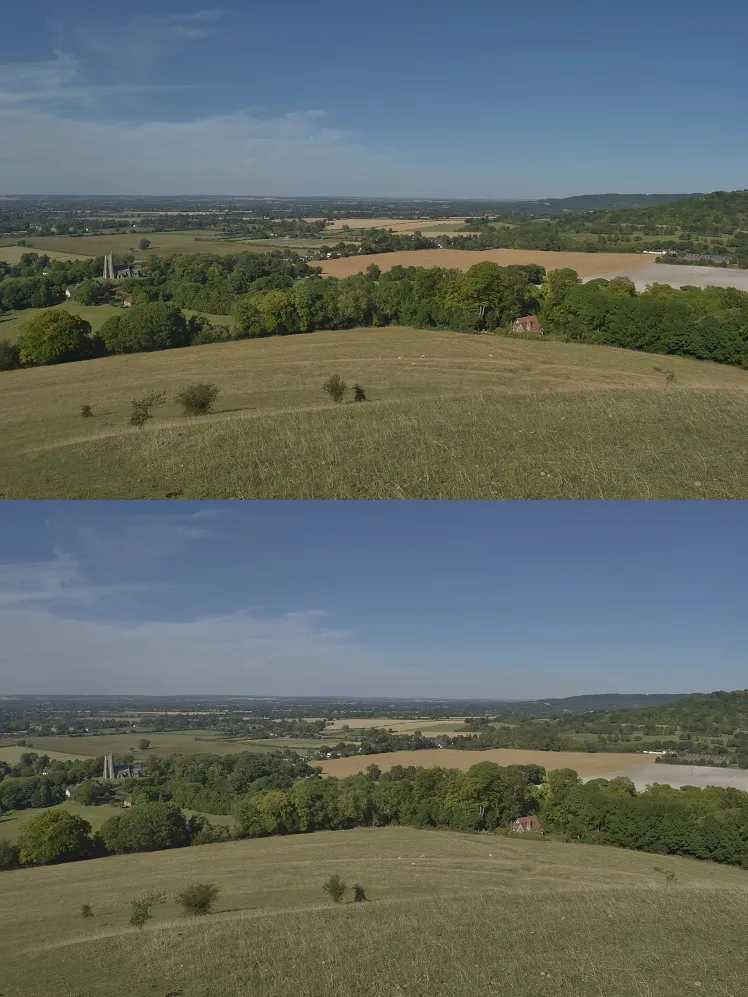
g) Color Space – determines the gamete of colors available for color reproduction. You may choose sRGB which is recommended for movies, general-purpose printing and display, and Adobe RGB, with its broader gamut of colors, which may be used for professional publication and commercial printing (Pic.32,33).

Nikon D5300 colour space settings

Pic. 32 D5300 Color space settings.

Nikon D5300 colour pace settings photo example, Chiltern Hills in the UK

Pic. 33 The Colour Space settings: 1 – sRGB, 2 – AdobeRGB.

h) D-lightning – same as in  Jpg images.

Finally, you can make an endless amount of Jpg photos from the RAW image. The animation below shows every image processes together (Pic.34).

Nikon D5300 RAW processing output photos compilation.

Pic. 34 RAW processing output photos compilation.

This is just part of the exercise, which you can make with the D5300 model. You can also use the proper software for RAW processing on your computer. See the list of programs below:

– RAW Therapee 4.2

– Capture NX-D

– DCRAW

– Photoscape 3.6.3

– Photivo


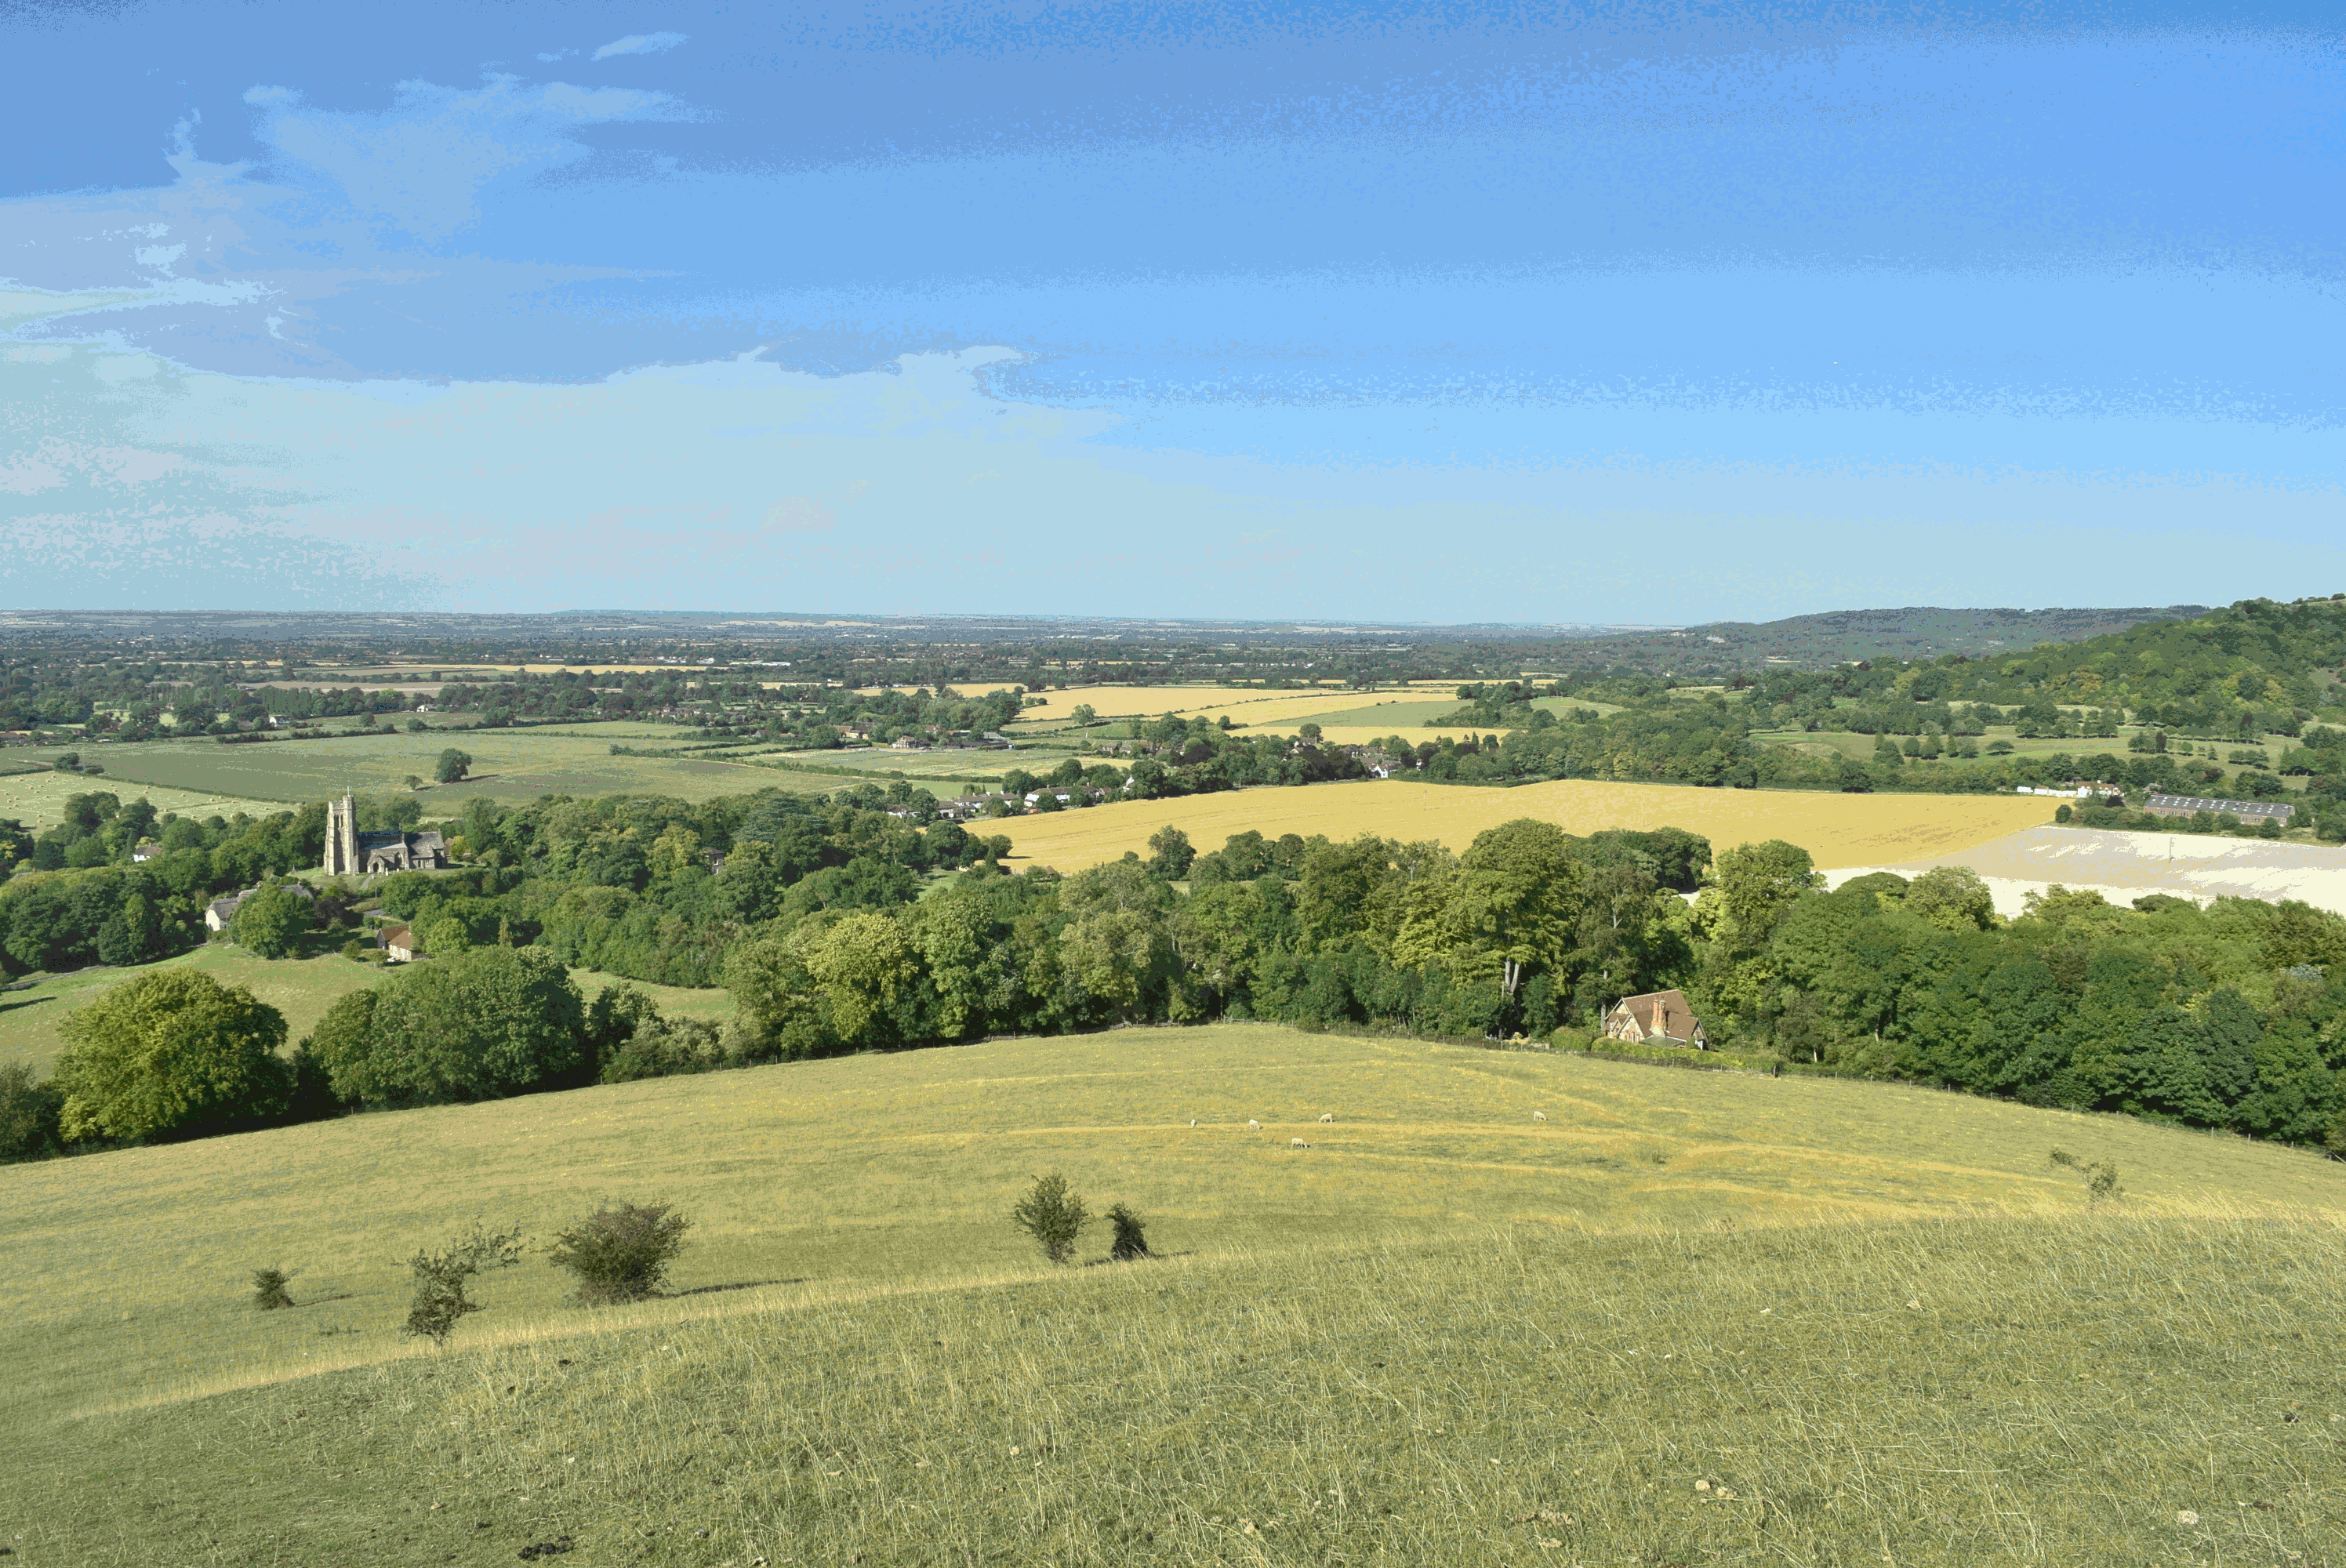
The picture parameters:

ISO 280

1/500 sec

F:3.6

The picture location:

Beacon Hill, Chiltern Hills between Ellesborough and Little Kimble.

Mariusz Krukar


Links:

English

How to process RAW images in the right way

10 reasons why you should be shooting RAW

RAW vs Jpg

NIKON D5300 Test ISO Sensitivity

Polish

RAW czy Jpg? Co jest lepsze i od czego?

RAW kontra Jpg – co powinienem wybrać?

RAW – większa rozdzielczość, więcej możliwości


You may also like...

Leave a Reply

Your email address will not be published. Required fields are marked *