Probably you used Google Earth many times, watched at least a few tutorials, and tried to manipulate some files by yourself. On the Web, you can find many sources, where the process of creating some simple elements in Google Earth is explained. Besides the drawing features, Google Earth can be a place where a user can alter existing .kml files uploaded from external sources. Usually, they can be done one by one, although here I want to demonstrate the way, you probably didn’t know before.
For instance, by reading this article, you can realize, that changing the properties of each object (or circumstance) separately might take a while. There is completely no need to do it as shown in the link above unless you deal with dynamic circumstances like changing cruising altitude. What is most important, the multiple-selection feature is possible just from the Google Earth Pro 7.3.2 version released in early 2019. Compressing our task to styling only, we can make the desired change only once for all the files. See the steps below on how to do this:
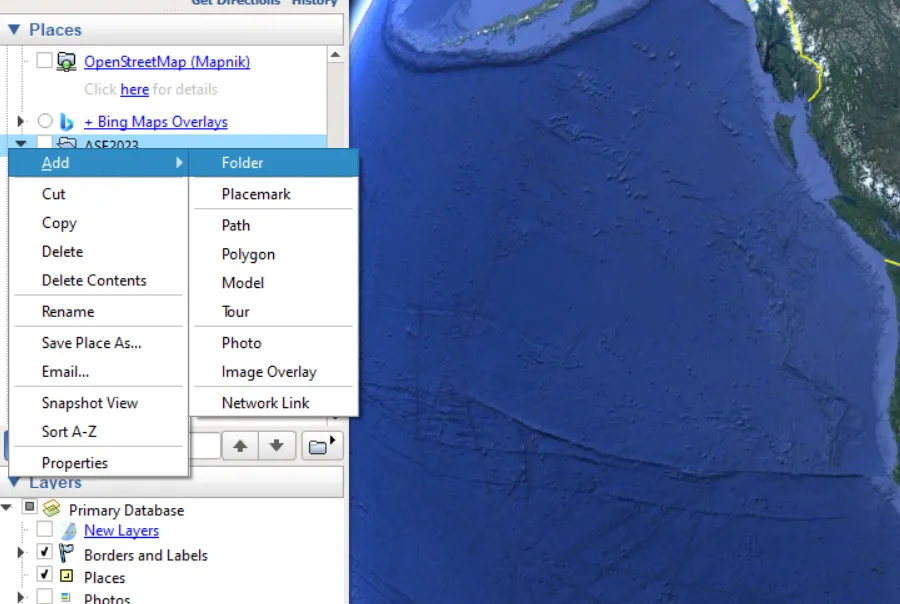
1. Create a new folder in your “Places” panel located on the left (Pic. 1).
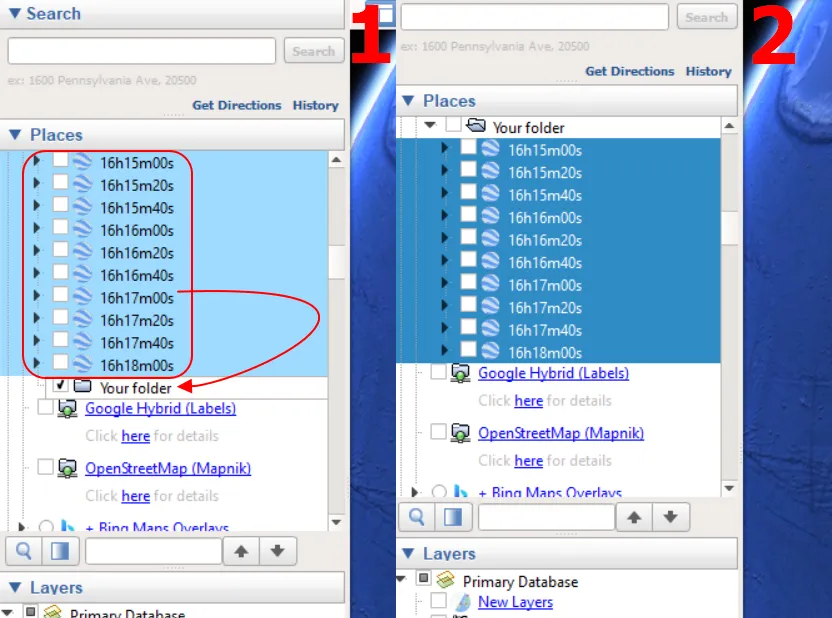
2. Move all your objects to the folder regardless of their total number. You can do it in pieces (Pic. 2).
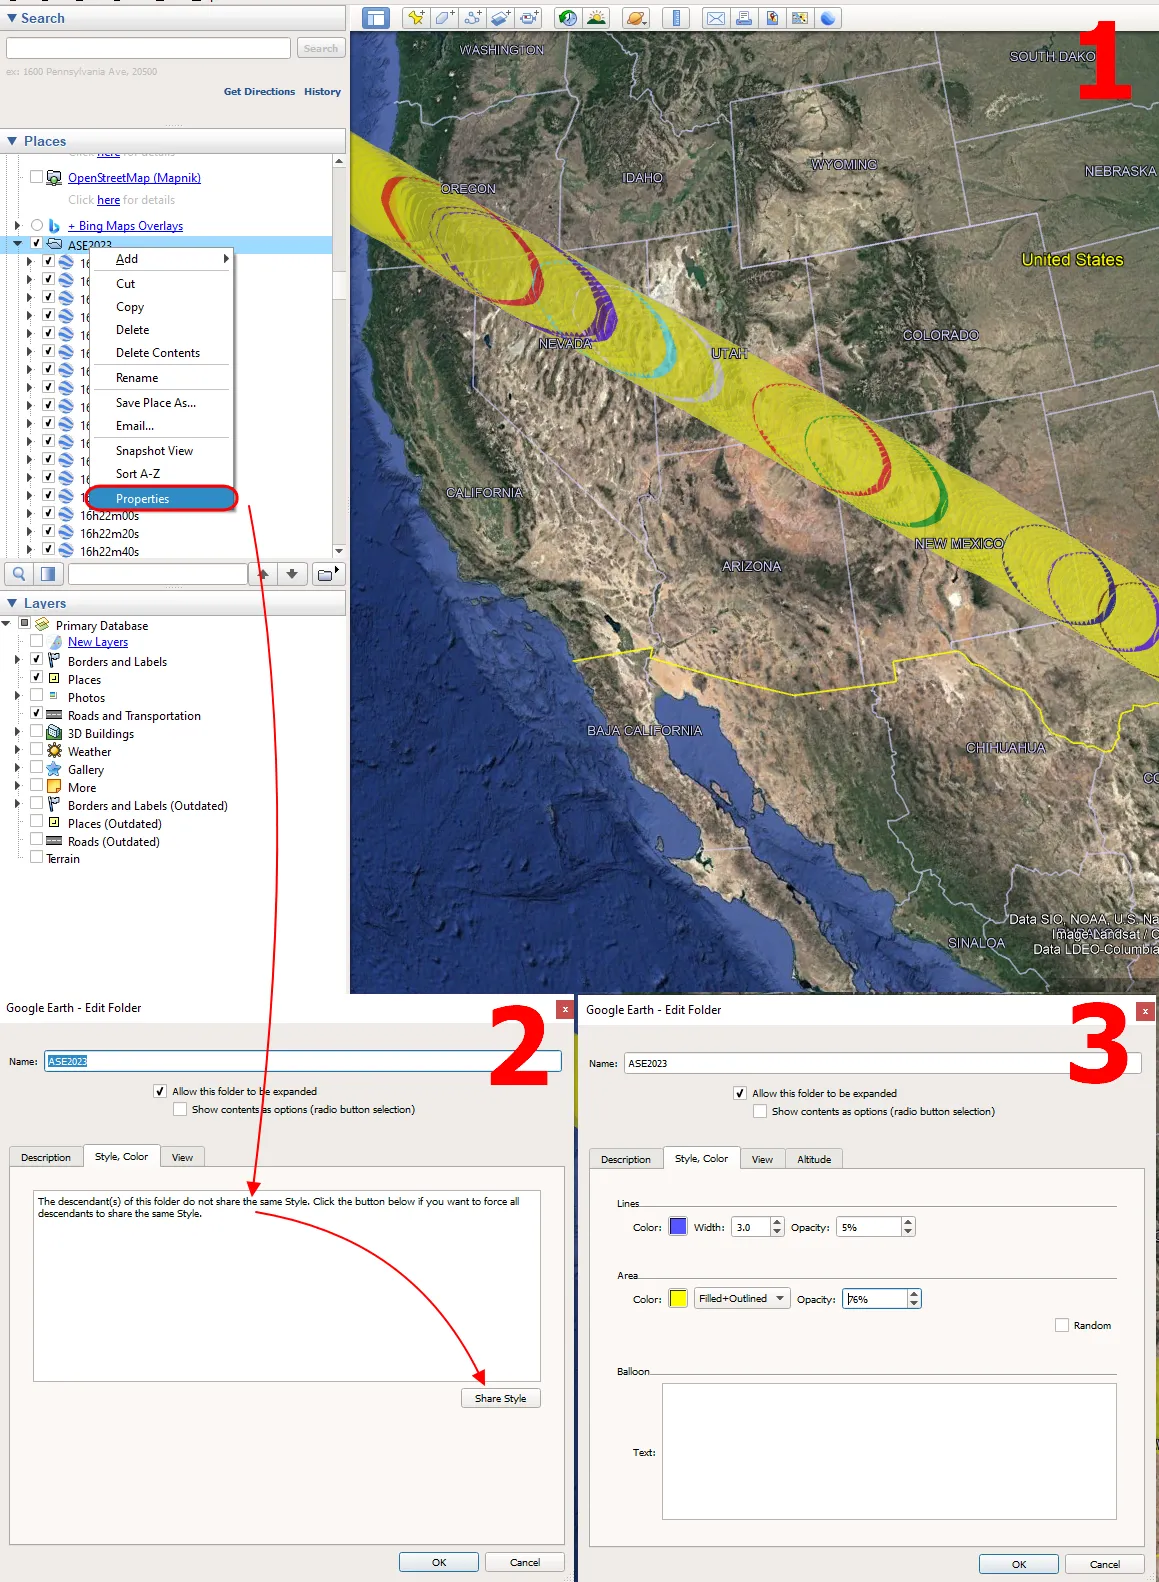
3. Every single object has its properties to change (Pic. 3). Look at all the options available there.

Looking at the above screenshot, you have an example of a defined style for one element. This style can be different across the other files in your folder.
4. Now, right-click on your folder including all the files instead of one file like previously (Pic. 4), and select the “Properties” option again. In this case, you will see nothing apart from the message that “The descendant(s) of this folder do not share the same style. Click the button below if you want to force all descendants to share the same style.”
By clicking the “share style” button, every single object located in your folder adopts the style visible in the “Properties” window. You can even notice, that all your elements become uniform regardless of their number in the folder.
5. At this step just change your options left. You can alter both styles and colors as well as the altitude and view of your items. What is the most convenient, every single change can be instantly visible on your Google Earth map beneath (Pic. 5).
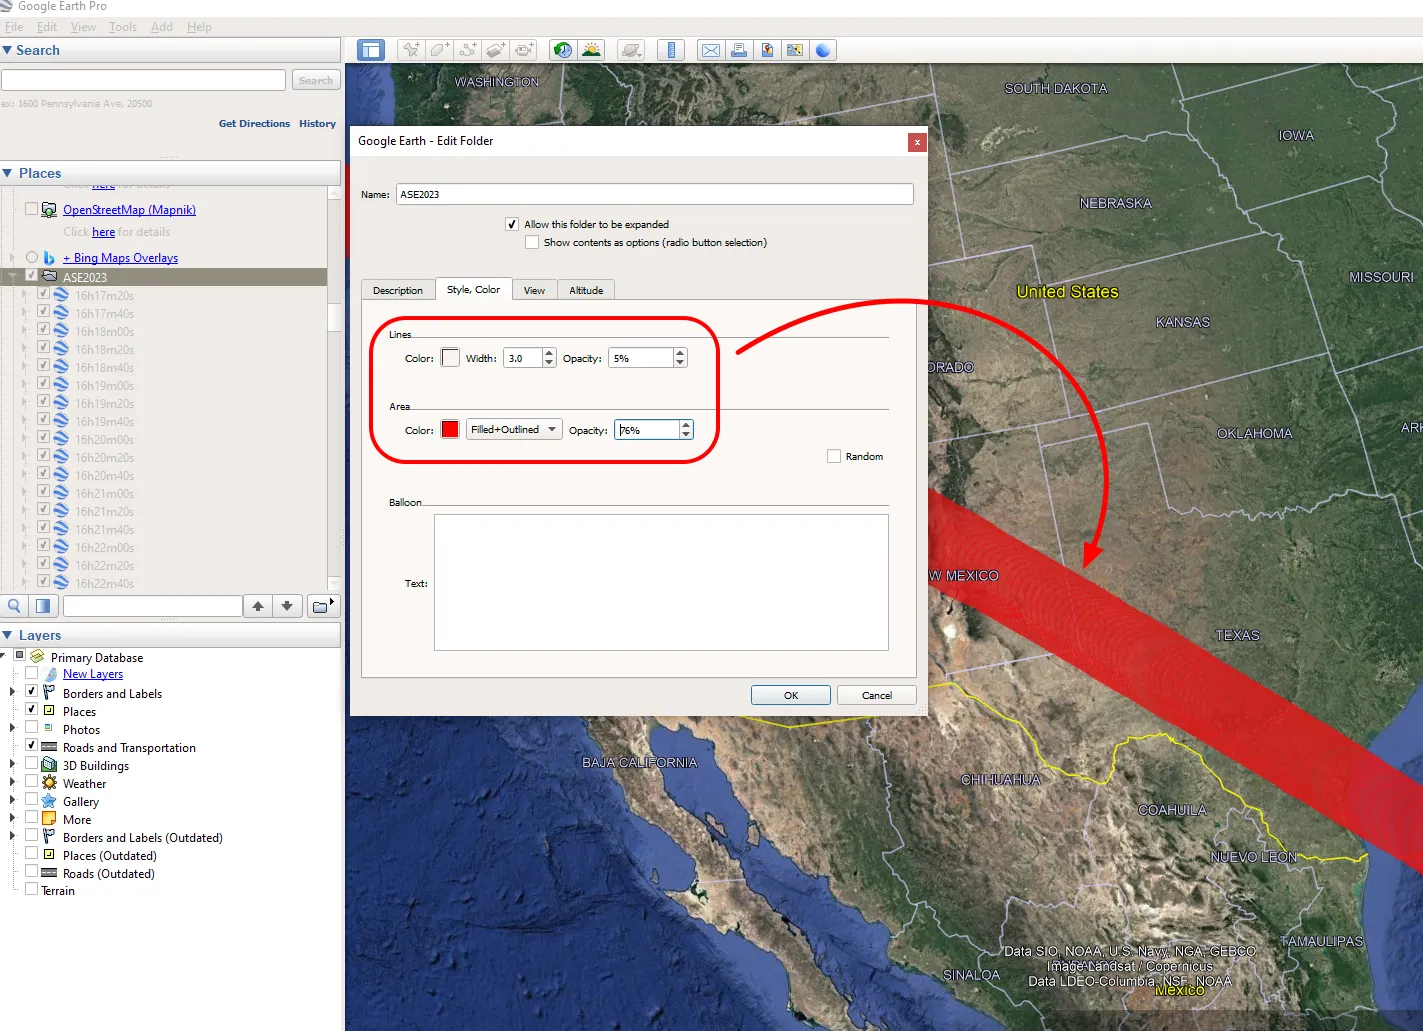
6. When you are happy with your styling, just click “OK” making your job done.
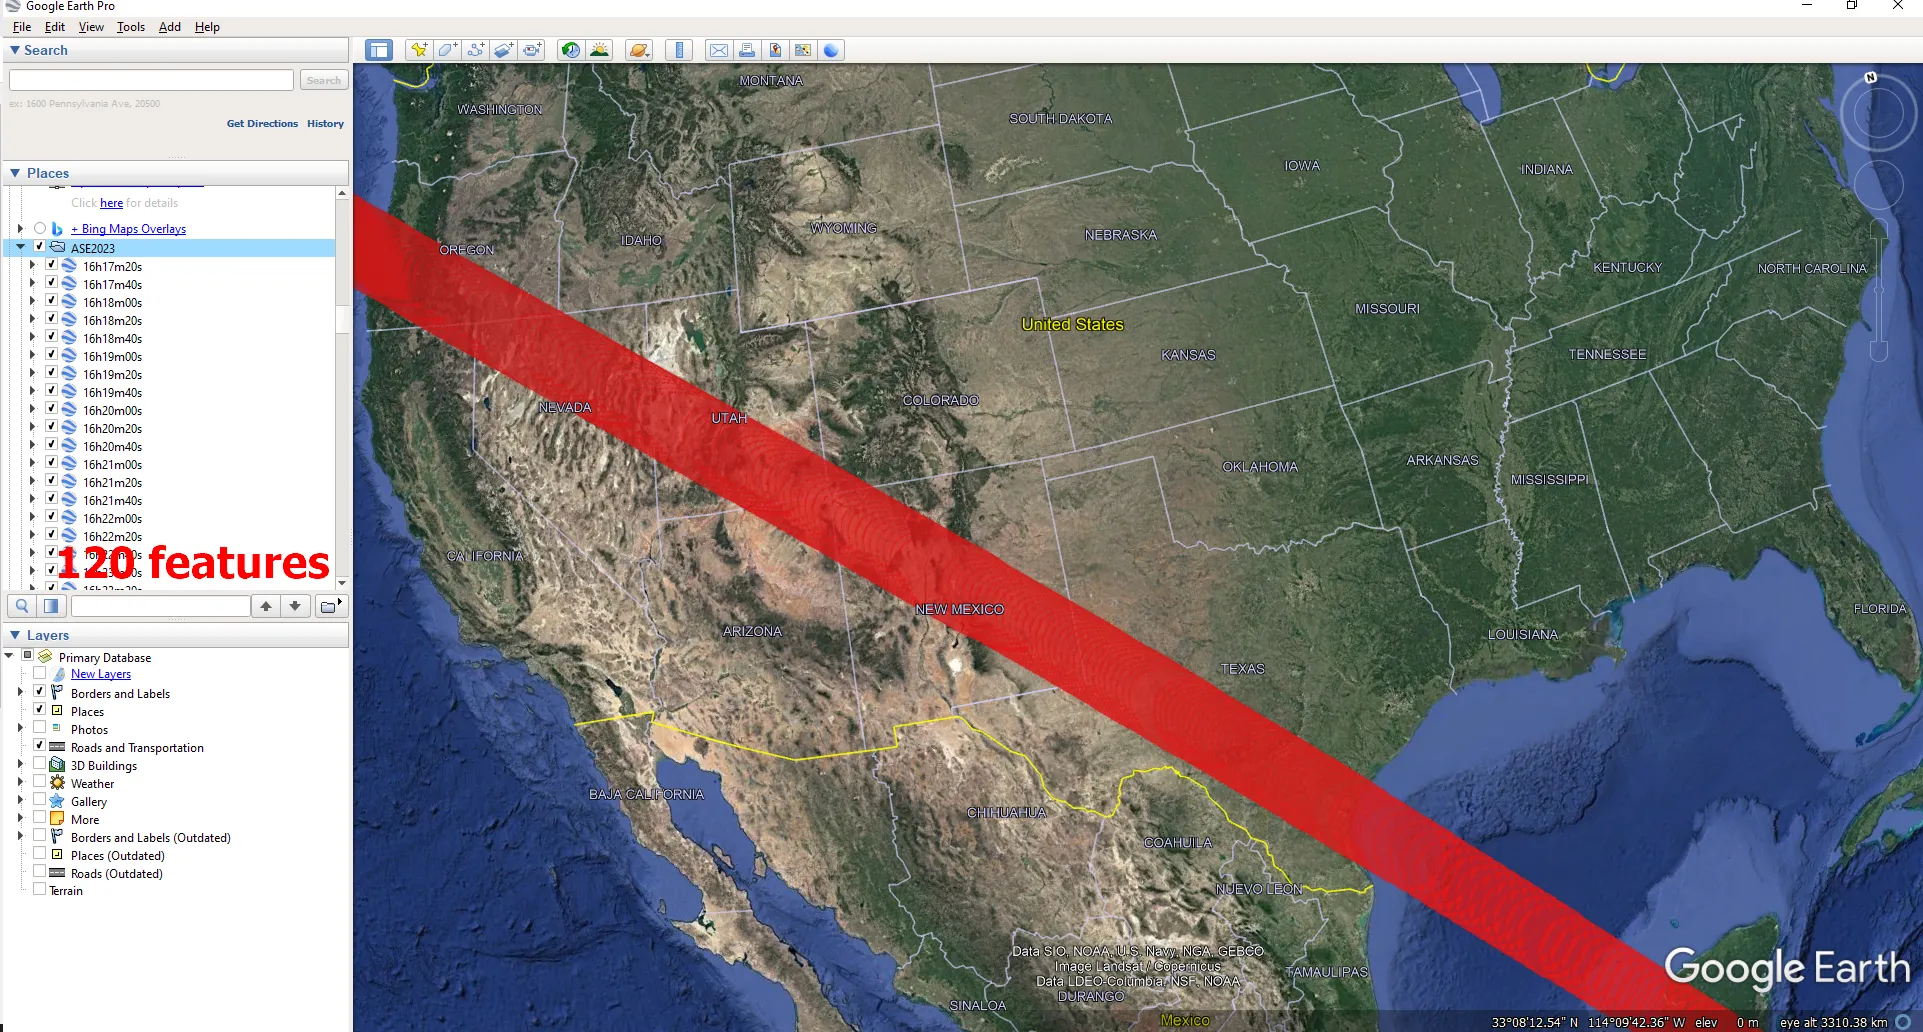
I have done it for about 120 features. Everything took me about a minute! Imagine now how much time you can save for a bigger amount of items. The prerequisite is their uniformity. The process cannot be applied when your job requires keeping the styling various. Every “Sharing style” will erase all other styles defined previously. This is basically the one and a very huge disadvantage of this solution. Concluding, this process must be applied deliberately. If this explanation wasn’t clear enough for you, watch the video below.
Mariusz Krukar
Links:
Forums:
- https://gis.stackexchange.com/questions/9662/select-more-than-one-place-at-a-time-in-google-earth
- How do I select multiple placemarks to move them all in the same folder?
Youtube:

