
There are a lot of real-time flight trackers and at least a few flight archives on the web. Some of them offer to purchase the data. After purchasing you are receiving full flight data, ready for further manipulation. The most popular flight tracker with a big flight data history is Flightradar24.com. There is also the option to get this data in a .csv or .kml file however only for users, who decided to purchase at least a silver account. Moreover downloading this data is restricted and for the cheapest option, the limit is 10 per month only. I realize, that you don’t need more, because usually, you fly not often than 10 times per month (consider your own flights only). Nonetheless is quite uncomfortable being reliant on this server without a chance to display your flight in a different software than the map provided there.
Let’s consider the different options then. Before I will come across my own example with the last flight I would like to tell you about the most convenient options to gain the .kml data from your flight. There are 2 other live flight trackers (as far as I know) with accessible data on the flight. Besides, there are other options to display the flights provided on the GitHub platform. Back to the web trackers for Americans, the most convenient is to be Flightwise.com. At least a few pieces of advice can be found on the web on how to use flight information from Flightwise.com on Google Earth. One of them can be seen in the movie below.
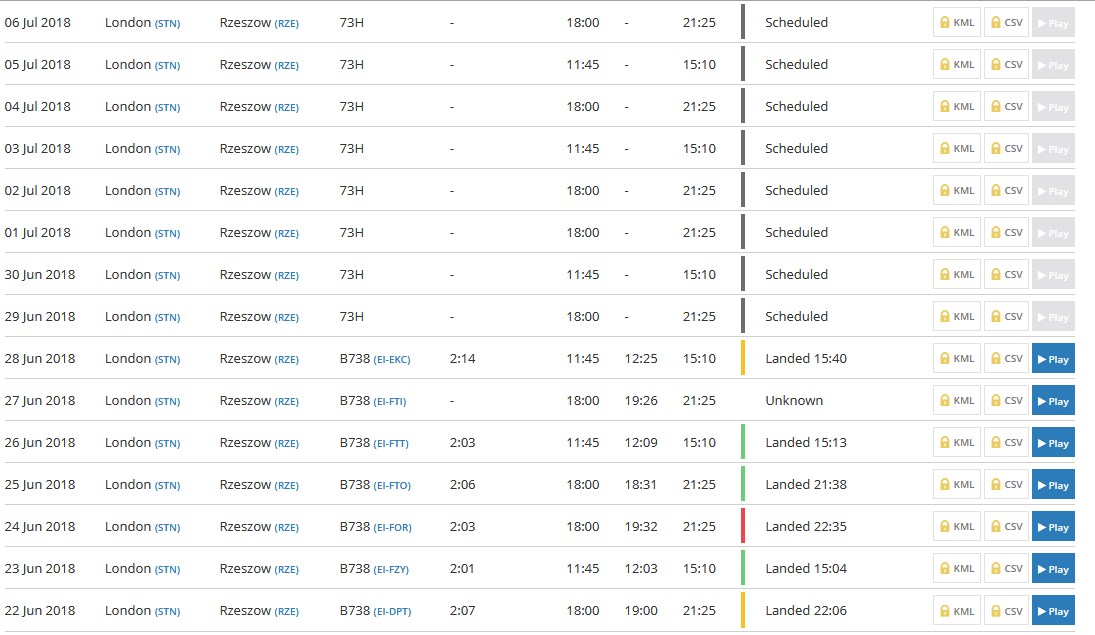
My example is based on Flightaware.com, which has a pretty good archival flight database. Writing pretty good I mean not equal the Flightradar24.com but still OK. When finding your flight you have insight into the flight log data. The “View track log” option is very useful for preparing your .kml file in the future. All details about the preparation of your flight data can be seen in the video below.
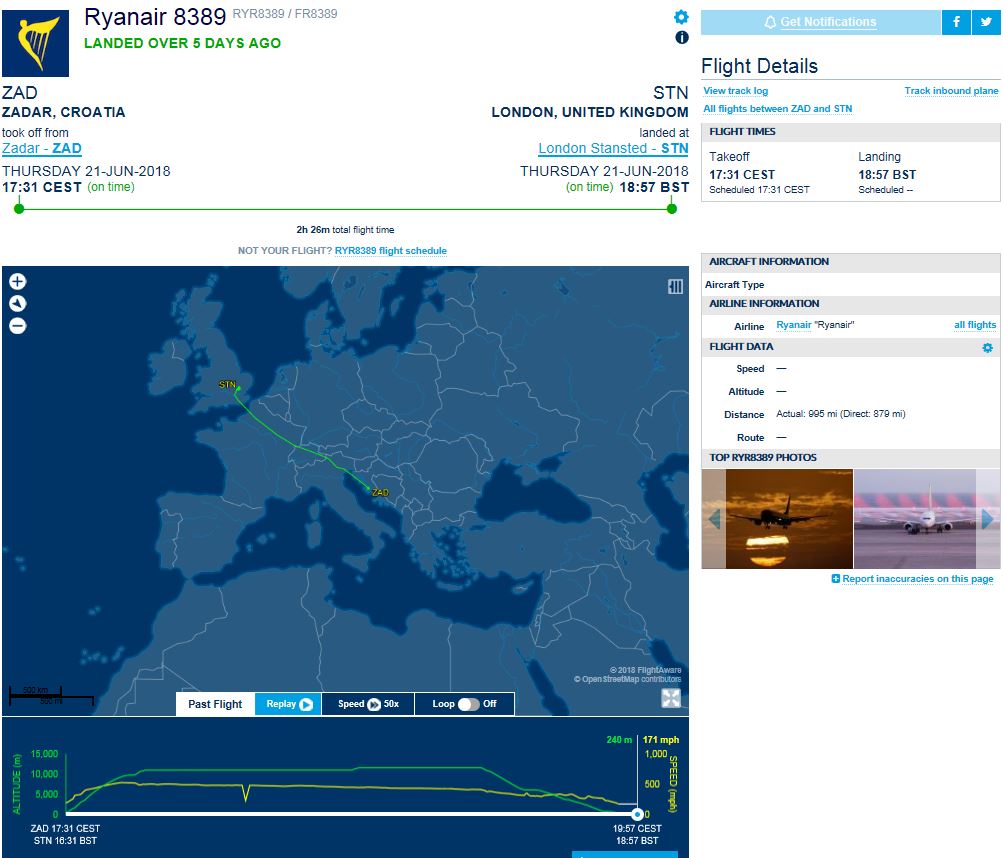
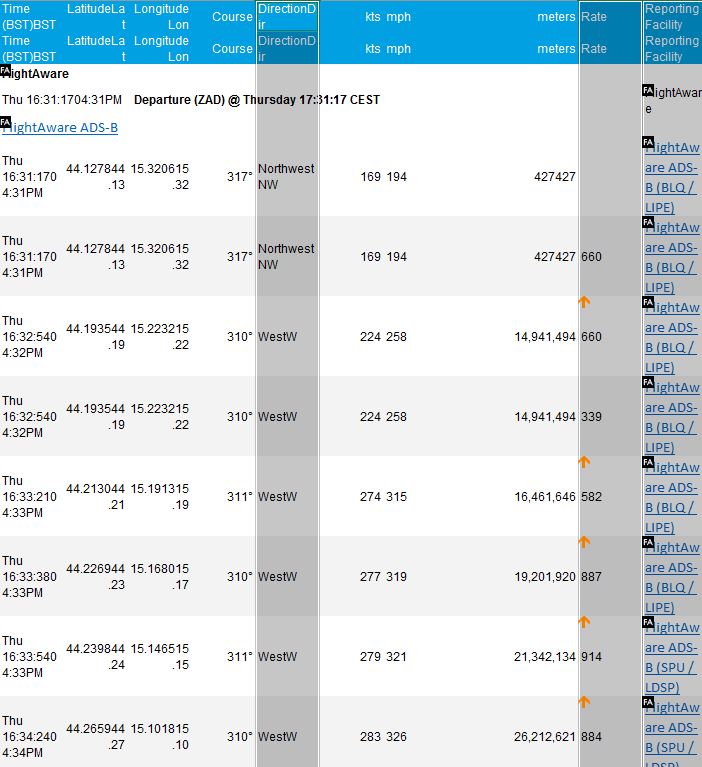
The movie above doesn’t cover the moment of data manipulation in MS Excel. I will show you step by step how to do it in my own example. This is the flight from Zadar (ZAD) to London Stansted (STN) operated by Ryanair. You can see the overview of your flight when finding it on this website (Pic. 2). Once you copied the data, you should have a table in MS Excel that looks like this below (Pic.3).
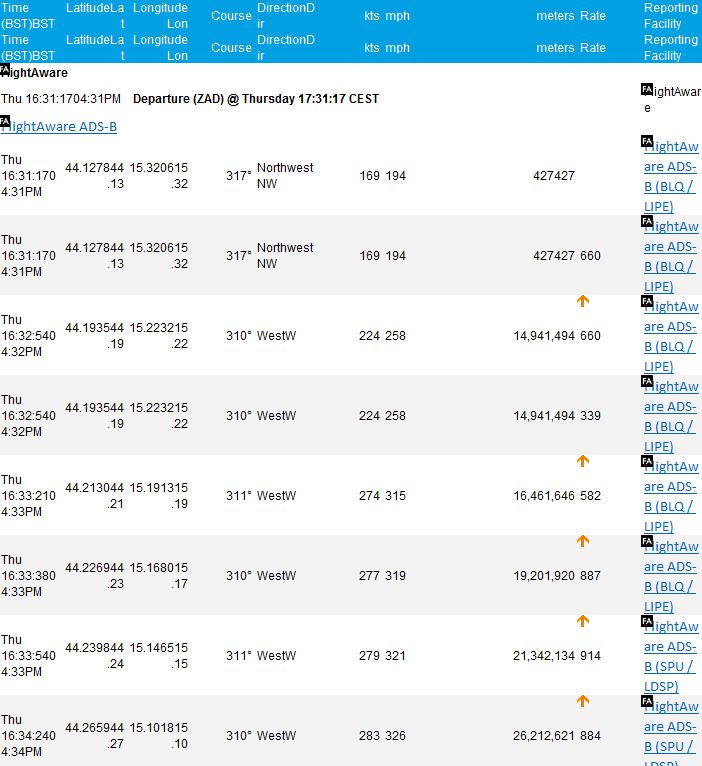
- The table copied to MS Excel looks almost the same. I mean almost the same, because (possibly you have spotted it) some values have been copied wrong. You can get rid of these mismatches and adjust this table by following the steps below.
- Some columns are not necessary for our flight details. Obviously, you don’t have to do the same as me. This is my example only. I decided to remove 3 columns: “Direction“, “Rate” and “Reporting facility”. I don’t need the direction when I have the azimuth in the “Course” column. I don’t need the rate too because I am not interested in how many meters the plane has ascended/descended in a past time interval. Basically, all I need is: “Longitude”, “Latitude”, “Time” and “Meters” (altitude).
Pic. 4 Selected unnecessary columns are to be deleted. - Once you remove unnecessary columns remember about unnecessary rows too. There are 3 on the top and another 2 on the very bottom.

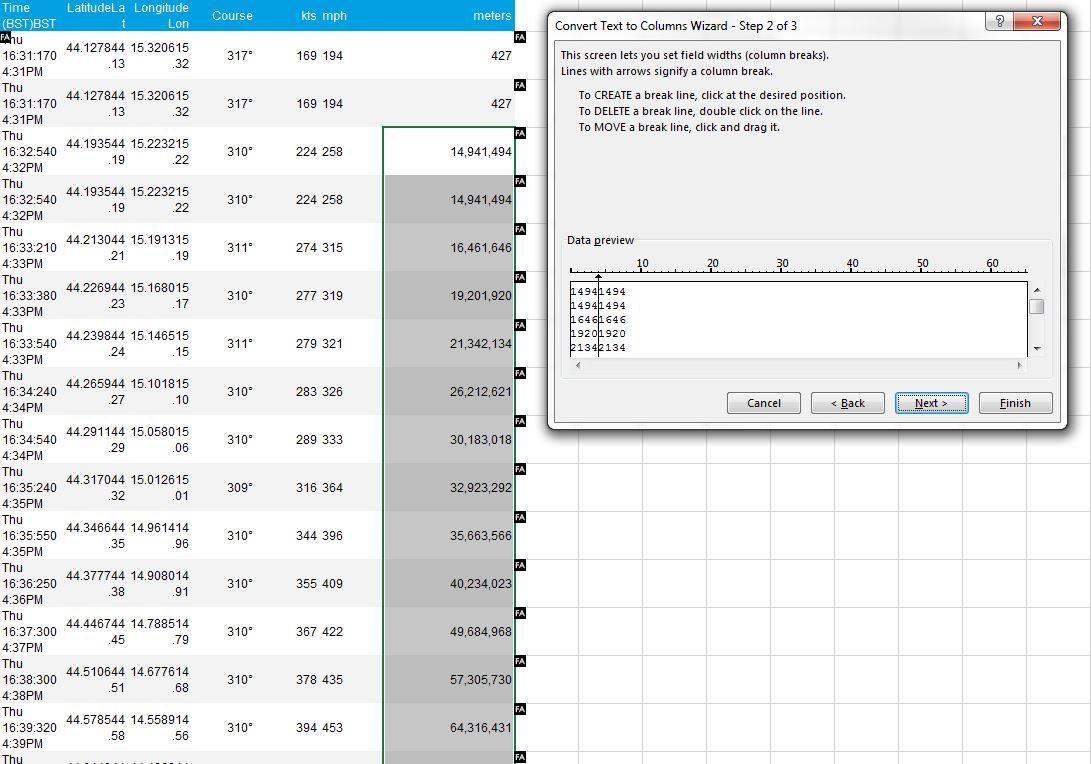
Pic. 5 Selected unnecessary rows are to be deleted. - Now is the time to make our data tidy. As I have written earlier there are some discrepancies between values on the website log and values copied to the MS Excel document (time and meters). The values look like they have been copied twice to the same row and appear as string text. Our current task is to convert this text to separate columns. Before you do this make sure, that you selected the proper rows. Remember to avoid the 1st row with the column name and repeat this for each group value (e.g. separately for values from 100 to 999, next from 1000 to 9999, etc.) to avoid further inconsistencies as per below. The value should have a fixed width.
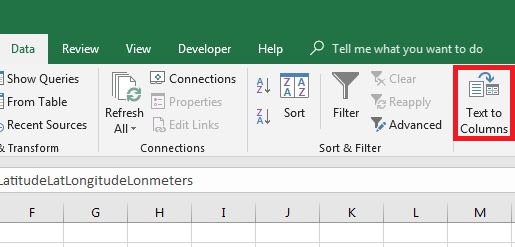
Pic. 6 In the “Data” section select the “Text to column” option. 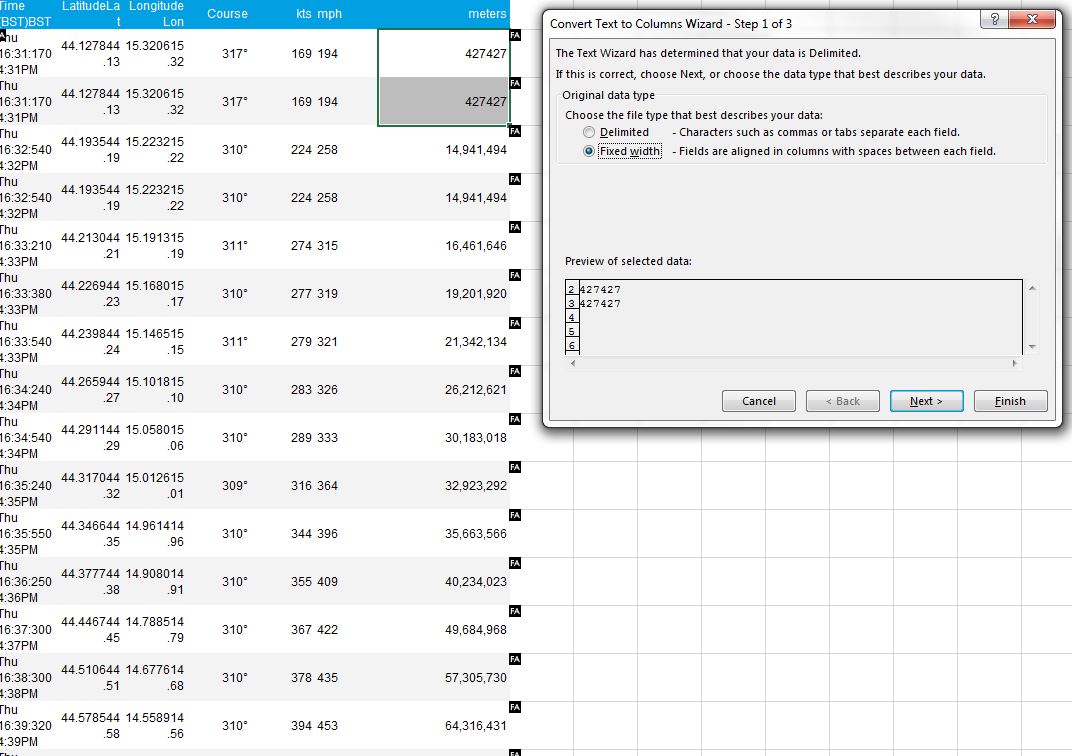
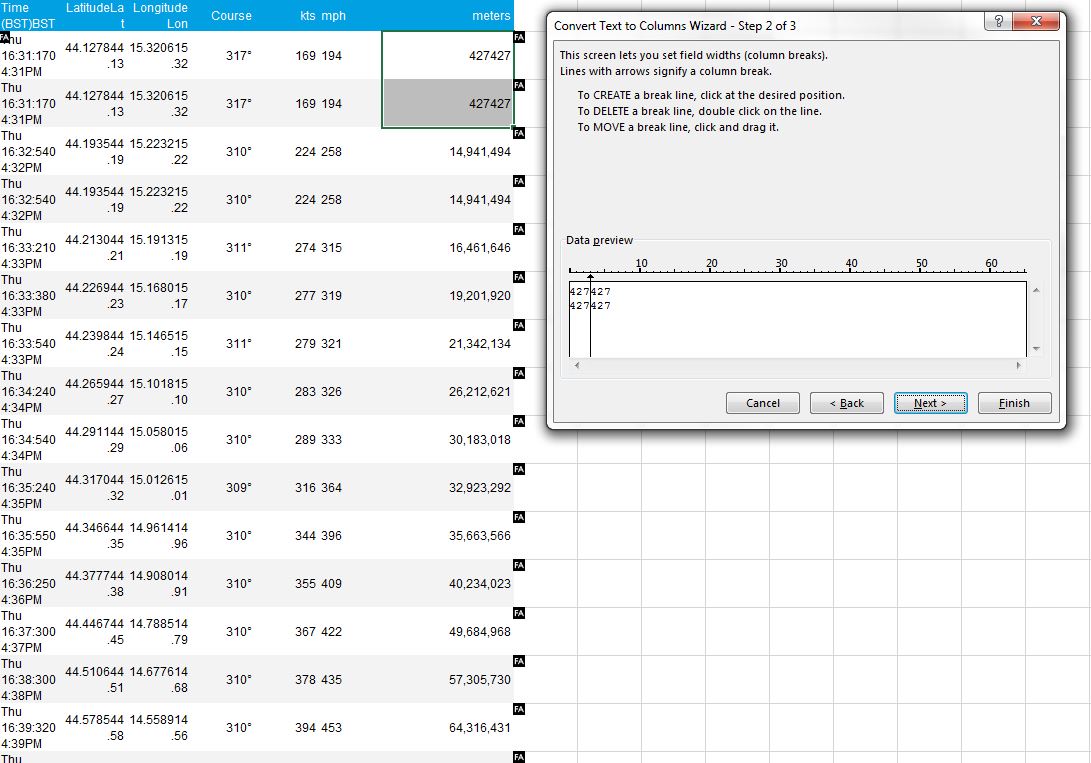
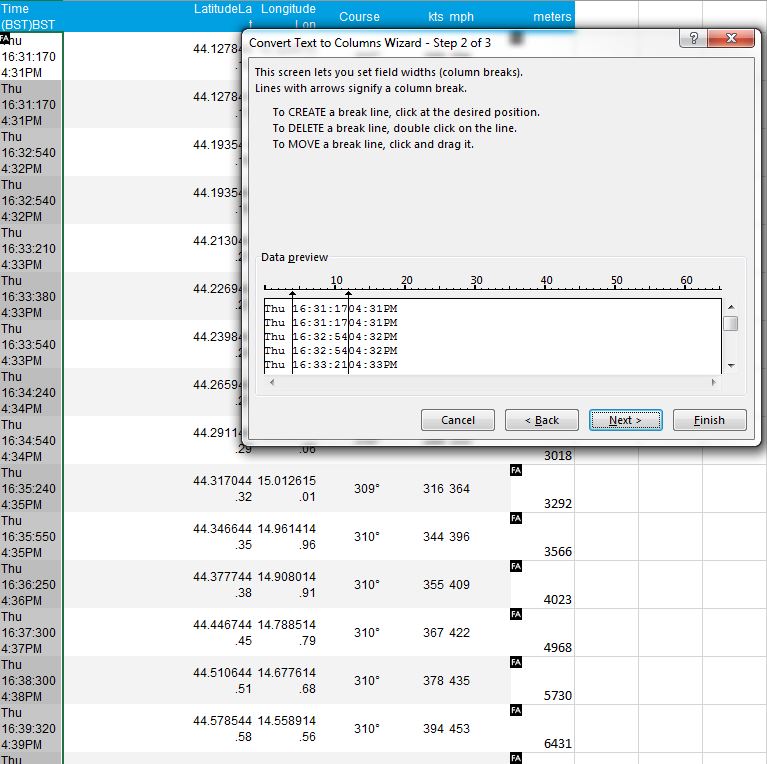
Pic. 7, 8 Conversion text to the column: firstly for the values lower than 1000. 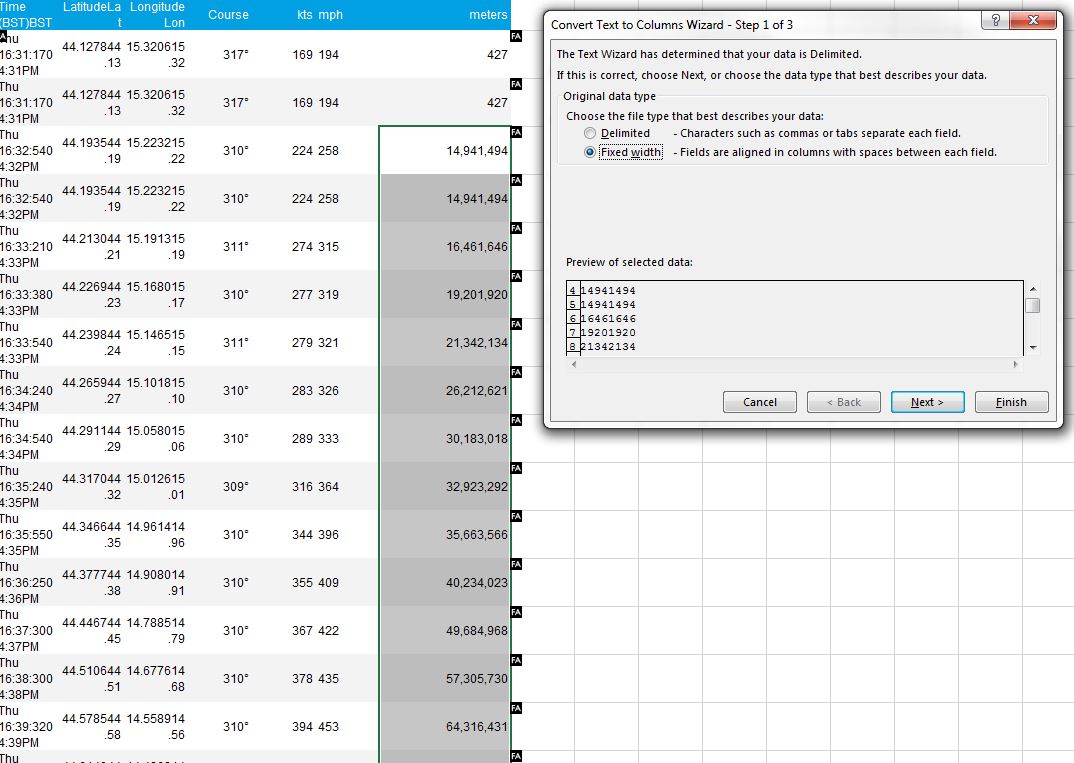
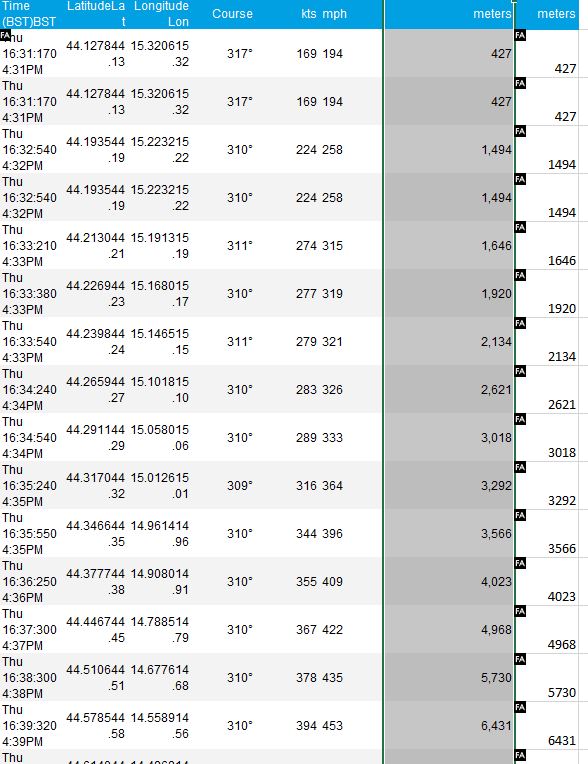
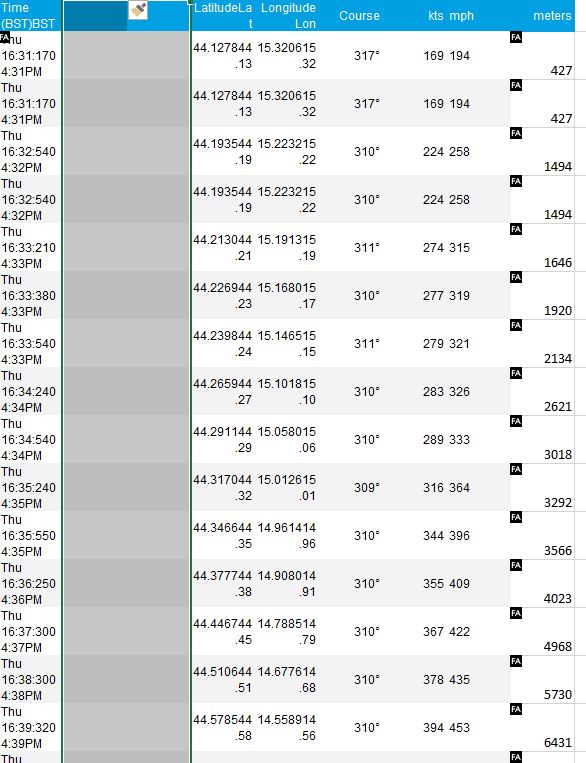
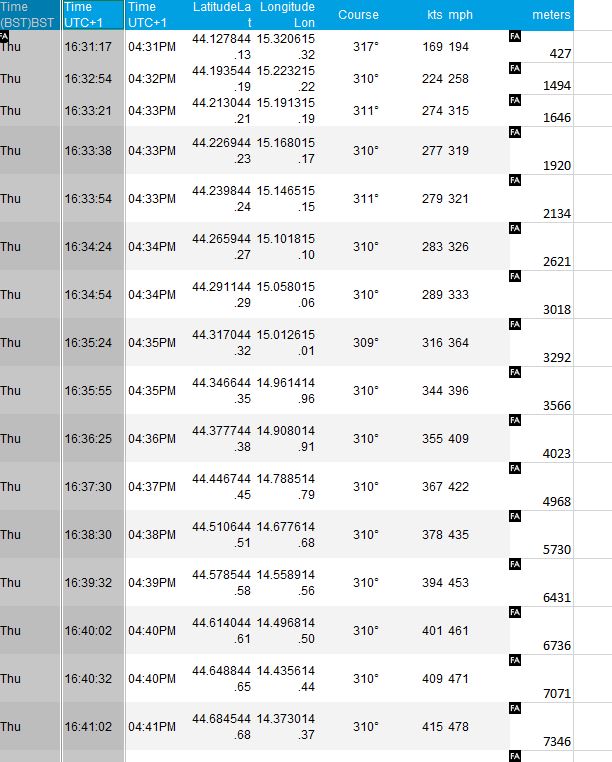
Pic. 9, 10 Conversion text to the column for the values between 1000 and 9999. - Fine! Now you have created a new column. Using this column seems to be more comfortable because there are no commas. So let’s copy the “Meters” column name to our newly created column and delete the old one.
Pic. 11 The old “Meters” column is going to be removed. - You have to make similar steps within the “Time” column. I have got the BST (British Summer Time) – GMT+1 due to the time zone in your destination airport. Initially, you have a weekday and 2 types of time descriptions set as strong. In terms of this, you will need to insert 2 new columns between the “Time” and “Latitude” where you finally embed the time values converted. I have chosen the hh-mm format because in my opinion is more readable. Besides the log is actualized around twice per minute.
Pic. 12 Insert 2 new columns where you will put the converted data. 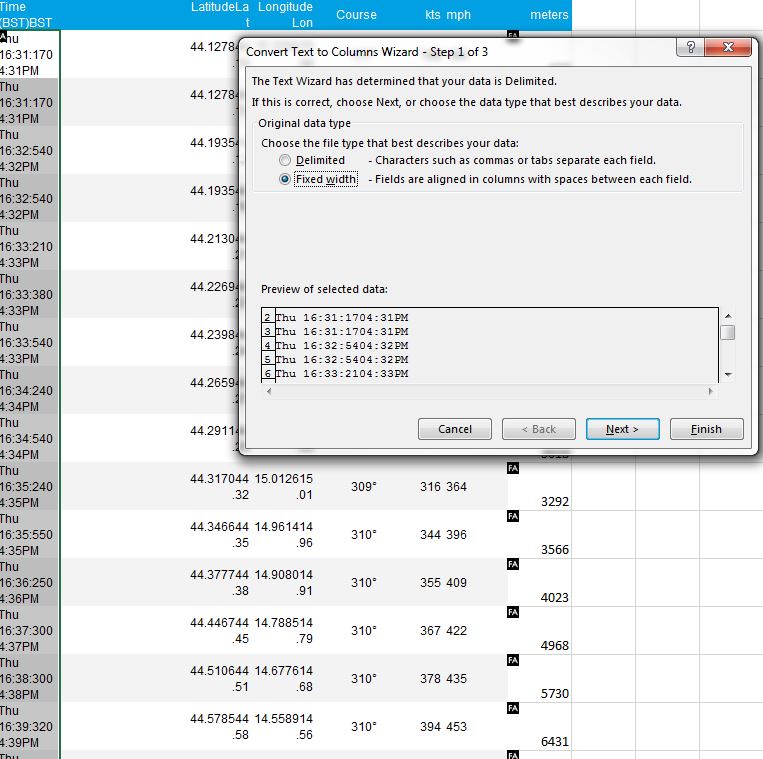
Pic. 13, 14. Converting the time values. - Sometimes you can see the alert below. Don’t worry about it just click OK. We are going to replace the leftmost column, another two will be used for newly converted data input.

Pic. 15 Alert about the data in our output columns. Click OK to replace it. - Now when you have the “Time” issues sorted remove unnecessary columns making your table clear.
Pic. 16 First, two leftmost columns are going to be deleted. - The last step is removing repeatable rows or as you wish more rows can be removed depending on how “dense” route would you like to have. I decided to leave everything as it stands just without 2 repeatable rows near the top.

Pic. 17 Look on the “Time” column and find the repeatable values, then remove them. - Save your file in .csv format, which is recognizable by Google Earth software.
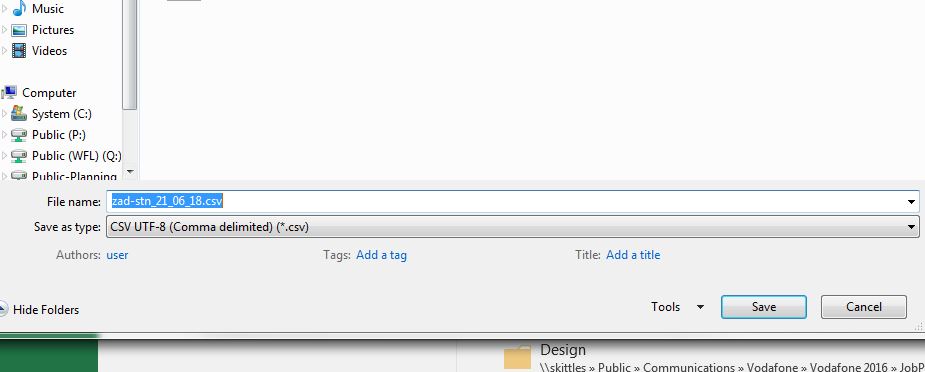
Great! Now you have the .csv file ready to input to Google Earth. There are solutions on the web on how to do this. The process is quite simple like in the video shown below. The issues with importing Excel data to Google Earth have been raised in an earlier article. Just in case you can see the video with the instructions below.
The difference between the standard process of inputting MS Excel data to Google Earth lies in the data specification. You cannot follow the aforementioned movie exactly step by step because you have to specify your field types correctly.
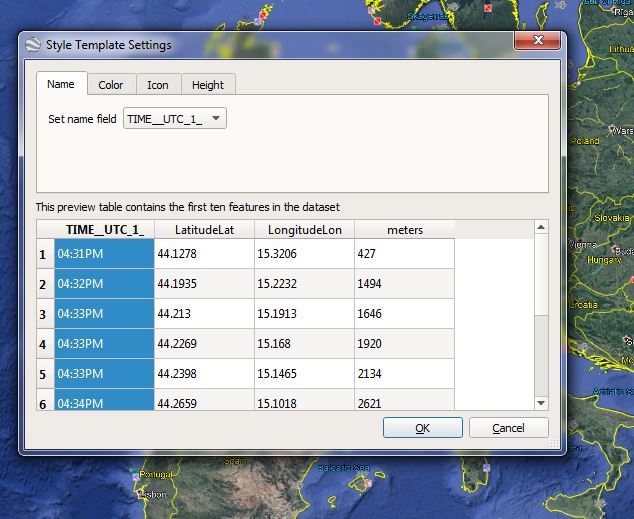
As per the picture above the “Time UTC+1” field should have the string type because our time value contains the string of both numbers and symbols. The “Latitude” and “Longitude” have to be set as the floating-point type. Otherwise, the tool will not interpret the flight track coordinates correctly. Finally, the route of your flight will not be shown correctly. Other fields should be set in the integer type.
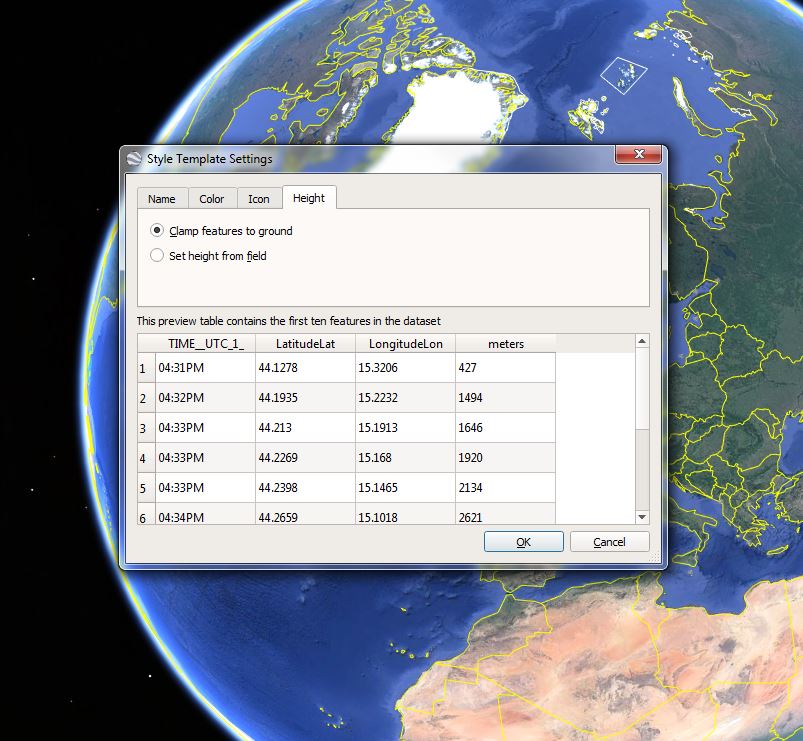
Considerating, that you came through the other steps and reached the moment of the “Style Template Settings” there are 2 very important factors, that you have to look at. First is the “Name” which it would be good to select from our “Time UTC + 1” column. If you miss this nothing wrong happened. Only the simple points on your route will not be identified. A much more important issue is “Height”, where we have basically 2 options. To simplify our process select “Clamp features to ground” and then click OK.
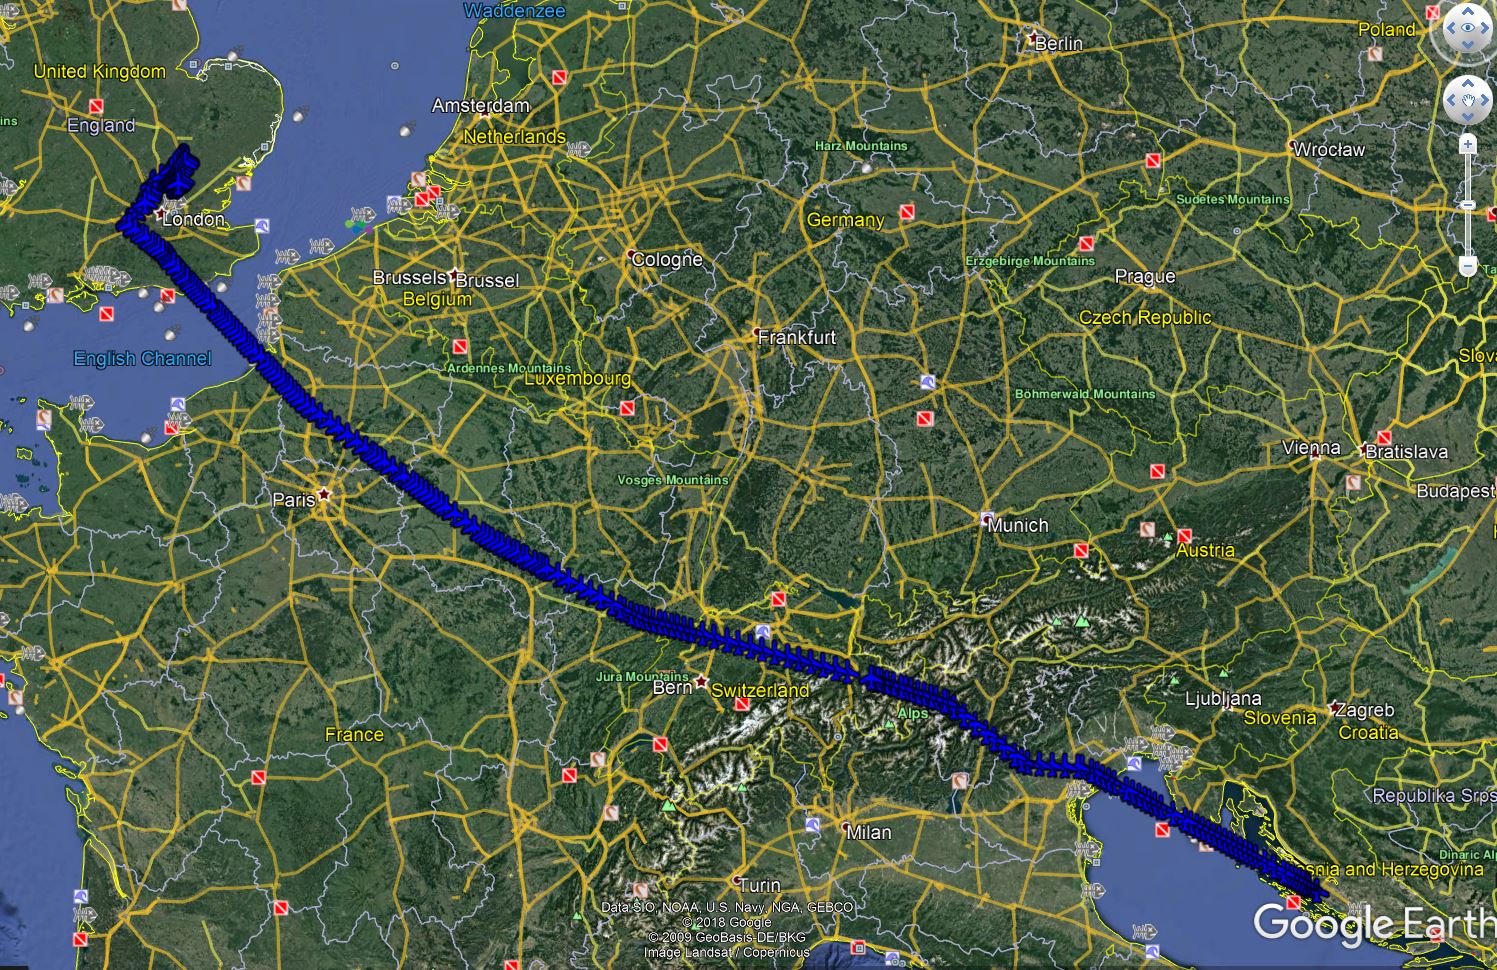
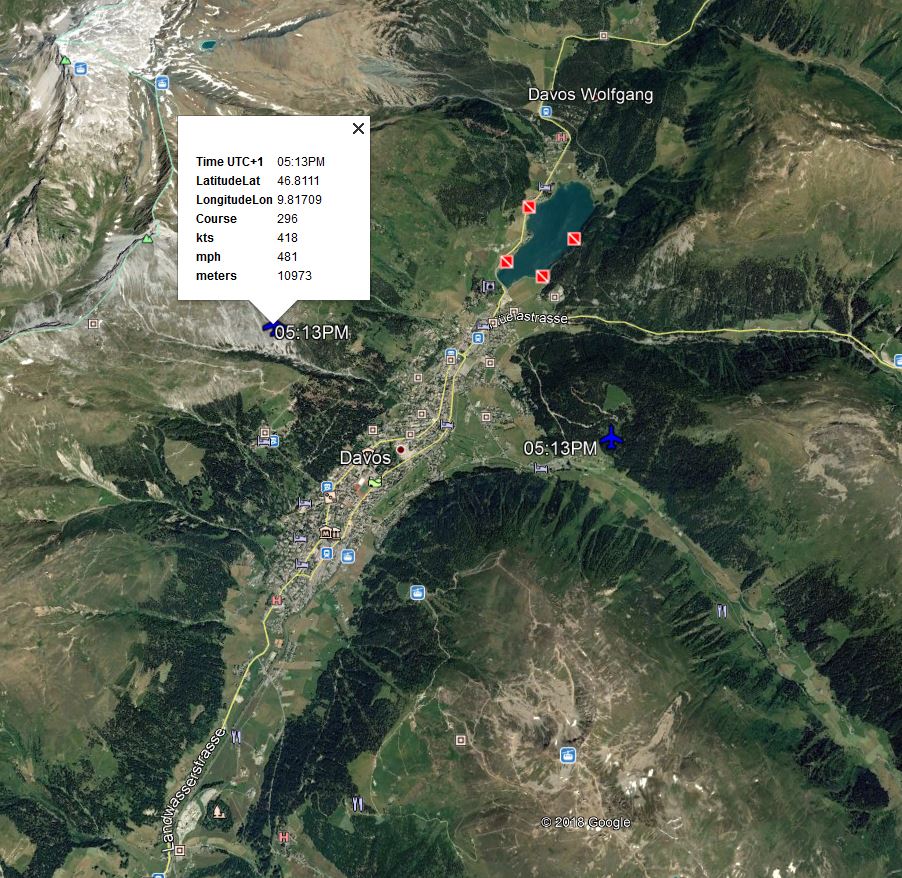
As a result, you should get an awesome flight route between 2 airports. I have not selected the name field hence my route contains the signatures only. After the name field selection as per above, you should have a multitude of text alongside the route, which can be not comfortable enough for the smallest zoom. Anyway, your flight route in Google Earth has been generated. Now, when you zoom in close to the ground and click on one of the signatures the popup window will appear with all information provided to the .csv file before (Pic. 23, 24). Basically, our flight route is ready then!…
…But some people can ask what about the real plane altitude during the flight???
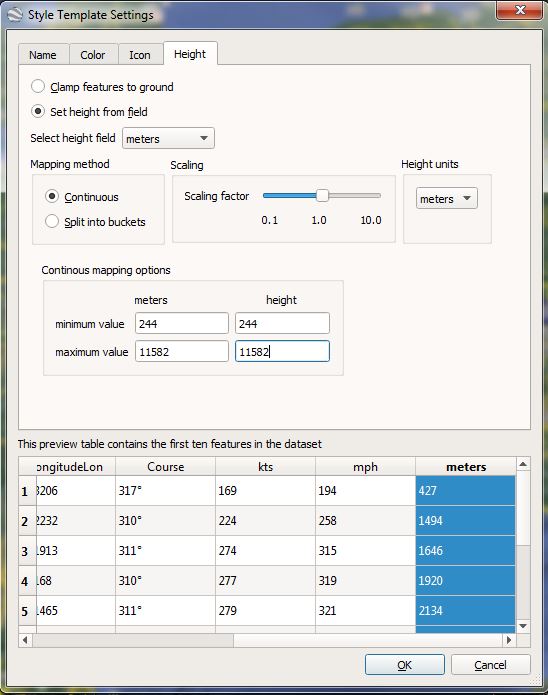
You can also prepare the flight route with an altitude factor if you want. I am not going to remove clamped to the ground route. The new route will exist above the first one. Do the same steps as I have described above and when you get to the “Style Template Settings” again select the “Set height from field” option. As a field select the “Meters” column because this column contains the plane altitude data during the flight (Pic. 25). Other things do as per the image below. Remember to set minimum and maximum values the same both for meters and height. Otherwise, the altitude will not be displayed correctly. When does this go OK making your aerial flight route ready.
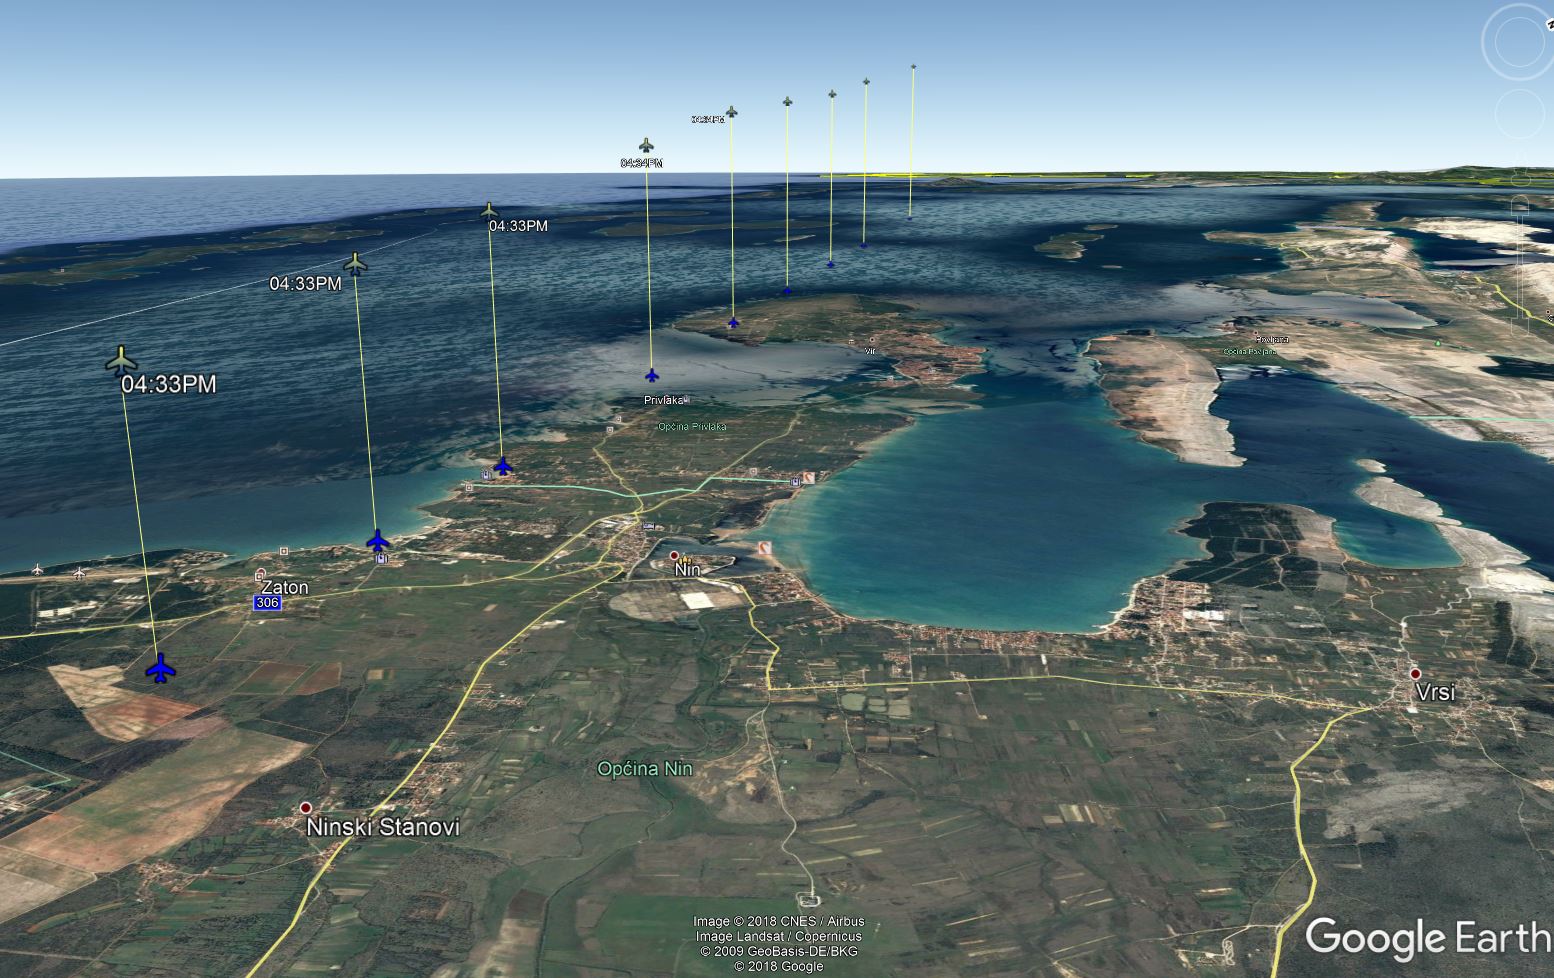

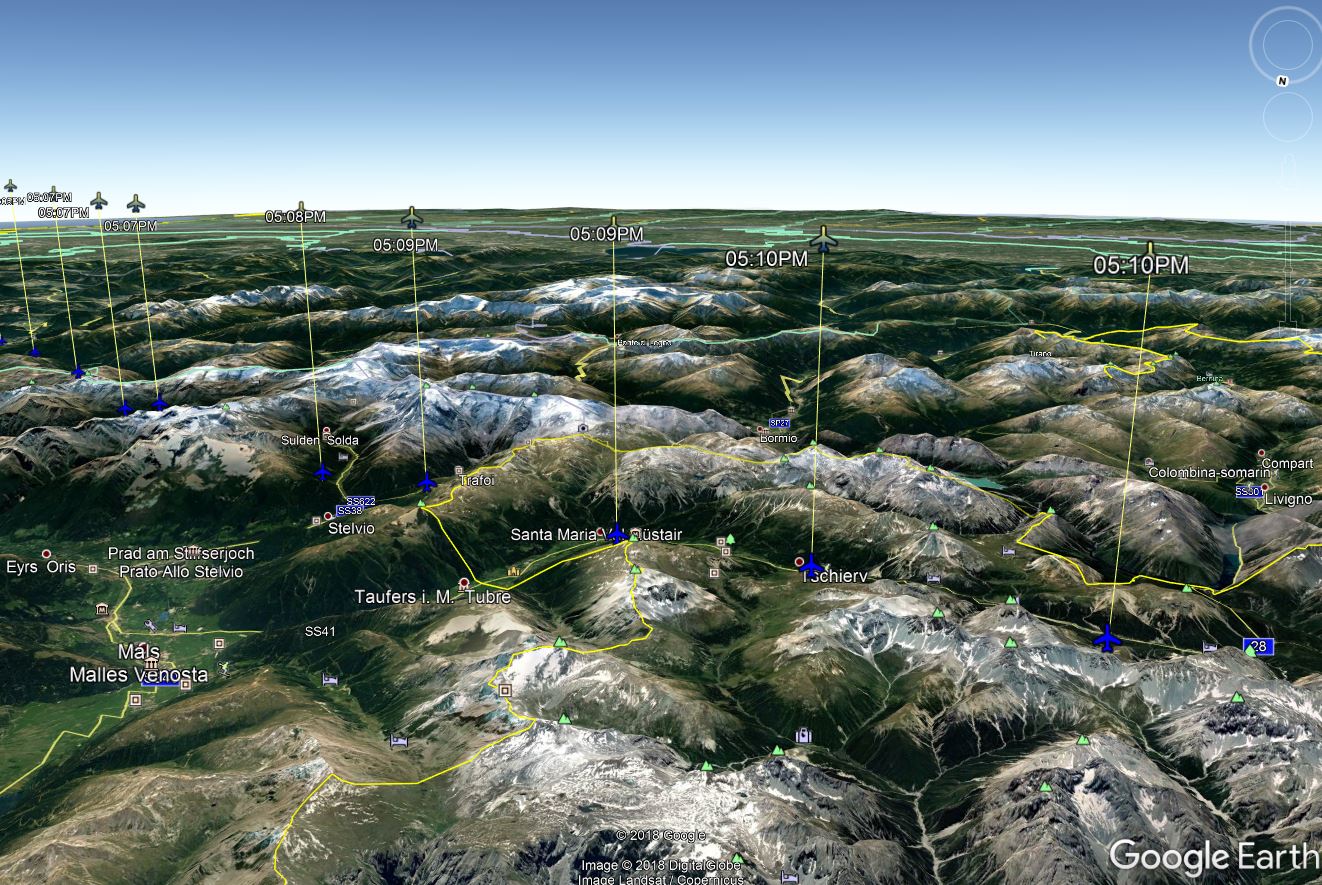
Excellent! Now you can see both routes clamped to the ground (blue) and aerial (yellowish). Unfortunately, it is one detail, that can make you slightly disappointed. All figures have been set relative to the ground, which means if your route passes above the mountainous area the real position will be elevated by the mountain altitude. To fix this problem you must right-click an object, choose the “Altitude” section, and next choose the “Absolute” option. It will keep your flight altitude relative to the sea level. At this moment you have to do it one by one (sic!) because this problem has not been solved on Google Earth yet.

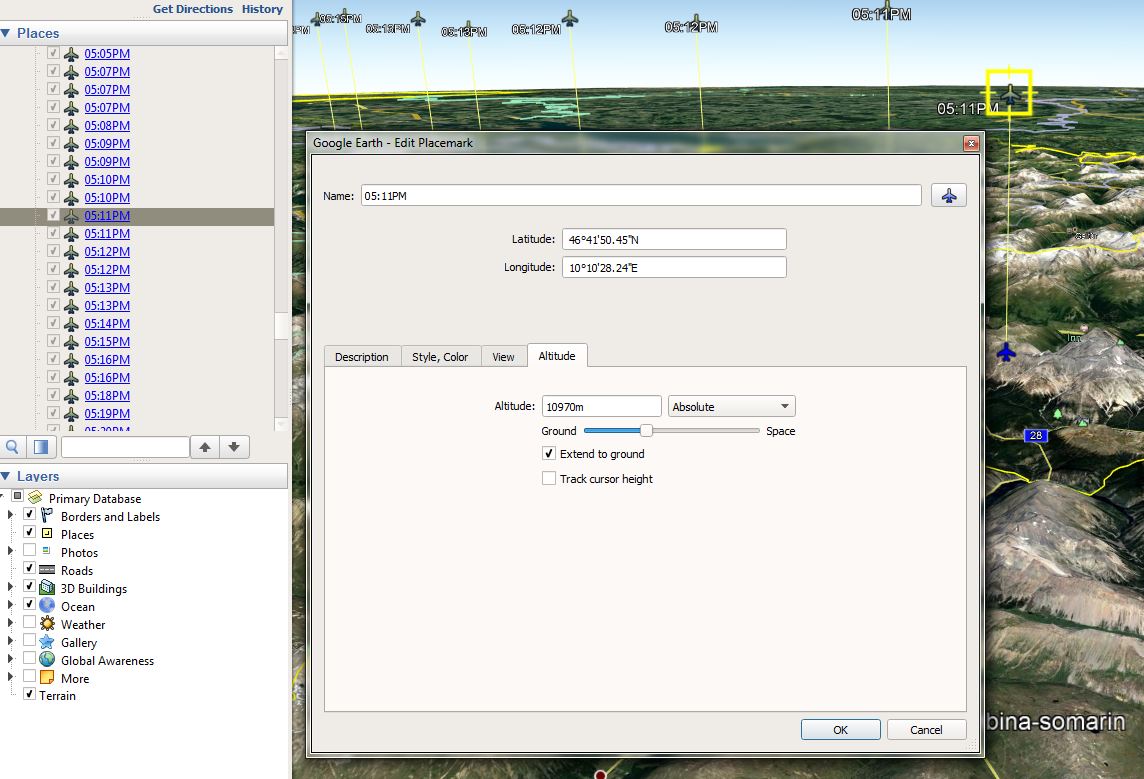
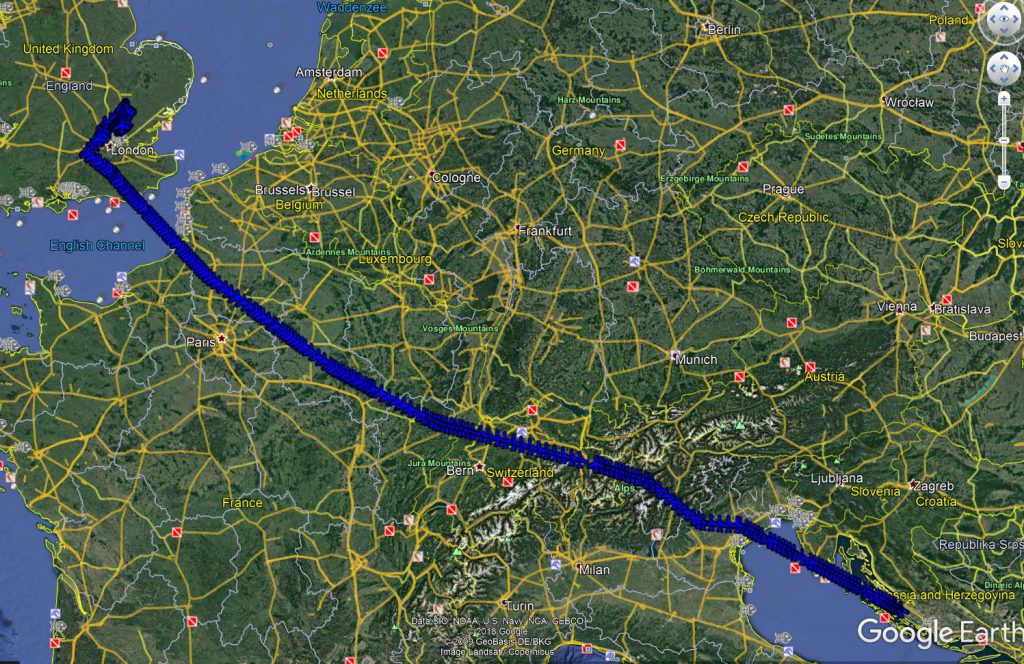
Once you do this, you have been fully shown a flight route on Google Earth (Pic. 30, 31).
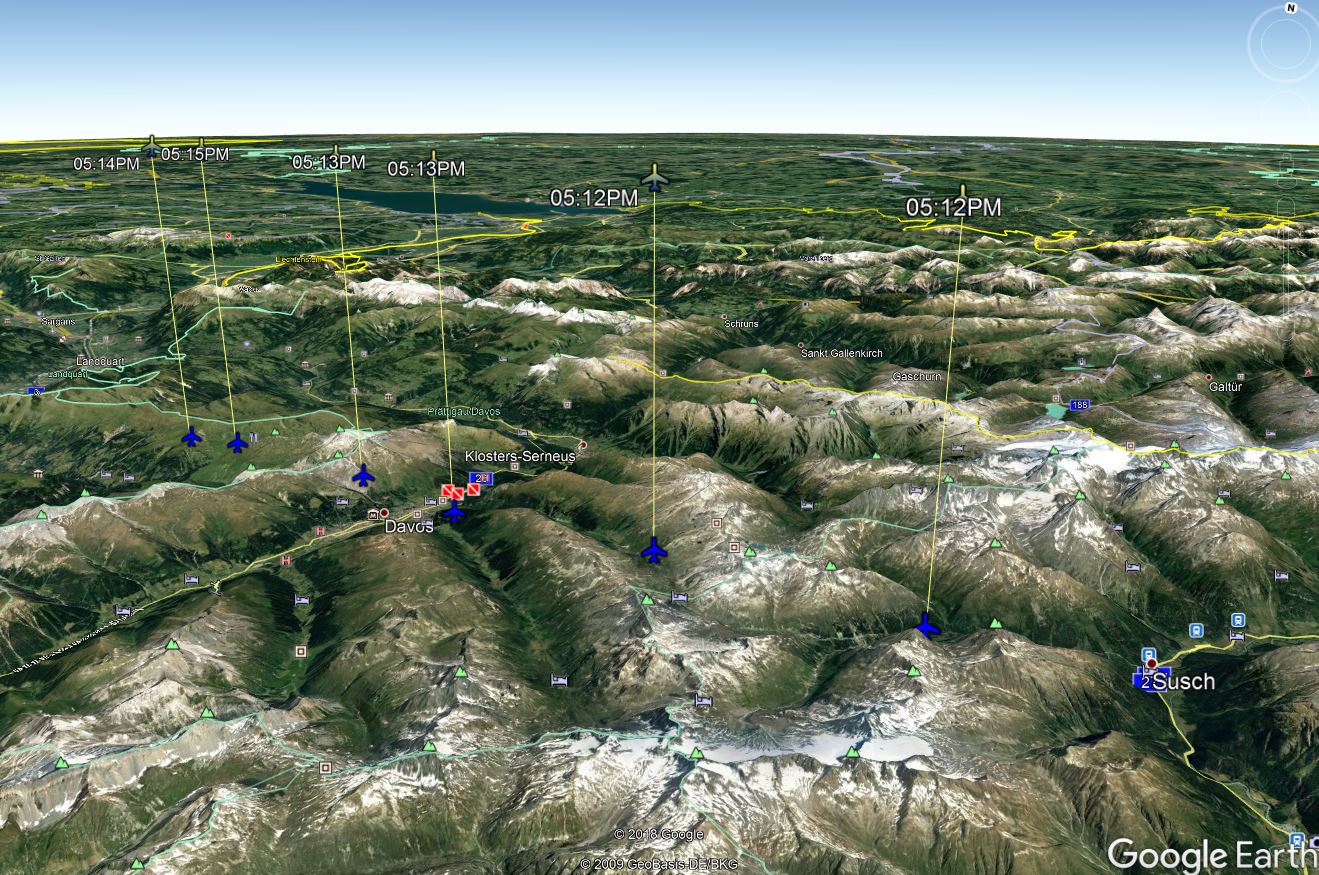
Reconstruction of the flight route can be helpful mainly for flightseeing purposes. Having it shown on Google Earth you are able to simulate the cockpit view on a particular part of your flight and analyze what can you see or what have you seen during your journey. This solution can be useful for short flights, there is no information about the real-time plane position for passengers.
Mariusz Krukar
Links:
- https://flightaware.com/
- https://flightwise.com/
- GitHub flight tracker
- GitHub: Google Maps flight tracker
- 10 tips & tricks to make flying easier with Flight Track Pro.
- Tacview: KML real-life flight recordings
- Google Earth flight tracker and viewer
- Flight tracking layer from Flightwise.com
- Weird altitude effects in Google Earth
- Google Earth copy & paste trick
- Google Maps flight tracker for Flight Gear
- https://www.experts-exchange.com/questions/24918085/Google-Earth-can-you-move-multiple-placemarks-in-My-Places-to-new-folder-at-same-time.html
- Flightwise.com flight tracker discussion
- Select more than 1 place at once in Google Earth
Read also:
1. The flood simulation in Google Earth
2. Total solar eclipse visualization on Google Earth
3. Using Heywhatsthat.com to generate multiple summit-perspective views in Google Earth
4. How to show the coordinate grids in Google Earth and Google Maps?