
Styling in ArcGIS Online is quite simple. You can find a lot of tutorials on the web, which will show you how to do it. However, some projects require advanced styling and I would like to give you some examples here. This text includes all of them, which can be done without using the Arcade programming language.
1. BACKGROUND FOR TEXT LABELS
There is one simple trick for making a full background for our text label. See the image below for how it works and what results should you expect.

Pic. 1 Text labels with the background and the option, must be applied.
Go to the Label -> Label Style and switch on the Halo. Next define its size, which must be min. 5 in thickness. As a result, you will have the full background for your text label as shown on the left.
2. ZOOM-BASED LABEL VISIBILITY
The visibility of labels can be defined by a certain zoom level. In the image below you can find the place where the visibility limit bar can be seen.
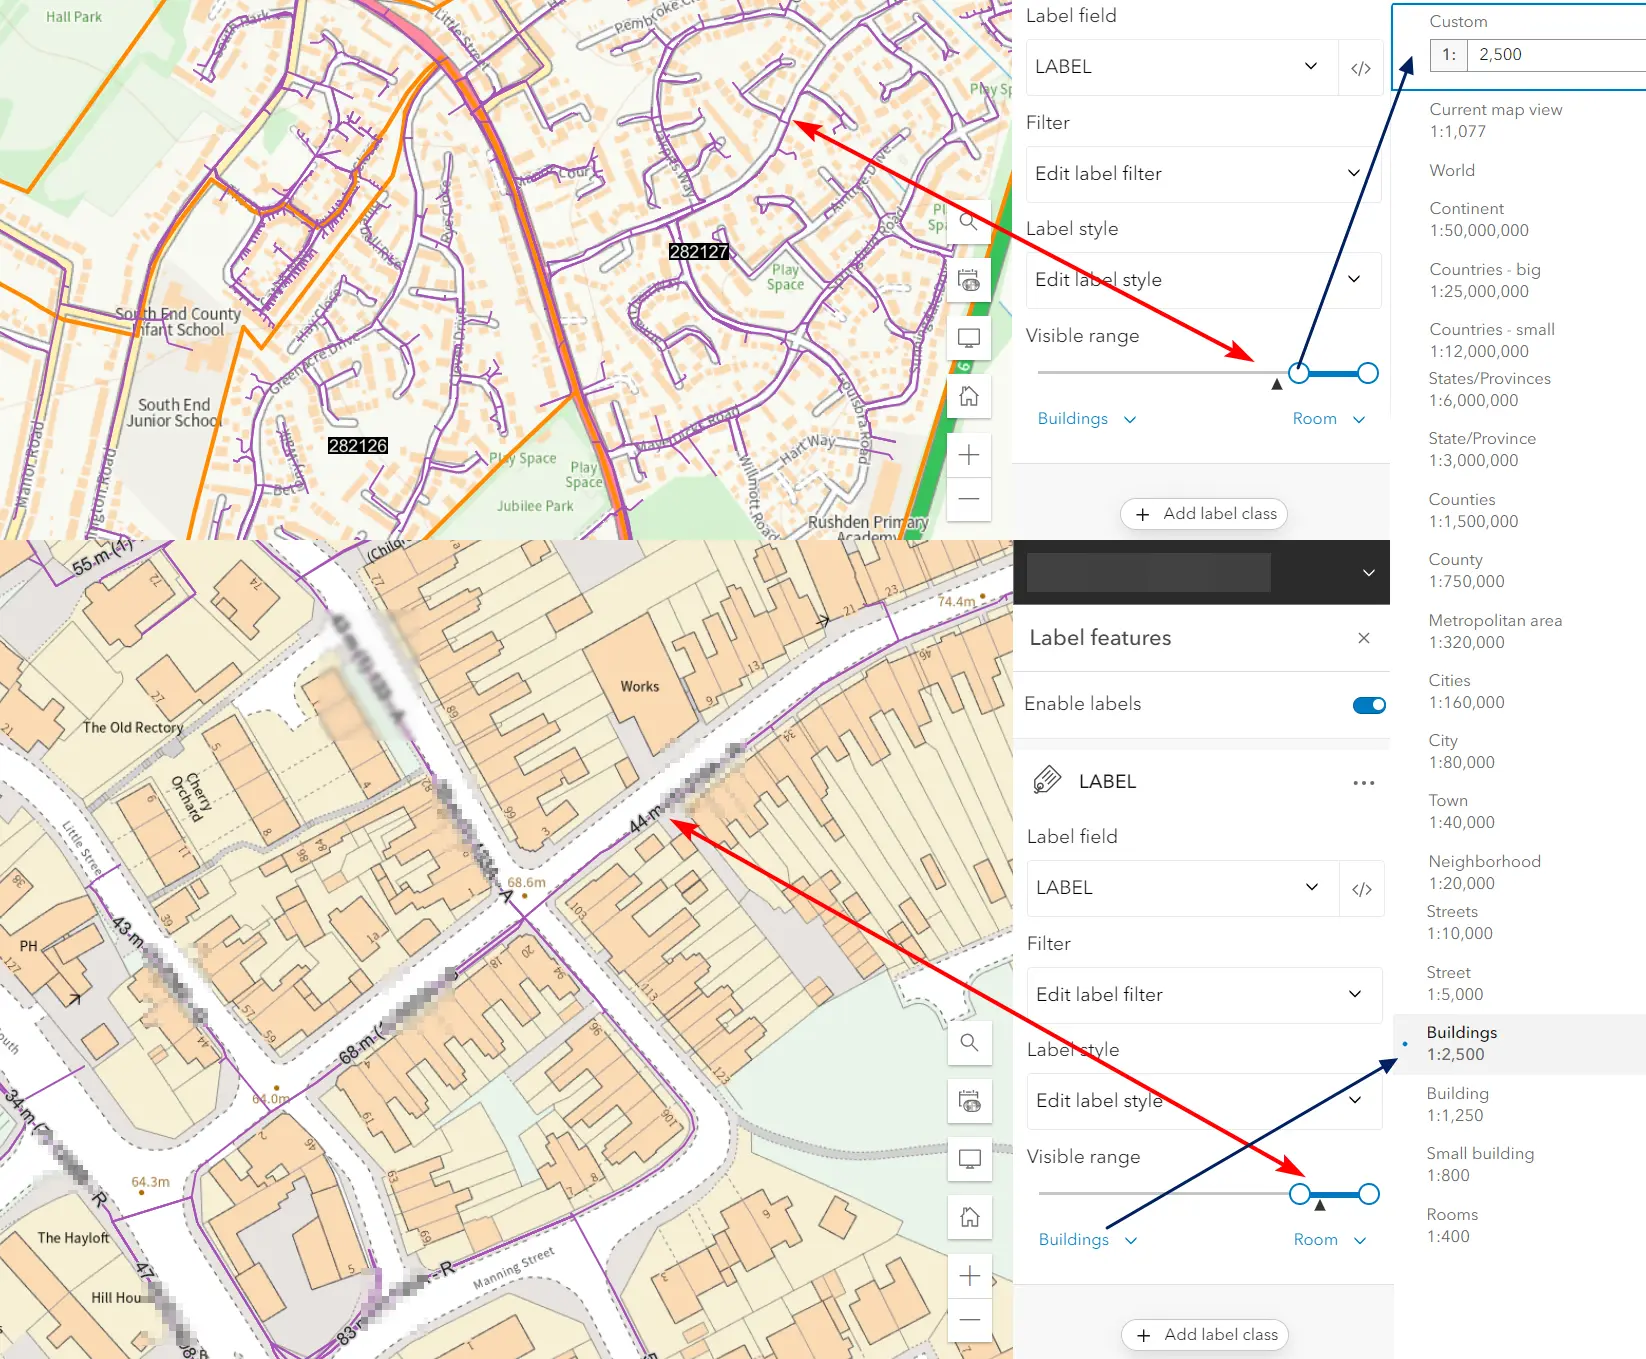
Pic. 2 Zoom-based visibility of labels in ArcGIS Online map.
The zoom-based visibility range can be changed in two ways. You can drag the white “balls” across the bar defining the visibility range “on the fly”. The other option is using the pre-defined scales beneath the bar. They correspond to the grips visible above. When the grip corresponds to the given scale, the proper range is seen below. For example, if you defined the visibility range to the scale 1:2600 it corresponds to the nearest pre-defined range, which is scale 1:2500 for Buildings. The largest scale is 1:400 and applies for Rooms. The list of all pre-defined scales can be found when clicking the dropdown just next to the right. The range of label visibility turns the bar from grey into blue and falls always between the two “balls” indicating the largest and smallest scale in which the given label can be seen.
Your current zoom level is indicated by the dark triangle marker moving over the bar. When the marker goes outside of the range of visibility, the label is not shown on the map. It’s a good solution in a situation when our map is packed with a large number of labels, which aren’t readable at small scales.
3. COPY COLOR TO OTHER ELEMENT
The color styling is a nice feature, but because the color palette is advanced it might be hard to “remember” the last color used. As a result, i.e. the green color might vary between one element and another. ArcGIS Online can remember the last 3 used colors, but how about the situation when we have more items?
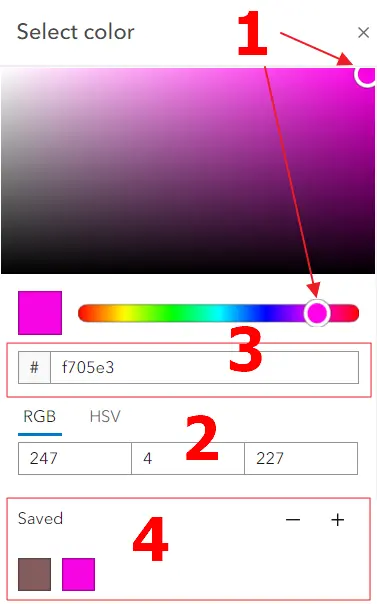
Pic. 3 Color palette in ArcGIS Online with some advanced options.
The grips in color palette (1) are for defining the exact color we need. Each color is defined both by RGB/HSV parameters (2) as well as the HTML code (3), which can be copied to the other palette and executed immediately.
The best seems to be the Saved section (4) where the user can store at least 25 colors.
3. LINES OR OBJECTS WITH VARIOUS THICKNESS
Usually, the items appear in the same size over a whole considered layer. Sometimes the size-based distinction is needed. There is just one single option, which allows you to keep the line thickness individual for each style category.
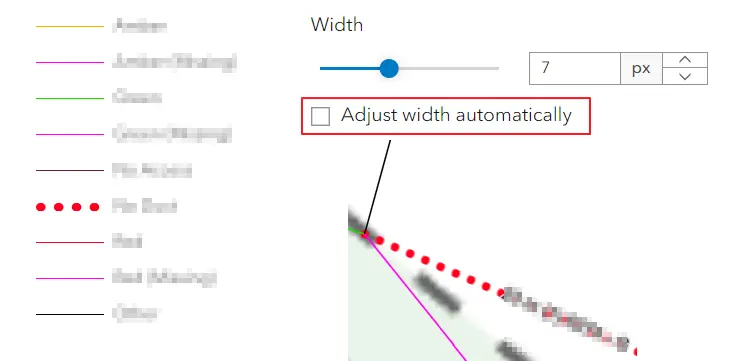
Pic. 4 ArcGIS Online styling – individual line thickness.
The only magic to do here is to switch off the Adjust width automatically (or Adjust size automatically) option, which is turned on as default.
4. MORE THAN 1 LABEL FOR AN ITEM
ArcGIS Online gives you a chance to assign at least a few labels for the given item.
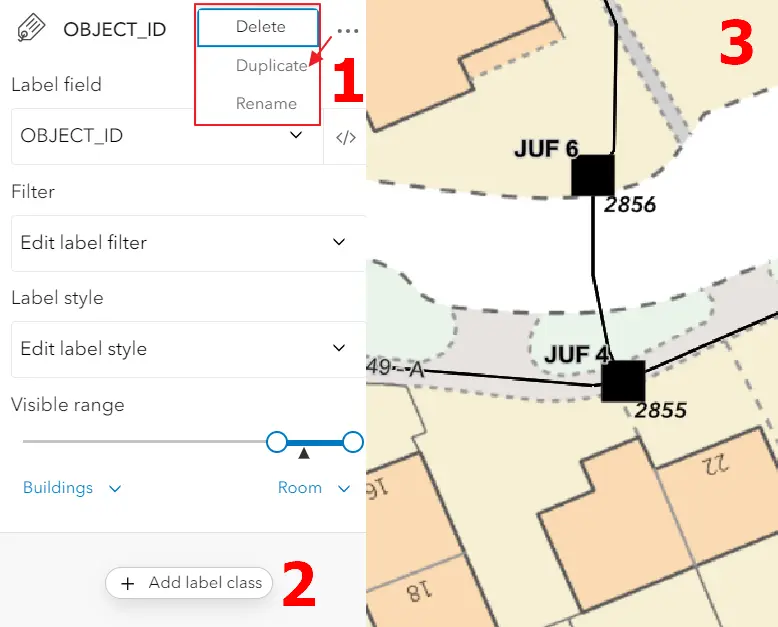
Pic. 5 An example of applying more than 1 label for one item in ArcGIS Online.
You can use two options for it. The first one (1) is the quickest for the situation if you want to replicate the majority (or all) of settings like level of visibility, font size, etc, and just change the minority of them including the label criterion. You can simply duplicate the given setting and make another label to be visible exactly in the same place. The other option (2) is longer but if you must set everything up from scratch it is probably better. The example of the result you can see on the right (3).
5. CONDITIONAL-BASED LABELS
ArcGIS Online has quite a well-developed option for conditional-based label appearance. We can specify roughly what conditions we need to have for label display. All the customization options are the same.

Pic. 6 Setting up labels based on specified conditions (expression) in ArcGIS Online map, where: 1 Map with general labels assigned for the field; 1A – The Edit data filter option; 1B – Adding new filter based on the certain value of the field; 1C – Selection of values with the total number of items with the given value assigned; 2 – Conditional-based labels on the map; 2A – the filter applied; 2B – Label filter options; 2C – Another filter applied.
Except for the general field applied for label features (1) we can add a label filter (1A) which will specify the specified value in the field we need to apply (1B). When choosing the value we have always the possibility of checking the total number of assigned values (1C). After that, we can see just the filter-based labels applied to our map (2), which can be seen in the filter section just next to (2A). The same as in the case of styling, the labels can be duplicated (2B). An alternative option is the “+ Add expression” where you can define another label filter (2C).
The label filters can be applied even several times depending on what you need to have on your map.
Each of our conditional-based layers can be styled with the same options as usual (Pic. 7).
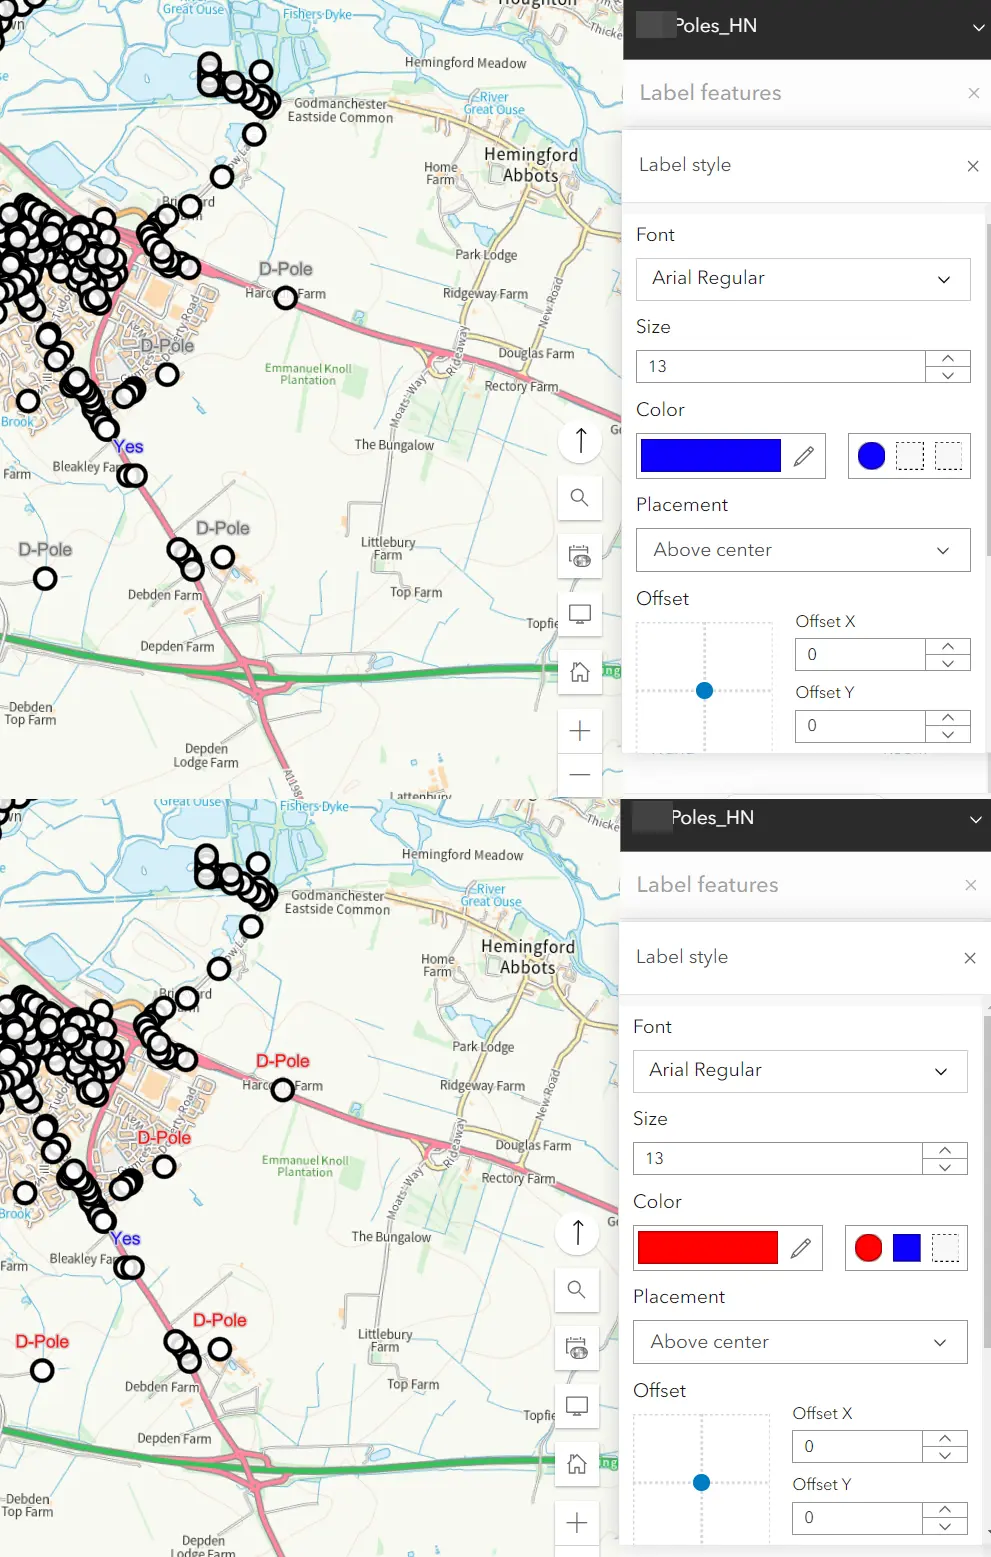
Pic. 7 Styling conditional-based labels in ArcGIS Online.