
Finally, I decided to buy this lens after a very long contemplation. It was the longest deal with my DSLR purchase ever, which lasted more than 2 years frankly. The reason, why this optic was so desired by myself was driven by the common problem in DSLR photography – “the lack of field”. The majority of kit lenses start from an 18mm focal length. We can find some of them with the minimum value of 17mm, which is a smallish bit better, and rarely from 16mm (Tamron 16-300mm; all in one lens). In other cases, we must find something with a wider angle available. There are a lot of DSLR camera lenses offering very good quality starting from 14 or 15mm. In other cases, you can always consider the prime lenses, which choice in the range is quite wide. However, the focal length is not the only factor to look at. Another very important one is the aperture. For me, as an occasional stargazer, it plays a huge role since I still make the rule of 500-based images. I am also not really keen on prime lenses because I always want to change the focal length. Threading its way I had a huge problem finding something in this range, that would make me happy.
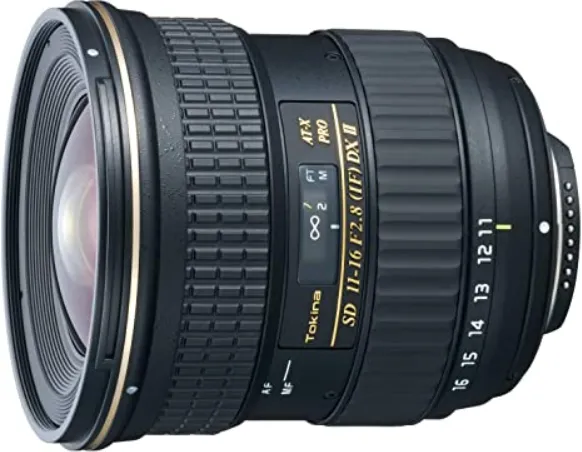
The Tokina lenses are one of the few, which personally I could take into consideration personally. Having already the Sigma 18-35mm f/1.8 Art I didn’t need to buy the 11-20mm lens, which was more expensive. I have chosen the 11-16mm model and I am happy. The lens is really good, although there are still some things, that could be better for this range of price. Traditionally I am showing all major features of the lens below.
1. DISTORTION
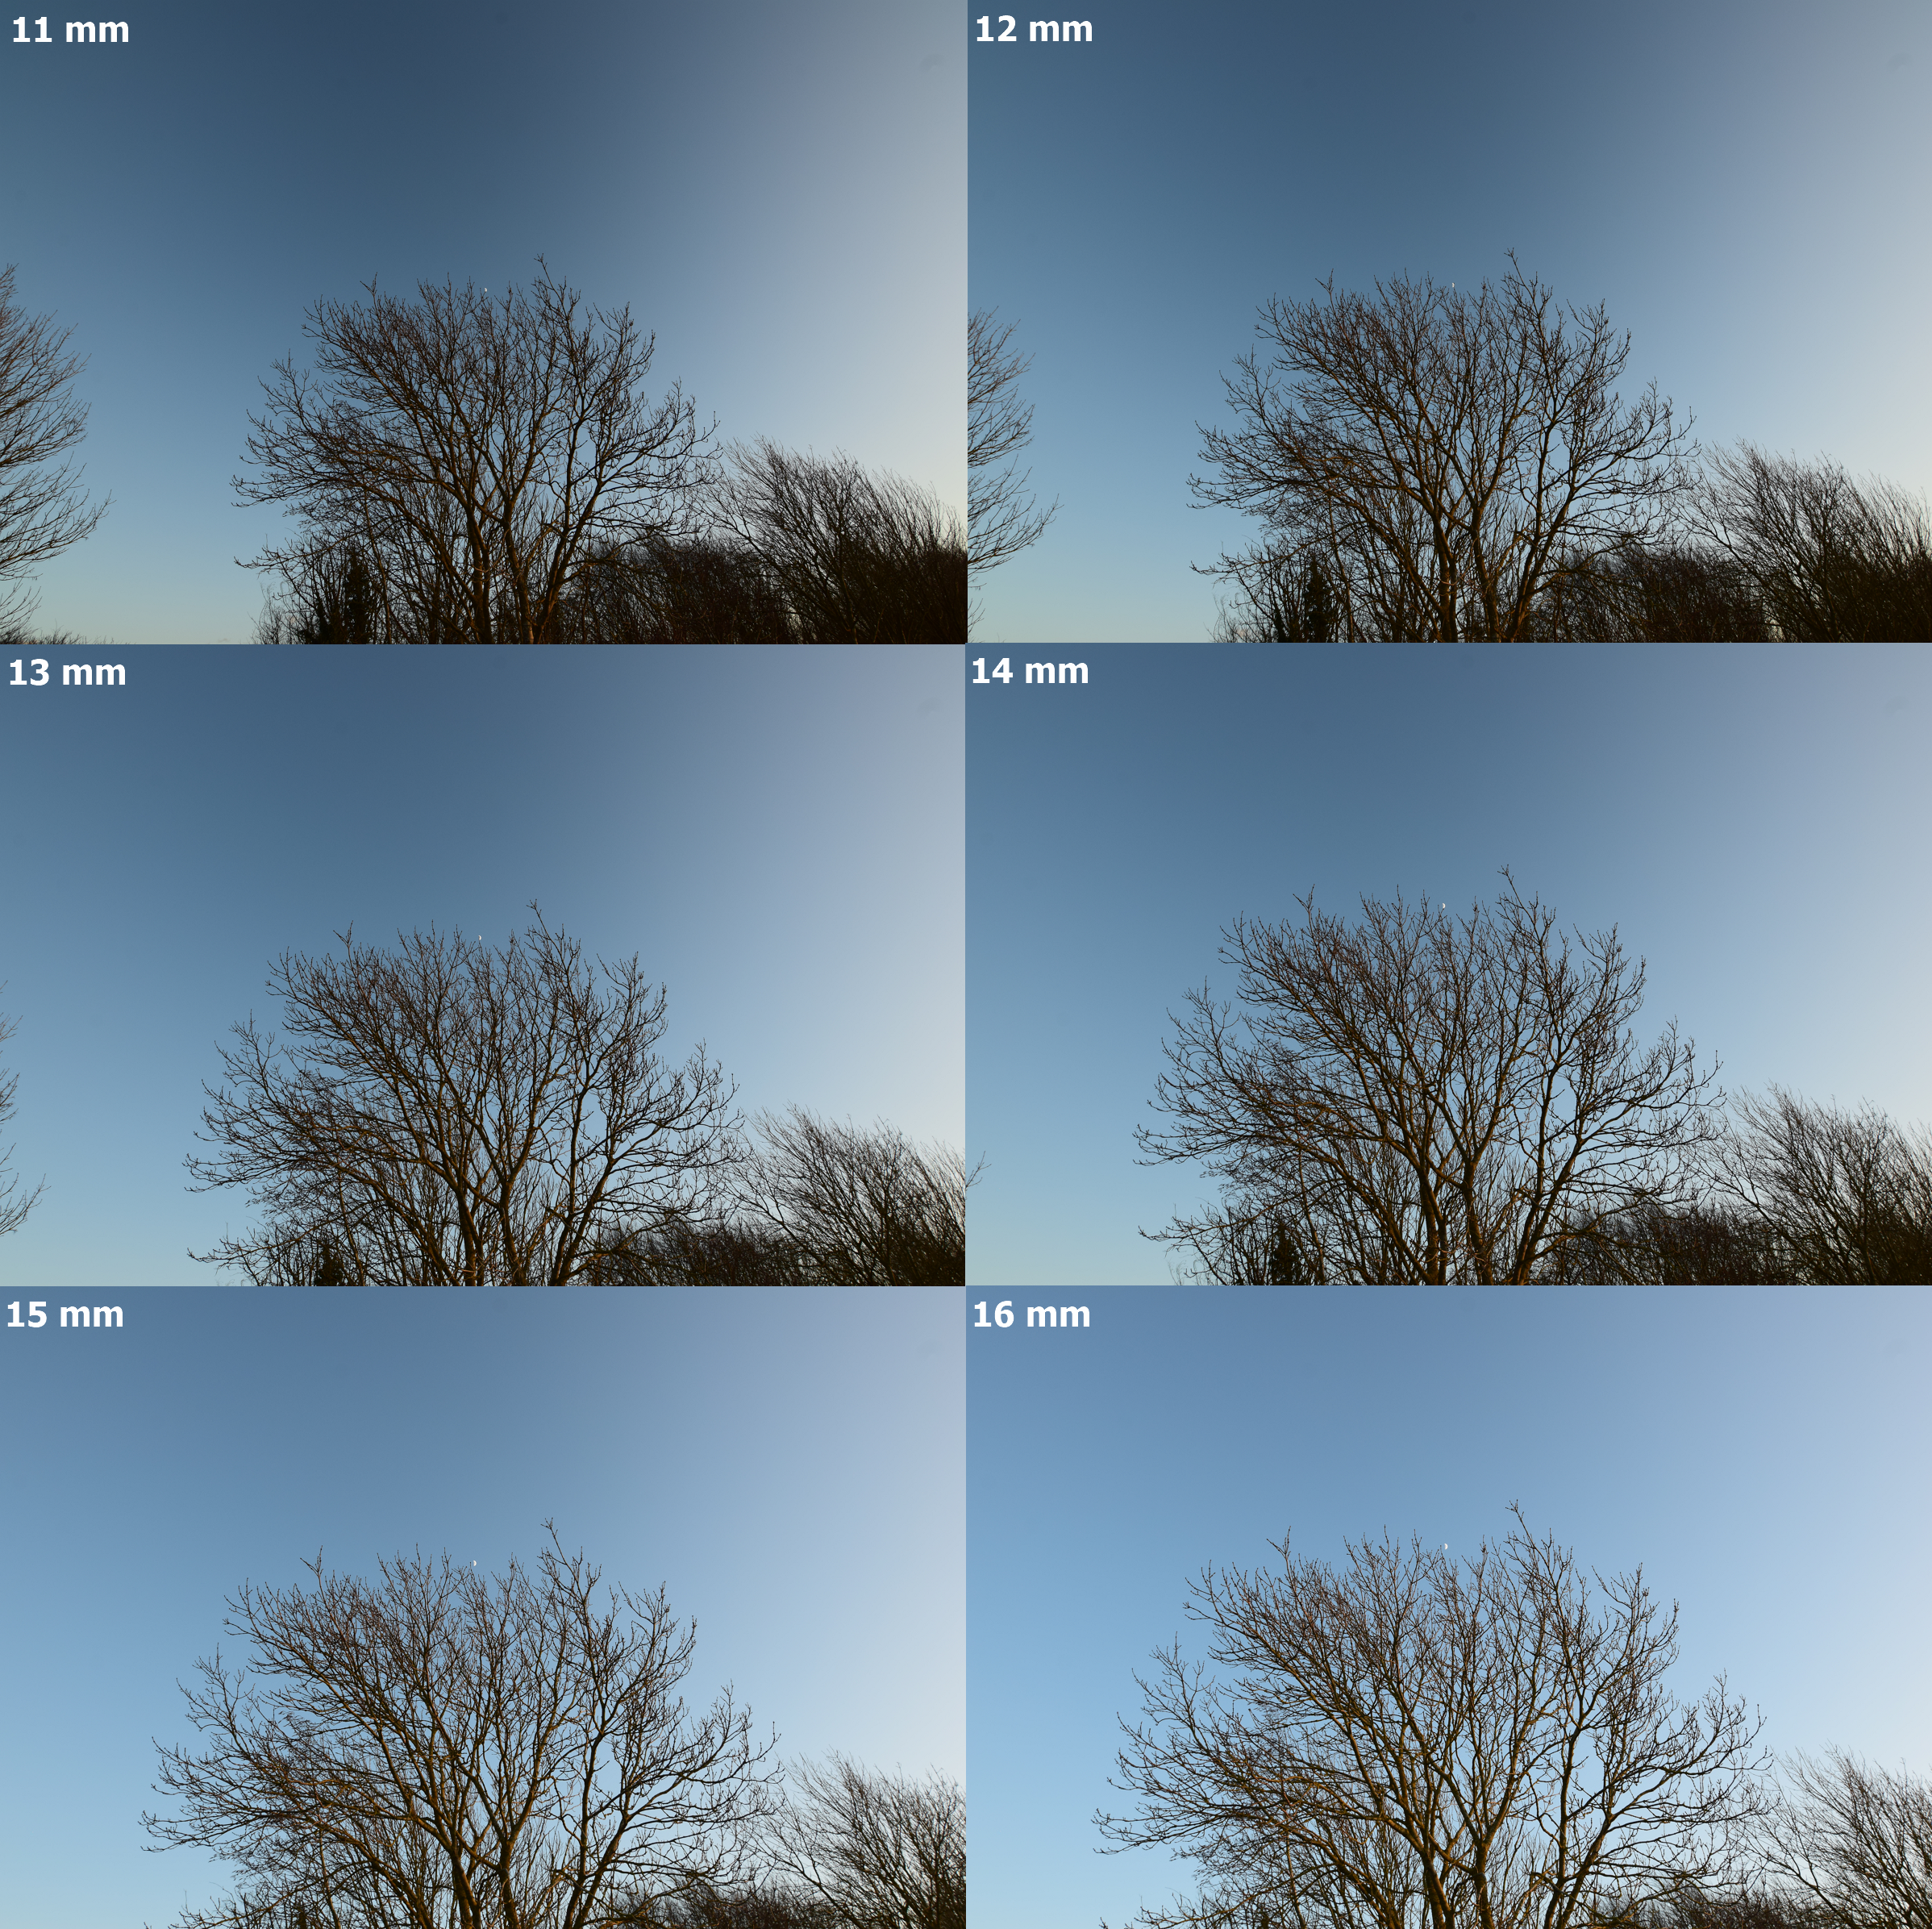
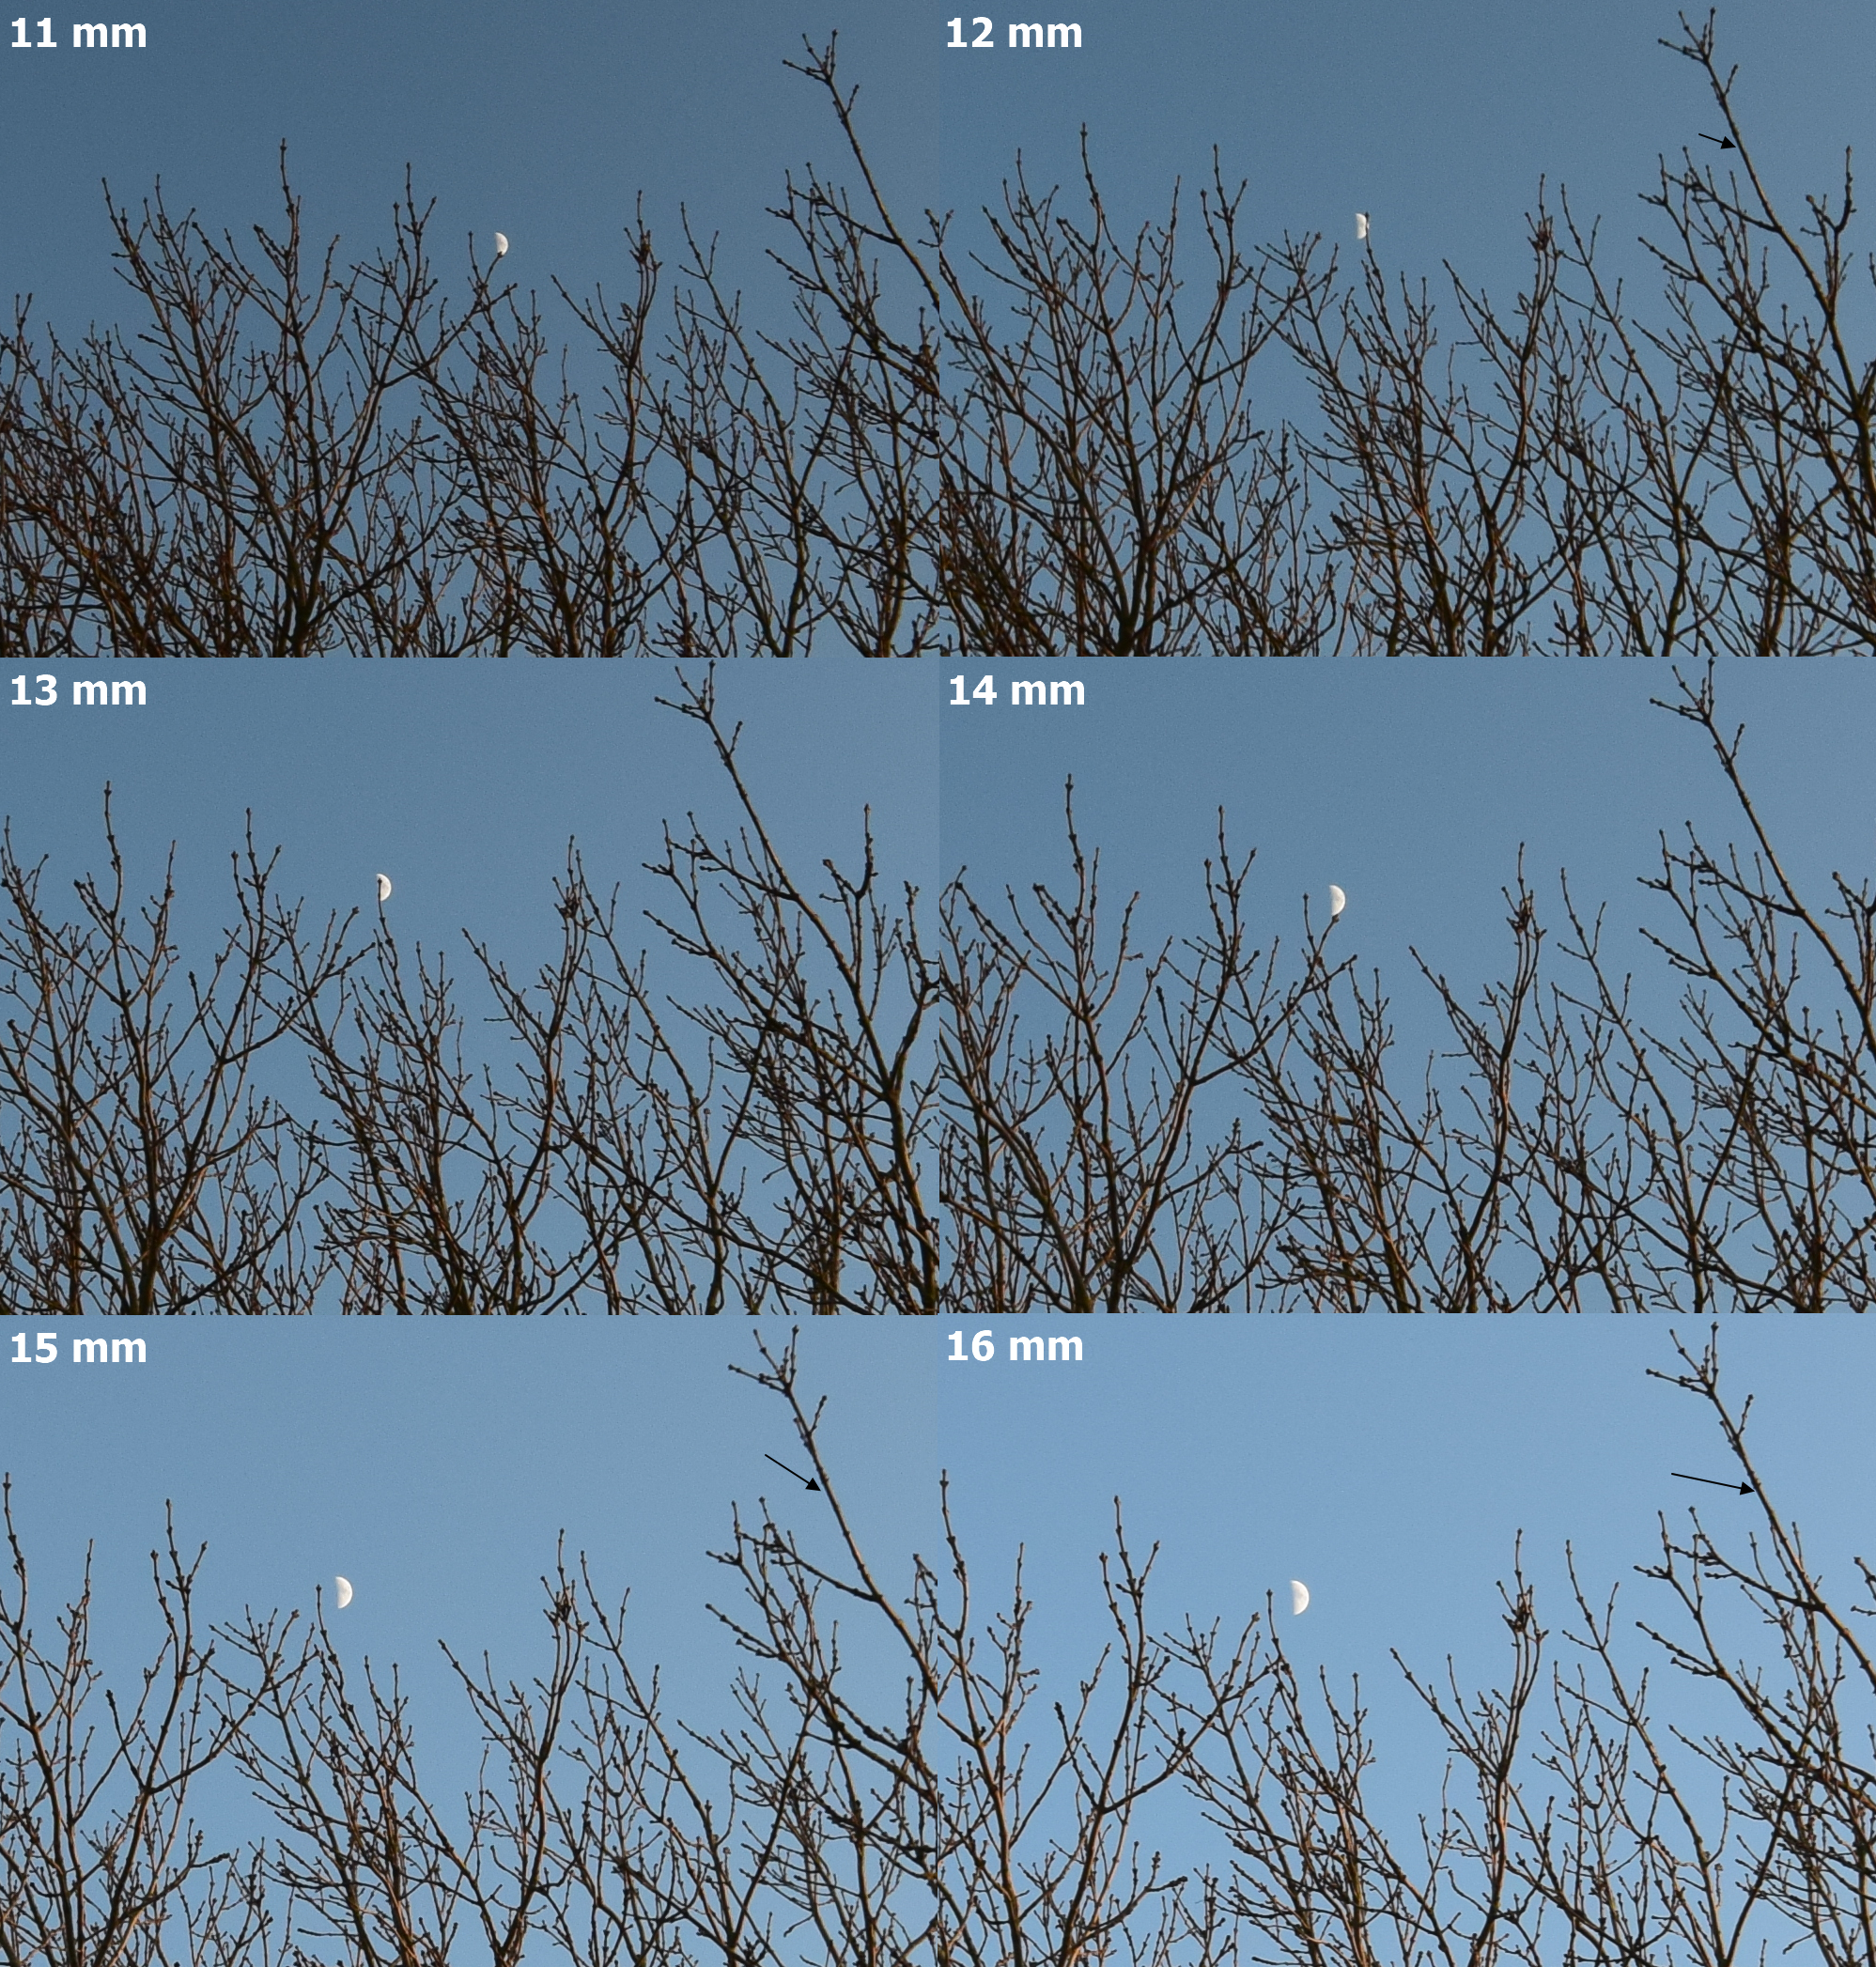
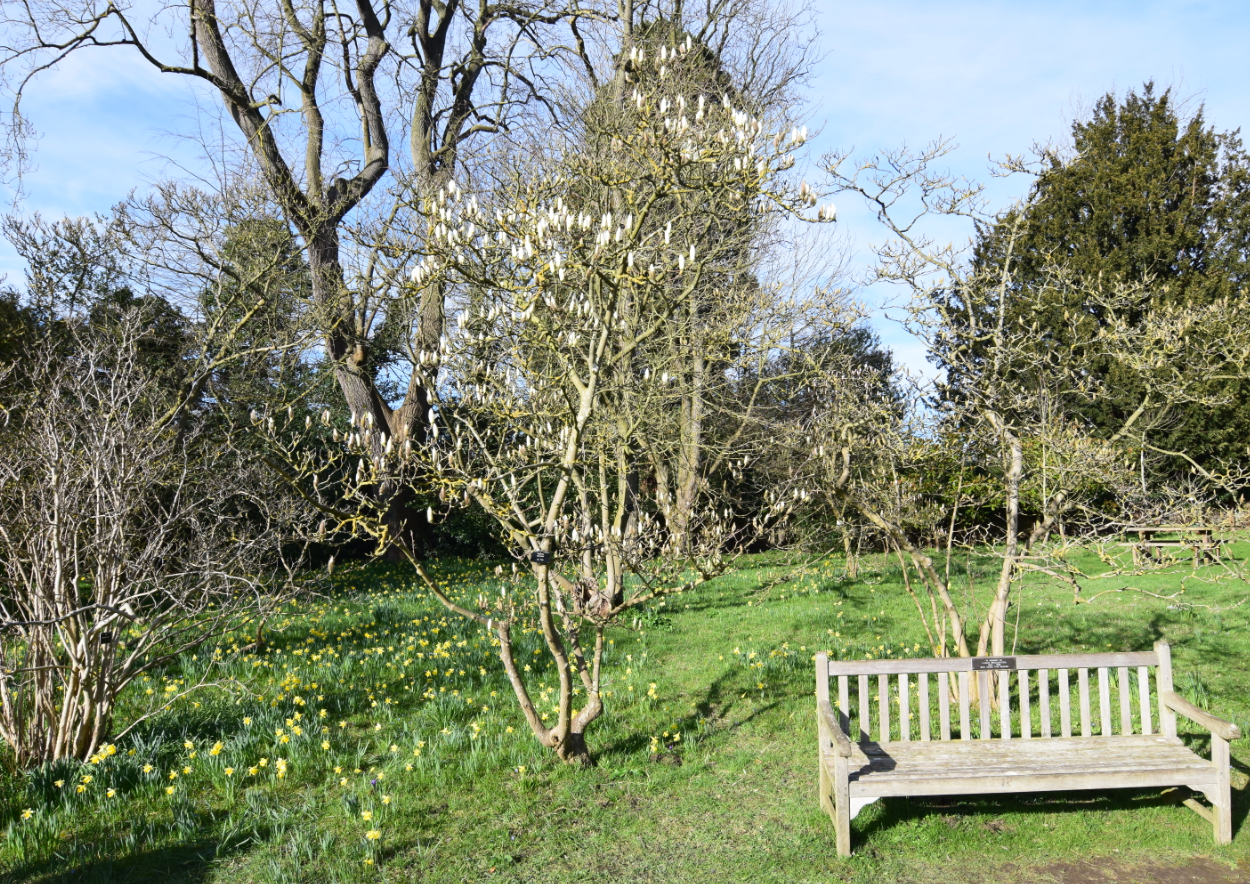
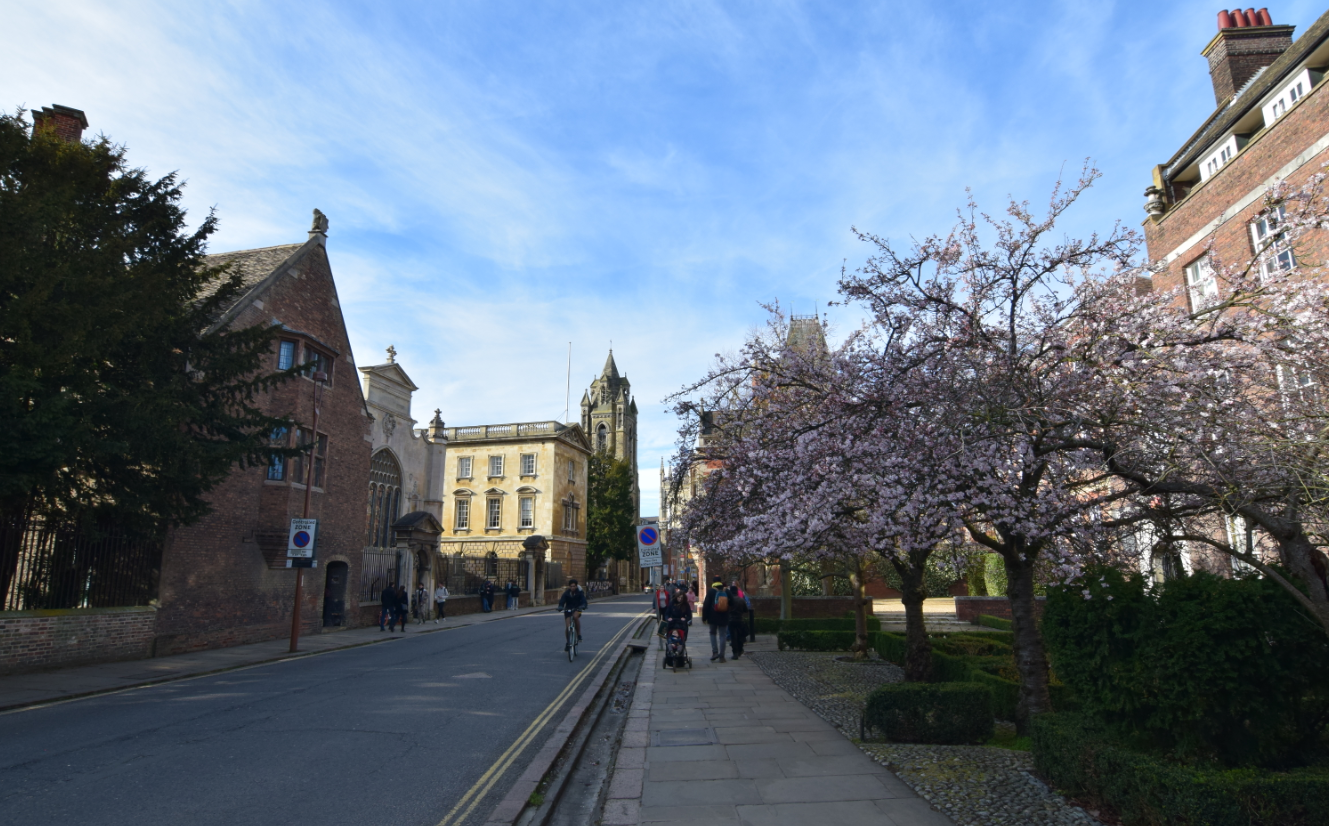
Tokina 11-16mm f/2.8 is the typical wide-angle lens, which suffers from barrel distortion. Basically, the wide-angle lens means, that the glass requires a more intensive curve for projecting onto the camera sensor. This is essential for covering a wide field of view. The curve also implies that objects at the edge of the image are far from the lens rather than those at the center. It means, that these peripheral objects aren’t enlarged as much as the objects in the center of the image. In other words, the field of view must be squeezed up to fit the camera sensor. As a consequence, the straight lines are bent clearly inwards, particularly towards the extreme edges of the picture (Pic. 1).
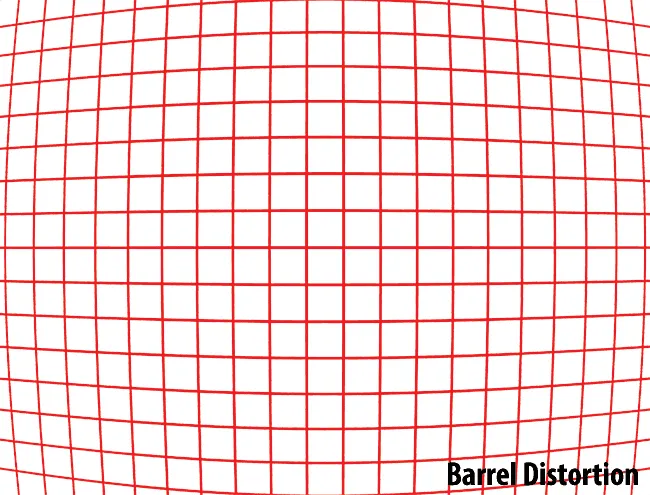
Now, we can see how these lines start bending away from the center. The image areas away from the center aren’t magnified enough, compared to the middle field, which can be easily seen in the graph above. It corresponds to the real use of this lens (Pic. 2-5).
The biggest distortion, reaching even -3% is typical for 11mm, although as we change the exposure, the problem decreases. At 16mm it’s expressed marginally (-0,5%). The percentage values mean how much % the image height is to be bent in relation to the overall image height.
2. SHARPNESS
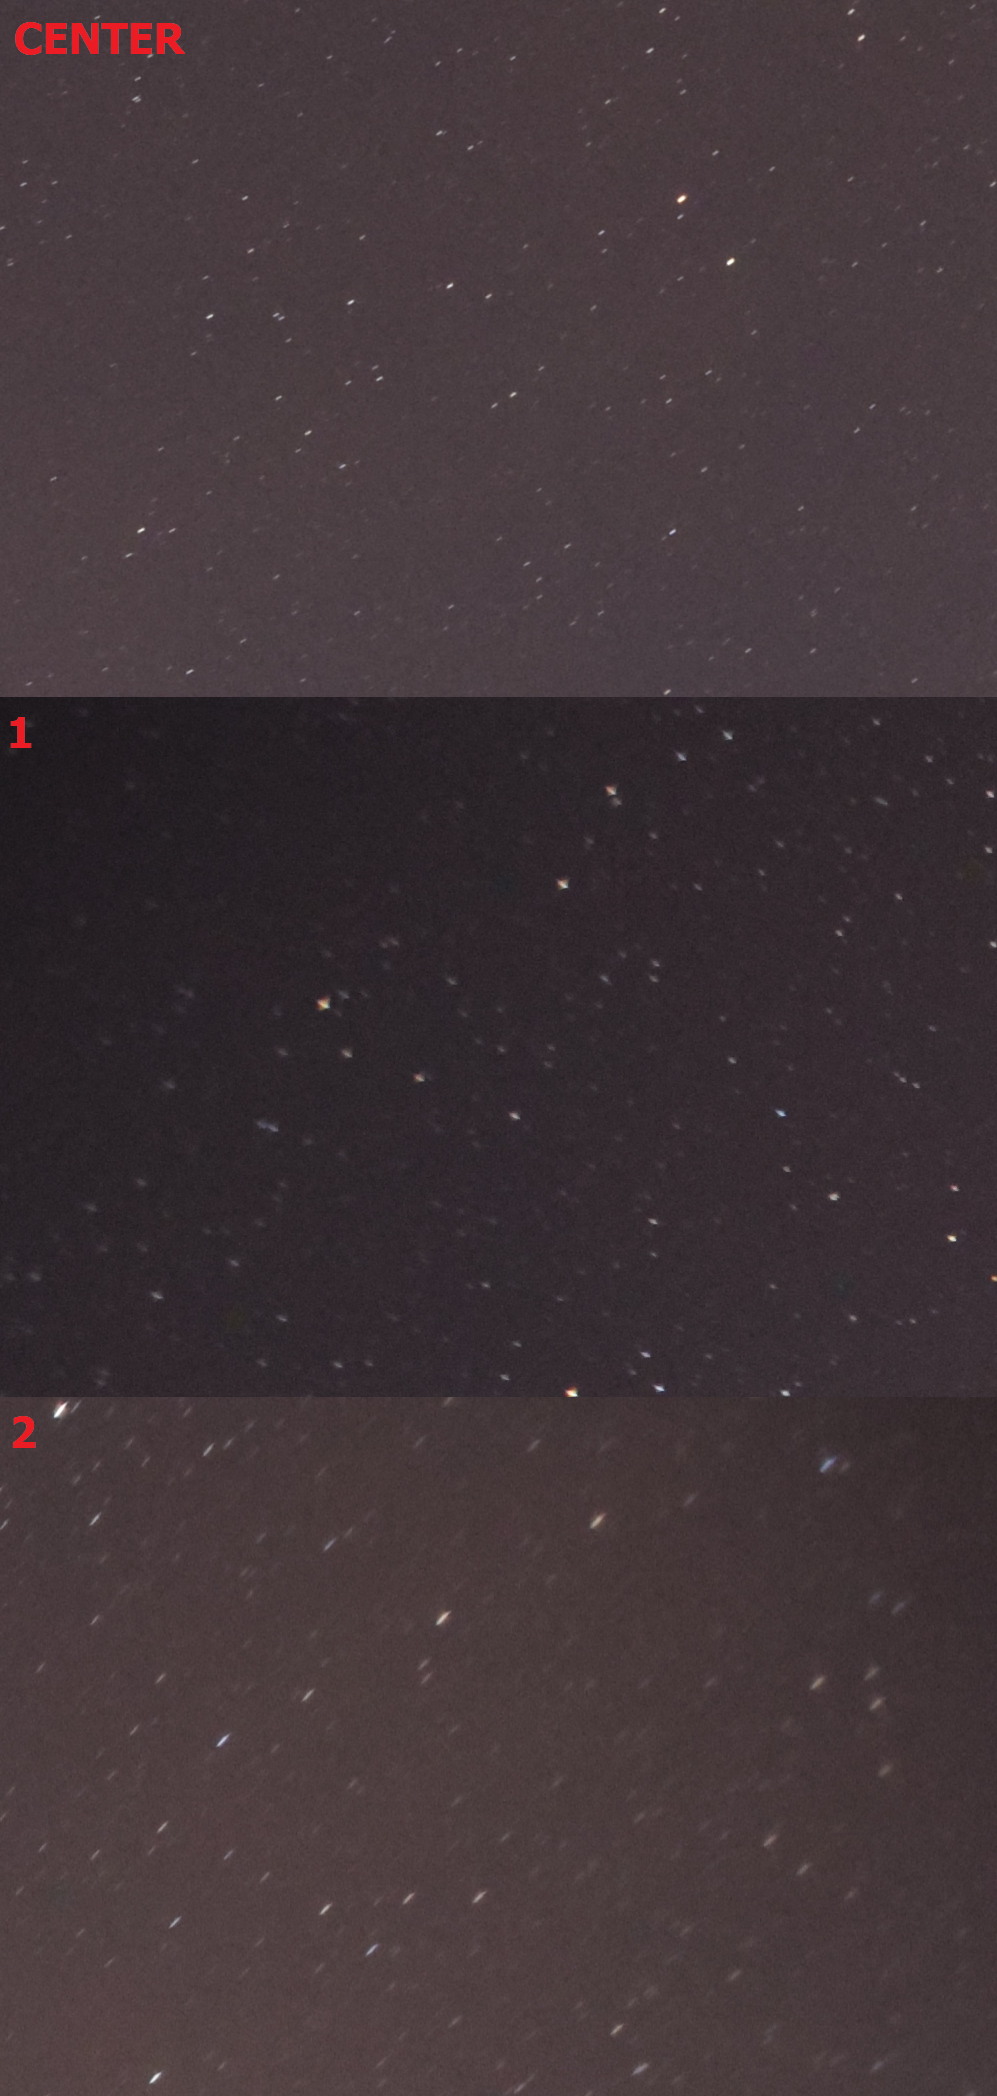
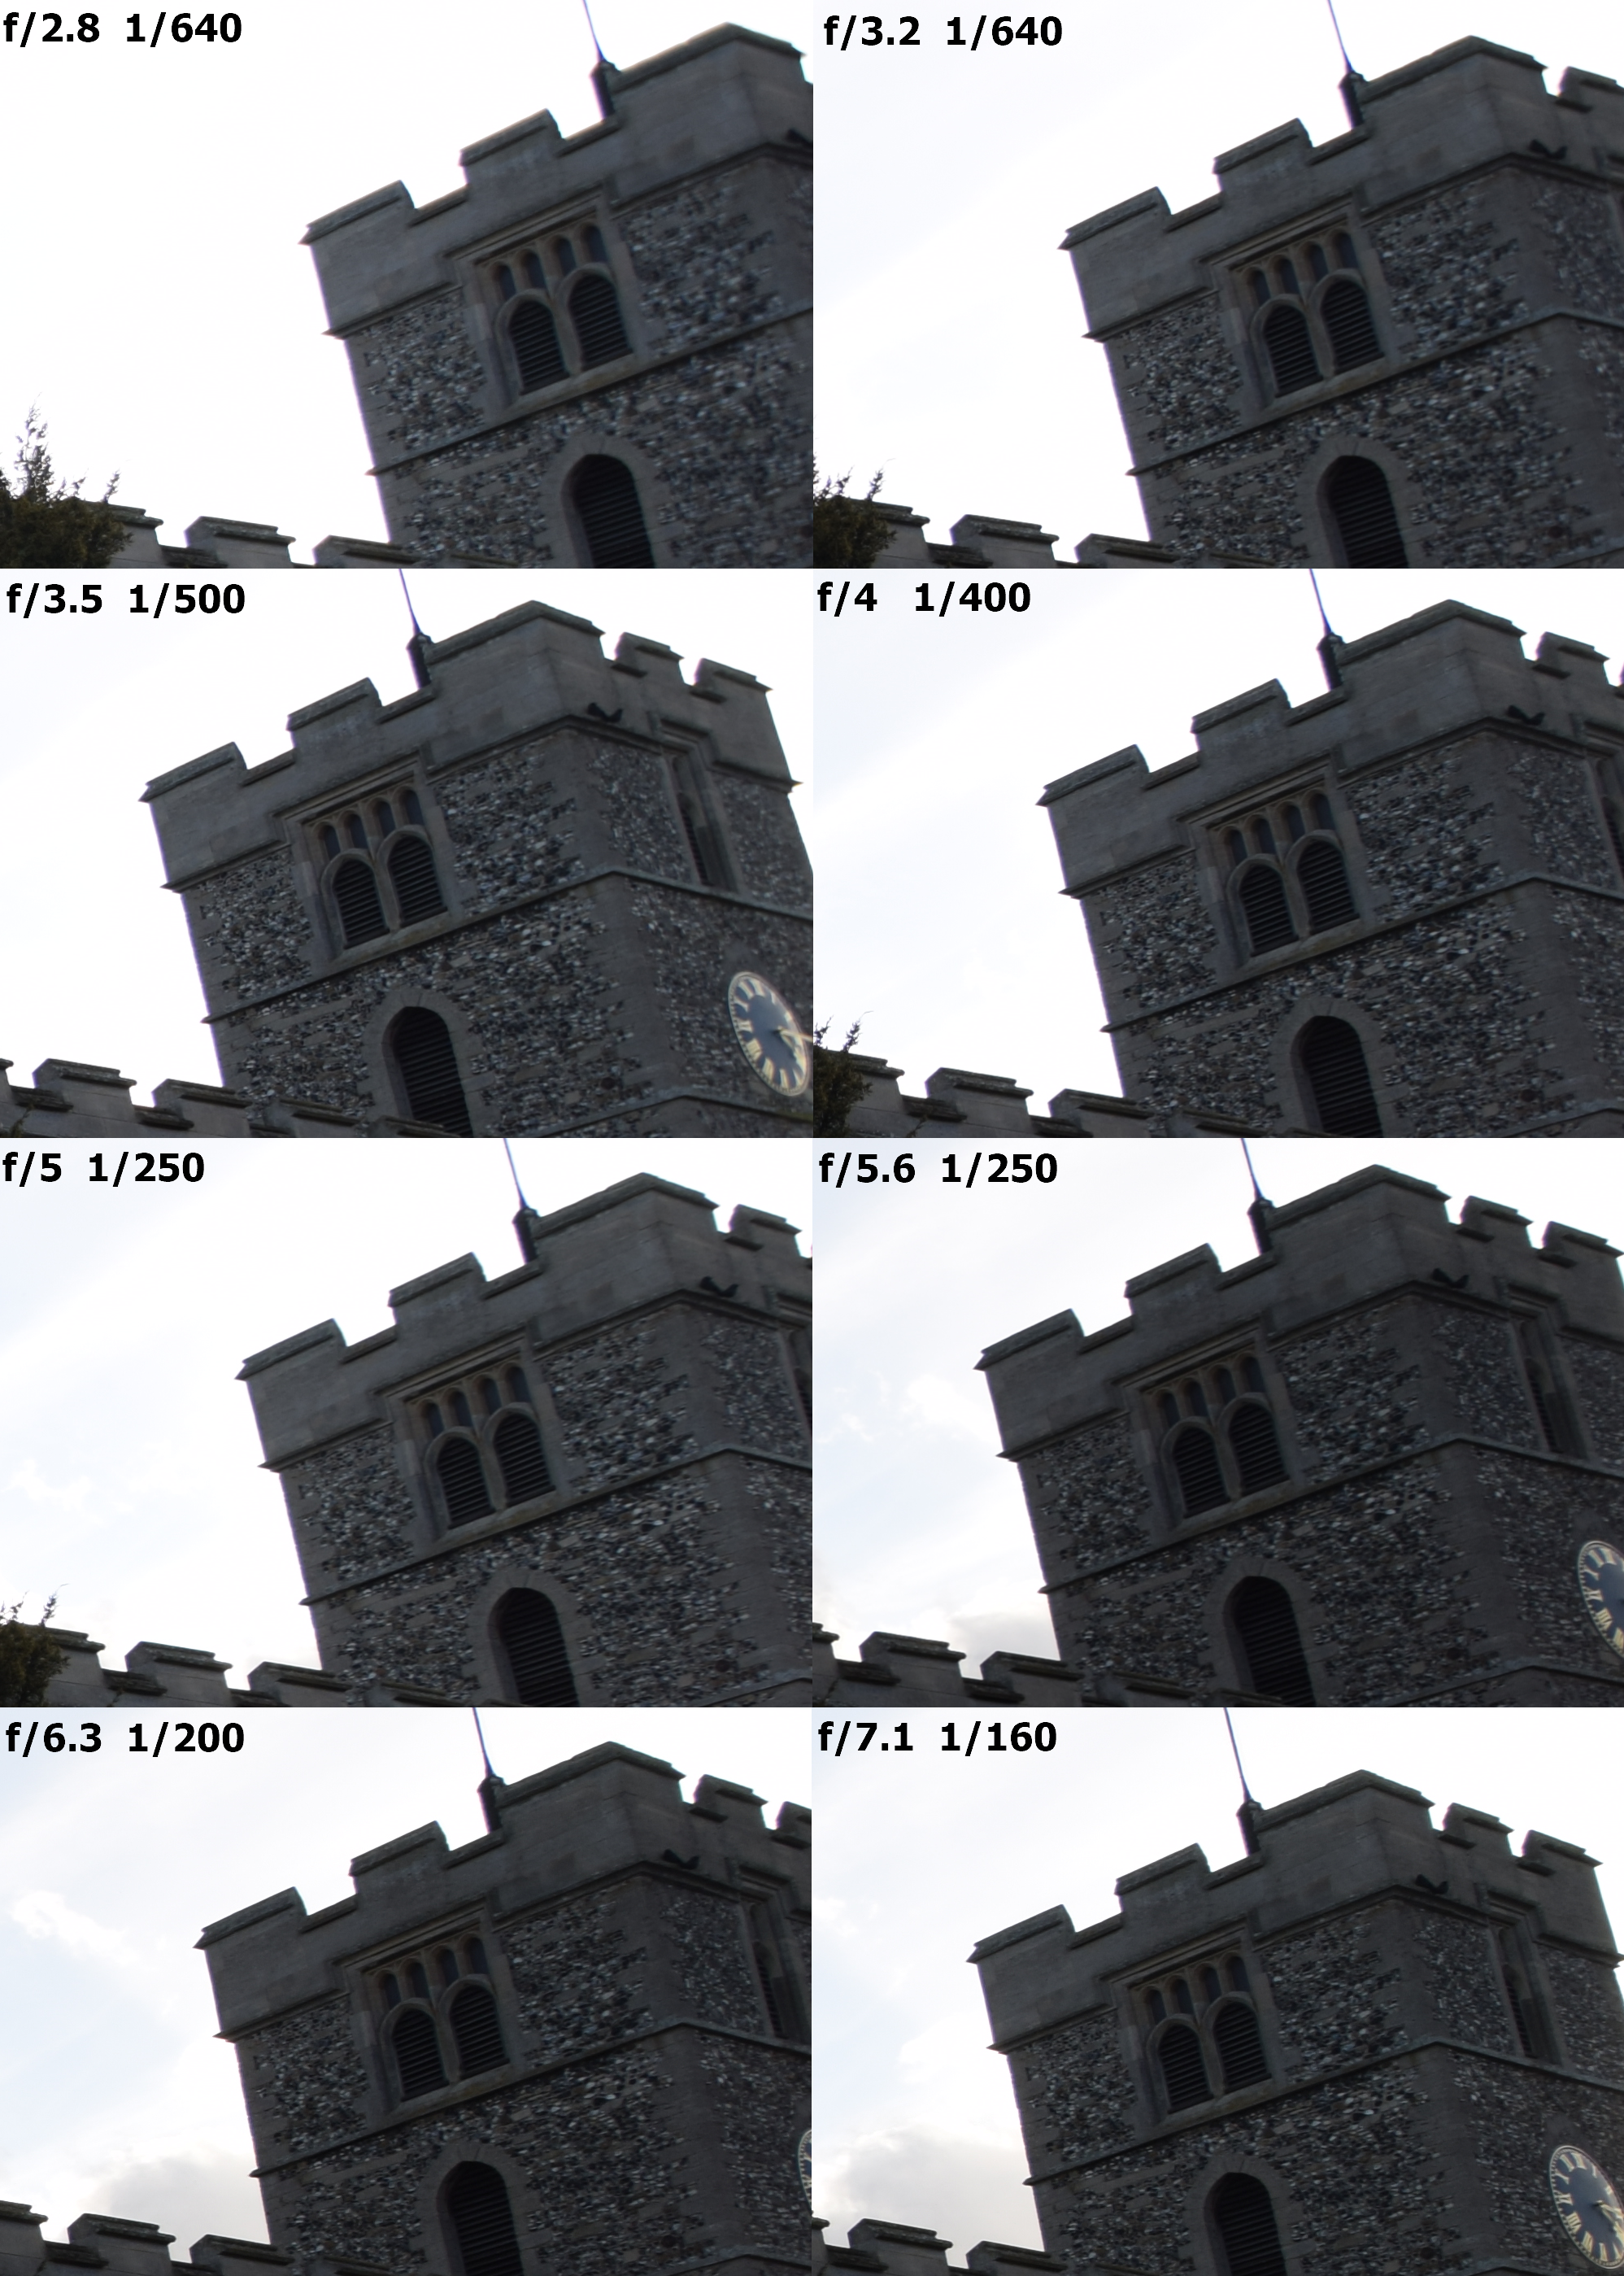
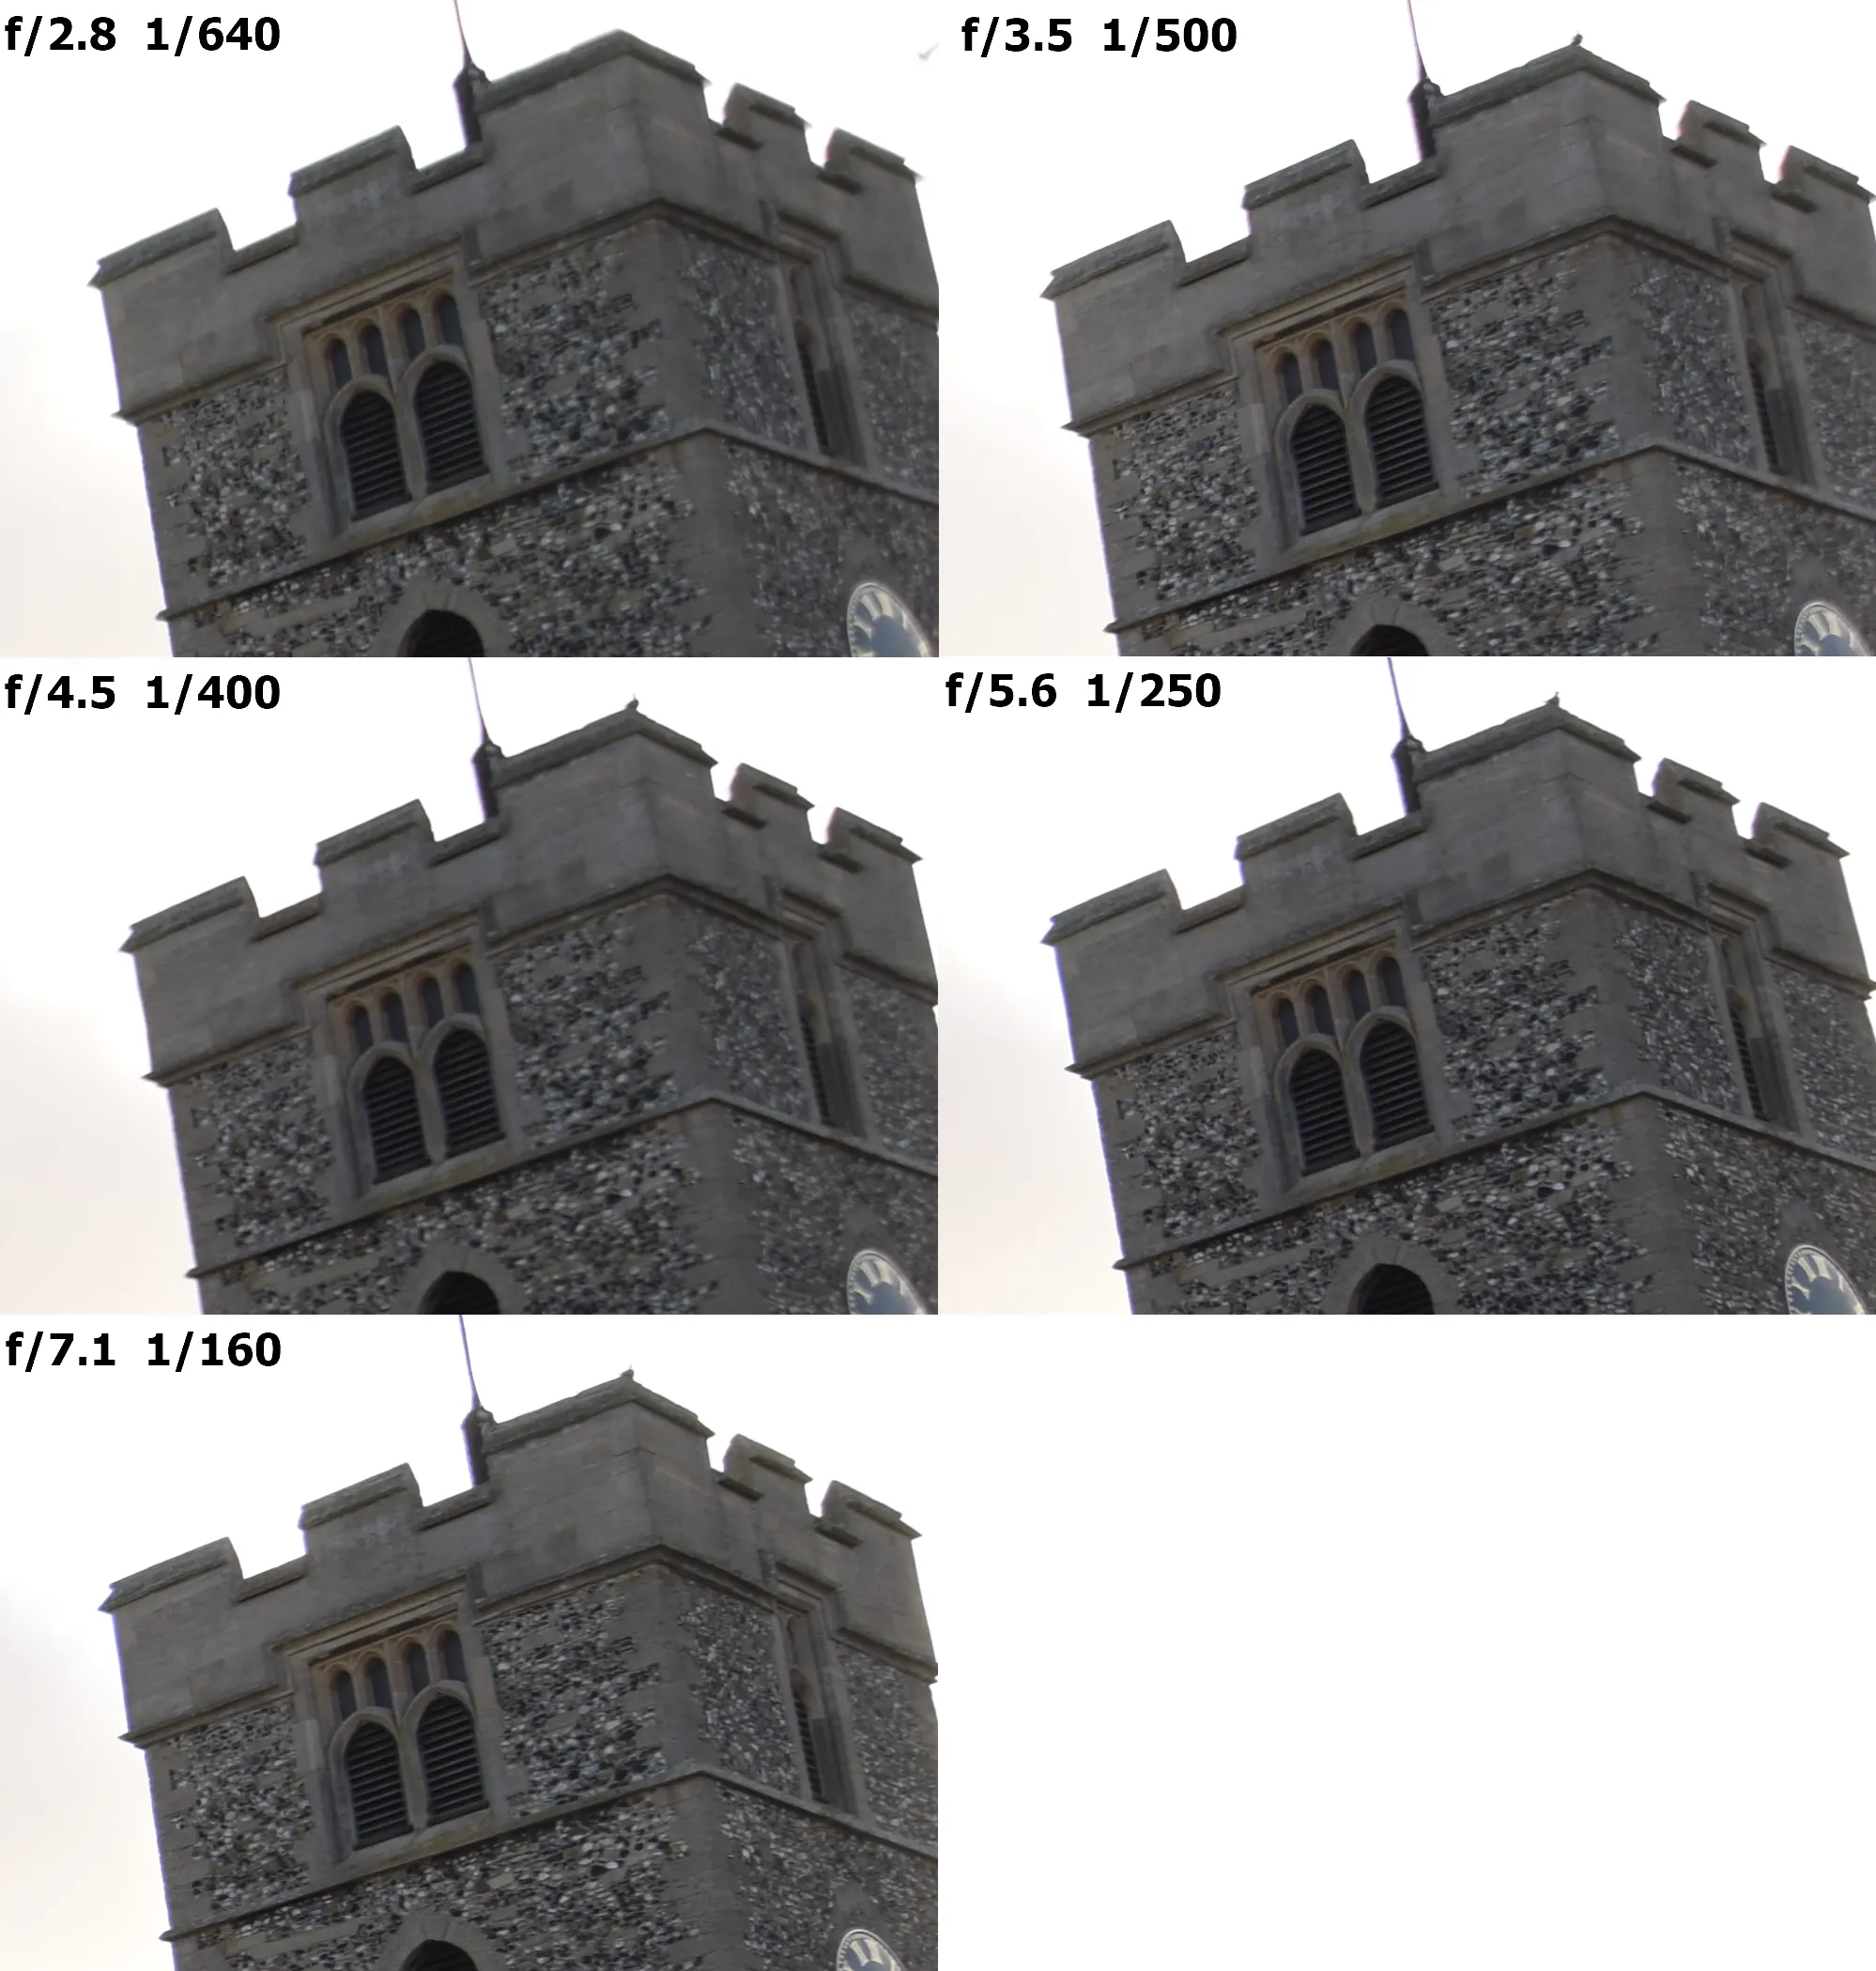
The sharpness of Tokina 11-16mm f/2.8 DX II is quite standard for all ultra-wide-angle lenses. Knowing the “depth of field” principle, where the middle of the image of all the cameras is the sharpest, we must know, that ultra-wide-angle lenses suffer soft edges of the images, especially their corners. The best explanation of this issue has been done here. Moreover, wider aperture lenses give a shallower depth of field. It can be repaired by a change of the aperture. When our aperture is the widest, all light rays reach the image plane. There are both light rays, coming from the center, which produce a minuscule circle of light, unlike the ones from the outer edge of the lens, which produce oval spots instead. These oval spots are a result of the high maximum angle of light, that can reach the sensor. When we reduce our aperture, then the light reaching the image plane from the peripheries is blocked, which results in a smaller angle of light, that reaches the sensor, and ultimately better sharpness of our image edges (Pic. 6).
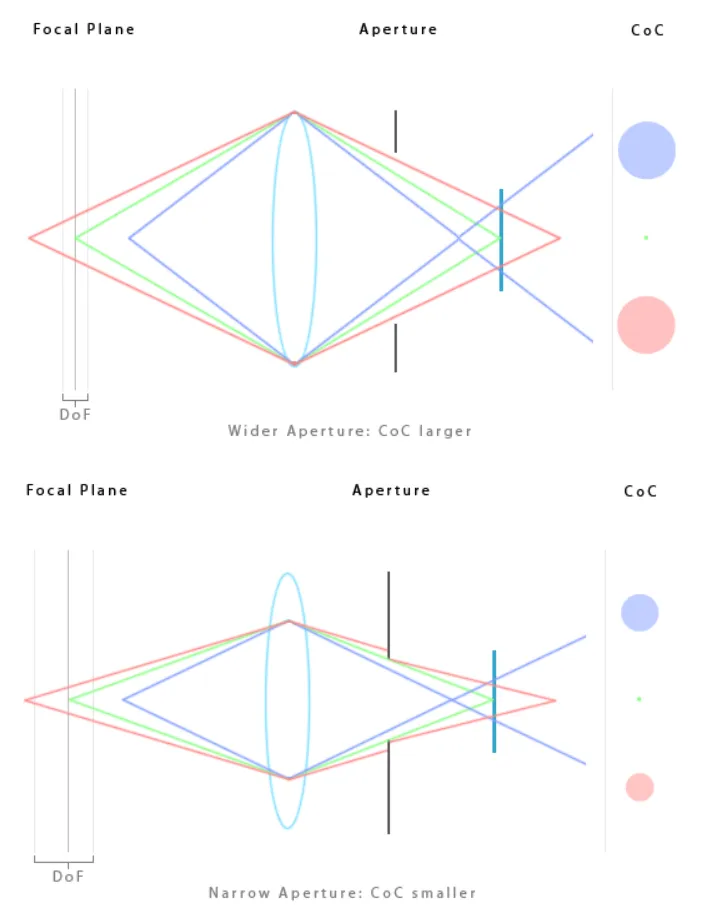
The soft edge of our image is called the Circle of Confusion or blur spot.
Concluding, the smaller aperture (in each lens) will give you a better depth of field and better image sharpness at once.
In Tokina 11-16mm f/2.8 DX II the situation looks as per the images (Pic. 7-10) below. The sharpness significantly increases effectively from the aperture lower than f/3.2.
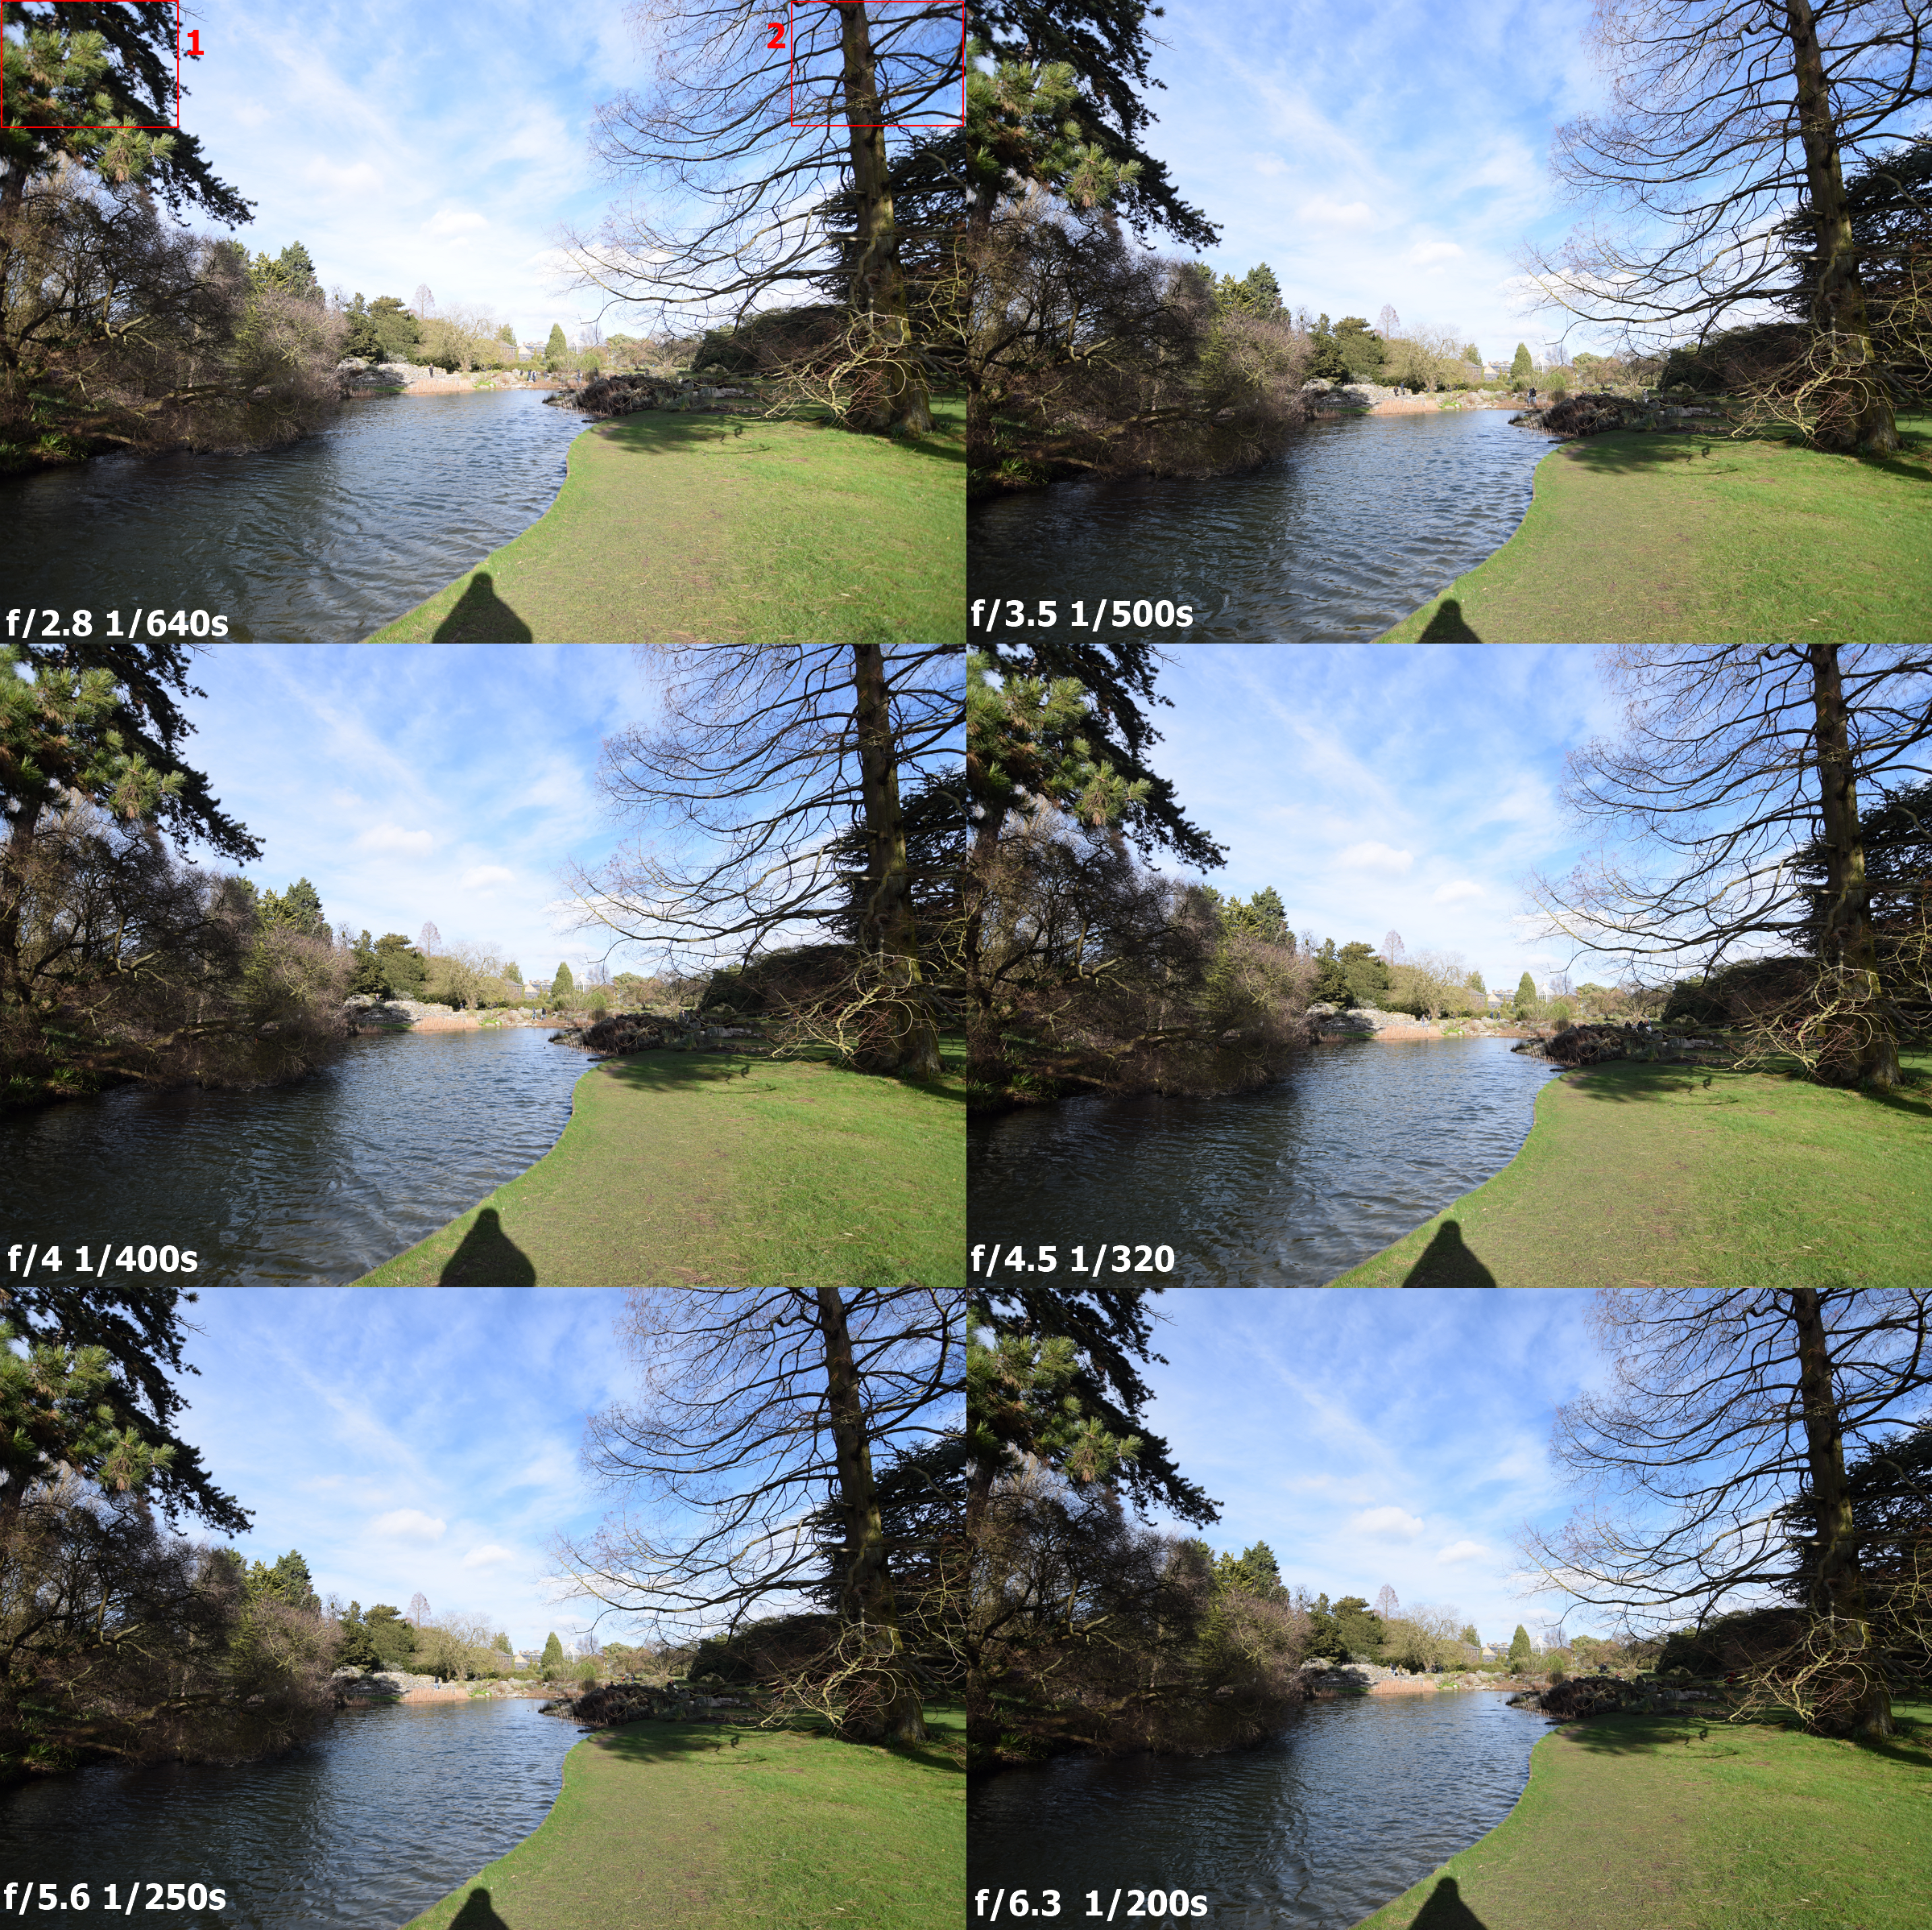
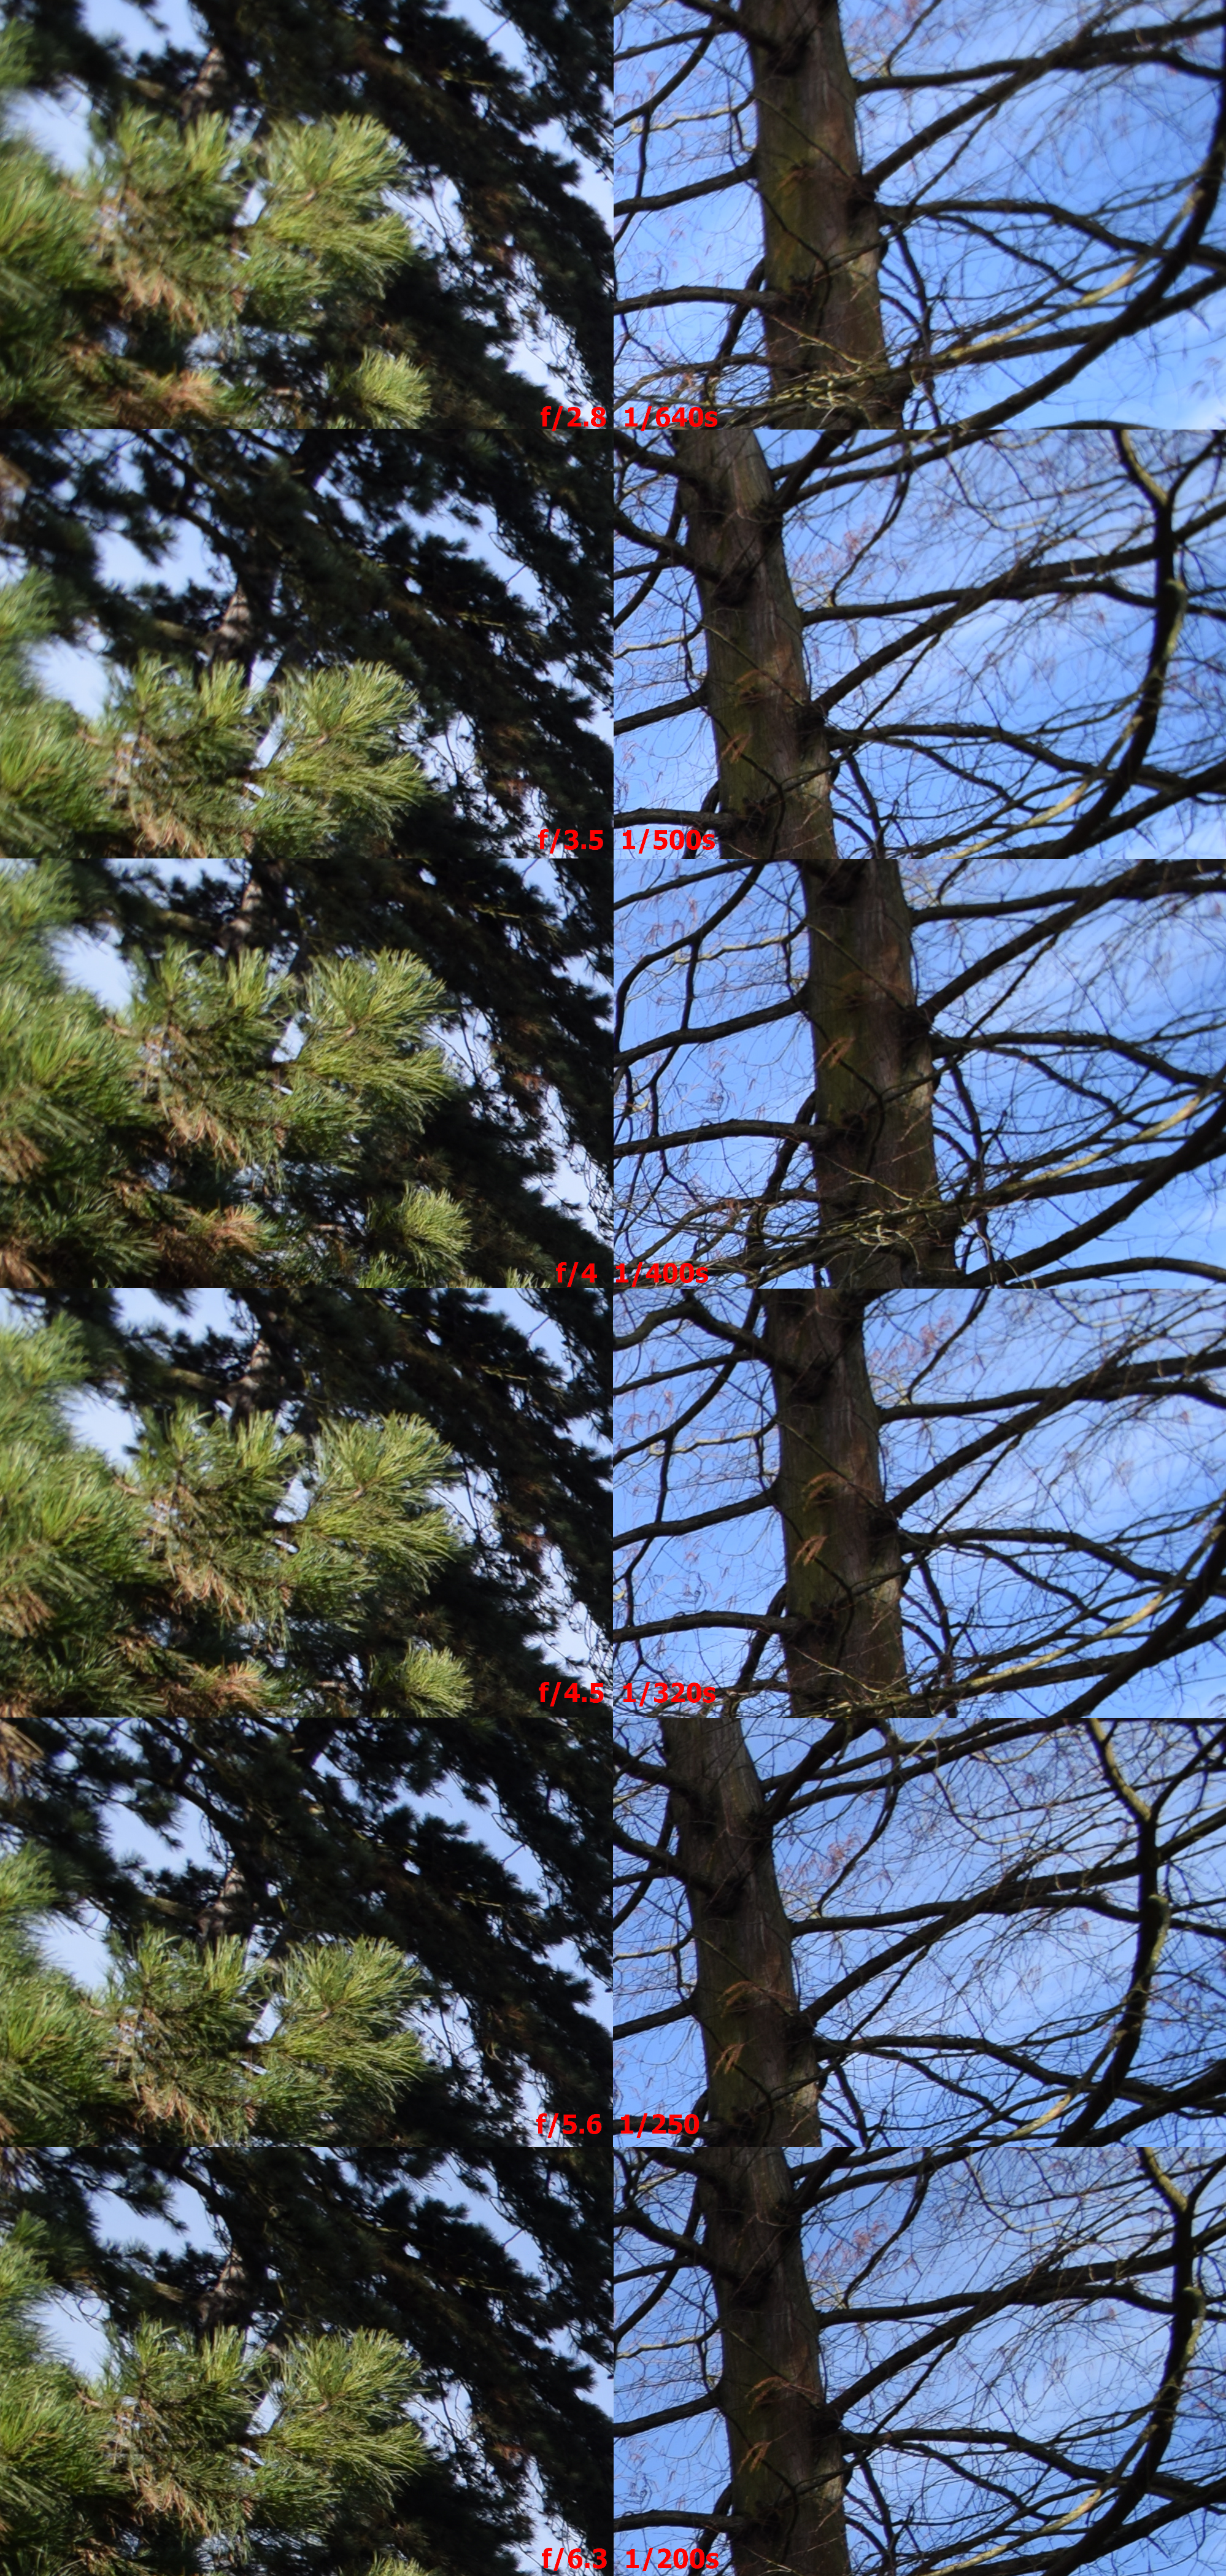

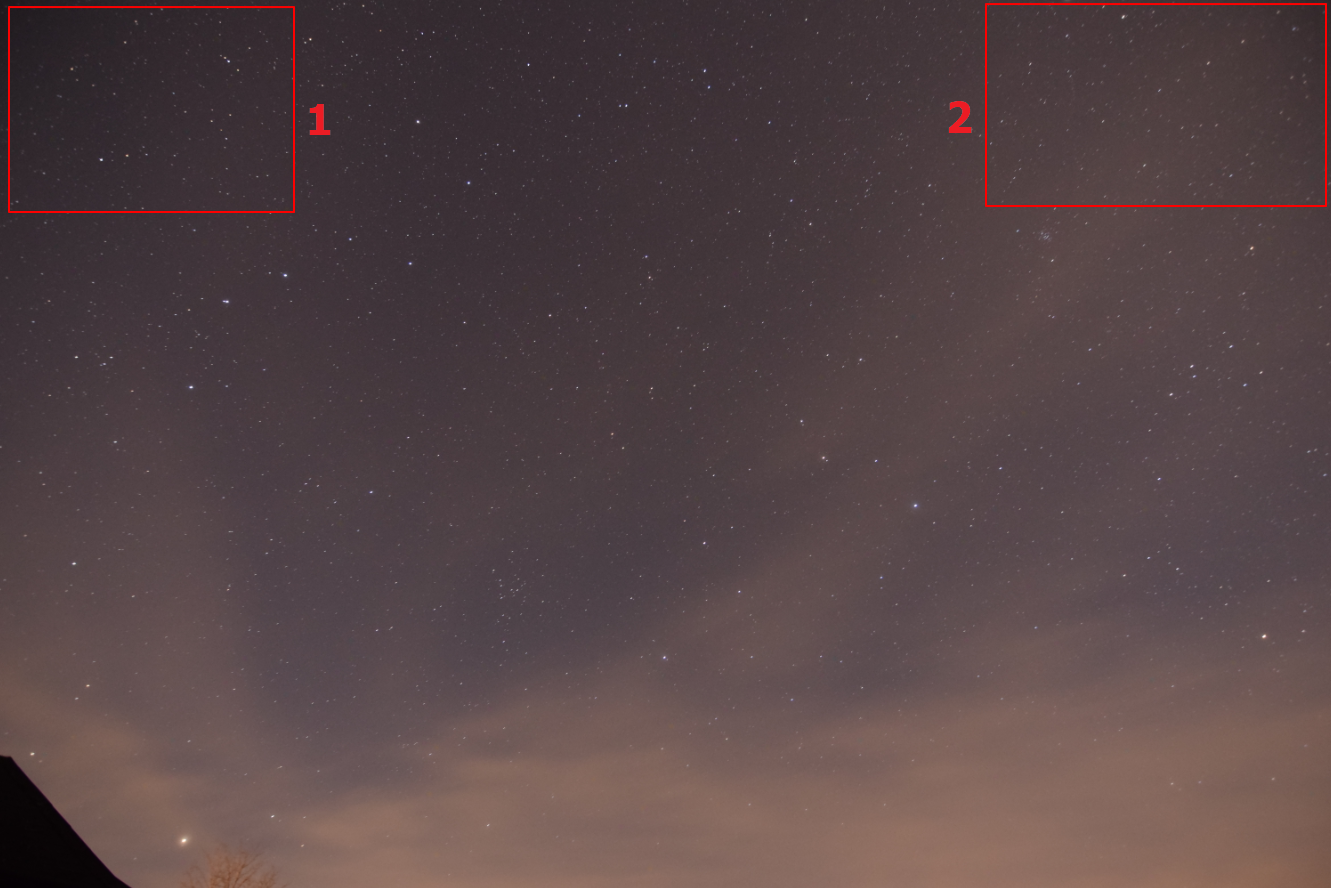
I have picked up the areas with twigs and branches intentionally in order to show you the size of softness, which is vast in the corners and drops slightly at the middle edges of our image. There is a considerable improvement from f/3.5. When the aperture is smaller than f/5.6 the problem is gone. However, I didn’t buy this lens for use with that narrow aperture, at least in low-light conditions. To be fair, the f/2.8 aperture was the prime factor of my choice. If you tend to use this lens for astrophotography, this flaw can be painful then.
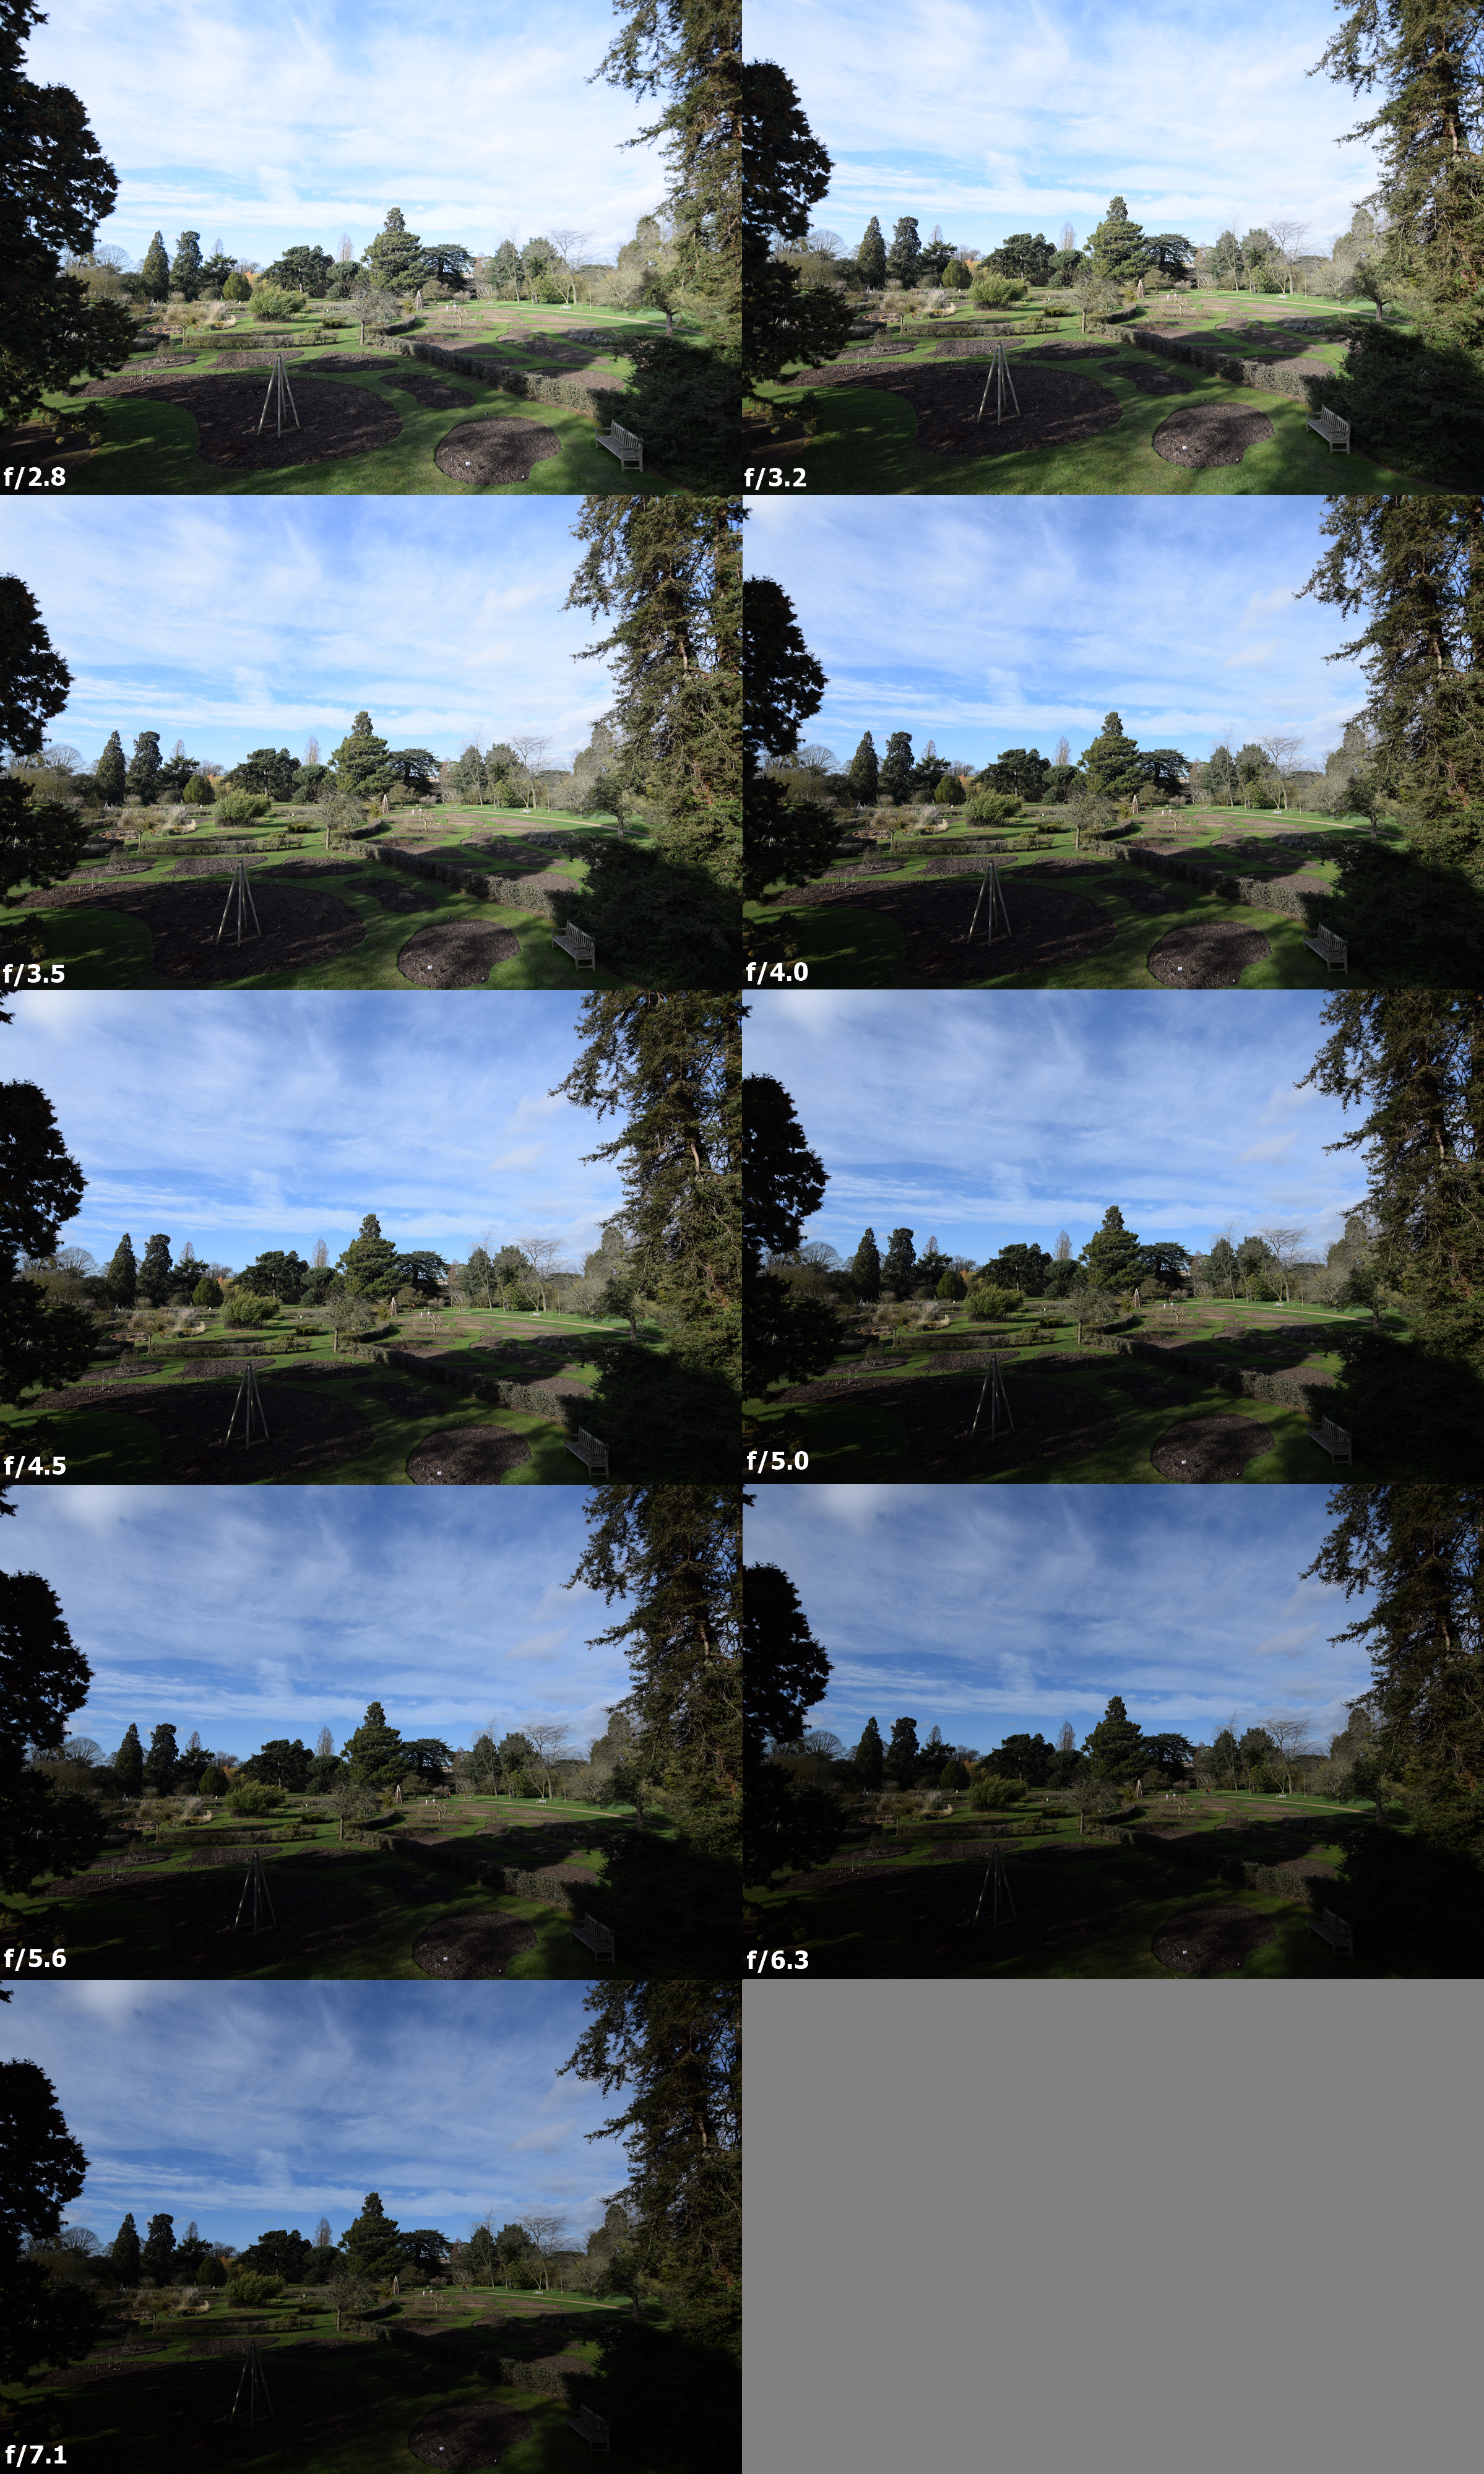
3. VIGNETTING
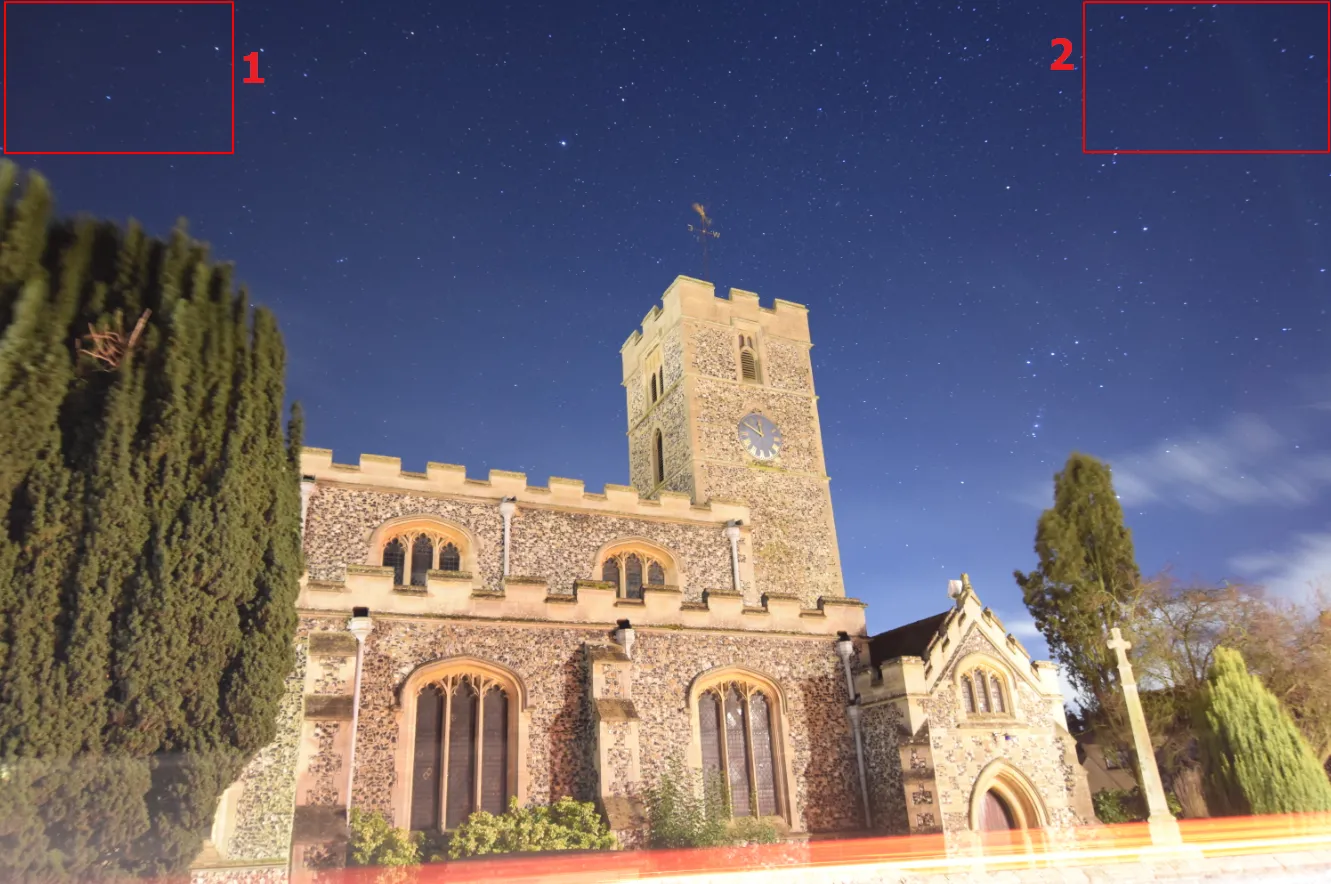
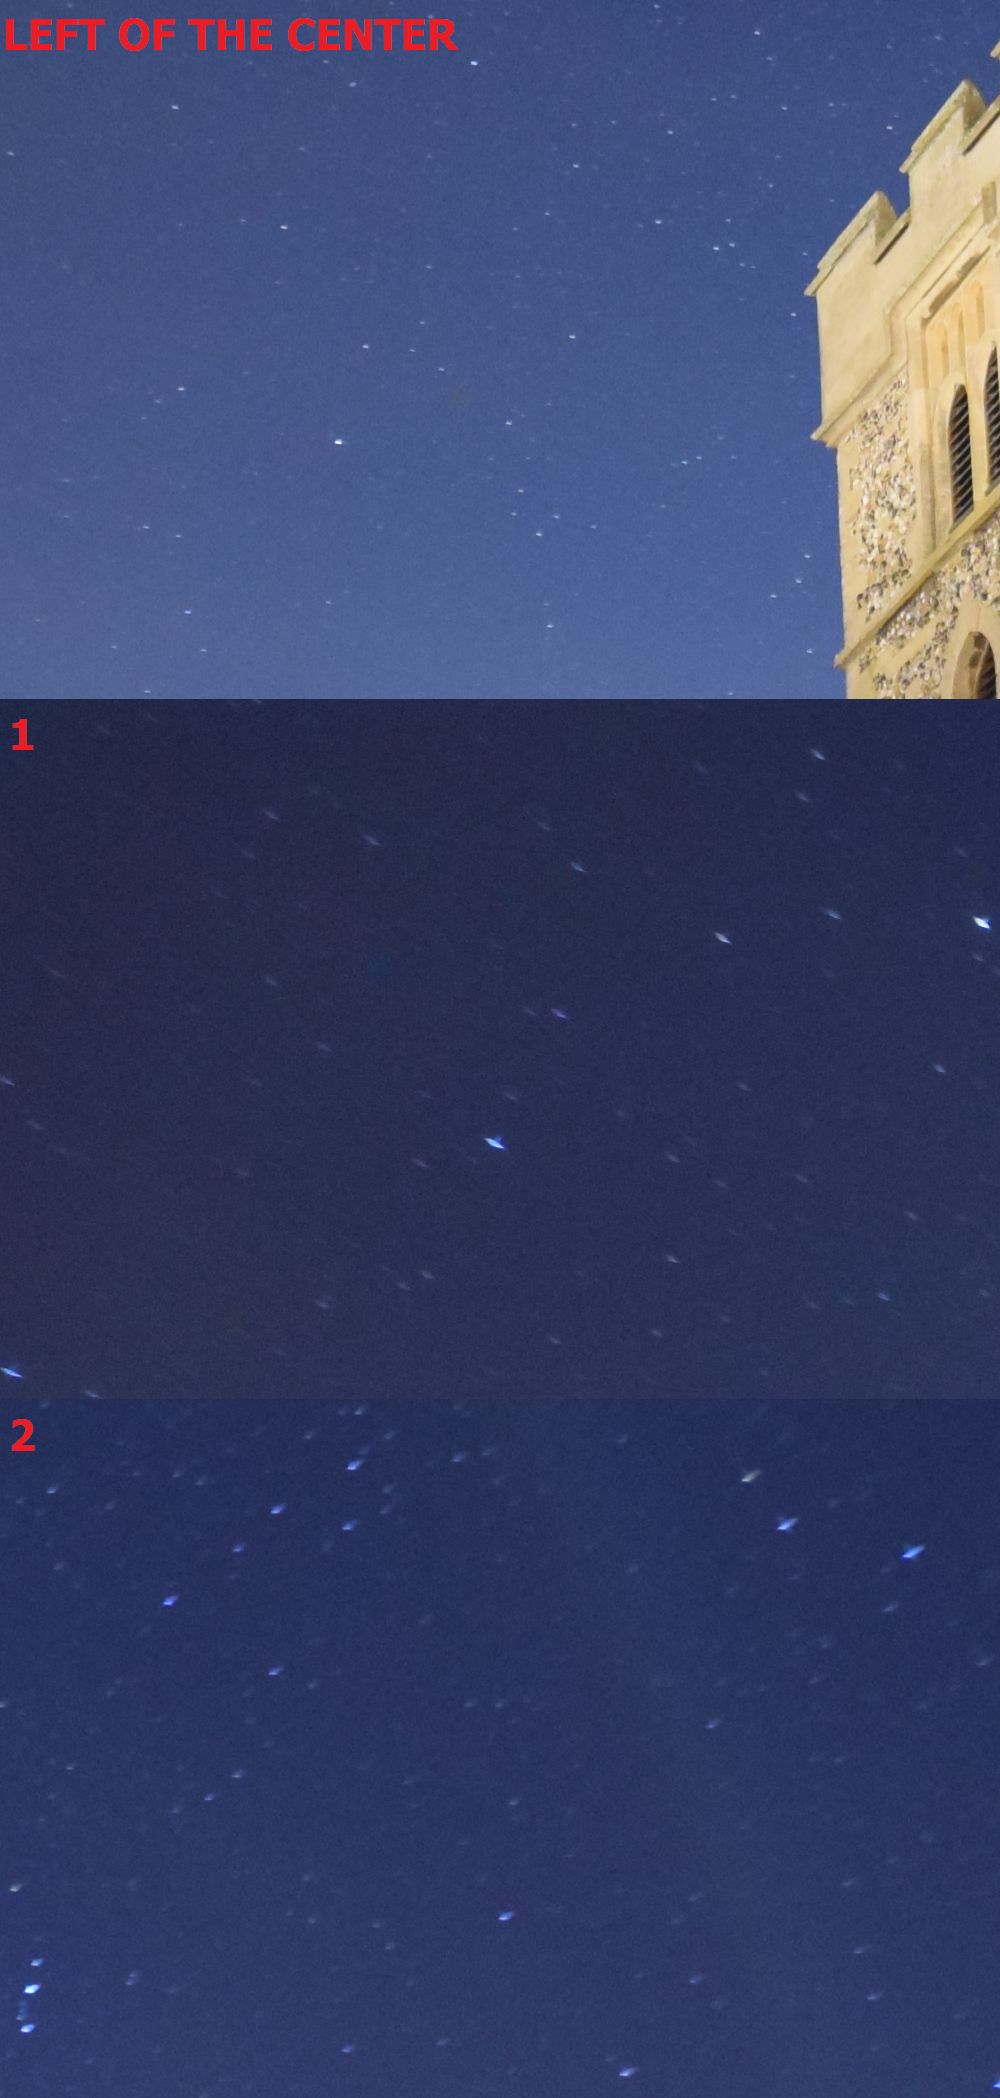
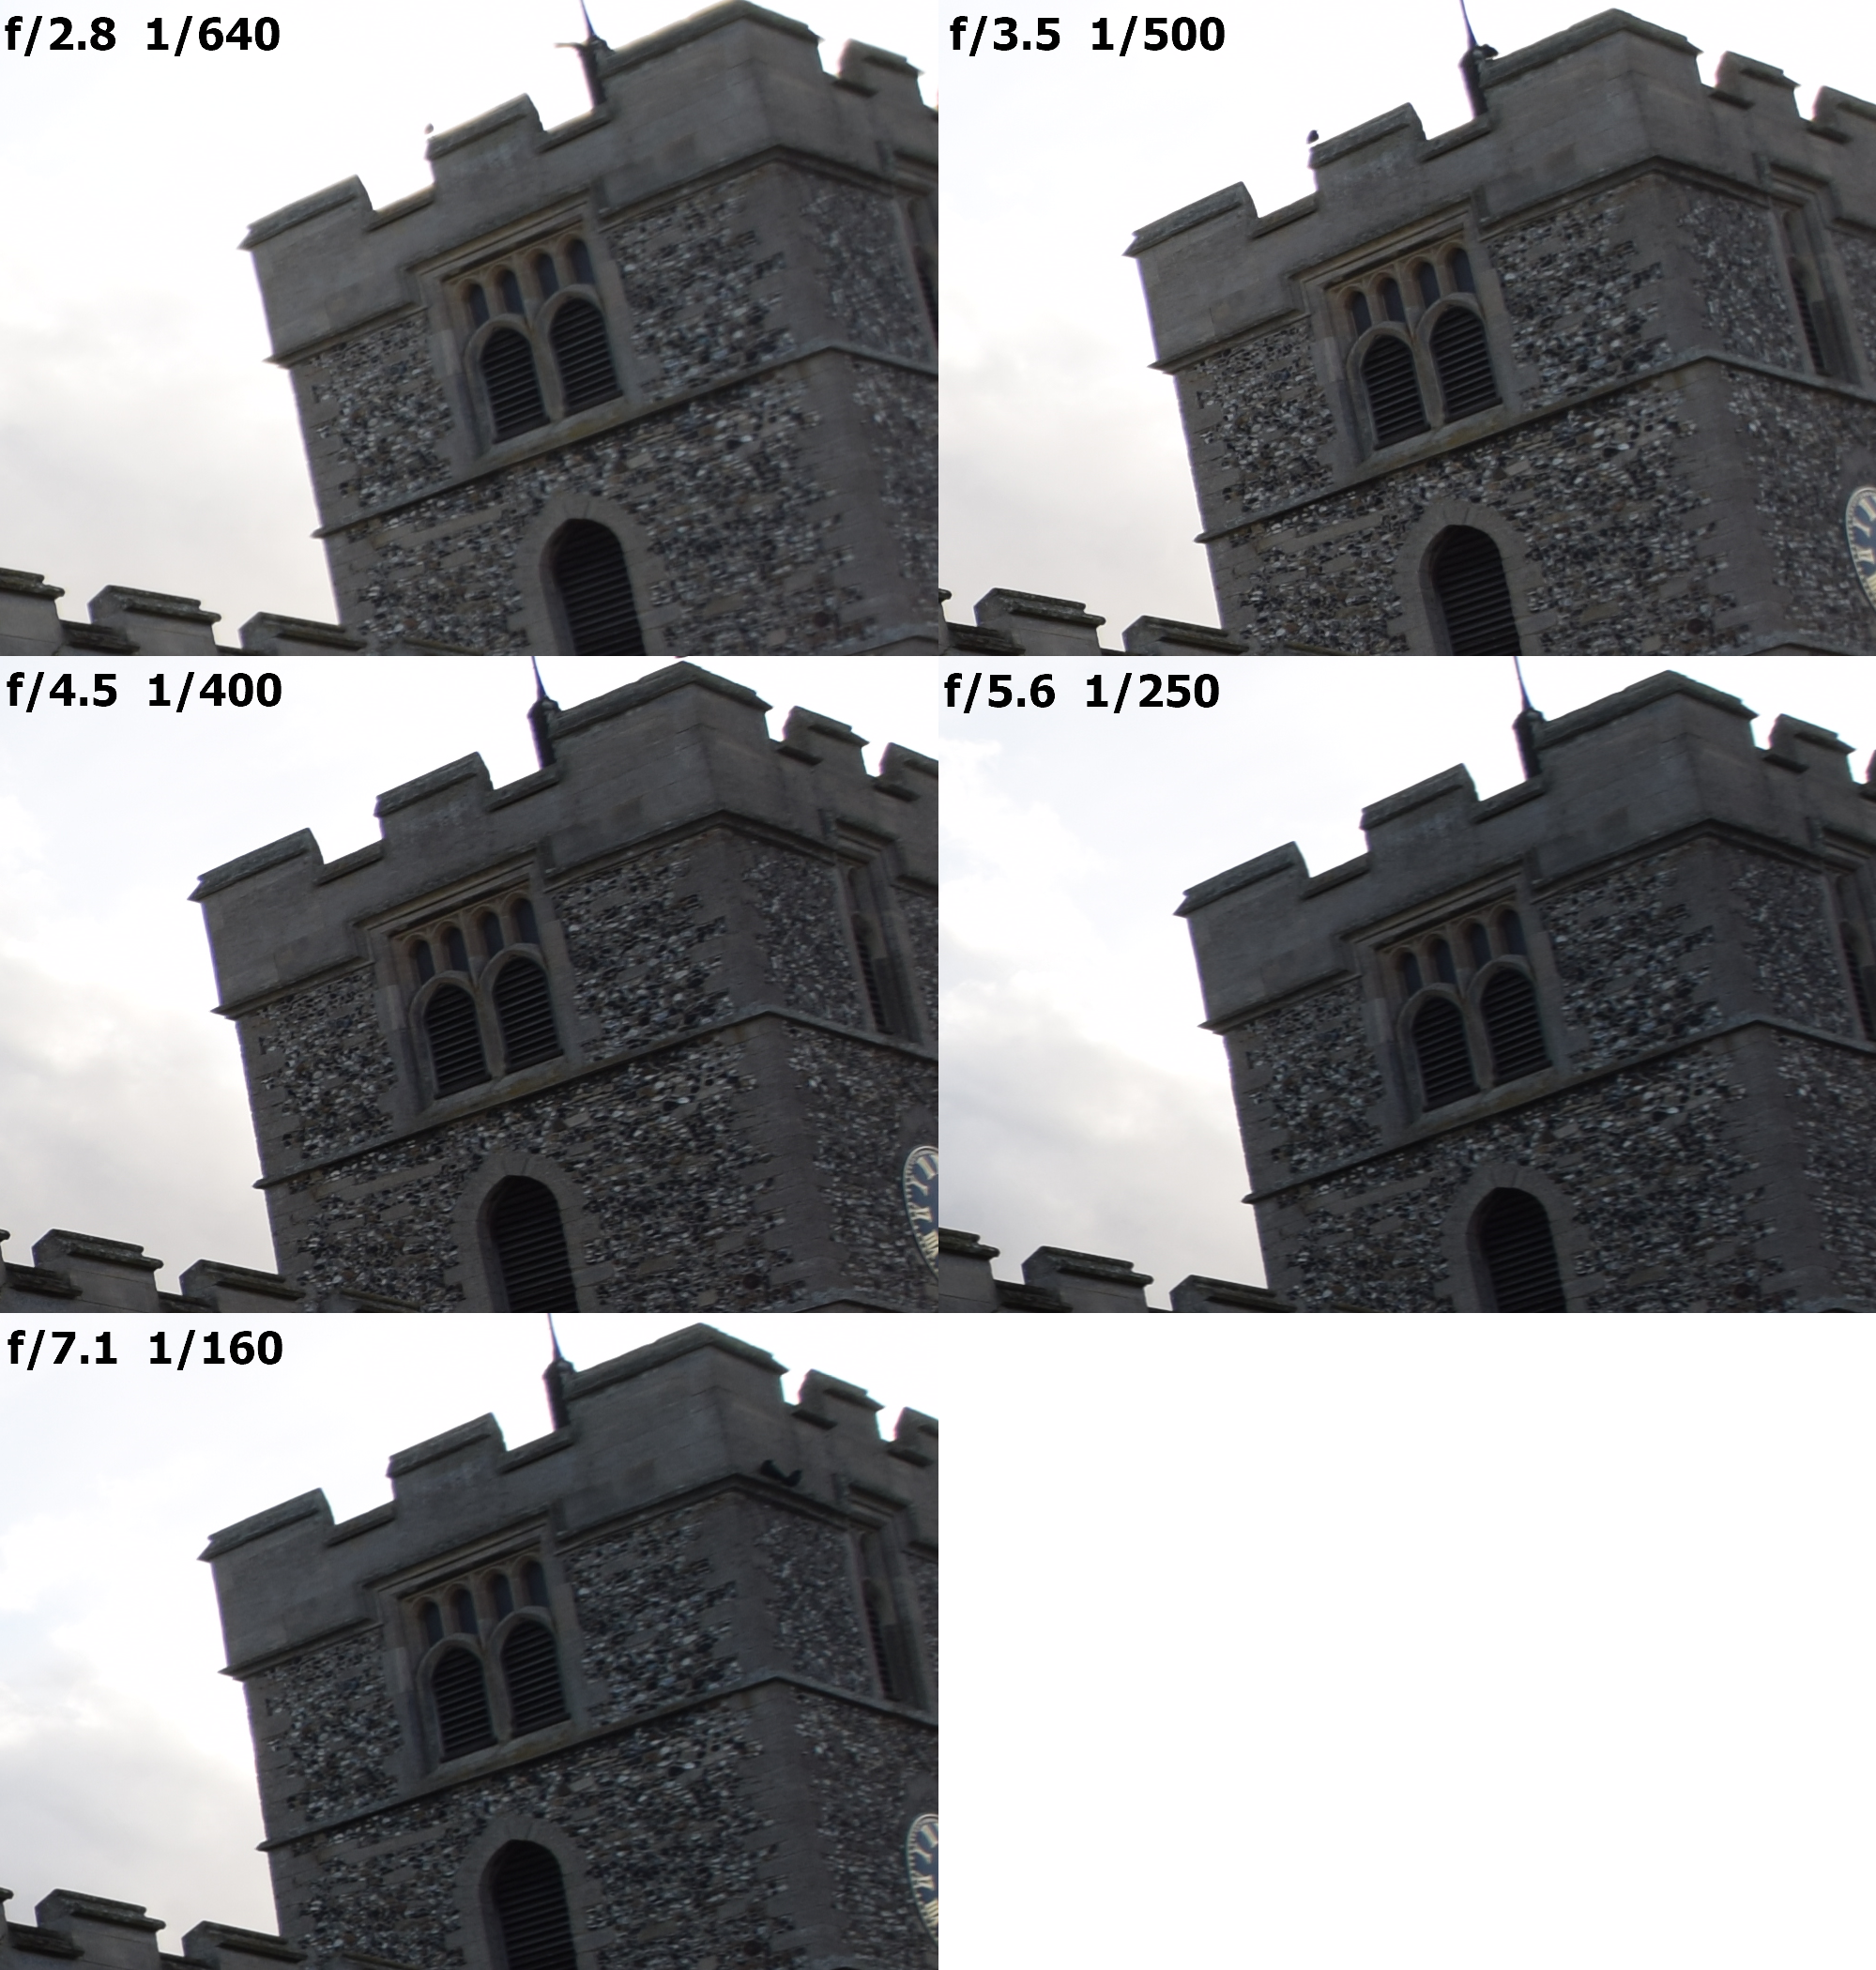
The vignetting issue is also very common, as the mechanism of its appearance is the same as by sharpness. The vignetting is caused by light falling on the sensor edges under the high angle is weaker, than light falling straight in the middle of the image plane. This is related to the inverse-square law. We will have the biggest vignetting in the image corners then. It affects every lens, especially the ultra-wide-angle ones, where vignetting is harder to control. This Tokina model doesn’t really handle the vignetting well enough, to be honest, which can be easily seen in low-light conditions. The strong vignette appears in the corners and smaller can be seen at the peripheries of our image when the amount of light is really low (Pic. 9).

The vignetting can be reduced by changing the exposure and squeezing down the aperture.
4. CHROMATIC ABERRATION
Chromatic aberration in professional language is the failure of the lens to focus all colors to the same focal plane, which is caused by dispersion. Various colors of light are moving at different speeds when passing through a lens. The result is noticeable color edges appearing around the objects, especially with alternating colors between the object and its background. This is the common optical problem called “color fringing”.
There are 2 types of chromatic aberration, which go along with Tokina 11-16mm f/2.8 DX II. This is the longitudinal and lateral chromatic aberration. The longitudinal aberration has an impact on bokeh frankly speaking. The “bokeh color fringing” occurs when moving out from focus before or behind the focal plane. This type of aberration has only little influence on the image (Pic. 10-12).
Another type is lateral chromatic aberration, which is significant in the Tokina 11-16mm lens. This type of chromatic aberration features the color fringing increment towards the image edges. It doesn’t happen always, but the best example is the images below (Pic. 11-12). The biggest appearance of this type of chromatic aberration is characterized by the edges with a high level of contrast (i.e black and white (Pic. 14-17). In general, the lateral chromatic aberration is not visible in normal view (Pic. 14), but it can be significant when cropping (Pic. 15 – 17). The size of the chromatic aberration reduces when changing the aperture or exposure (Pic. 15 – 17).
To summarize, I think, that the chromatic aberration in Tokina 11-16mm f/2.8 DX II is not an as big issue as described in many tests on the web. You can convince me about it by seeing my detailed photo examples above.
5. MINIMUM DISTANCE
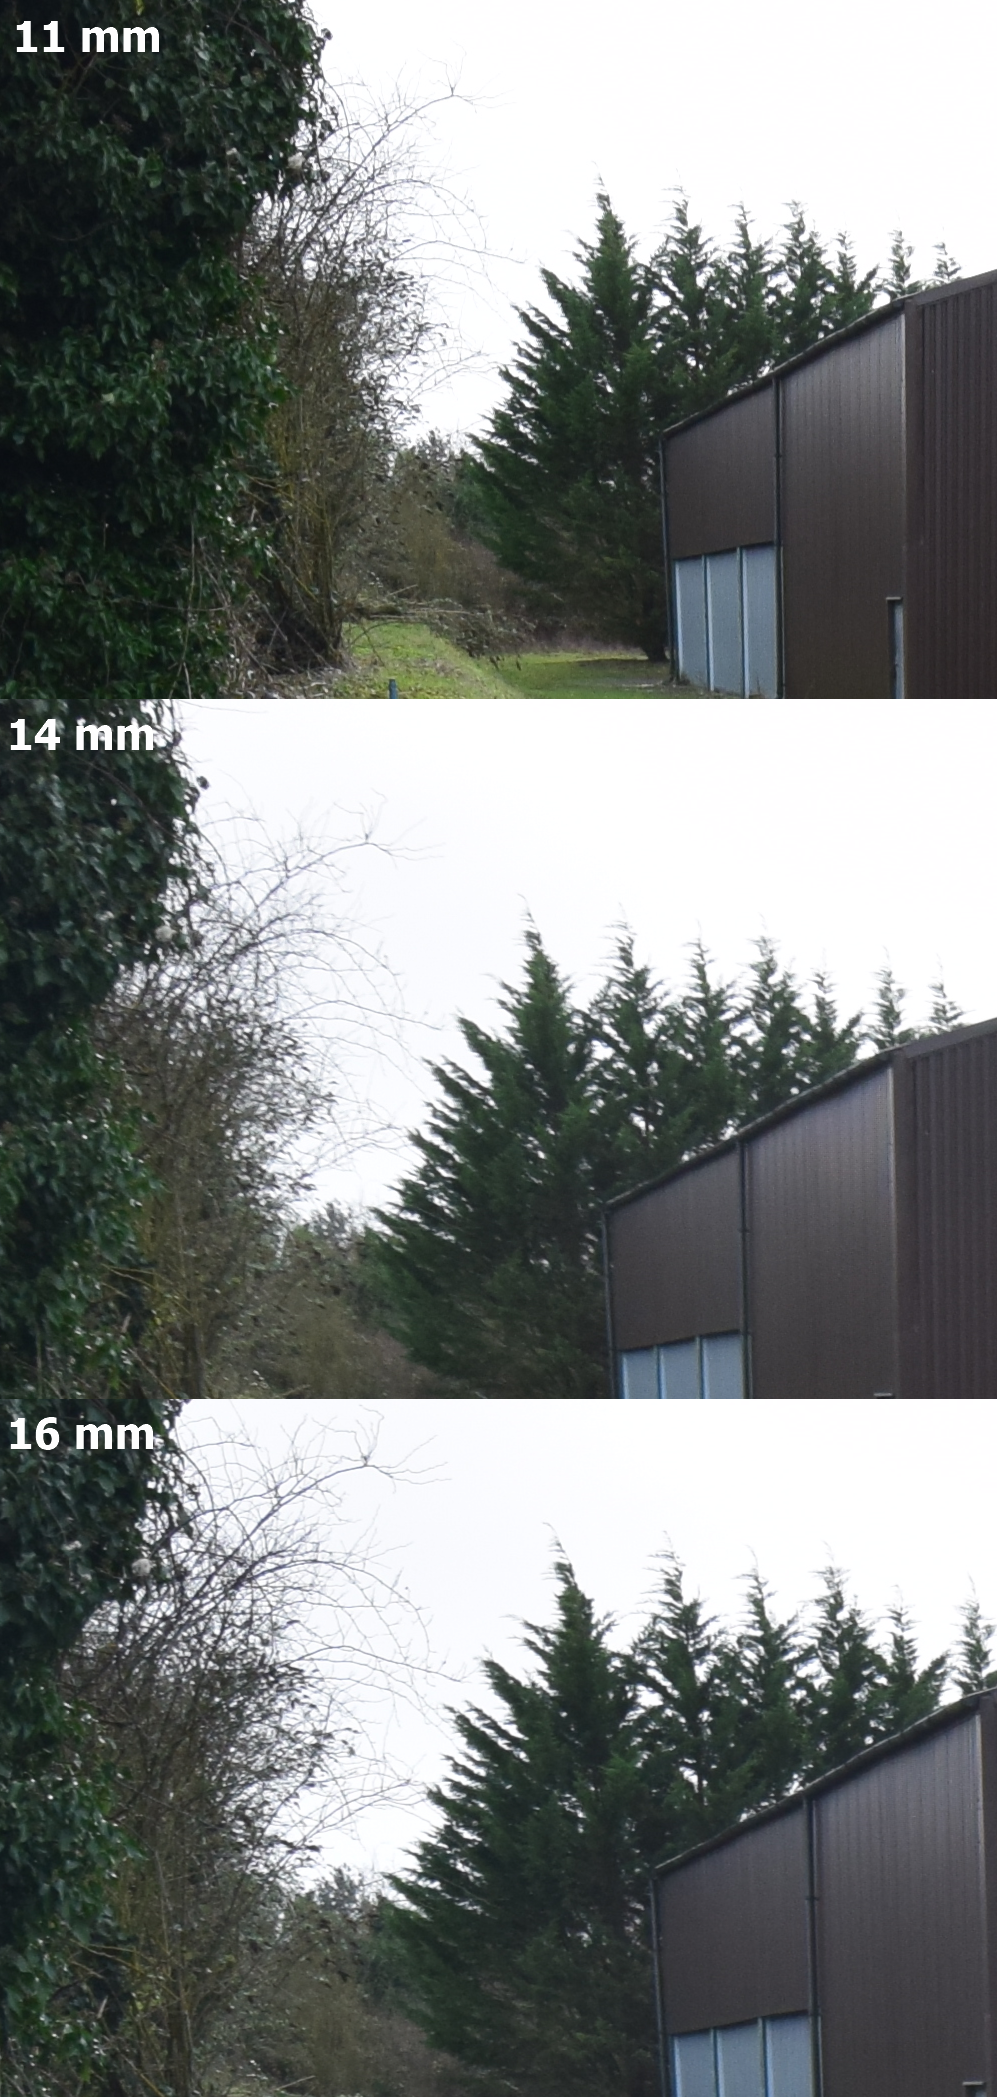
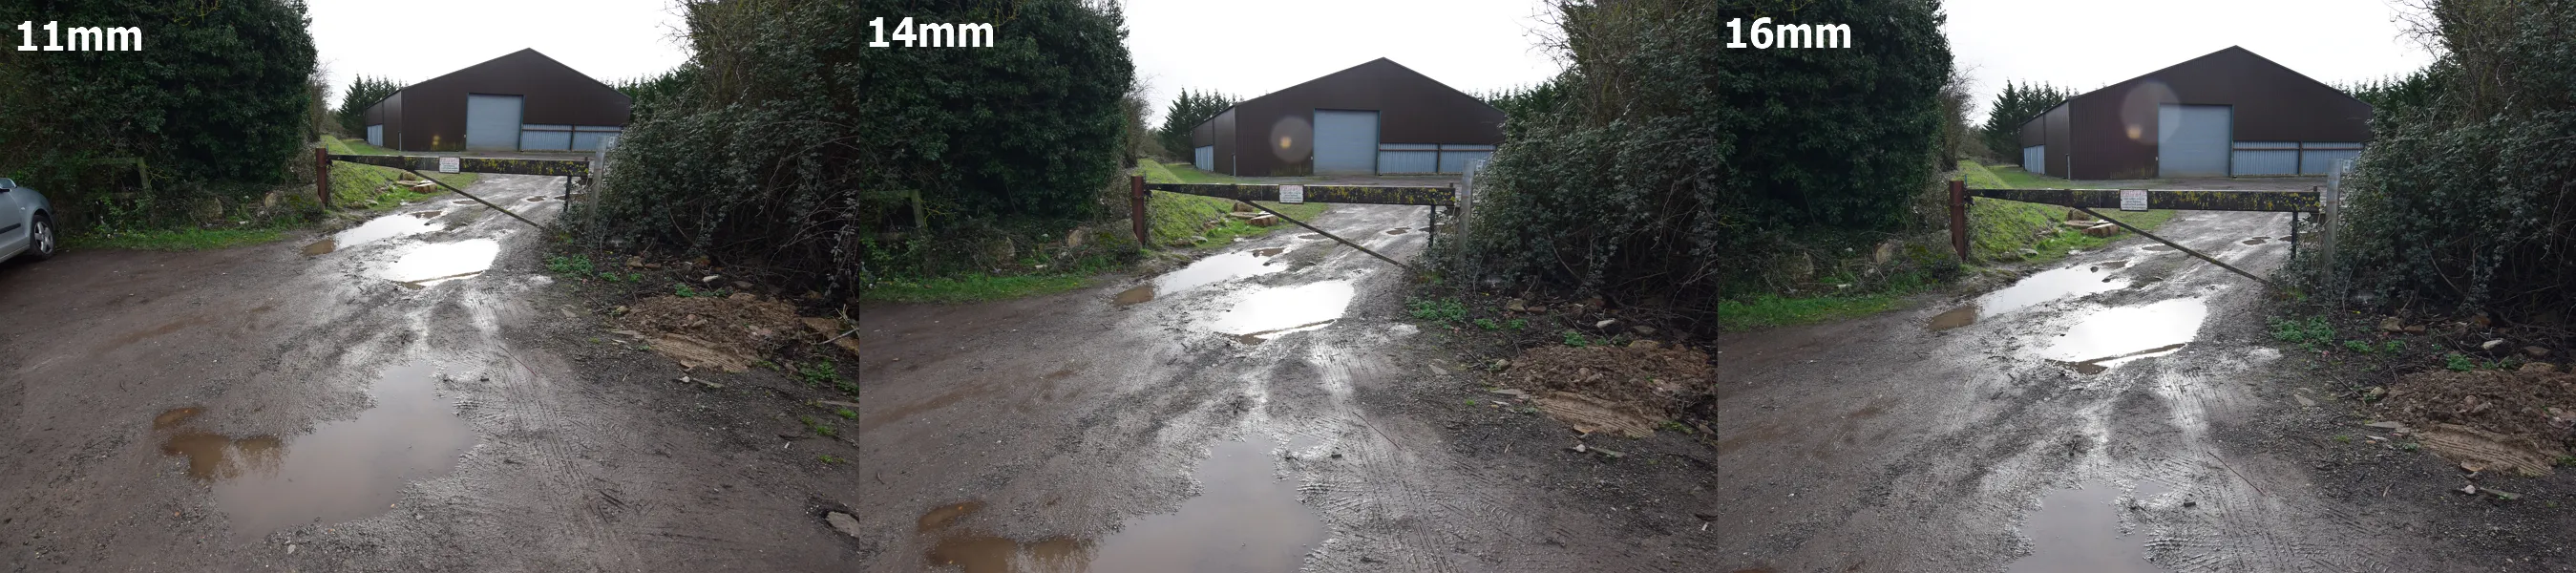
The minimum distance, from where we can shoot by Tokina 11-16mm f/2.8 DX II is exactly 28cm. The image received from this distance is very good for a whole focal range (Pic. 18-20).
6. FLARE
The lens flare is an undesirable light artifact within the image caused by very bright light (sun, moon, streetlamp, etc.). Sometimes the flare can exist as haze veiling a whole scene, making the colors washed out a bit and smaller contrast. The flares are the effect of light scattering inside of the lens, comprised of single glasses featuring some surface imperfections. Important is the spatial distribution of the flare, which mostly depends on the shape of the aperture.
Tokina 11-16mm f/2.8 DX II likewise another ultra-wide lens is prone to flare, much more, than other type lenses. The Tokina is one of the worst lenses if we are talking about the flares. You can see ghosty artifacts even when the source of bright light is away from the frame.
Personally, I can say, that the problem of flares in Tokina 11-16mm f/2.8 DX II has been exaggerated in sunlight conditions. The flares exist but aren’t as big as described in many tests.
When the Sun shines strong, the flares purportedly are too weak to make significant marks in our image. In the set of pictures above I could spot serious flares from 1 to 3. As I moved my camera away from the Sun, they were gone.
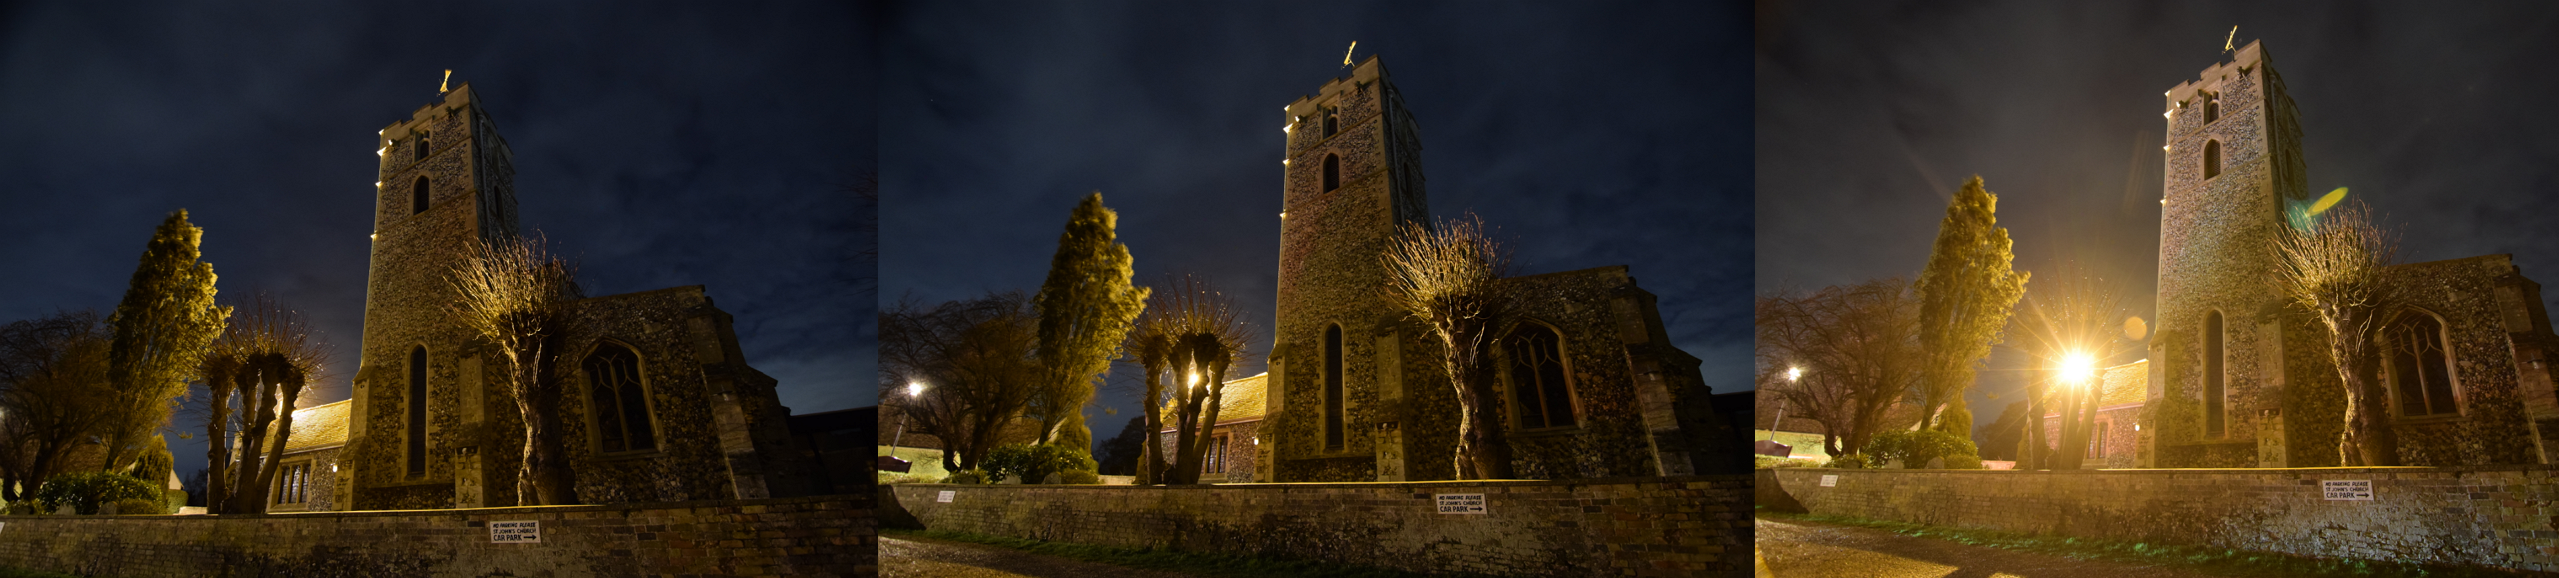
In the other example, I checked the flare appearance depending on the exposure, exactly towards the solar azimuth.
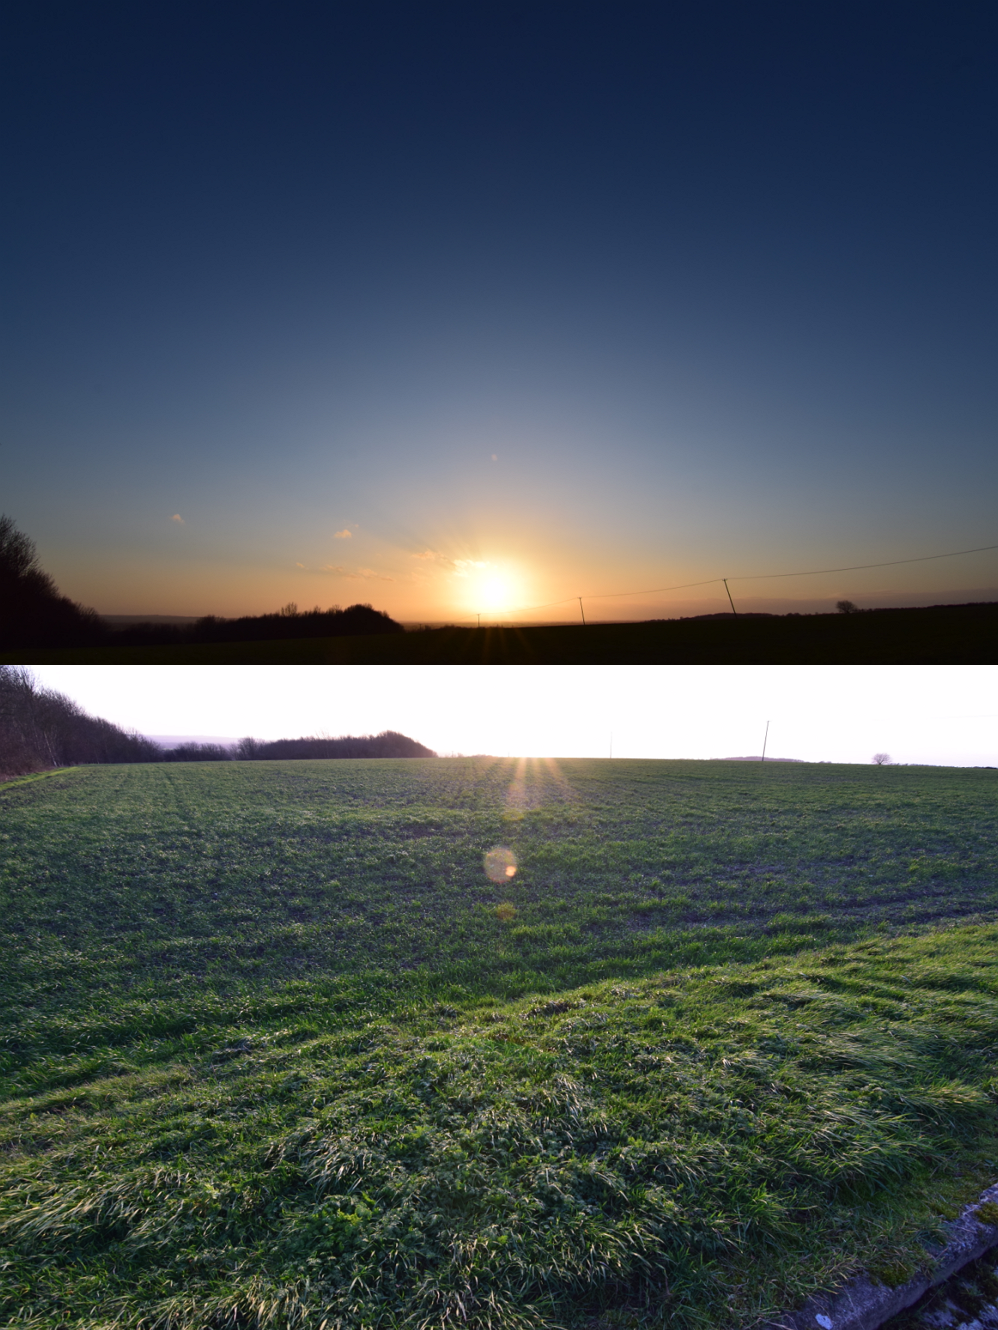
The flare, which appears in the lower image is not really big. I could say, that it’s typical for all ultra-wide lenses. In the upper image, it’s completely gone.
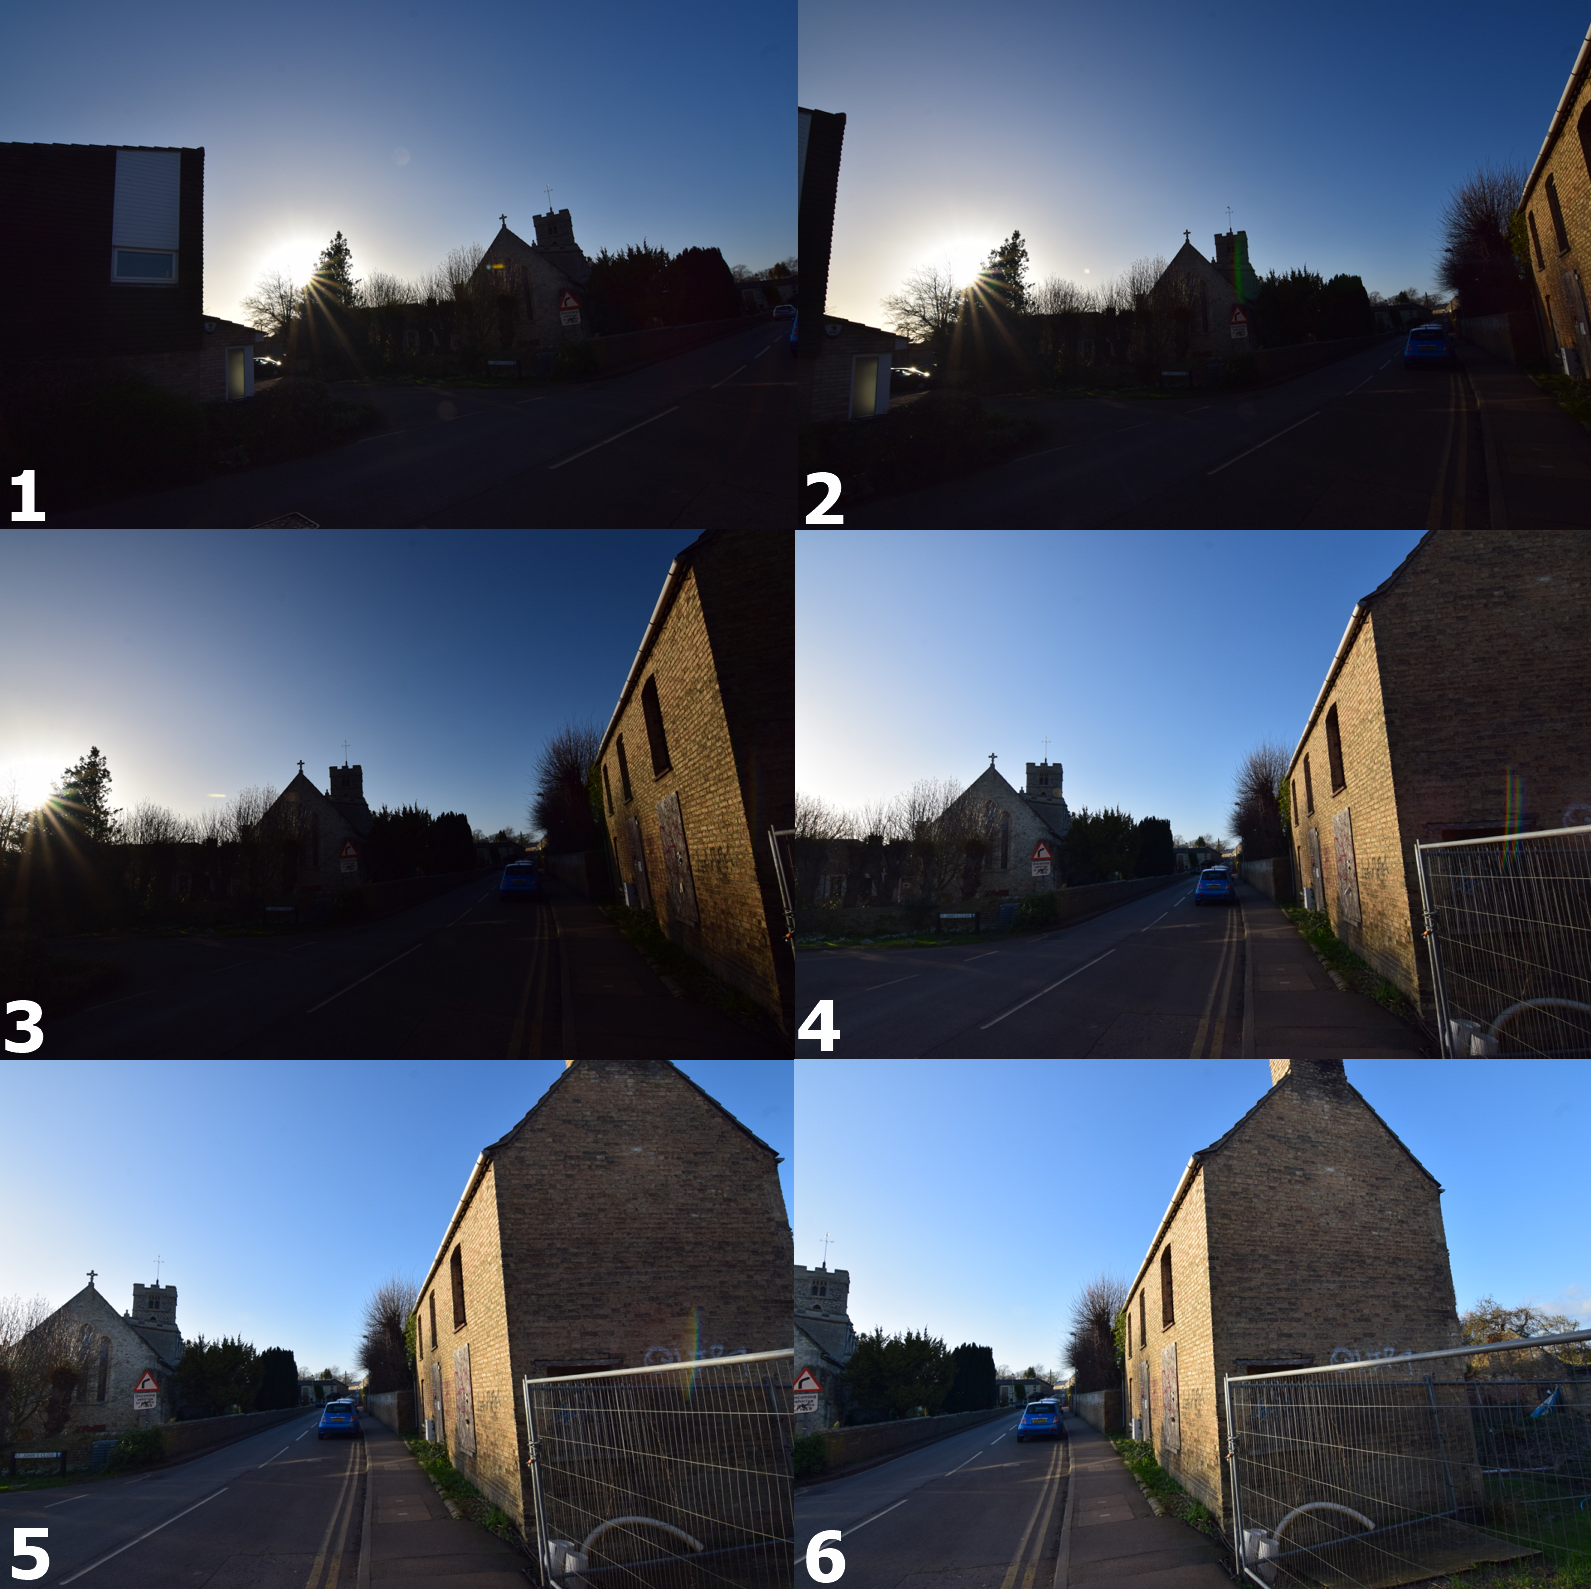
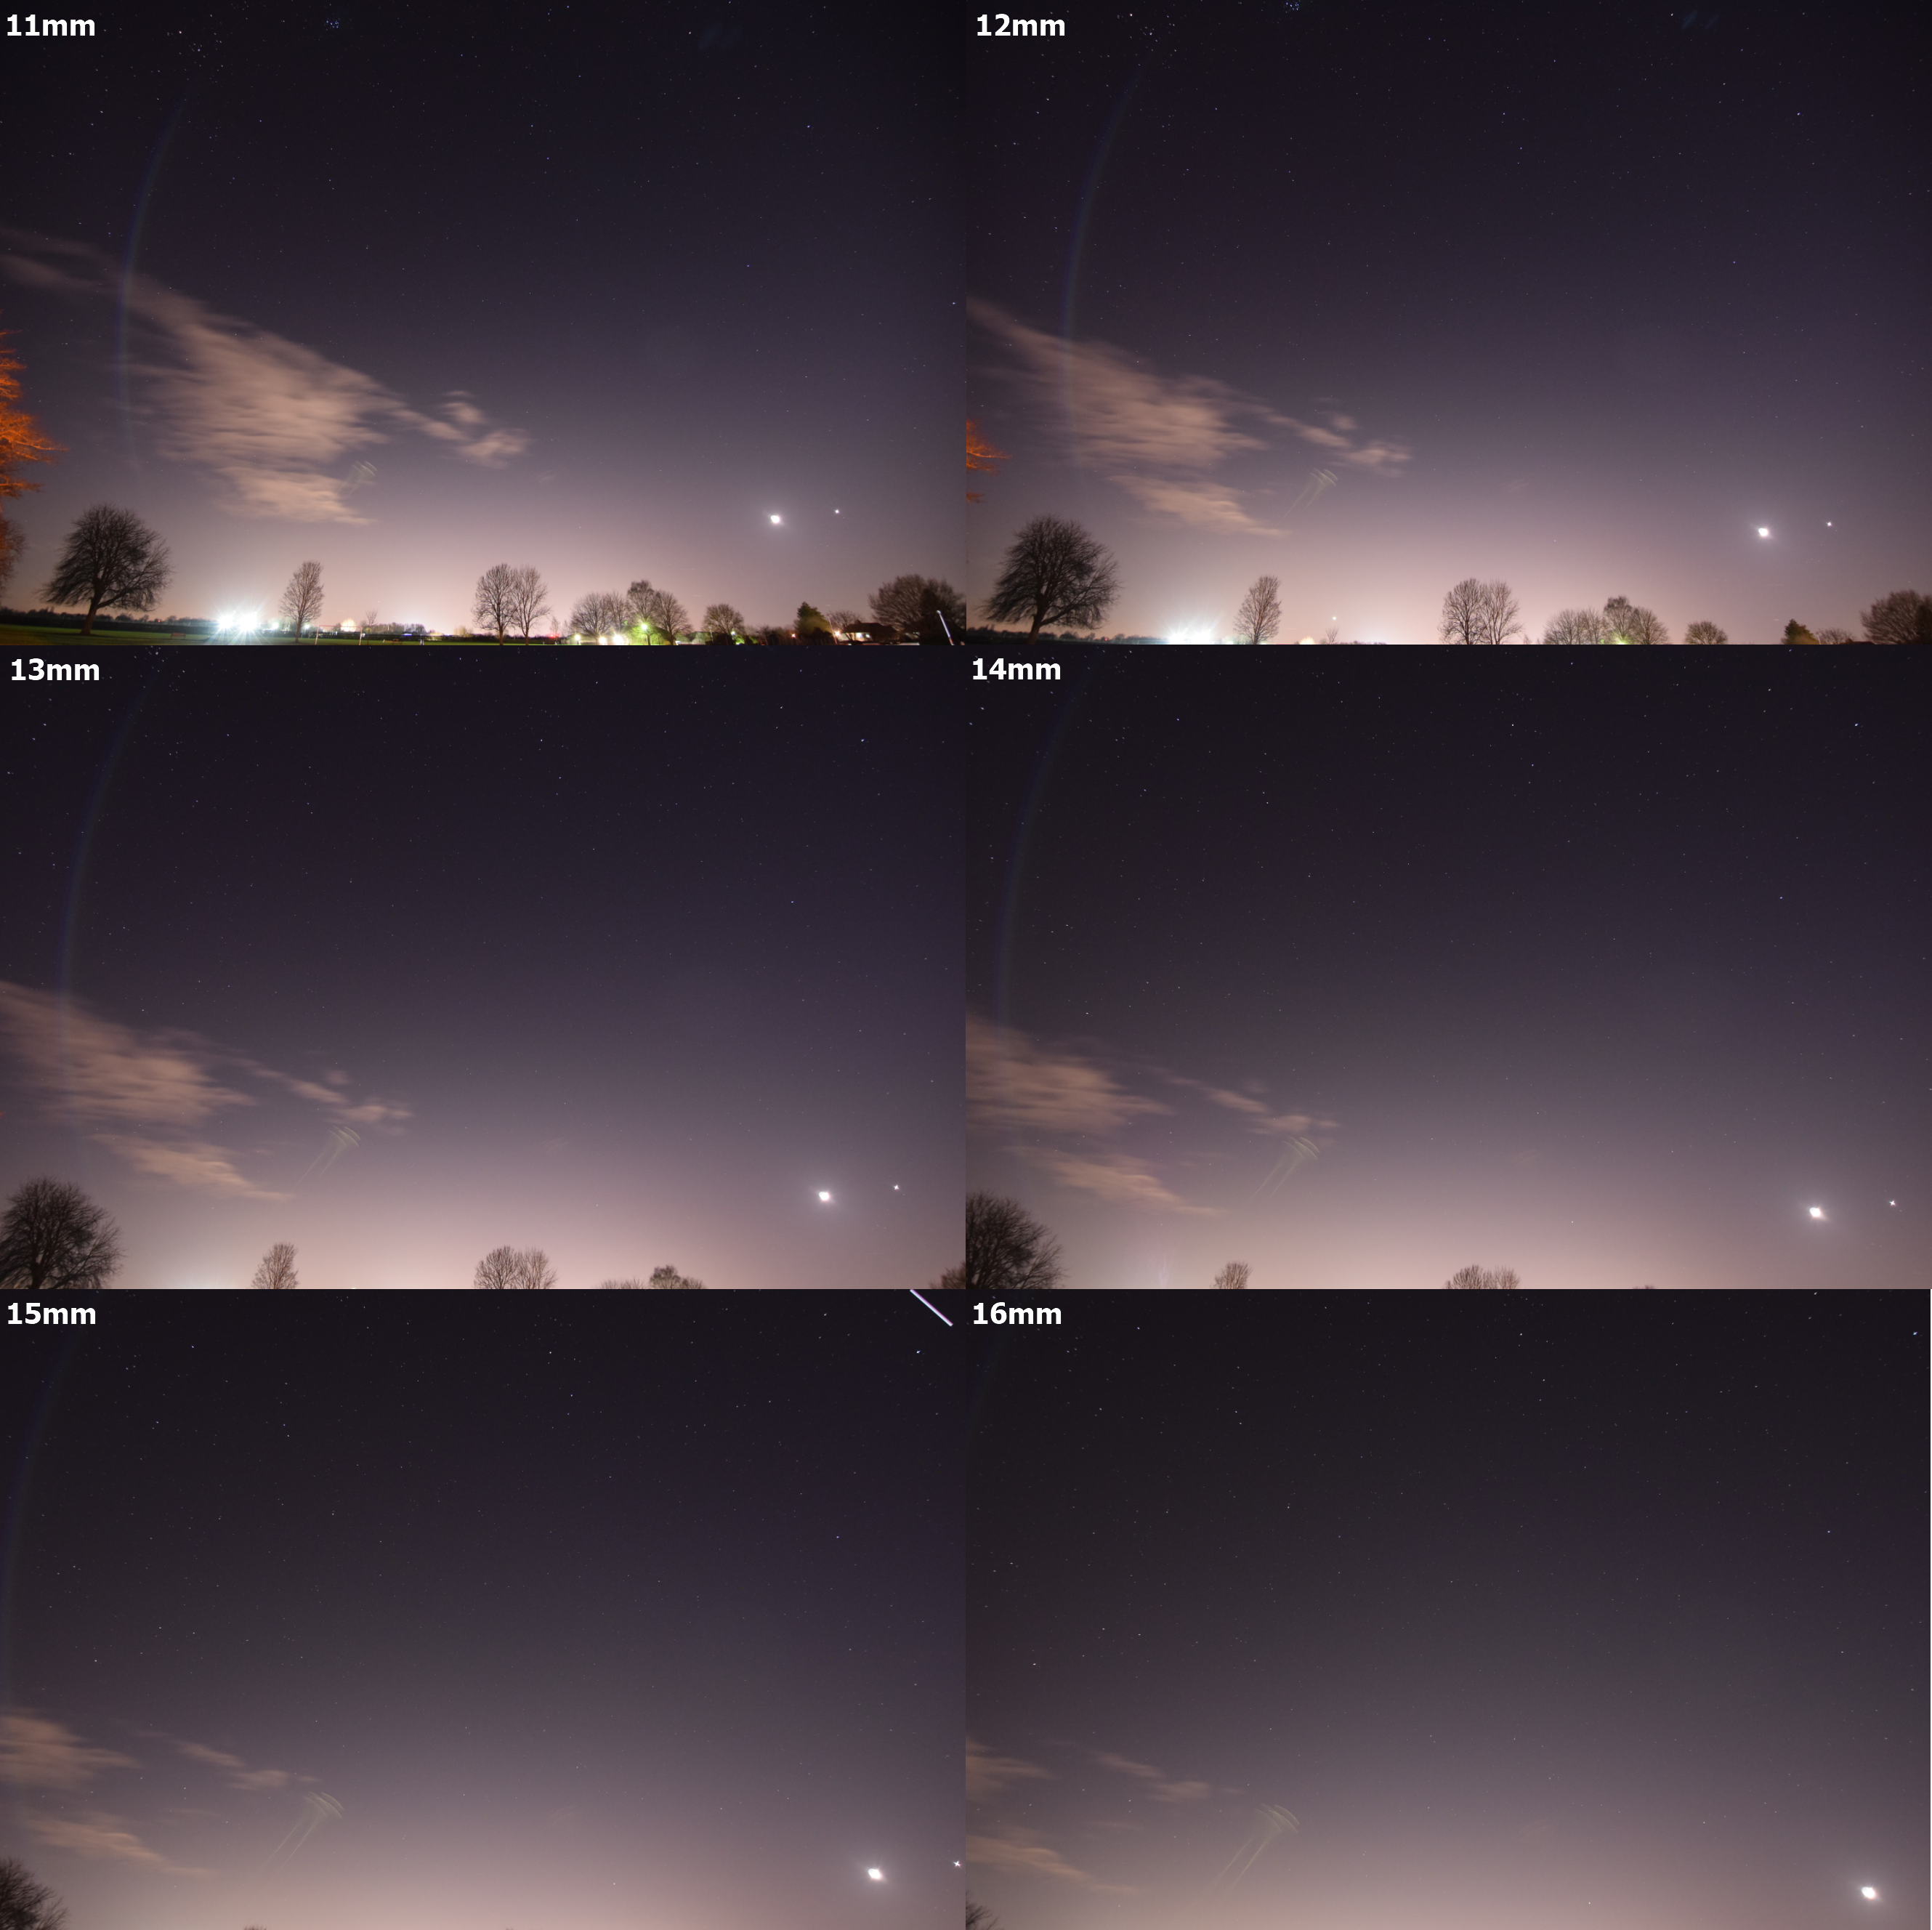
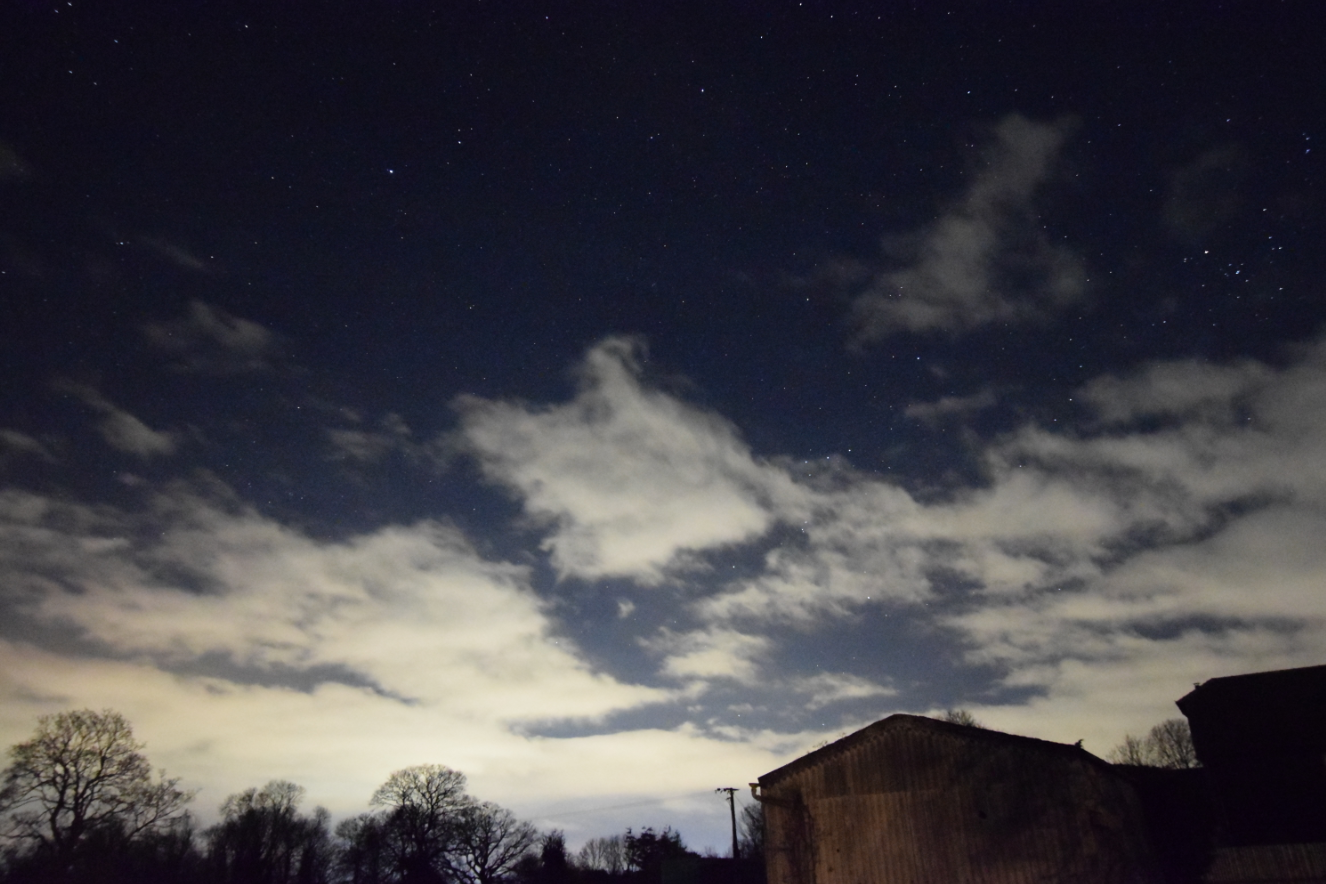
I repeated this investigation when the Sun was veiled by altostratus clouds (Pic. 23). Moreover, I did it for the whole range of Tokina 11-16mm focal length instead of 11mm only, as previously.
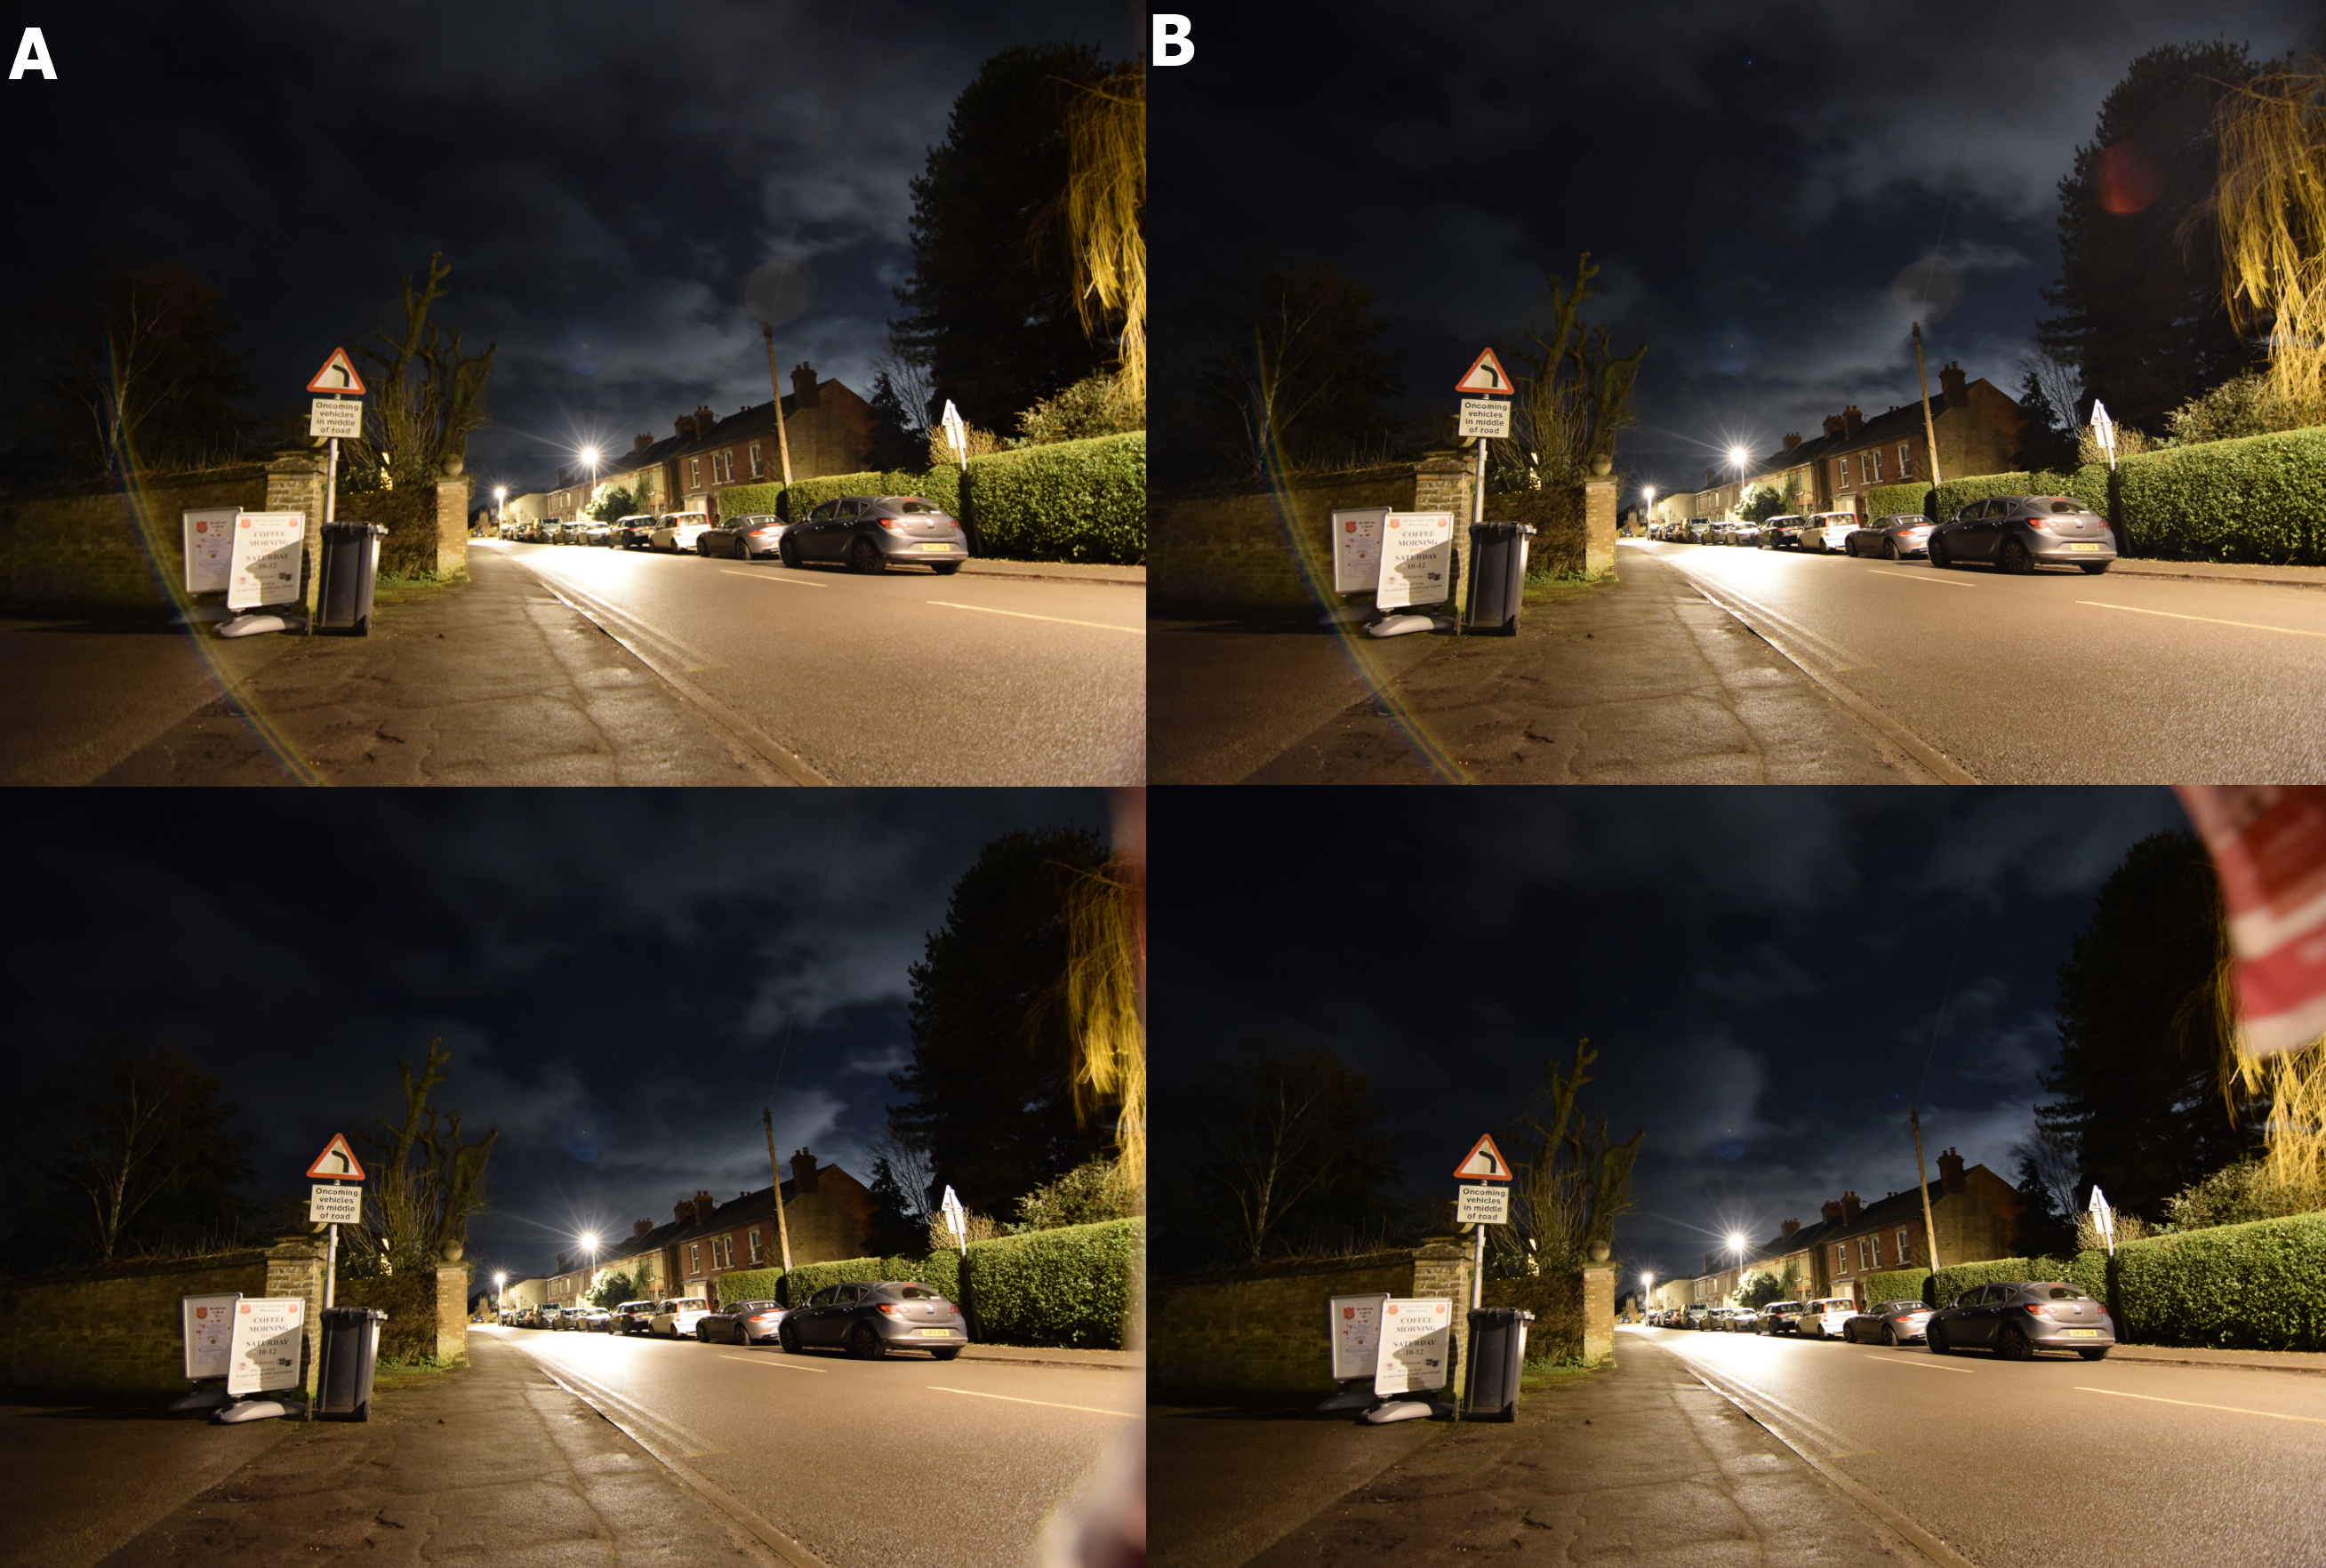
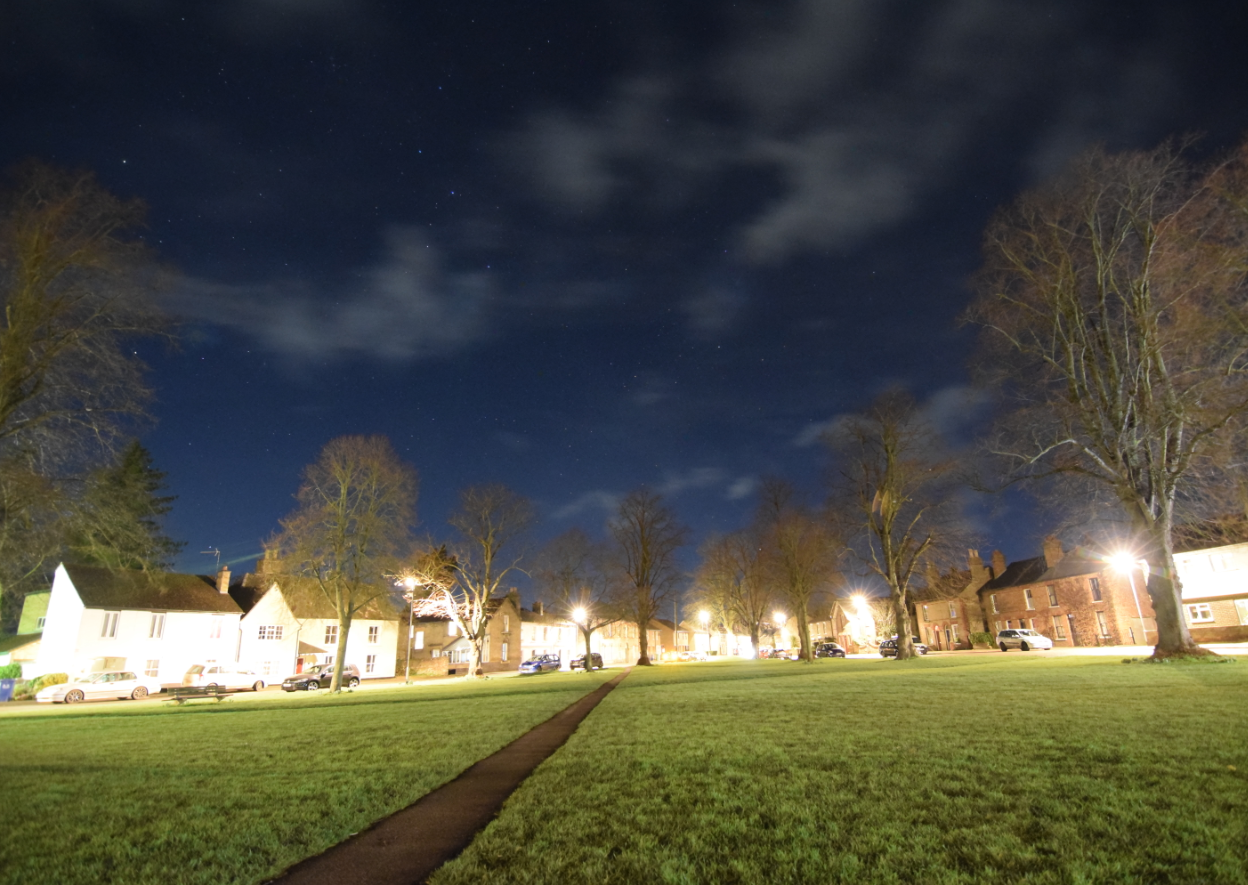
The altostratus clouds are too thin to prevent our image from the artificial signs marked by sunlight, which is still strong despite cloudiness. As a quick recap, I can say, that the flare problem in Tokina 11-16mm lens in daylight conditions isn’t big. The situation changes rapidly when the level of light drops in general and the contrast between the strongest source of light and the surroundings is more significant. It applies to the nighttime scene, which is illuminated by streetlamps in places or alternatively by Moon, as it is worse even the crescent one. In this event, I can say, that the flares are really awful, as you can see below. The change in focal length doesn’t really help.
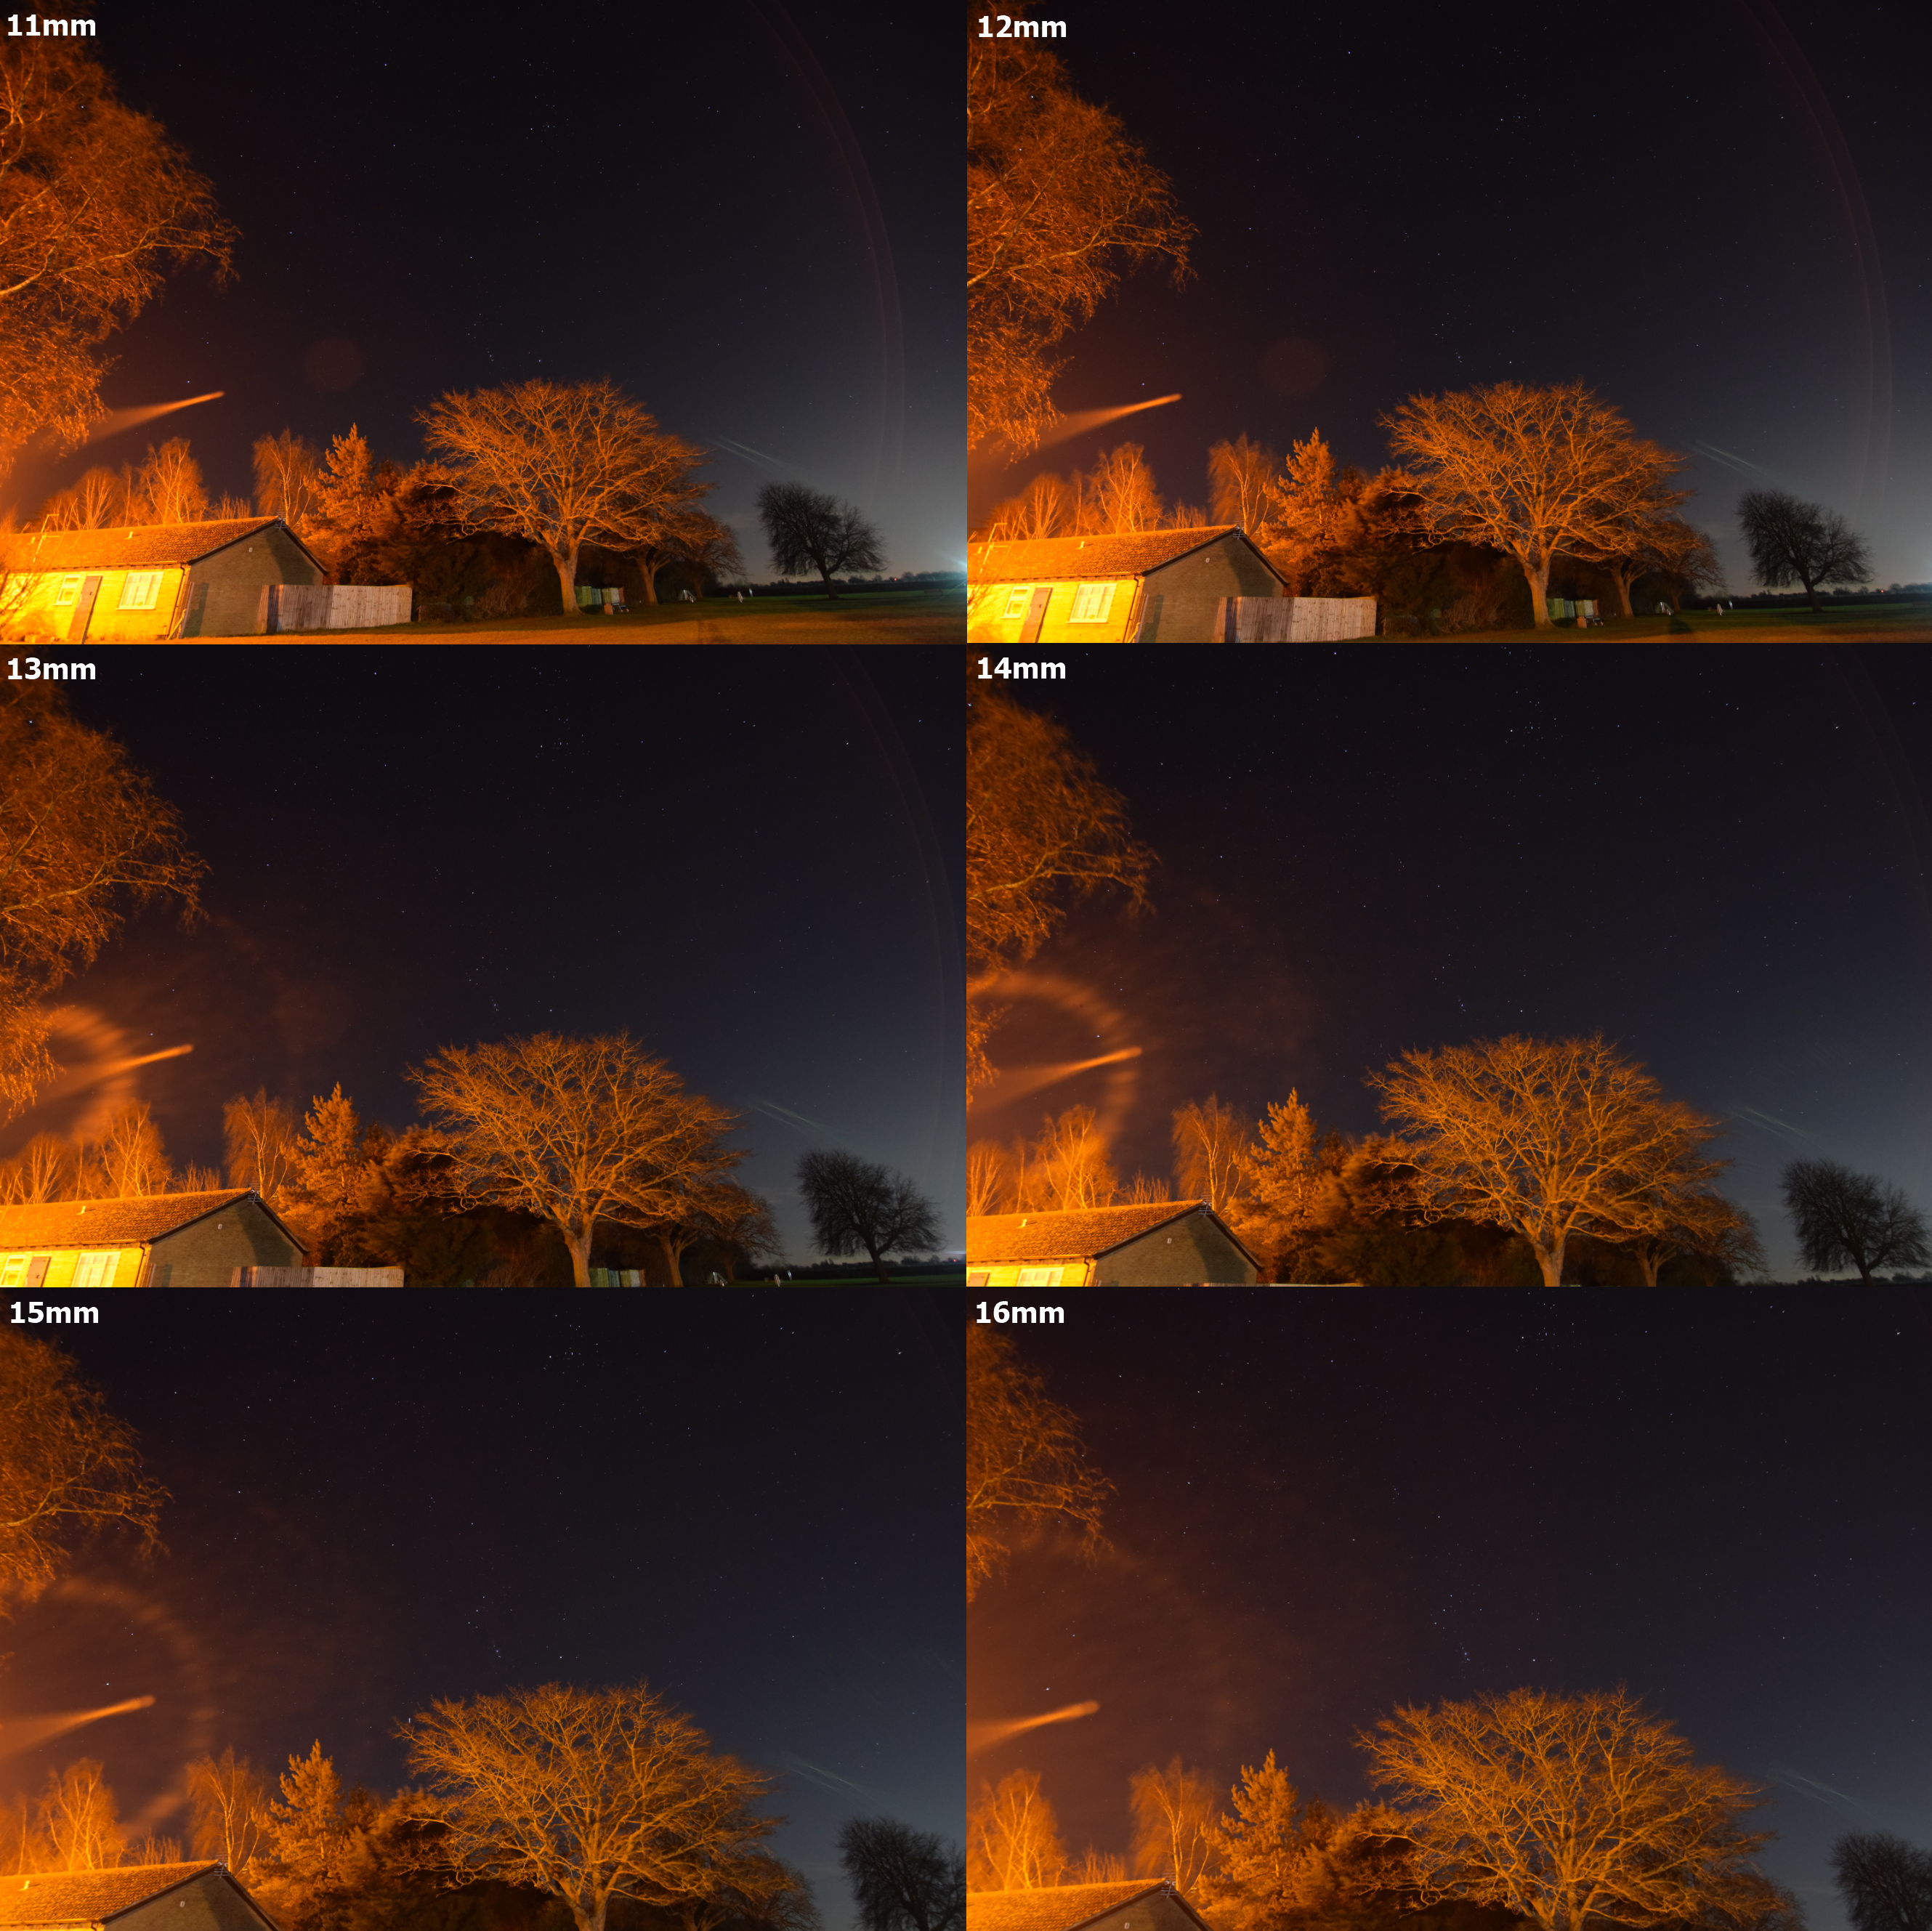
These artifacts remain the same after the exposure & ISO changes either.
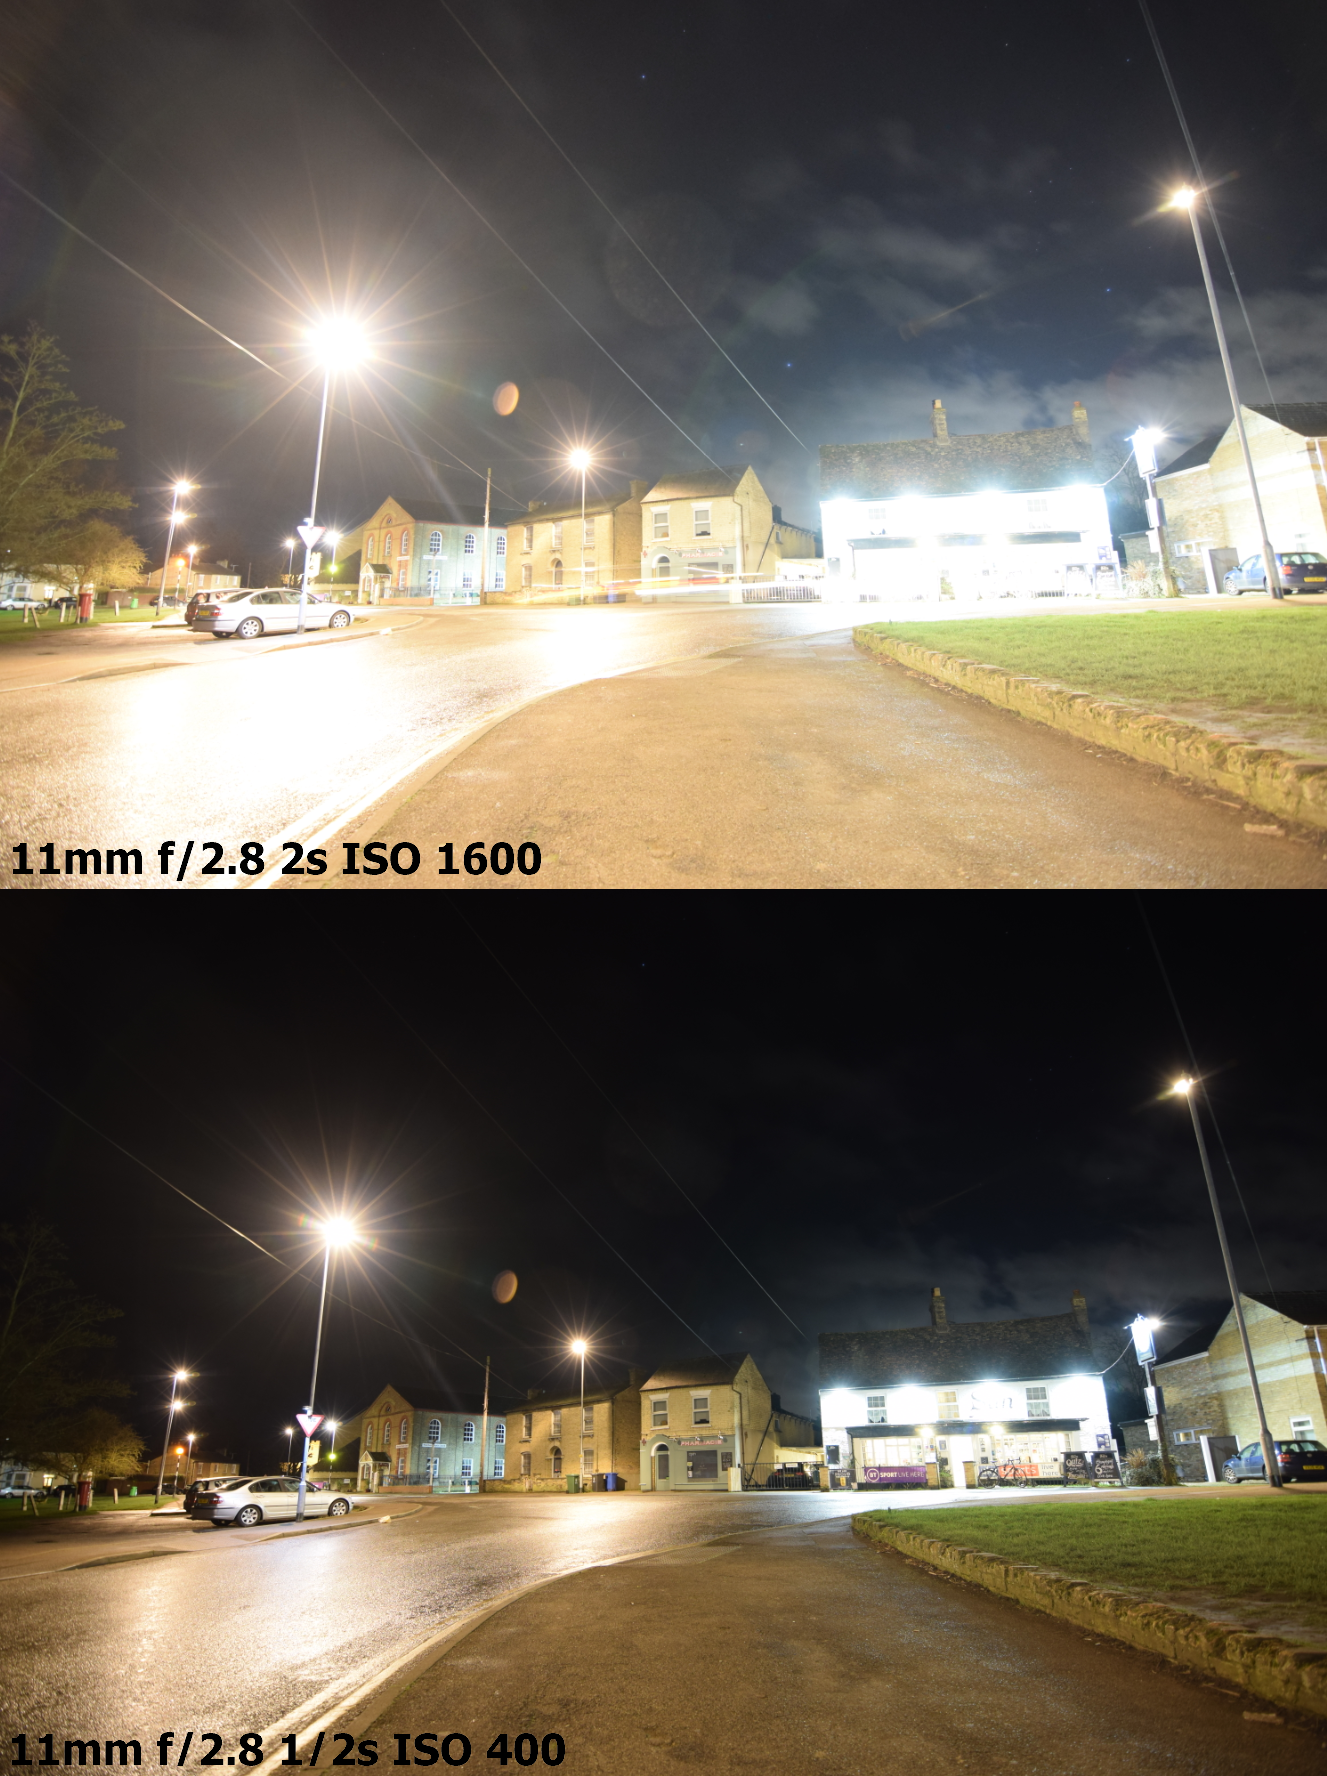
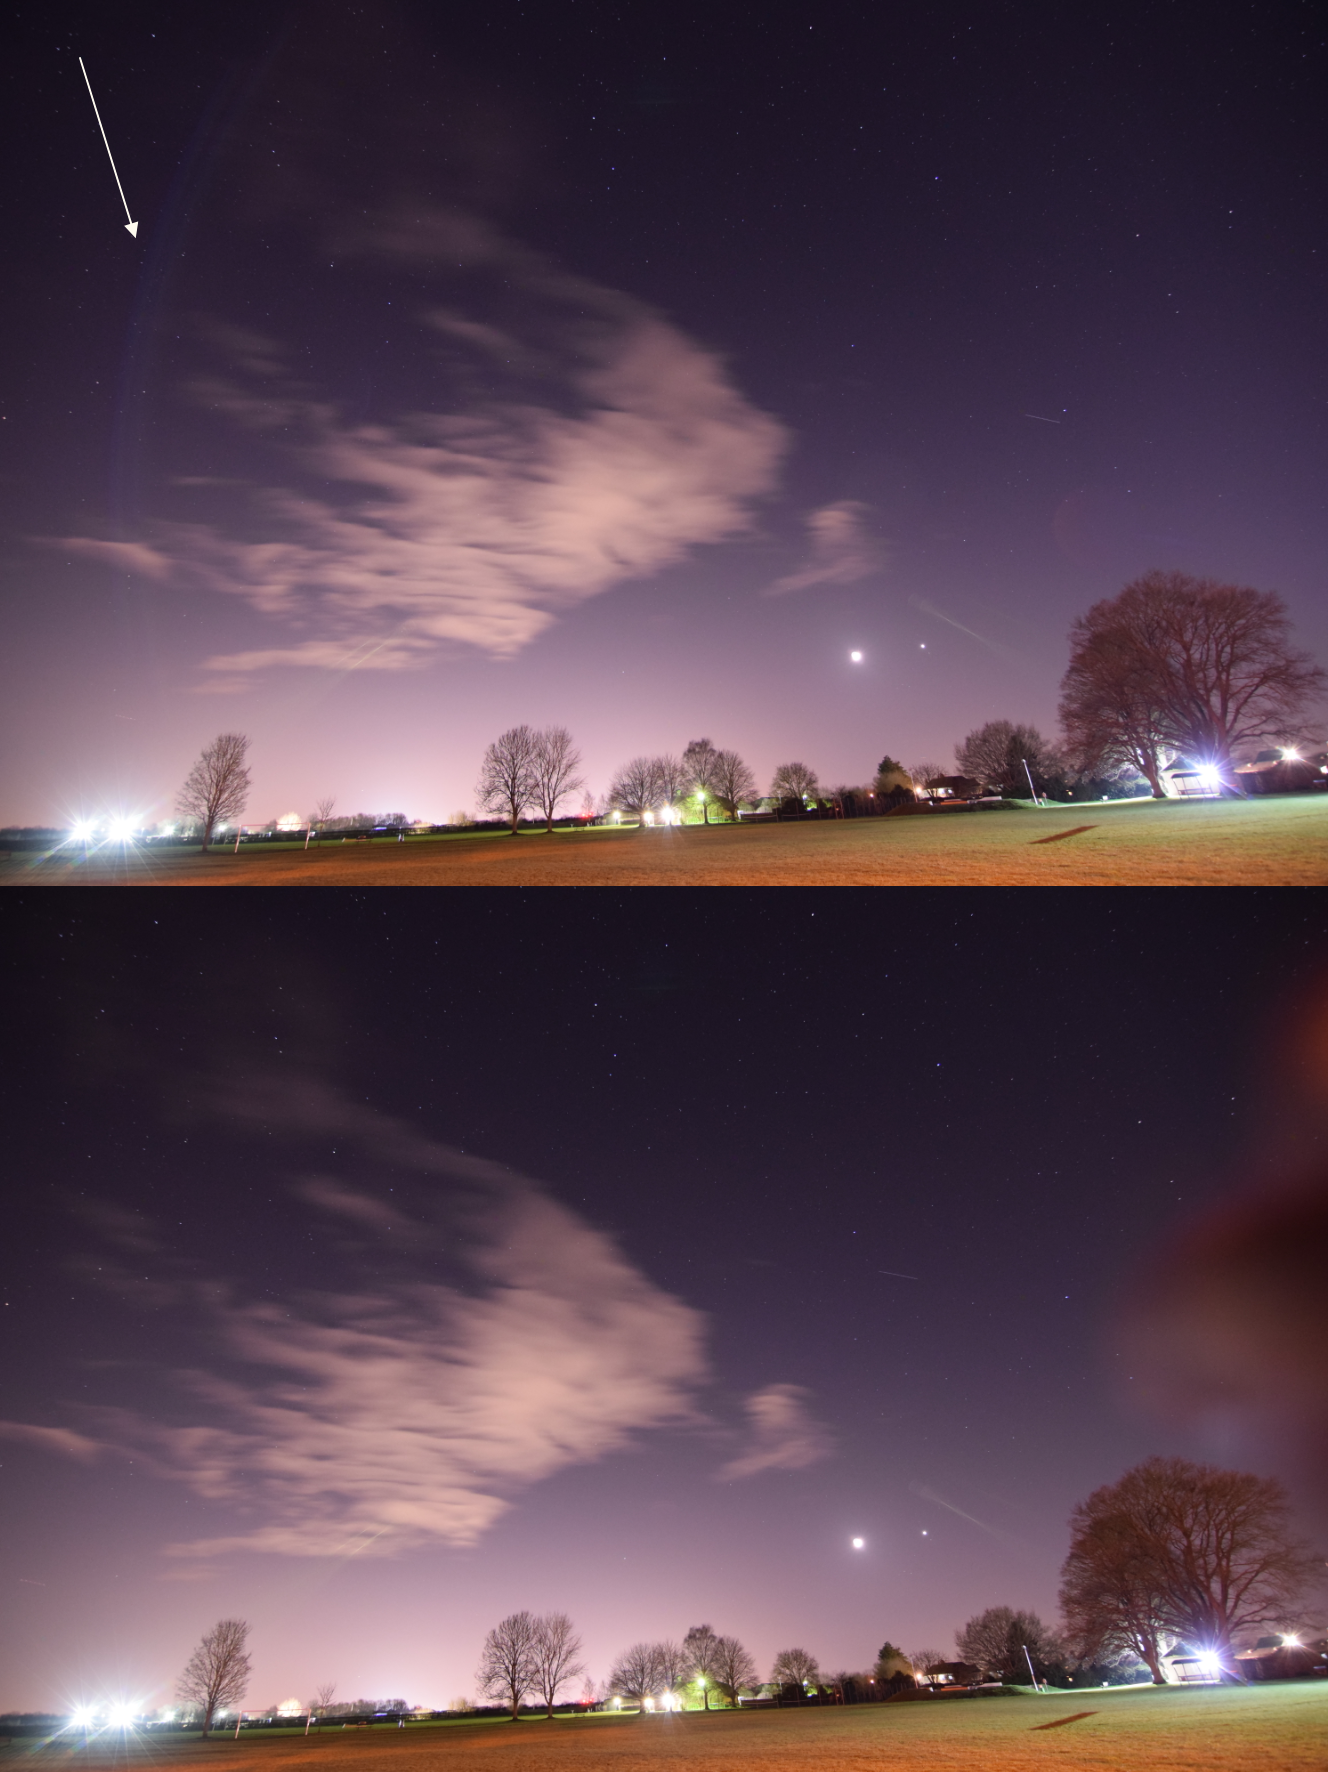
The angular distance from the source of light is important, but not that much, if we take into account, that flares are present even when moving our lens away, more than 90 degrees. The bigger focal length usually emphasizes these ghosts, as you can see below.

The flares can be caught, even when standing further from the streetlamp. Their shapes are different and tend to cover the image more globally.
The artifact can be caught even when the streetlamp is 60m away from us!
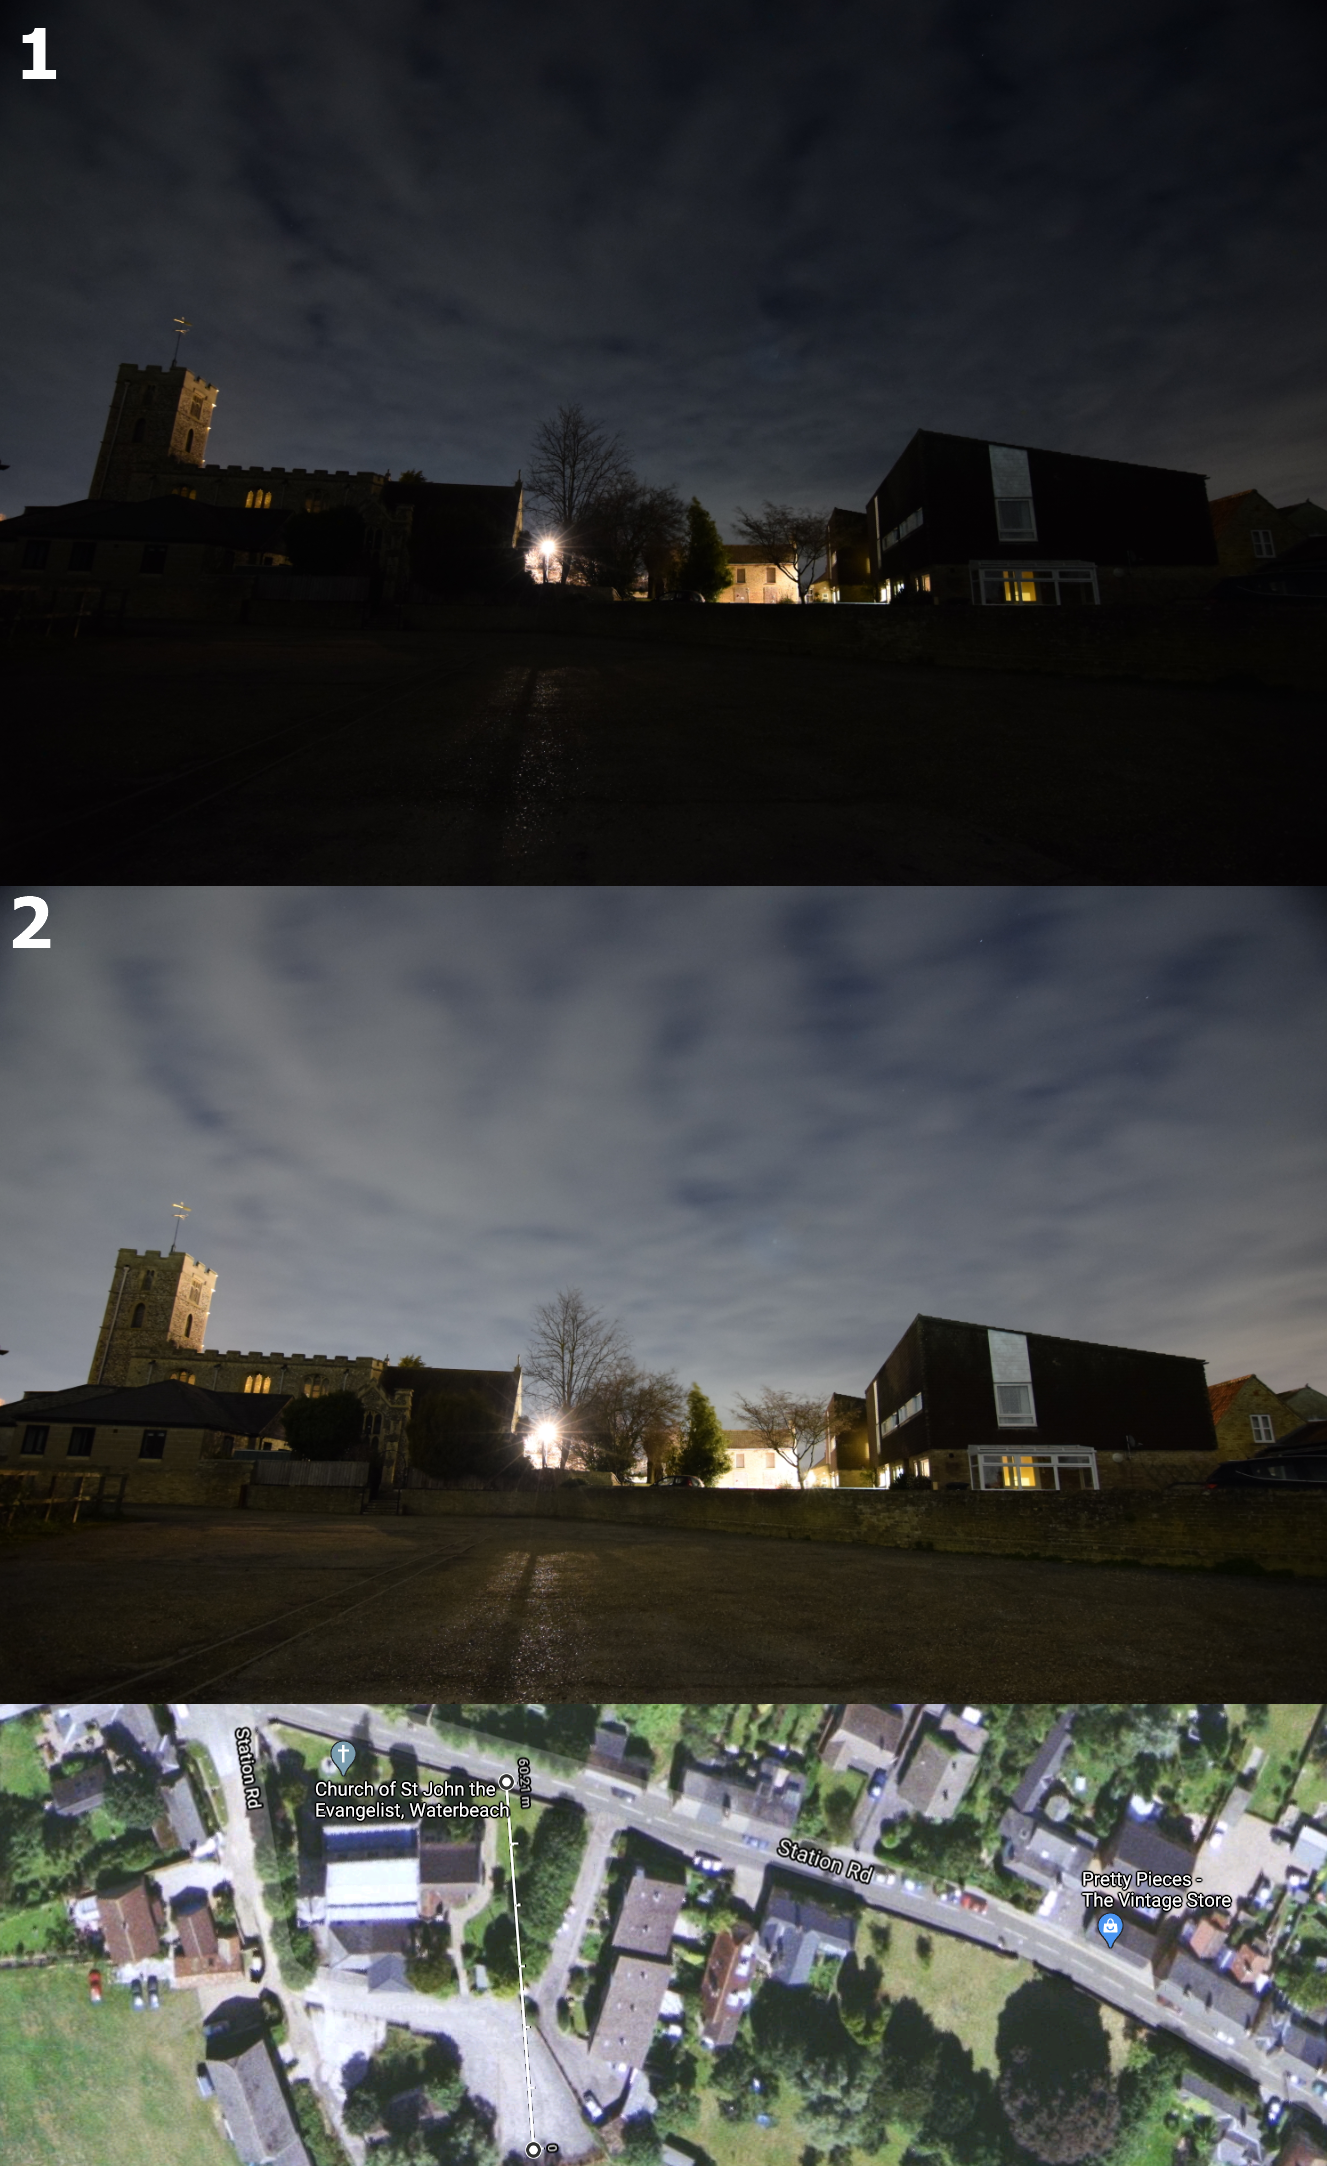
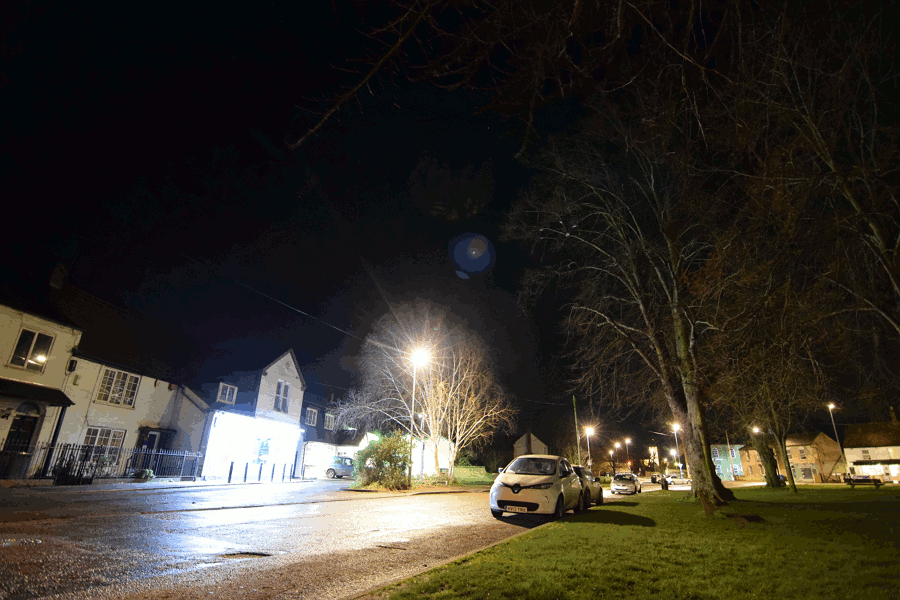
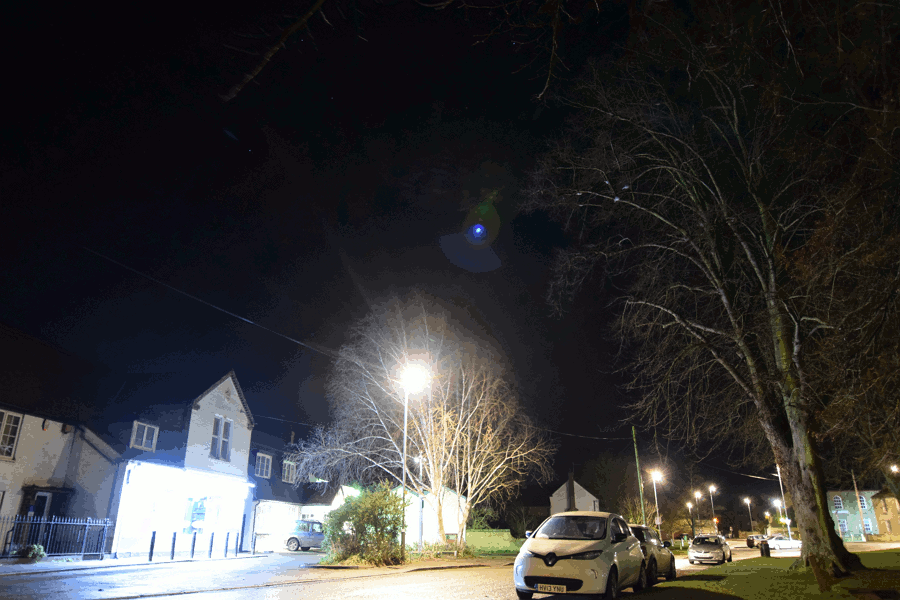
The wide presence of flares in Tokina 11-16mm can be really troublesome to prevent, even if the source of light is further from the photographer. In the village or the town, there is a multitude of streetlights, which results from various ghosts appearing in our image. It’s really hard to escape from them. Even if you manage to cover one side, the light can come from the other one and still deteriorate your image.
The best option to avoid the flares is to place our camera lens vis-a-vis some tree shadow. Even when the tree branches can hinder the light partially, the effect can be satisfying.
It’s no doubt, that the flare issue is the biggest flaw in Tokina 11-16mm f/2.8 DX II. It’s hard to avoid them, especially at night, when we want to photograph something in urban, illuminated areas. In this event, post-processing is definitely essential to keep the image clear.
7. GENERAL COMPARISON
I did the basic comparison only, using another 2 items, which I was fortunate to try. One of them is Sigma 10-20mm f/3.5 EX DC HSM, which in my opinion isn’t the perfect lens either. Compared to the Sigma, Tokina 11-16mm performs much better on the edges (Pic. 34,35) both in sharpness and aberration. Despite slightly different light conditions, when both images were taken, the difference in image quality is noticeable. The things, which differ between these 2 images below are direct sunlight and 11mm focal length in Tokina 11-16mm. Sigma’s image was captured when the Sun was outside of the frame and the focal length was 10mm.
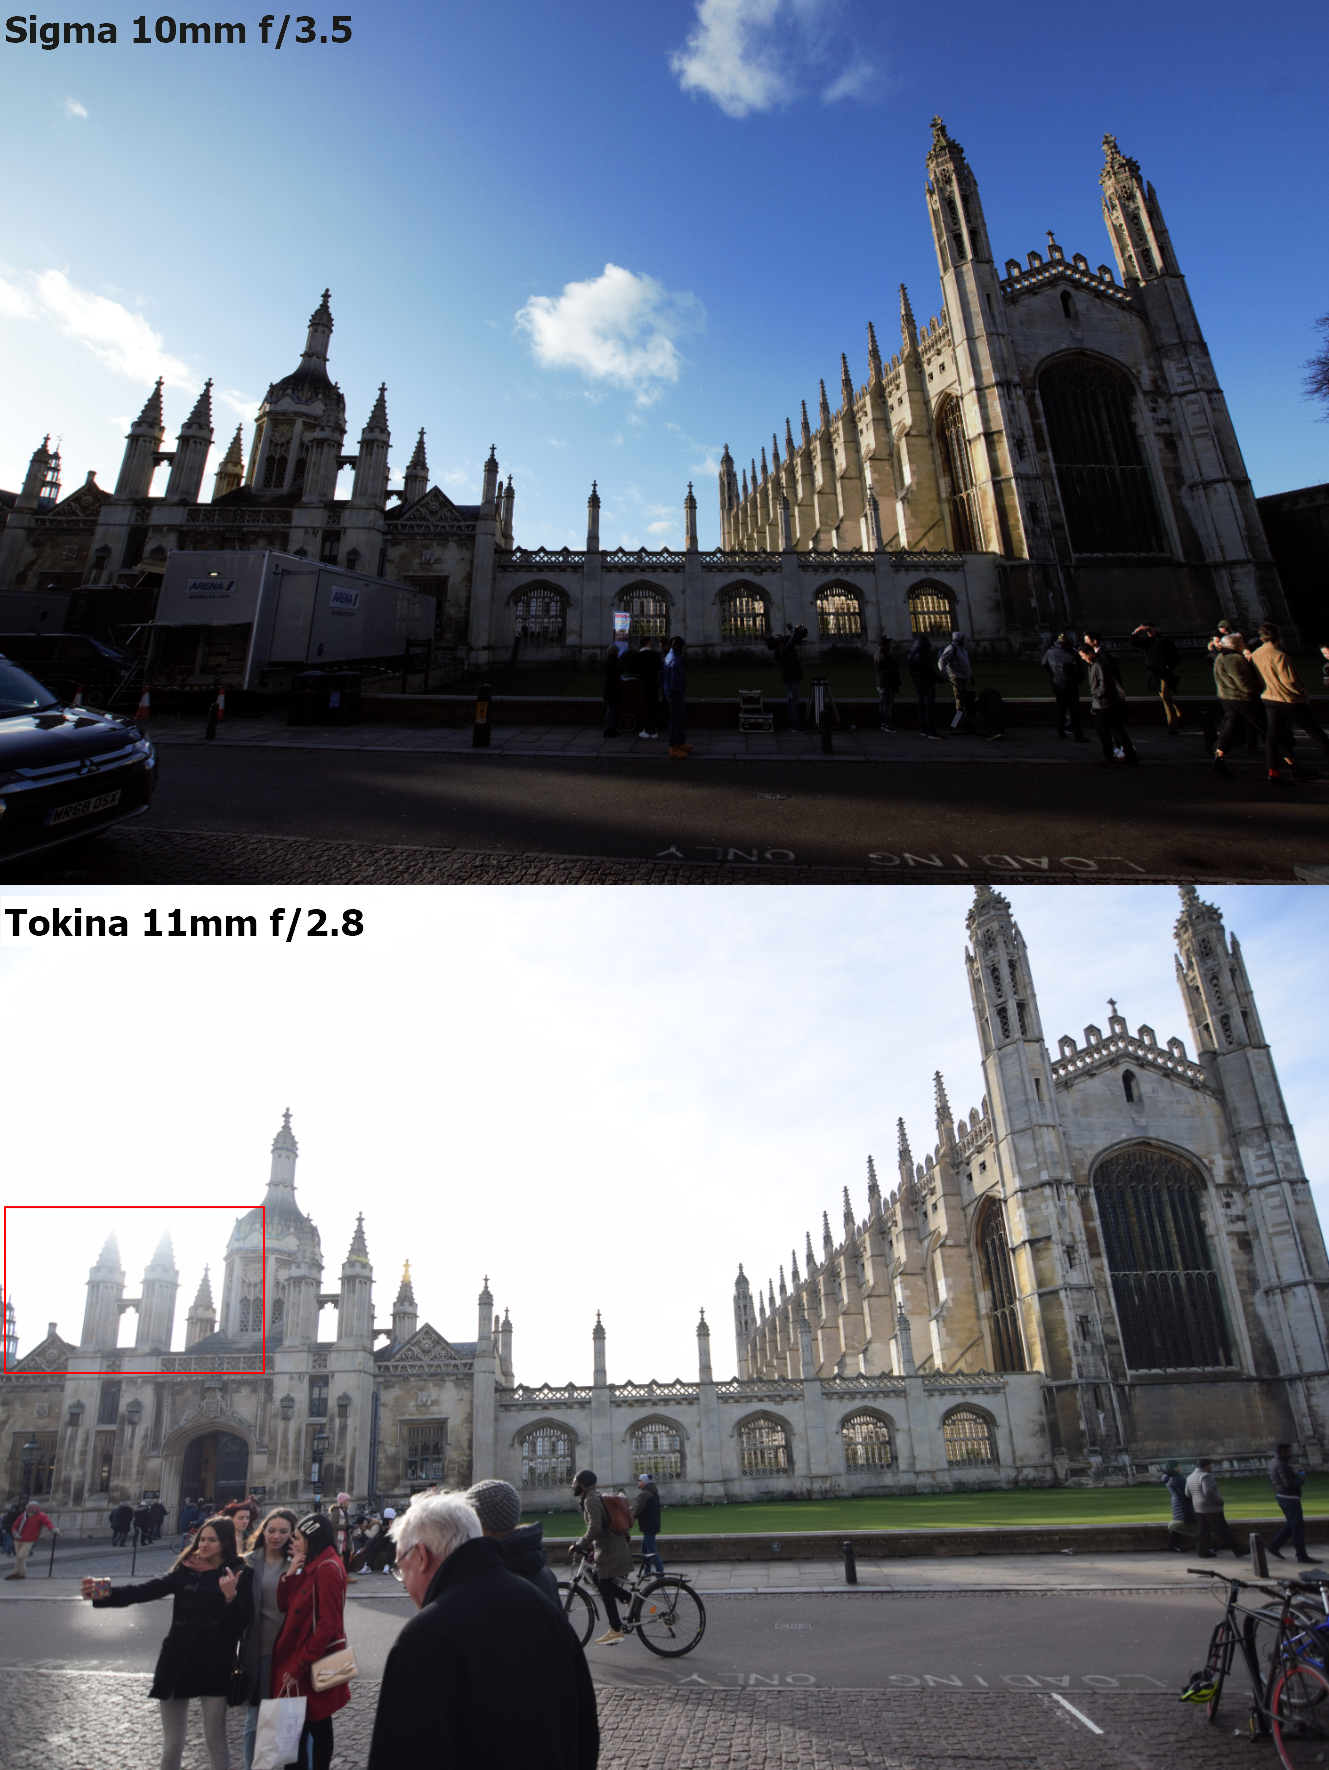
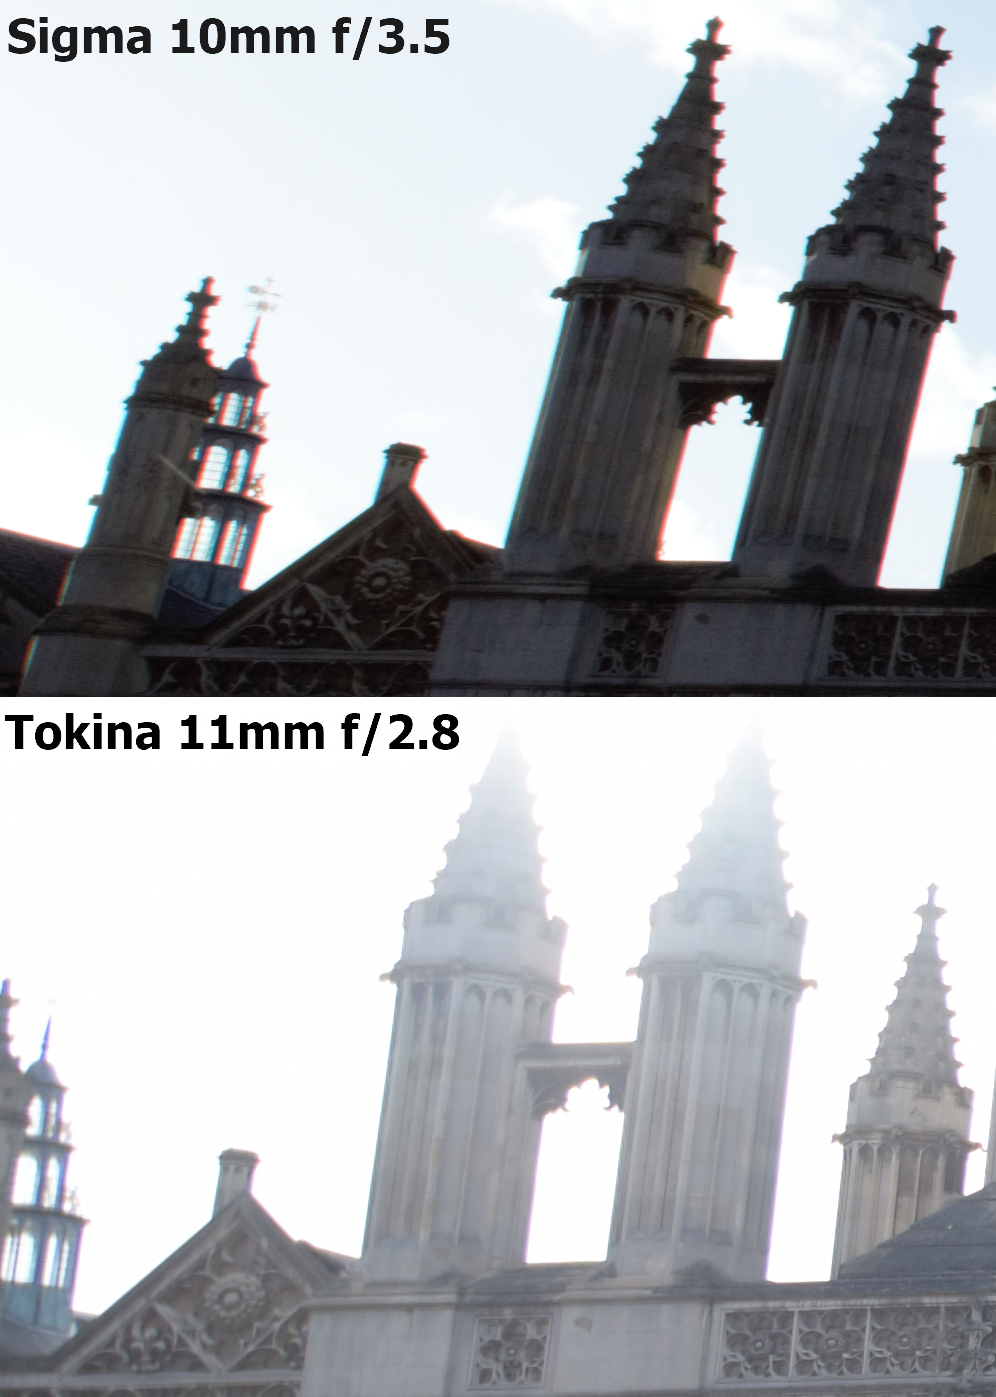
Admittedly the difference in focal length is considerable, but nevertheless, Tokina’s performance looks better.
My second benchmark was with the Mi 9 device, which features the wide-angle mode. In this situation, there is no doubt, that Tokina 11-16mm f/2.8 has much better performance, but not always. It’s an implicit situation, as we compare the DSLR lens to the electronic device. However, It’s good to know it is out of interest.
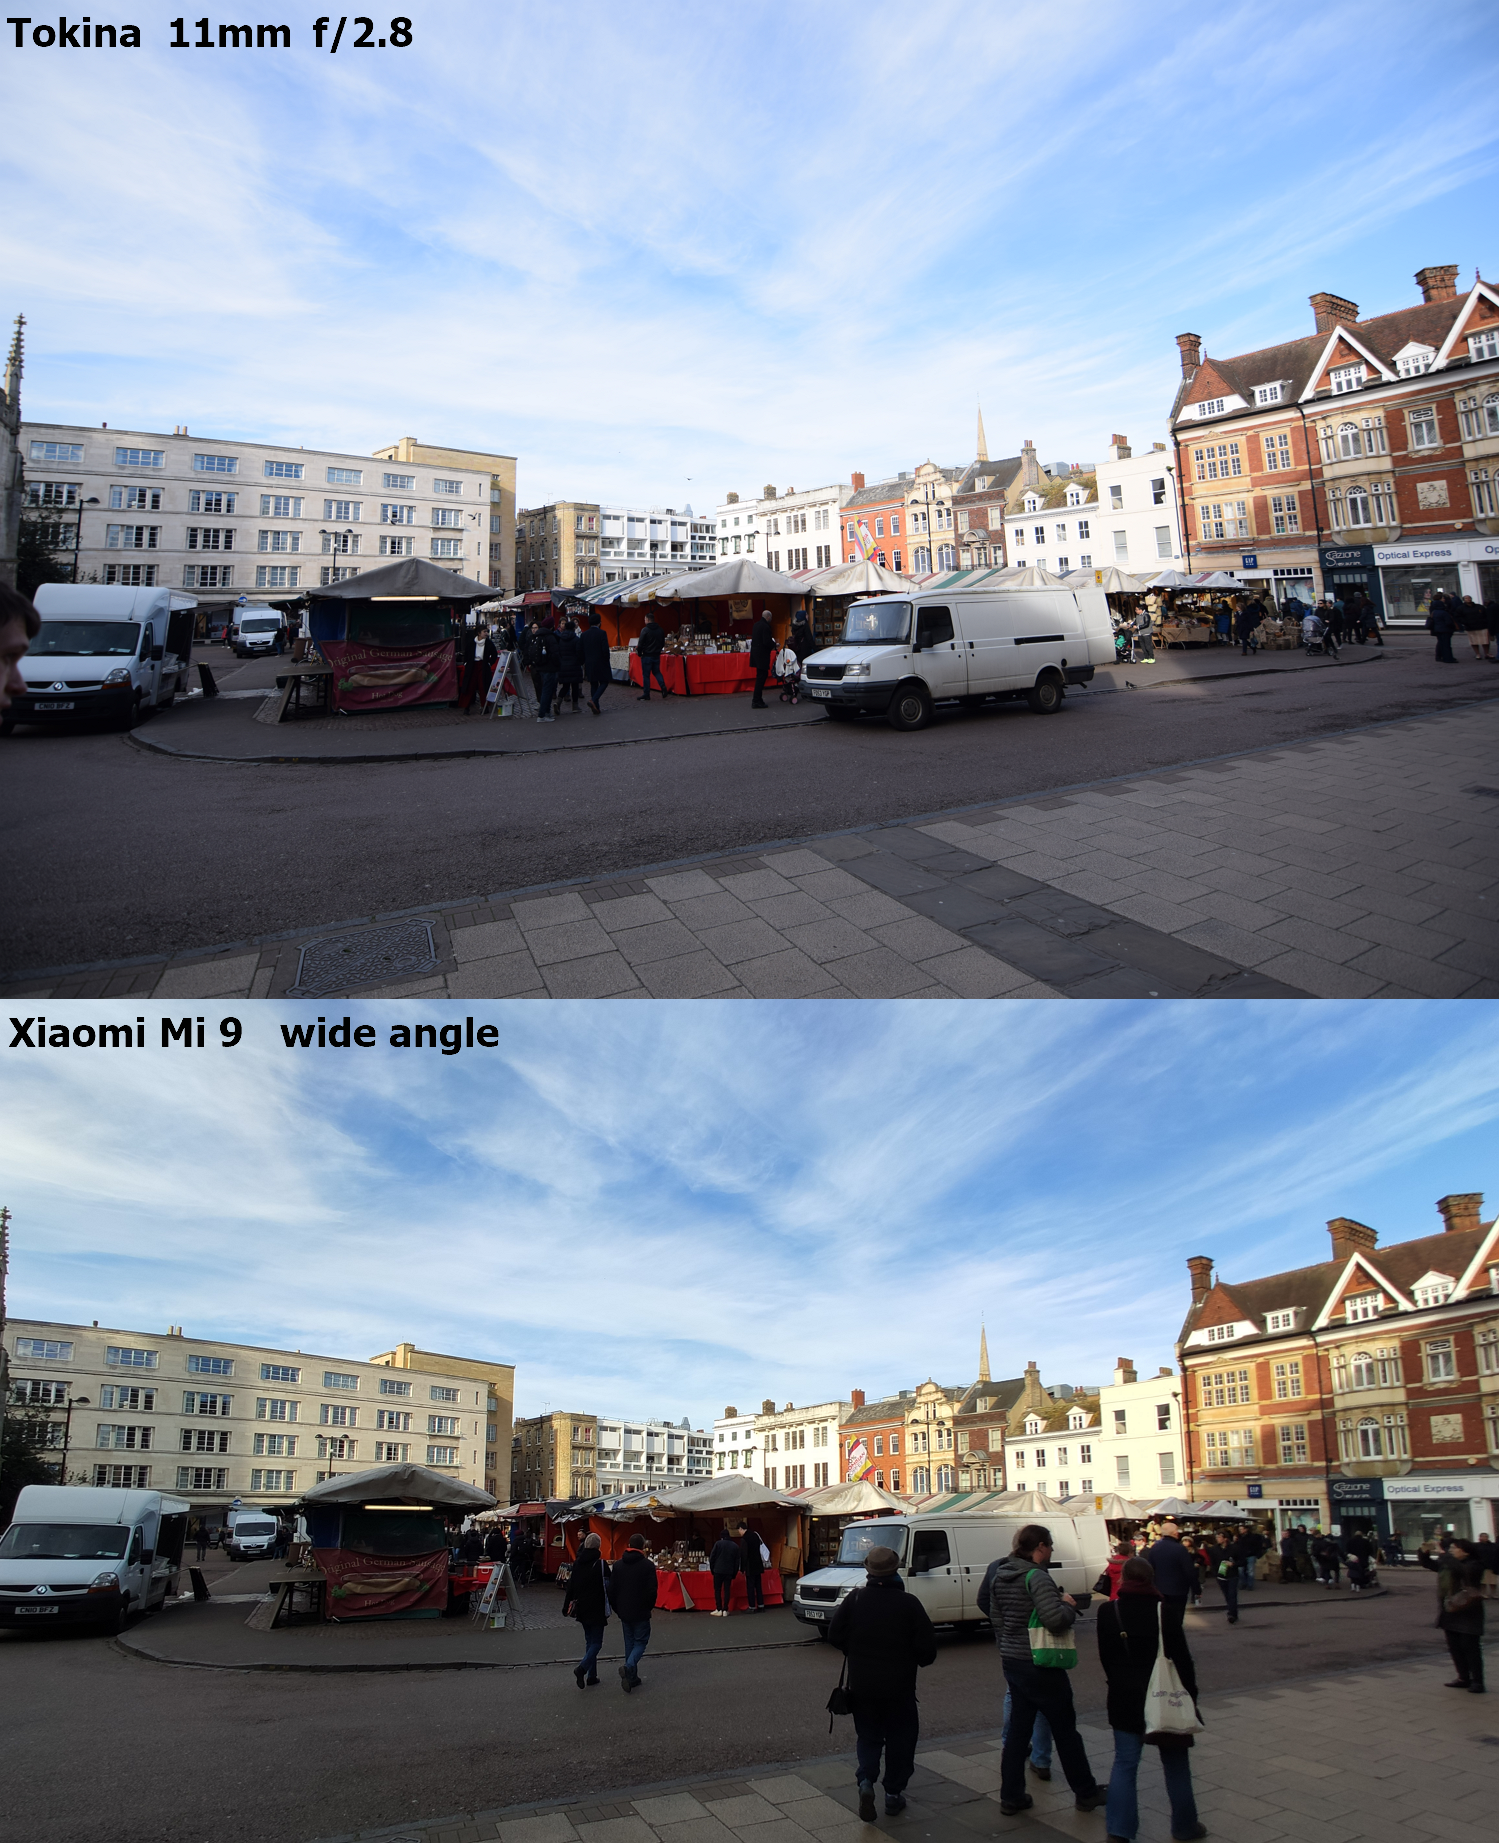
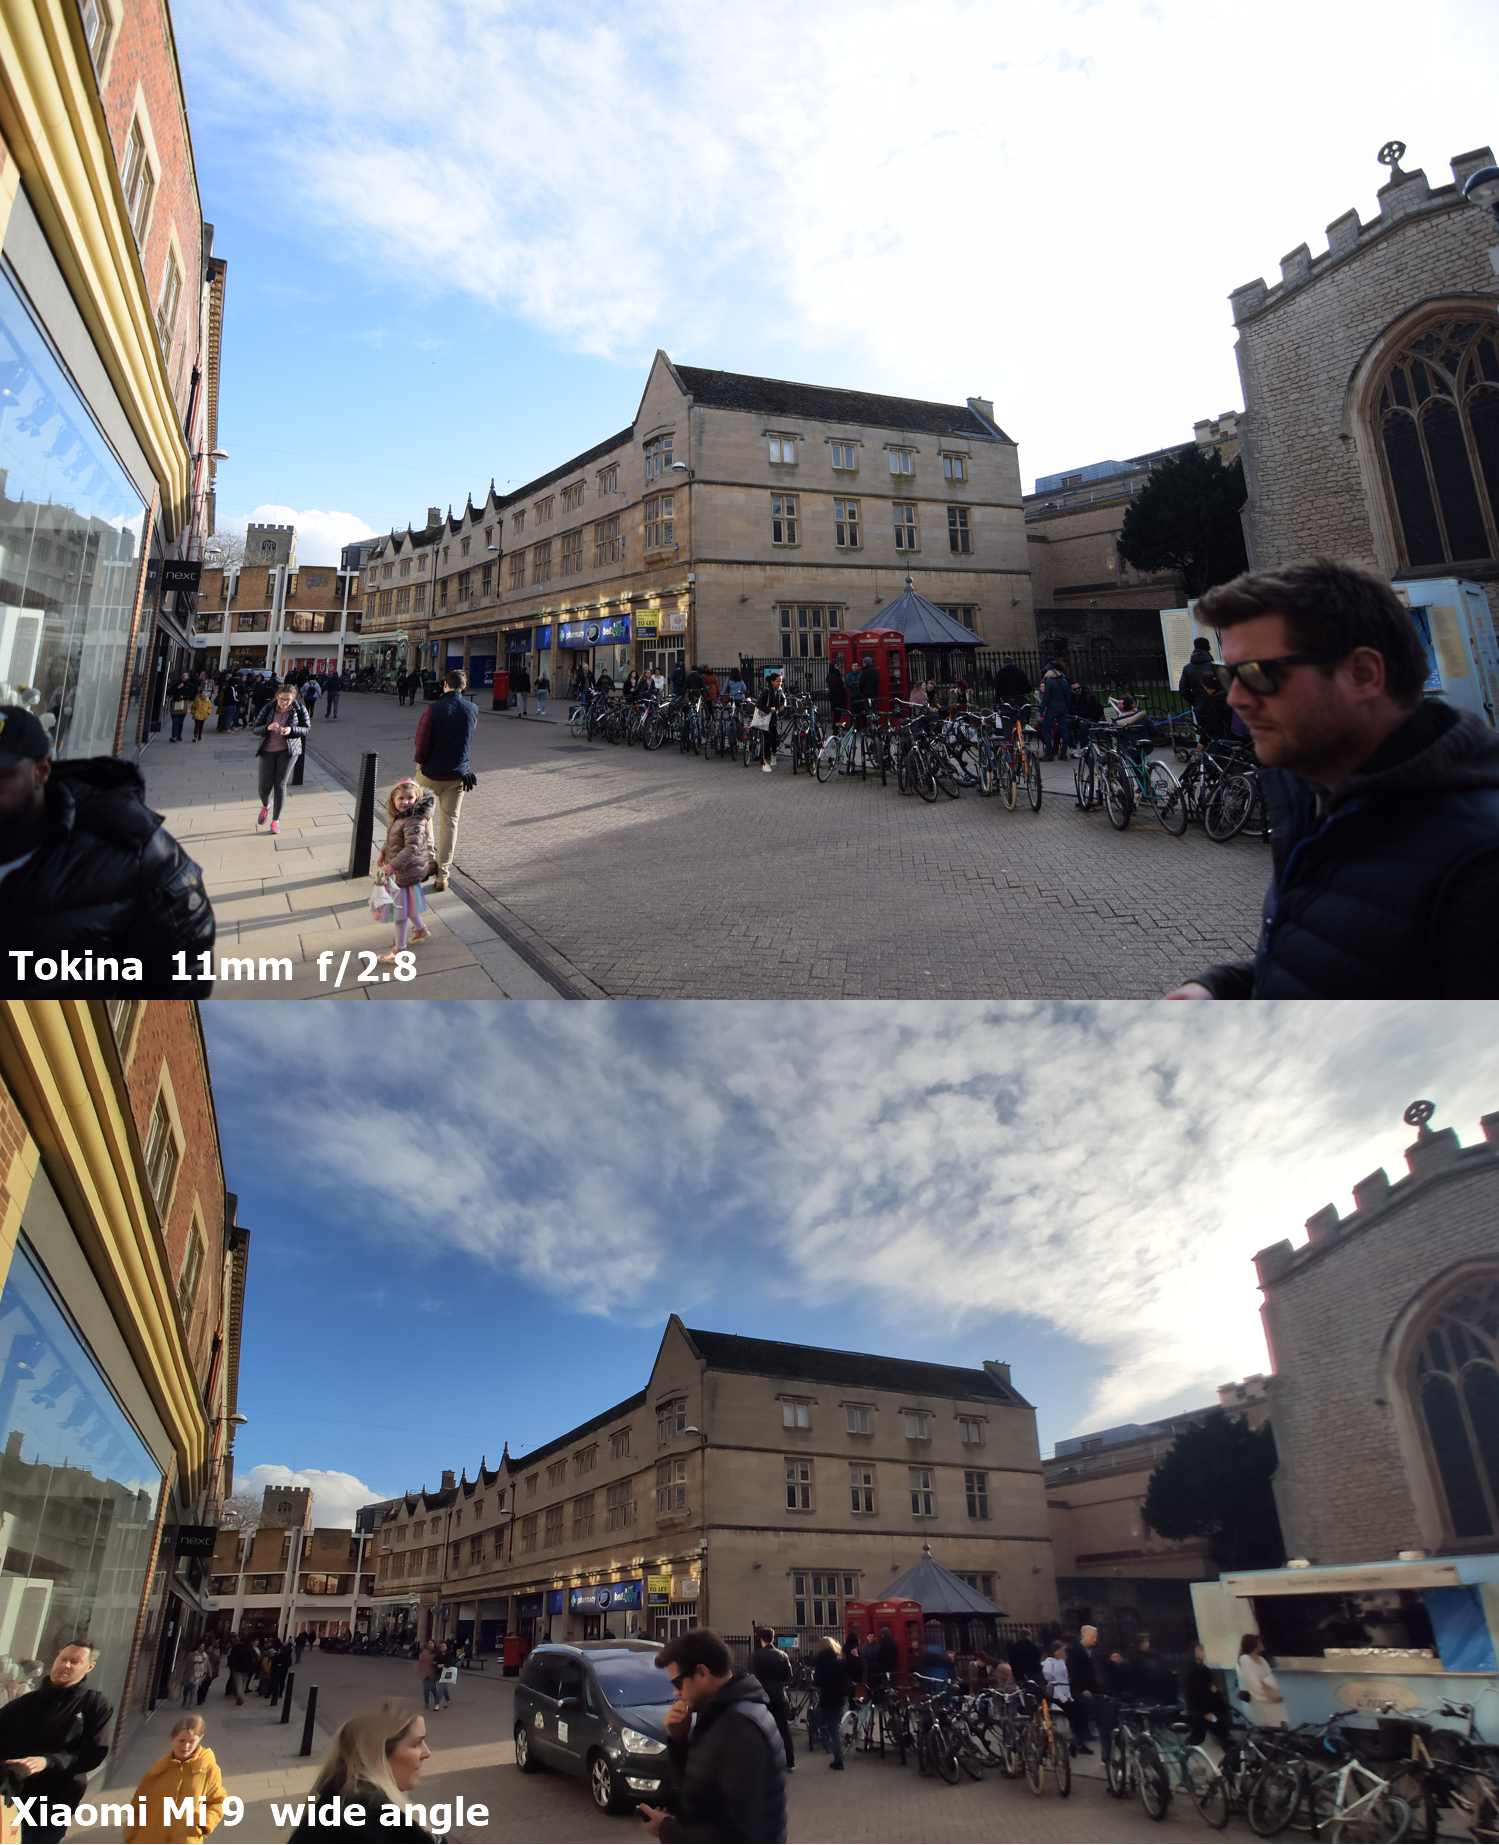
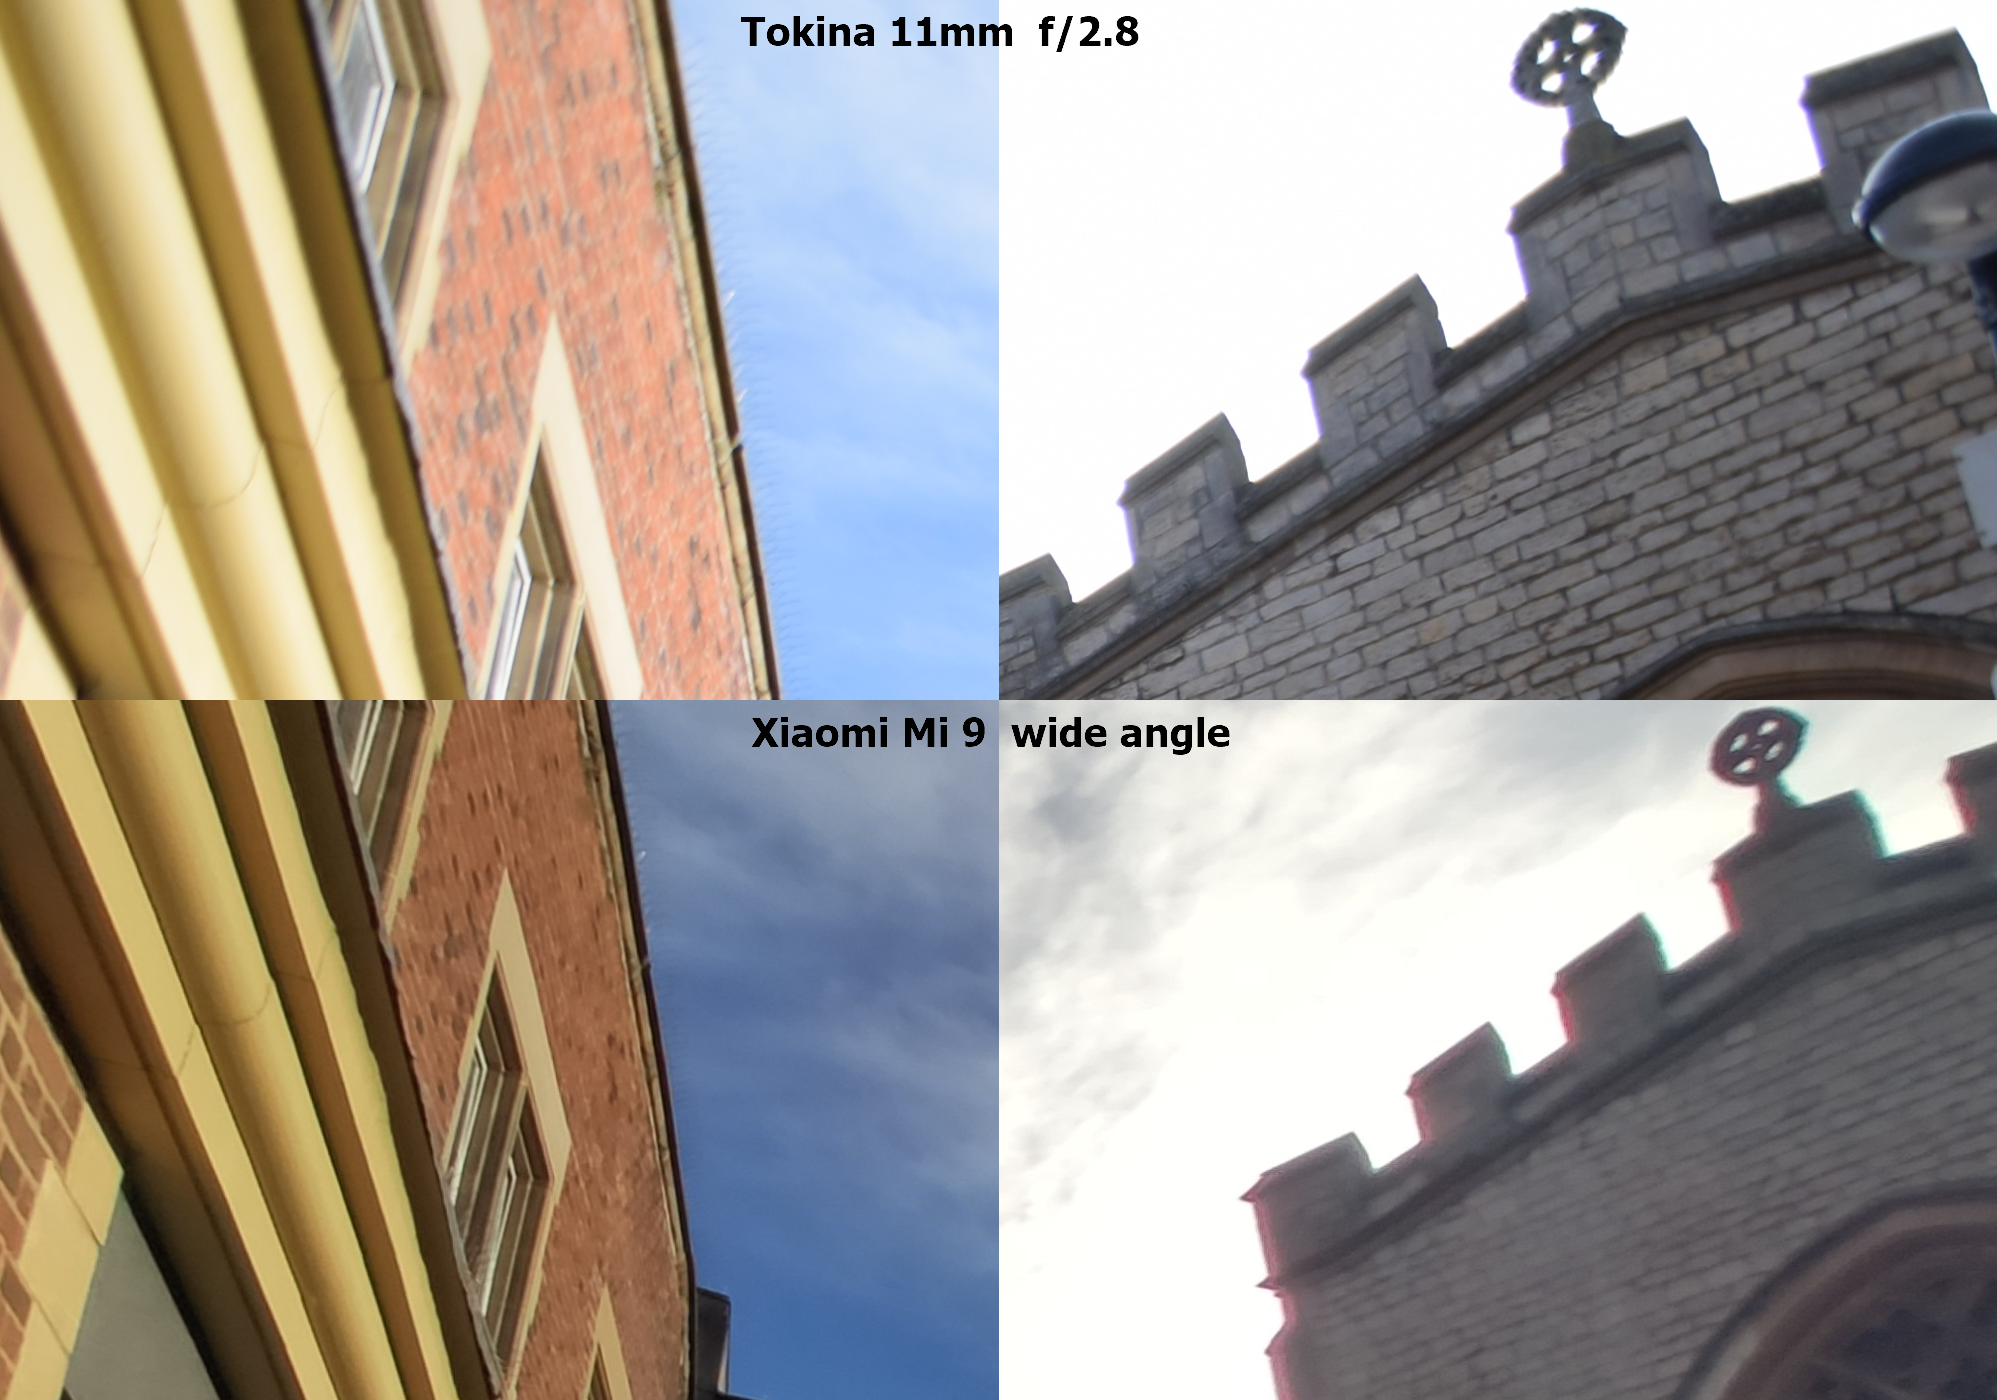
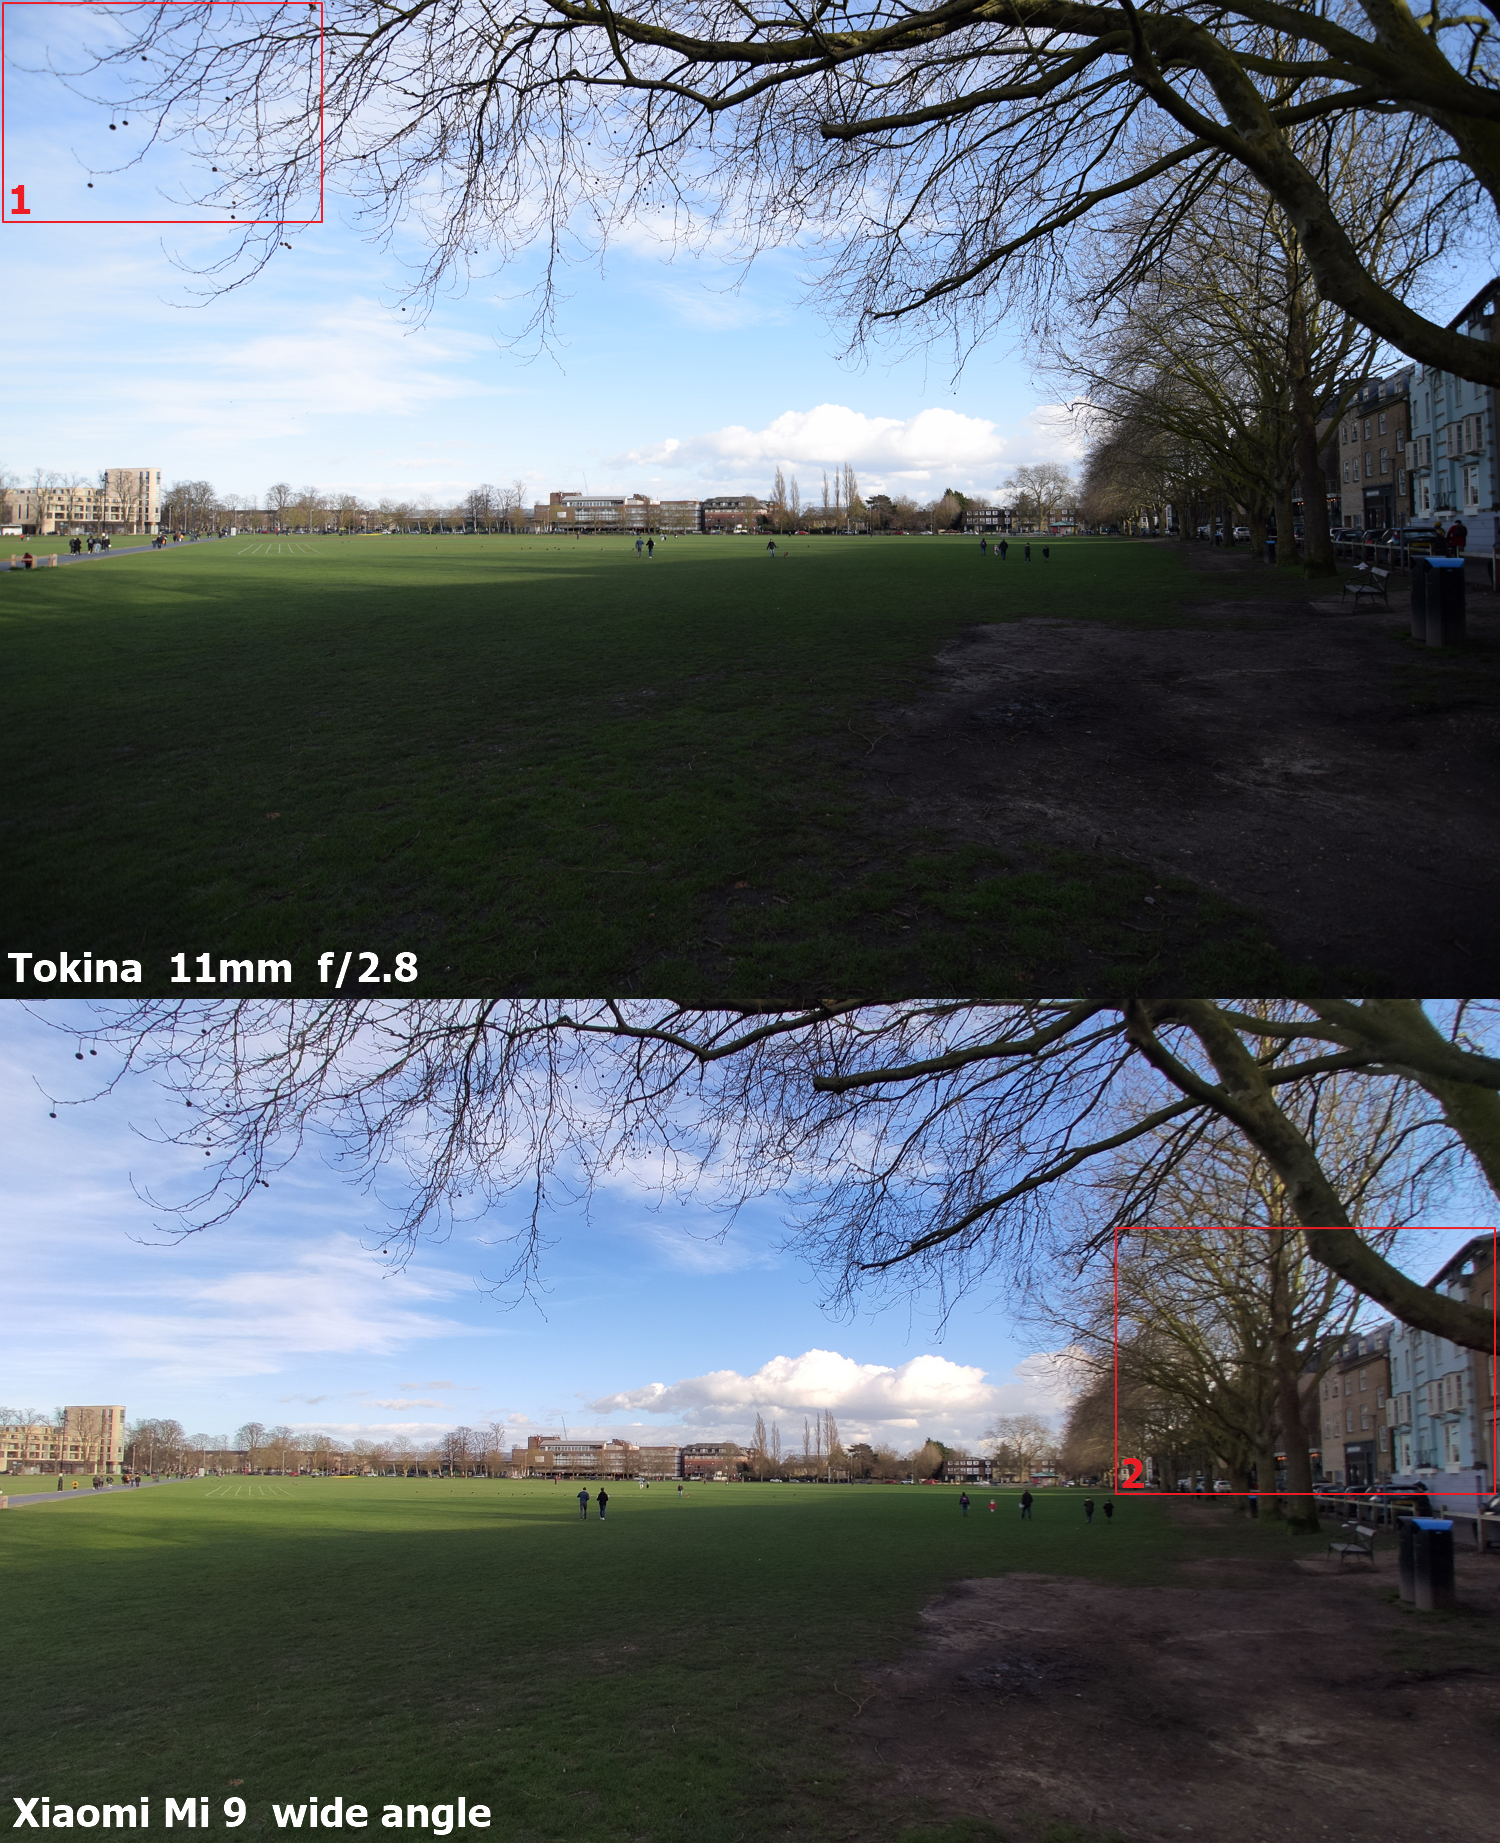
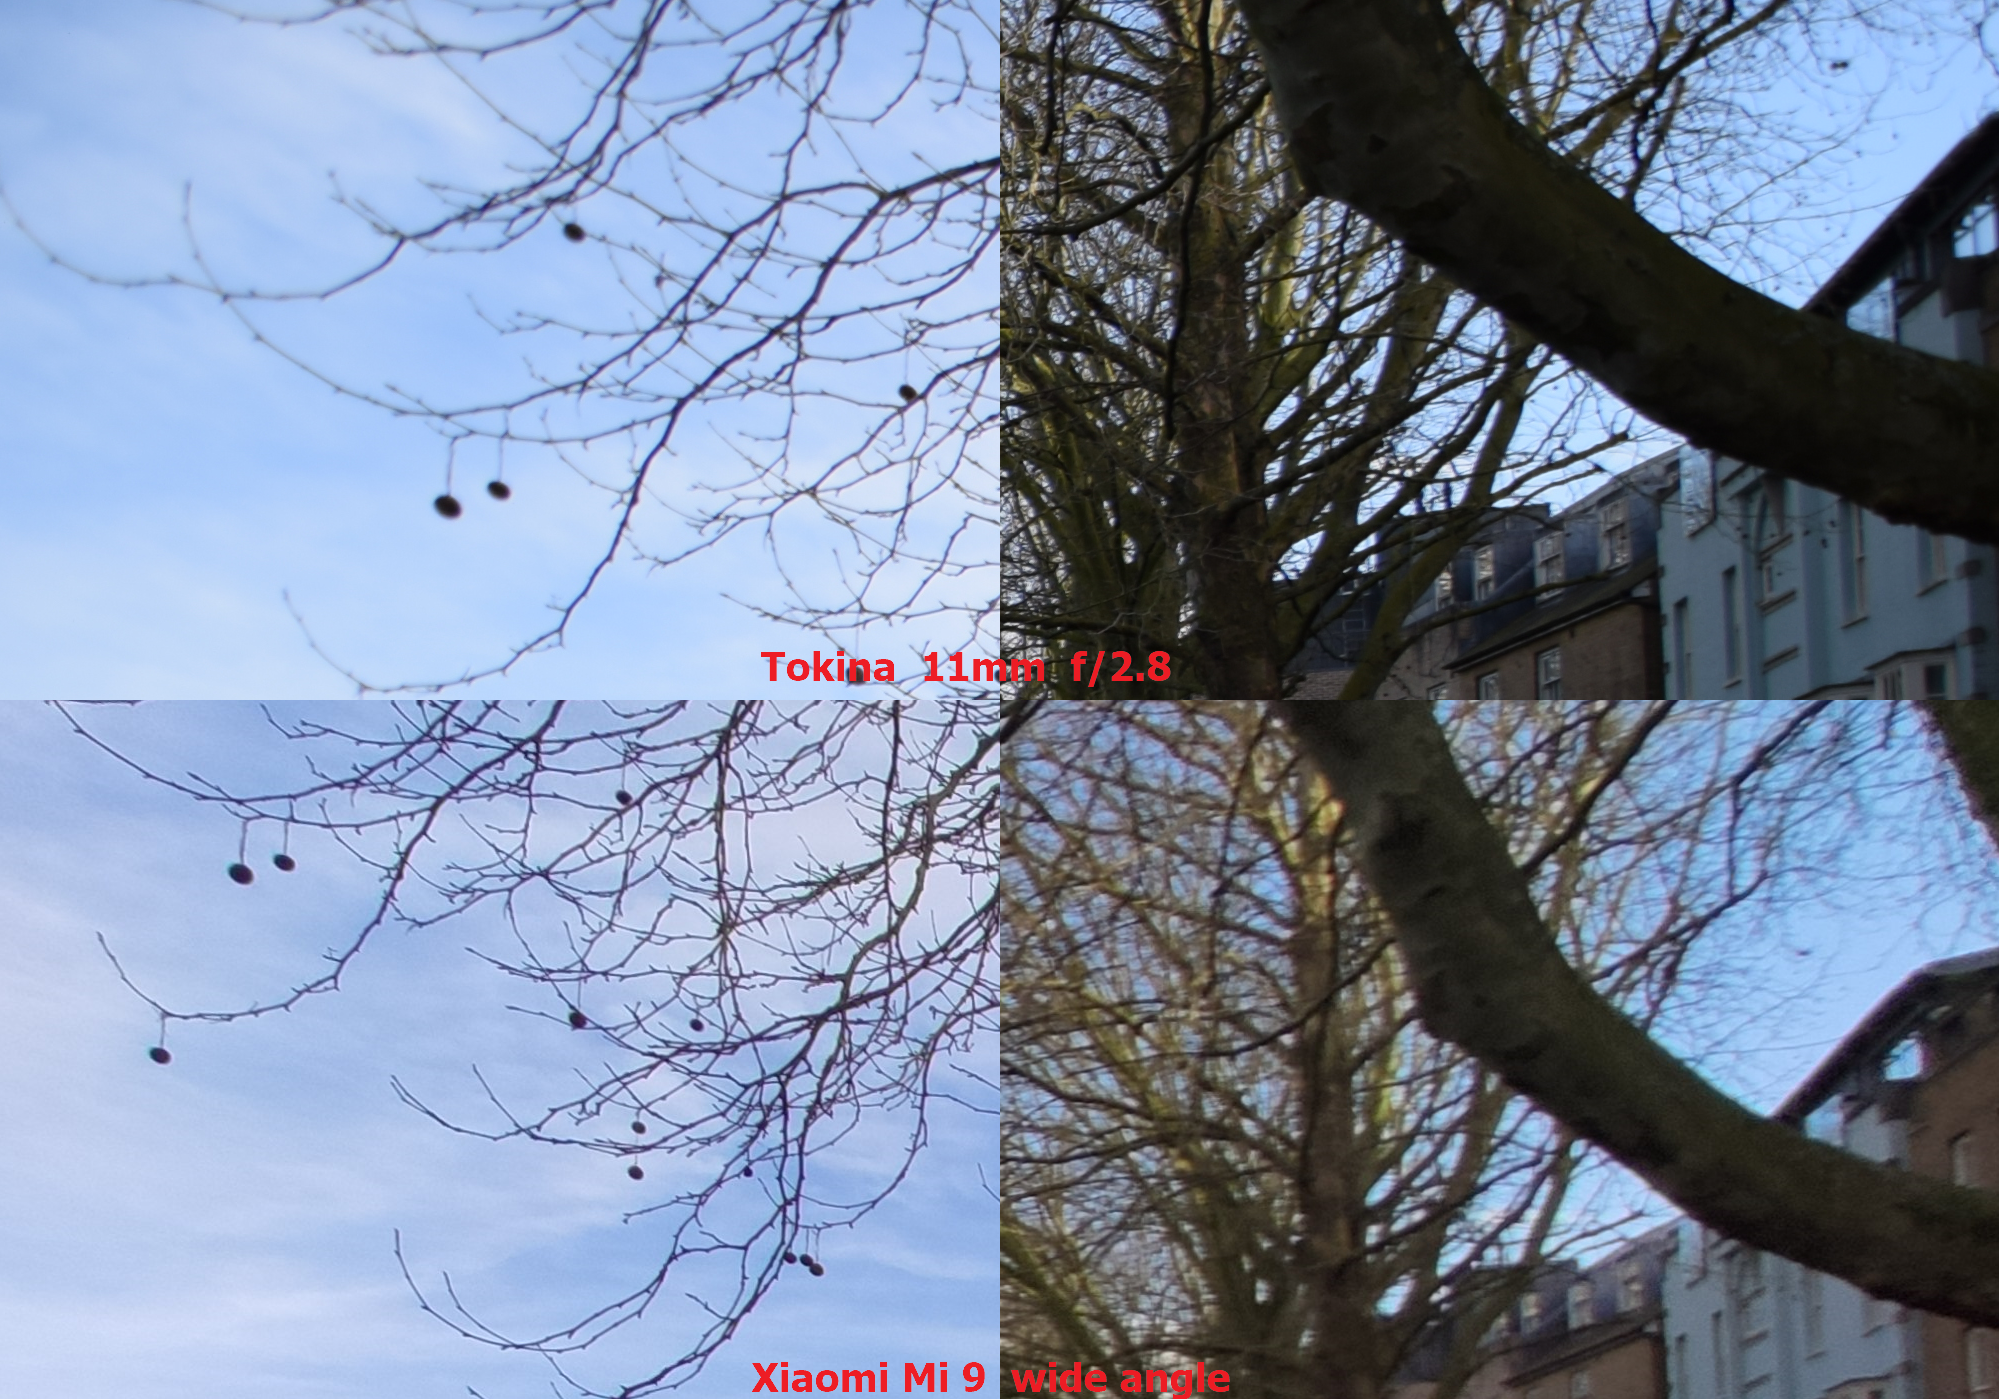
I found an interesting issue. In the top left corner, the sharpness in Tokina 11-16mm f/2.8 DX II is even worse, than in Mi 9 wide-angle mode.
8. SUMMARY AND EXAMPLE IMAGES
Despite serious flaws, which the Tokina 11-16mm f/2.8 DX II lens has I think, that it still remains the best lens in the ultra-wide-angle environment. My suggestion is based on the wide aperture and small focal length at once. Most of the ultra-wide-angle lenses in this range don’t feature as wide an aperture as the Tokina 11-16mm does. On top of that even if the aperture is more narrow, the image quality at the edges can be still out of question, what you could see on the Sigma 10-20mm f/3.5 example. If you want some alternative to Tokina, you must look around the 14mm focal length, which is the lowest for other lenses with wider apertures. The 14mm field is not as wide as 11mm, unfortunately. However, the wide aperture in Tokina 11-16mm results in poor sharpness at the edges, unfortunately. In the most extreme cases, even some crops can be required, which is a total contradiction of this choice. Fortunately, the level of sharpness deterioration is not high at the edges in the middle of the image, but in the corners only. The appearance improves for apertures narrower than f/3.5 – the value, from which most of the ultra-wide-angle lenses start from.
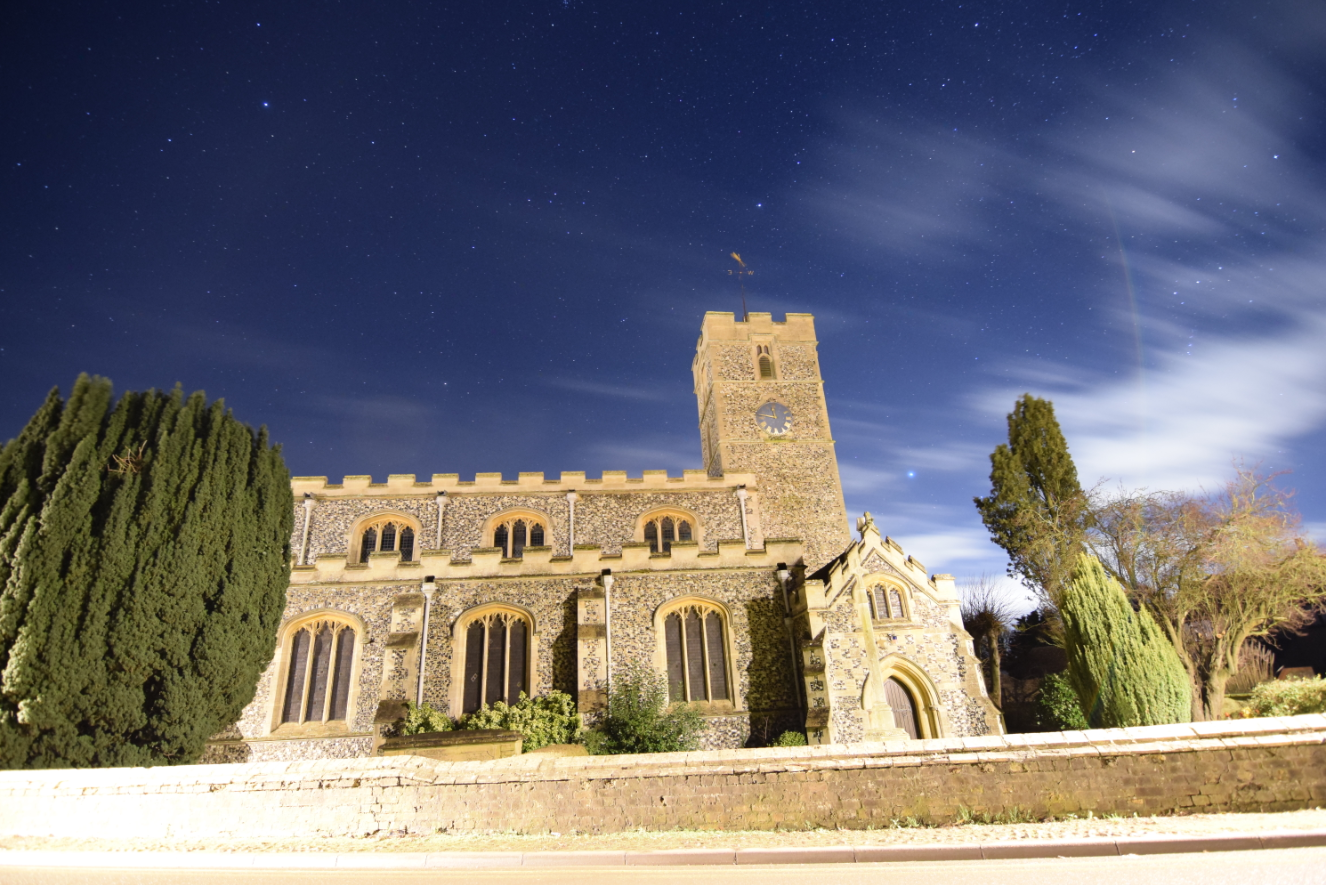
I hope, that this amateur test of the Tokina 11-16mm f/2.8 DX II lens gives you slightly bigger clarification than the majority of tests available on the web, where attention is paid to other points. I didn’t want to bombard you with the specific optical and photographic terminology, because I believe, that you would rather see this lens in action. At the very end, I would like to share some example images with you.

Mariusz Krukar
Links:
- https://photographylife.com/what-is-distortion
- https://www.kenrockwell.com/tokina/11-16mm.htm
- https://expertphotography.com/what-is-lens-distortion/
- A brief overview of lens distortion correction
- Ephotozine.com:Tokina-af-11-16mm-f-2-8-at-x-116-pro-dx-lens-review
- http://www.bobatkins.com/photography/technical/diffraction.html
- Tokina 11-16mm Distortion Test
- https://www.camerastuffreview.com/en/tokina-11-16mm-review-nikond3200/
- https://clickitupanotch.com/lens-distortion/
- https://diglloyd.com/articles/UnderstandingOptics/understanding-distortion.html
- https://photo.stackexchange.com/questions/9624/what-exactly-determines-depth-of-field
- https://www.lenstip.com/379.8-Lens_review-Tokina_AT-X_116_PRO_DX_II_AF_11-16_mm_f_2.8_Vignetting.html
- Chromatic aberration simulator
- https://www.image-engineering.de/library/technotes/750-longitudinal-and-lateral-chromatic-aberration
- https://photographylife.com/what-is-chromatic-aberration
- https://www.lightstalking.com/500-rule/
Forums:
- Does aperture affect the geometry of an image??
- tokina 10-17 or tokina 11-16
- https://photo.stackexchange.com/questions/19097/what-does-distortion-xx-mean-in-lens-specs
- How to test the sharpness on my tokina 11 – 16mm ???
- https://photo.stackexchange.com/questions/71046/why-are-some-photos-sharp-in-the-center-but-soft-on-the-edges
- https://photo.stackexchange.com/questions/30976/how-can-i-take-a-photo-with-everything-in-focus-with-my-dslr
- https://www.reddit.com/r/AskPhotography/comments/76pxec/what_are_the_difference_between_lateral_and/
- Tokina 11-16mm Lens Flares- Please Help….
Wiki: