

The last bit of this whole text covers the full guidance for the creation of the individual feature hosted layer, which can be used next for all available ArcGIS Online tools.
In the last article, you’ve learned how to prepare your AutoCAD layer upon its further loading as the file to ArcGIS Online. In fact, the file you uploaded can be also turned into a feature-hosted layer straight away. Due to the limitations in further usage, this way of uploading seems to be still not good enough. We might see some options unavailable, therefore now it’s time for the presentation of the third, and the most complicated way of uploading layers to ArcGIS Online, namely as the feature-hosted layer.
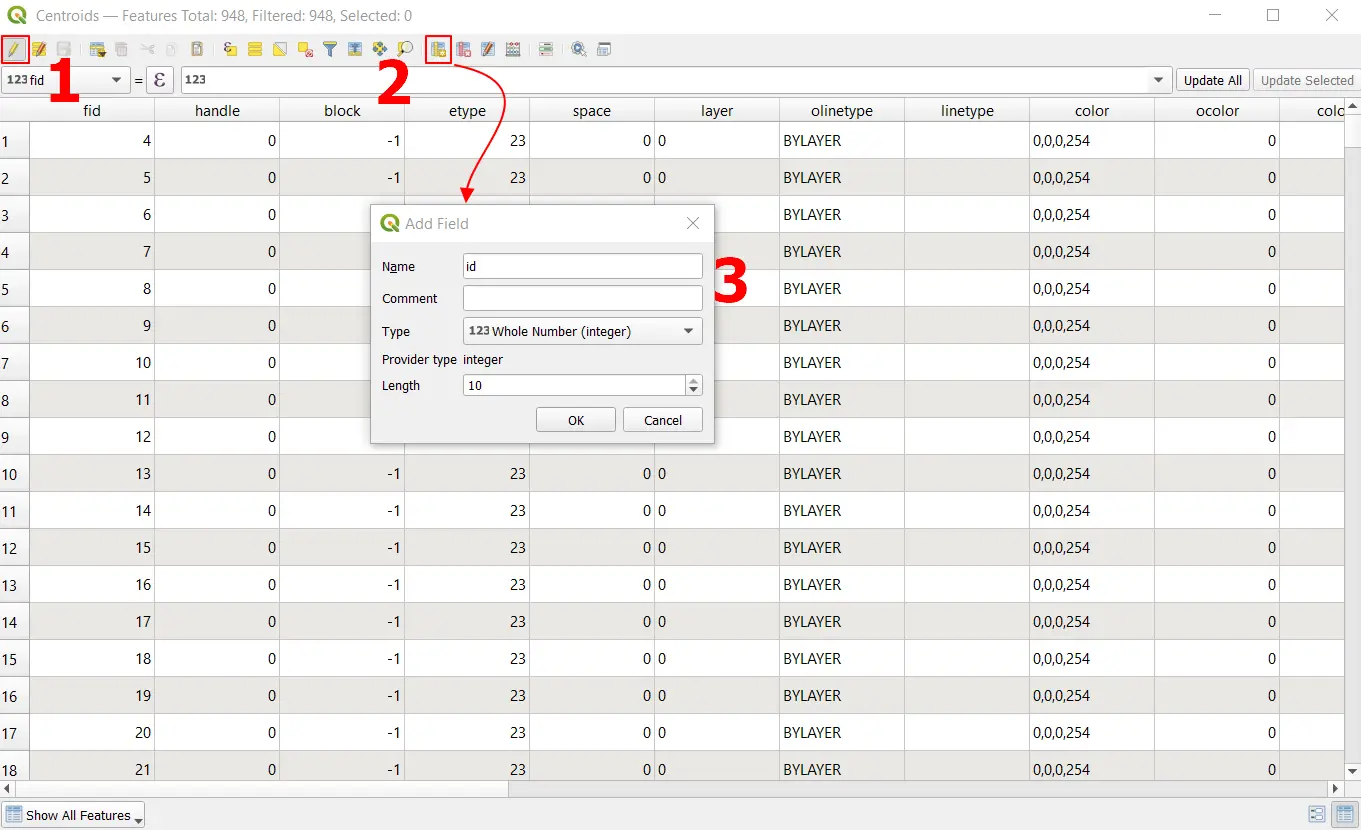
Our process should be considered at the QGIS stage, as we need a unique field. In fact, the DXF layer contains the unique id column called “fid“, but it’s not detectable by ArcGIS Online. The parallel unique ID column is necessary though. It can be created in the data attribute table (Pic. 1). When opened, we must make it editable (1) and choose the New Field (2) which will launch the Add Field box (3). Name the new field for example as “id” and keep it as an integer.
Next, we must fill up this field with data. The quickest option is using the formula bar at the top. The image below (Pic. 2) shows roughly what to do. In the field dropdown in the top left select the correct column, which we want to be filled with the data (1). Next, we need to provide the formula for calculating the ID number for each of them. It can be:
$id
or alternatively
$id + 1
Next, hit the “Update All” button (2) and wait for execution. The formula above returns the unique numbers for each item in our field (3) (Pic. 2).

Now, our layer is ready for the update, assuming that it has been reprojected earlier, as explained in the last article.
In the ArcGIS Online dashboard, you can see several options. Intuitively you could visit the Map, as the potential place, where the map can be created. In fact, this is quite the right place, as the New Map is opened, although you need to know, that each map needs components (layers). All these components are stored in different tabs, in the Content. The image below (Pic. 3) shows the place in the main bar, where the Content can be found.
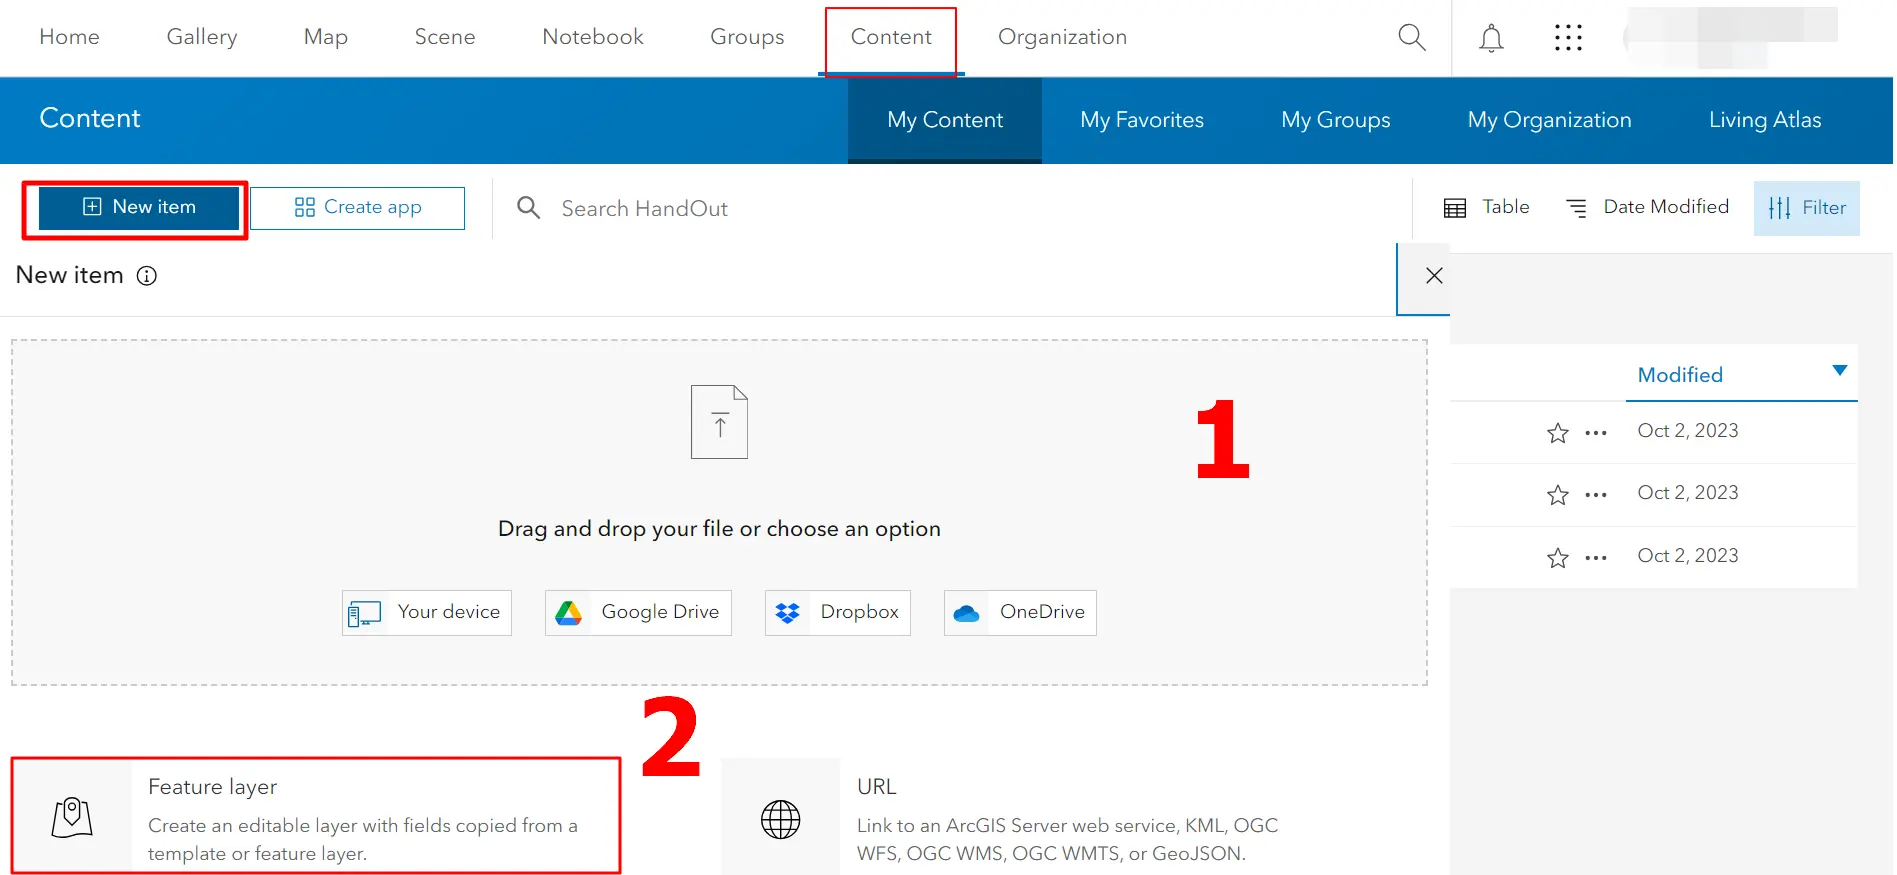
This is the place, where all the items can be uploaded upon further map equipment. As you know from previous articles, this is the option for directly adding the file (item)(1) as well as creating the Feature layer (2). Because the first case has been explained previously, we can take care of the second one.
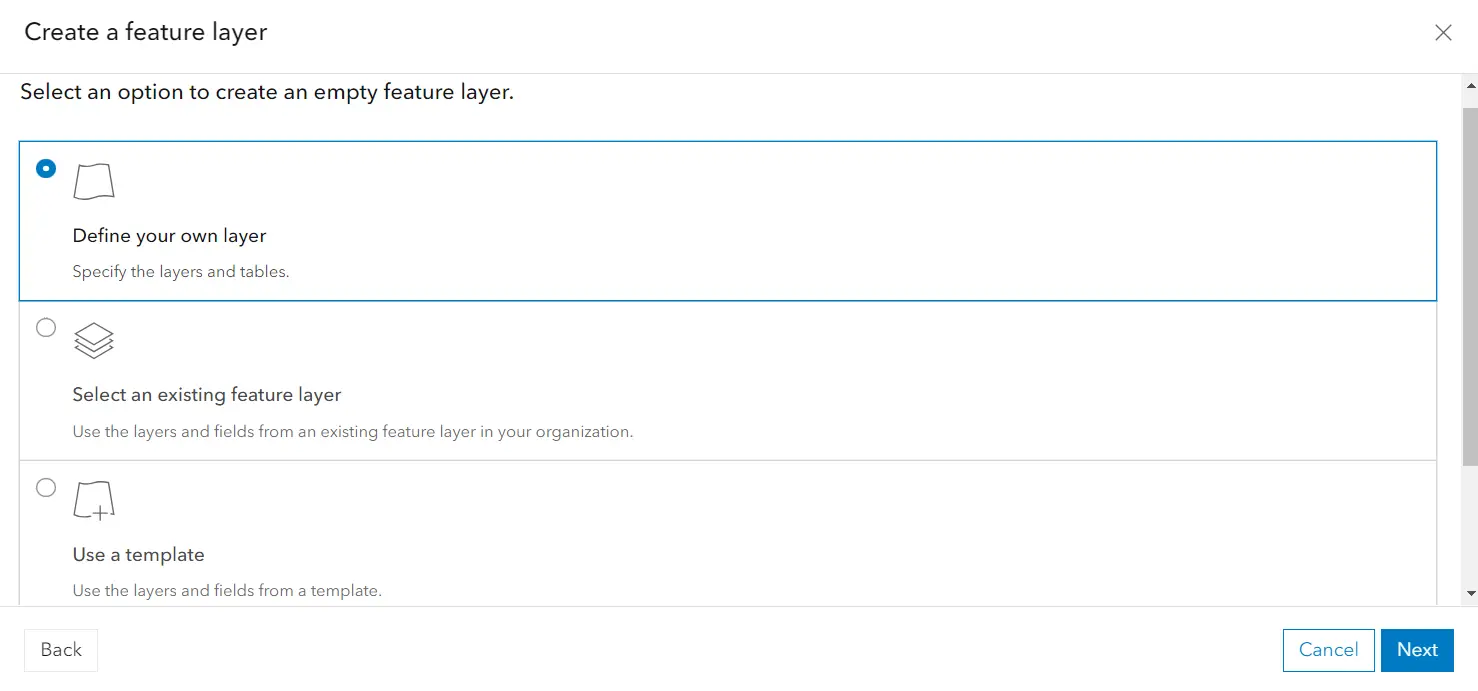
By selecting the “Feature layer” option, we have some choices. In our case, effectively we can pick up the first three of them. I assume, that you would like to set up your own template and you don’t have a similar layer in the given geometry and type. In this event, the first option seems to be right for you (Pic. 4).
The definition of your own layer isn’t complicated. You just need to provide the name (1) and specify the layer type (geometry) (2) (Pic. 5).
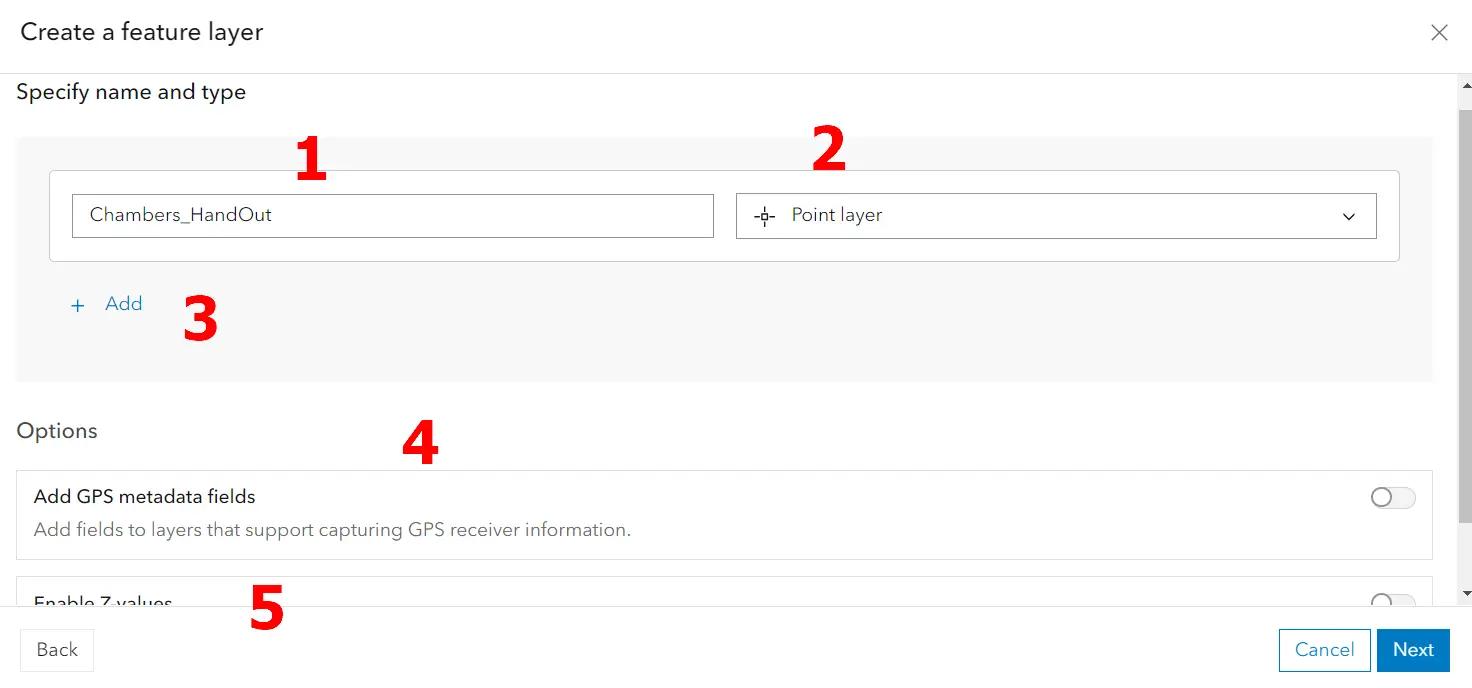
Our feature-hosted layer can be built from more than 1 layer (file) (3), include the GPS metadata fields (4), and have the Z-values enabled (5). After a recent update, the user can turn on the Enable M-Values option. The M-values include the measure or value of each vertex of our geometry.
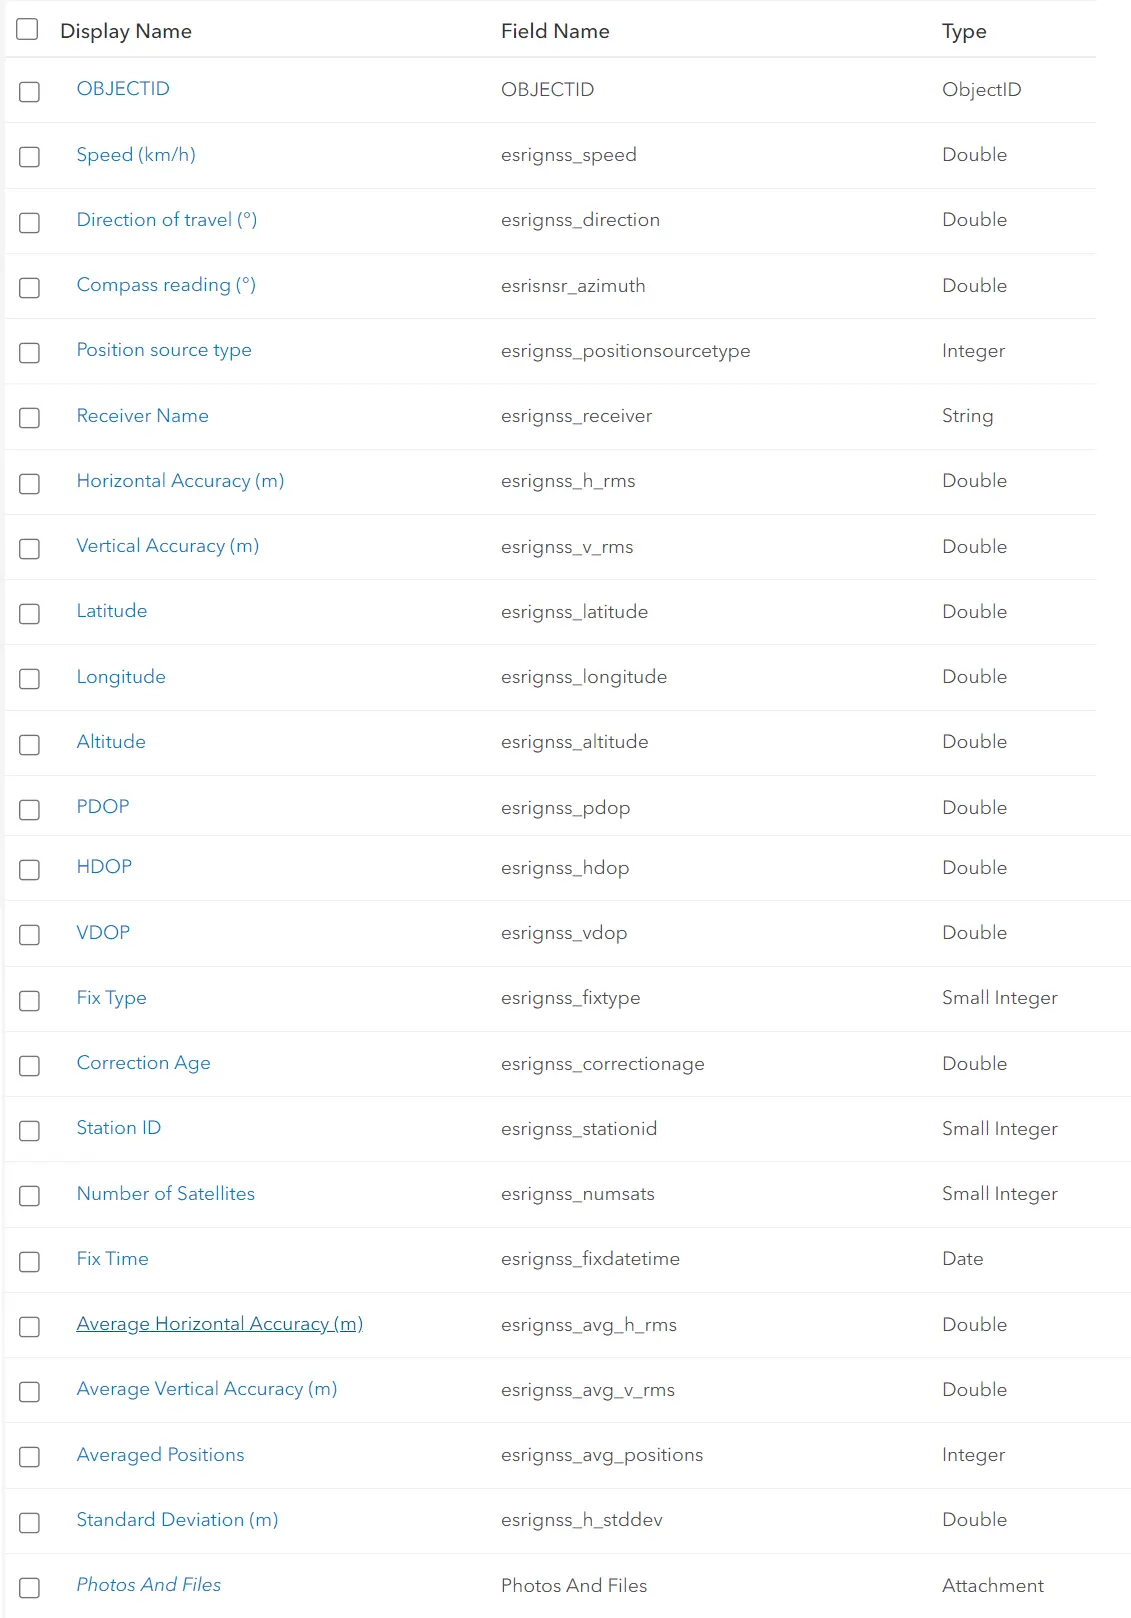
None of them are needed for our purpose, as we are focused on creating only the simple feature layer. GPS metadata fields include a robust attribute table, which includes a bunch of fields like the Number of satellites, Speed (km/h), Direction of travel (°), etc (Pic. 6).
We won’t need the Z-values enabled, as they are needed only for the 3D visualizations. Our layer remains simple then.
Once the layer is created, you will see the layer dashboard with all the options (Pic. 7), which are to be explained in the AGOL section.
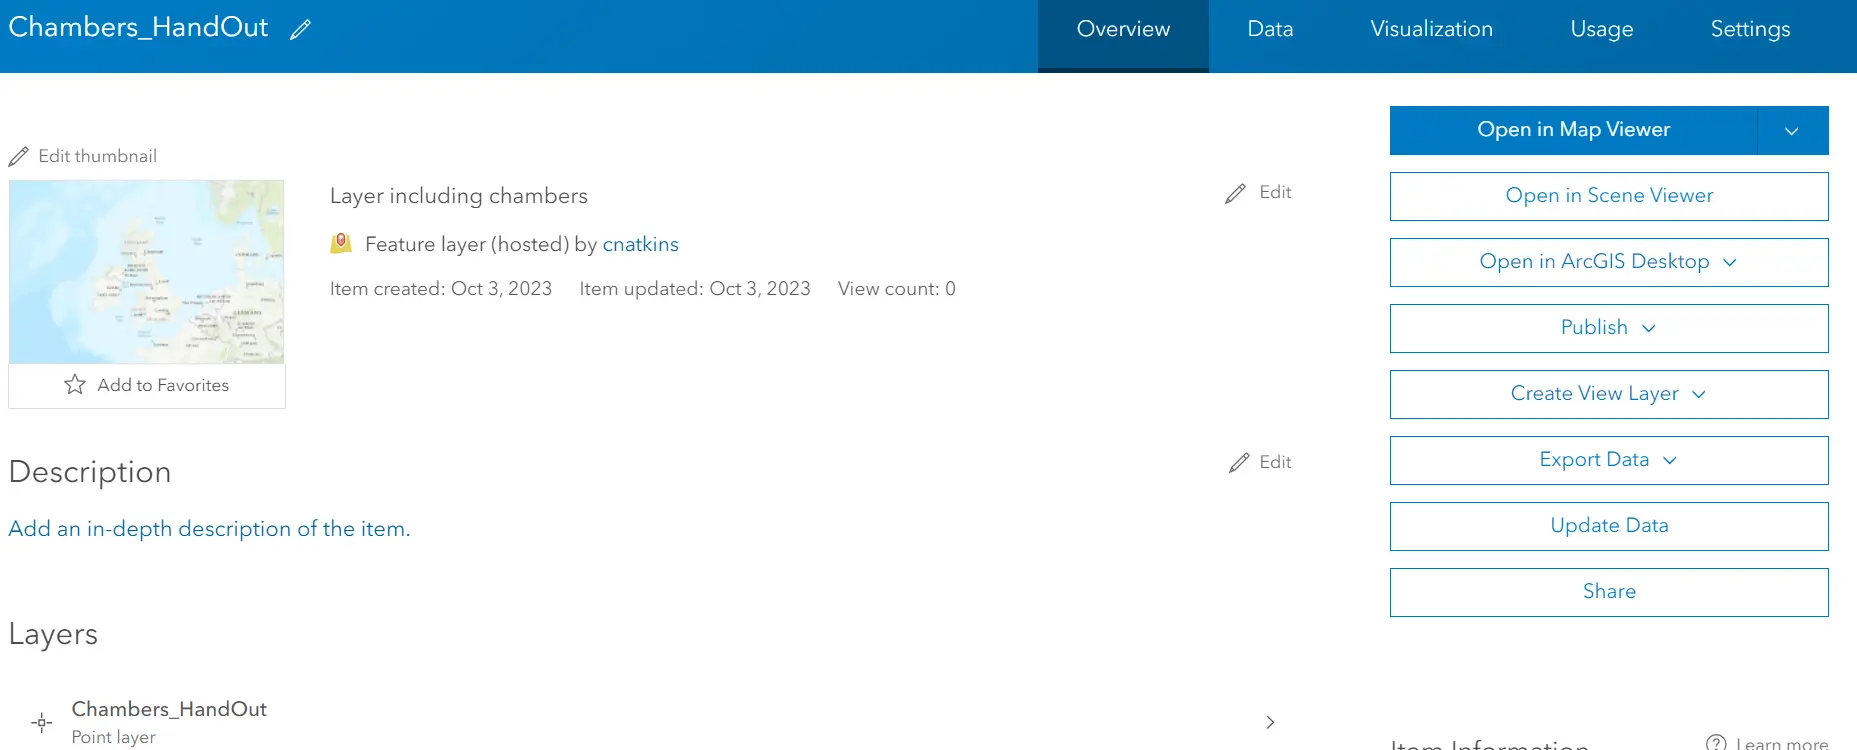
For now important is to know, that our step plays around the Data section. The data is displayed both in Table (1) and Fields (2). The Table mode allows us to check the data in the same way as in the QGIS attribute table. The Fields is dedicated to detailed insight into the details and field settings (Pic. 9). By default, there are only 2 fields OBJECTID and Photos And Files as the Attachment type (Pic. 8).
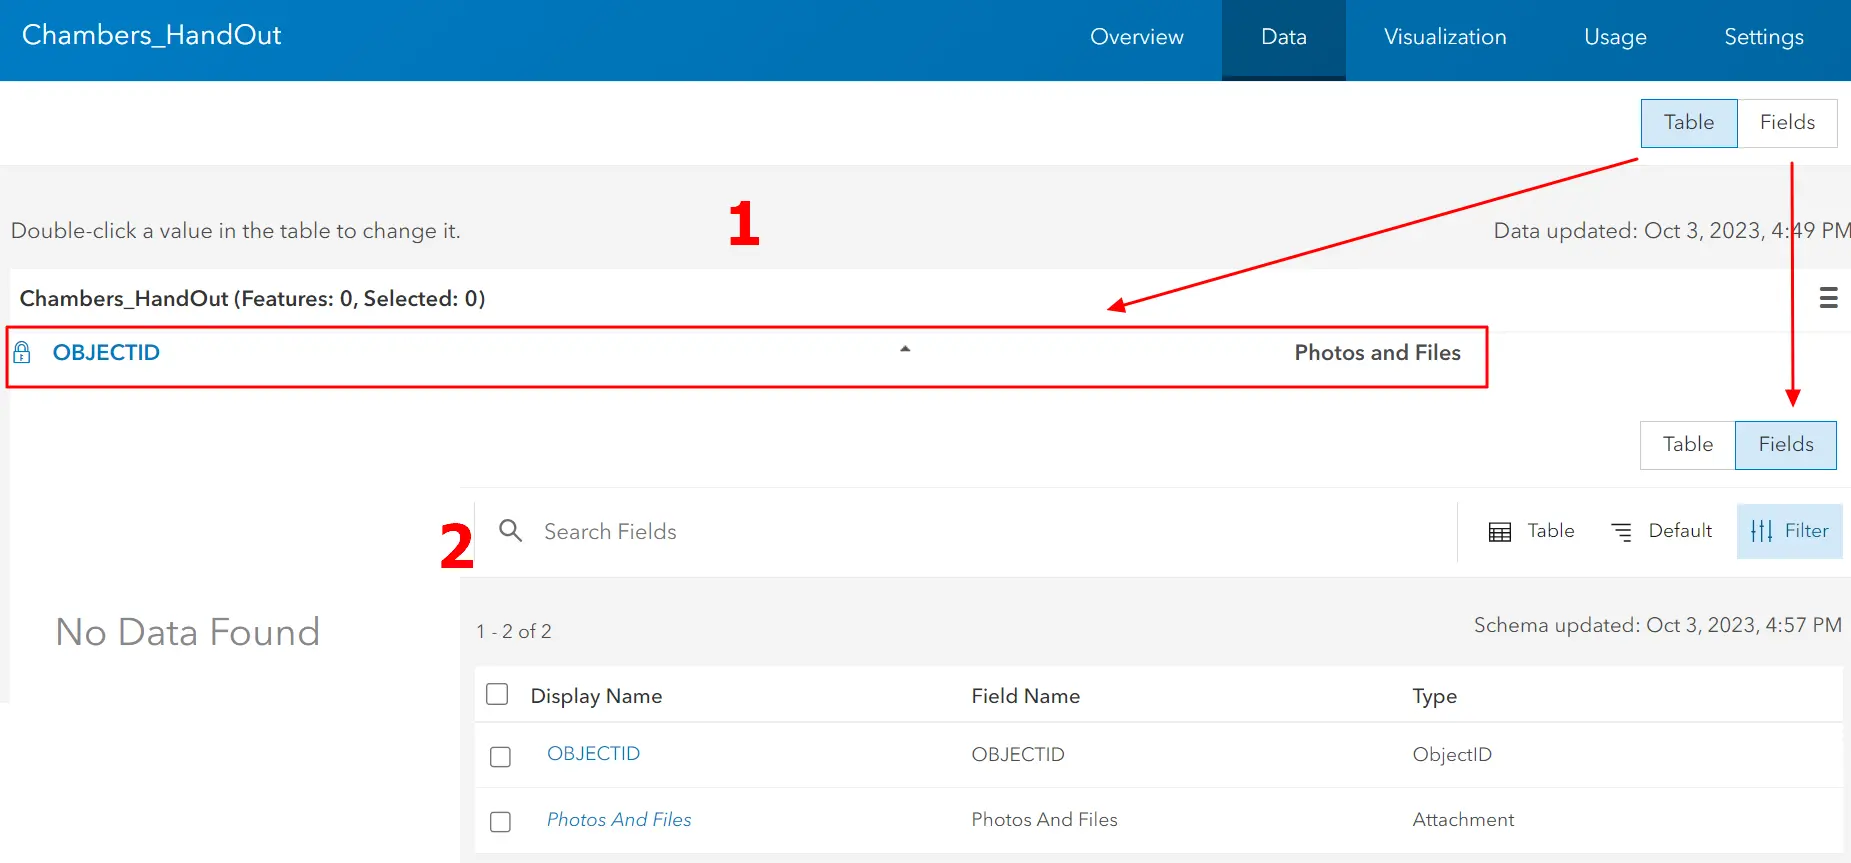
We must open the Fields by now and get familiarized with it. The Fields include a few things worth attention. The main tab shows all the fields included in our layer (1), which next can be found in the search bar (2) or filtered by type, alternatively by Field Value Type (3). Example of Field Value Type is Measurement, Phone Number, Date, and Time or Currency. The search options can be used occasionally when your layer list is long enough and exceeds one page. Finally, the most important is the + Add button, where we can define our own field (Pic. 9) (4).
Worth attention are also filters available, which can help you sort all the fields out.
The new field can be added by pressing the “+ Add” button (Pic. 9). Here you have a few fields to specify (Pic. 10). The Field Name as well as the Display Name are the freeform. Whatever you place there, it will work. As default, I put the “id” value, as it refers to the ID stuff pulled from QGIS. Very important is the Type. It must be always an Integer when we need to use this field for ID numbers. Because our values are to be unique, we cannot specify the Default Value (Optional), because it will always come out. A good alternative is to have the Allow Null Values option turned on. For this reason, the default value won’t be required and the field can be hidden in the Field Maps Designer form or others.
Once the new field is created, it starts to appear in the list discussed earlier (Pic. 10).
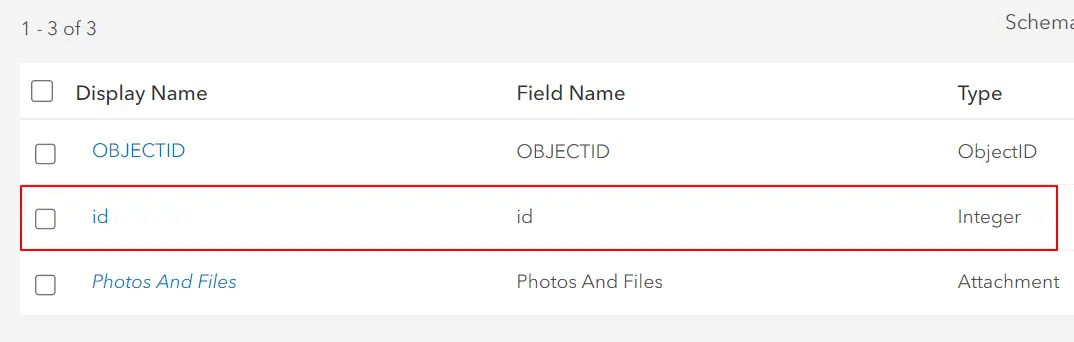
The list includes Display Name, Field Name, and Type. All of them have been defined recently (Pic. 9) upon the field creation step. Now let’s notice, that the Displayed Name acts as the link. It points out the access for the field details after clicking (Pic. 11).
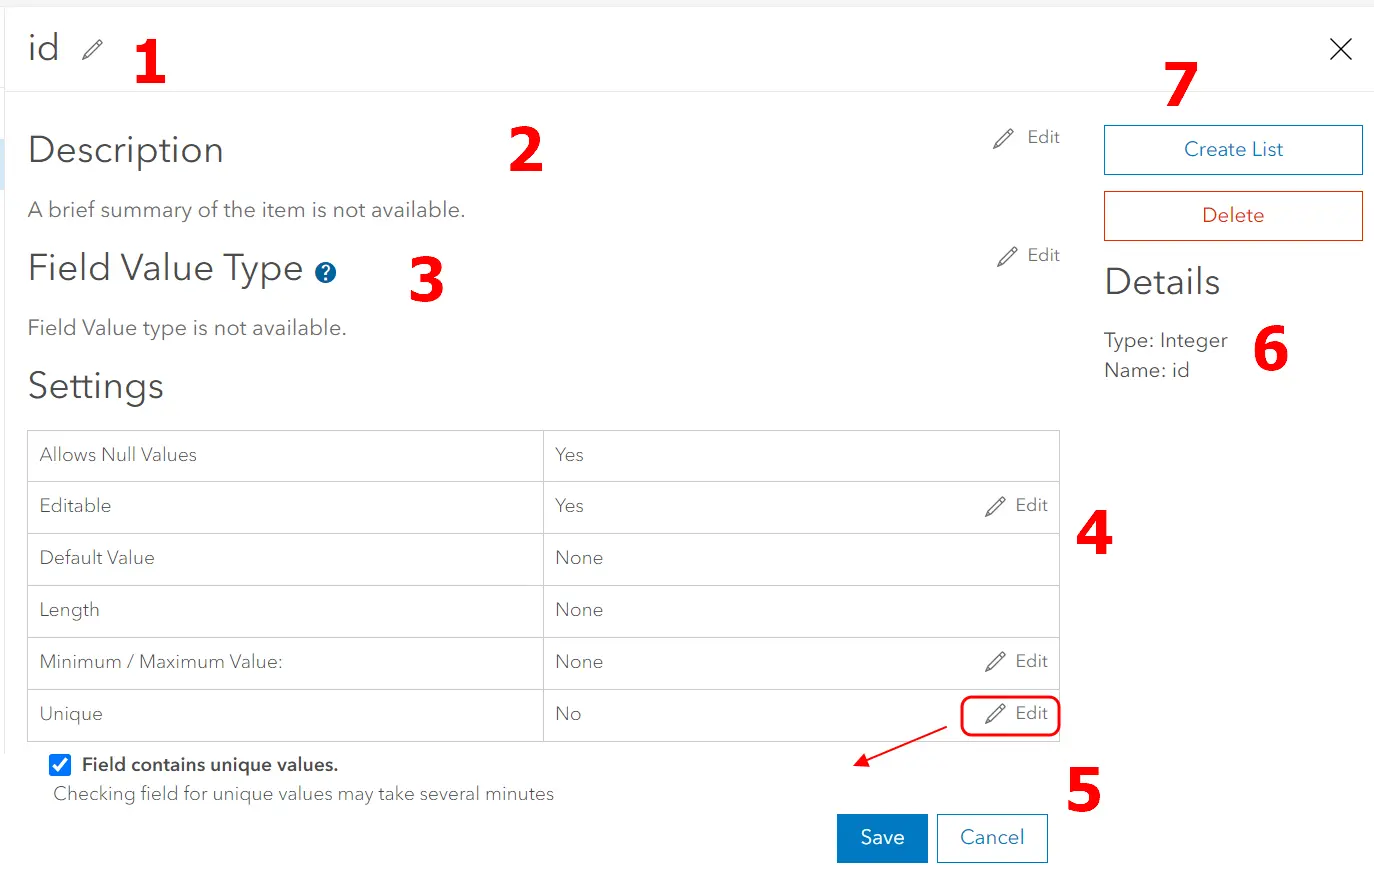
The Field details give us another important information. This is the place, where we can still make some changes. For instance, it’s another moment for defining the Display Name (1) and the Description of our field (2) up to 500 characters. We can also specify the Field Value Type (3) and change some settings (4). Some settings are fixed, therefore they should have been thought over at the moment of field creation (Pic. 9). The most important setting is making our layer unique (5) in order to make a successful correlation with the layer prepared in QGIS.
In the meantime, we can get the information about the layer details (6) and see how to Create List (7), although a more detailed explanation of these options can be found in the main ArcGIS Online section.
When everything is done, go back to the Overview tab and start uploading your data (Pic. 12).
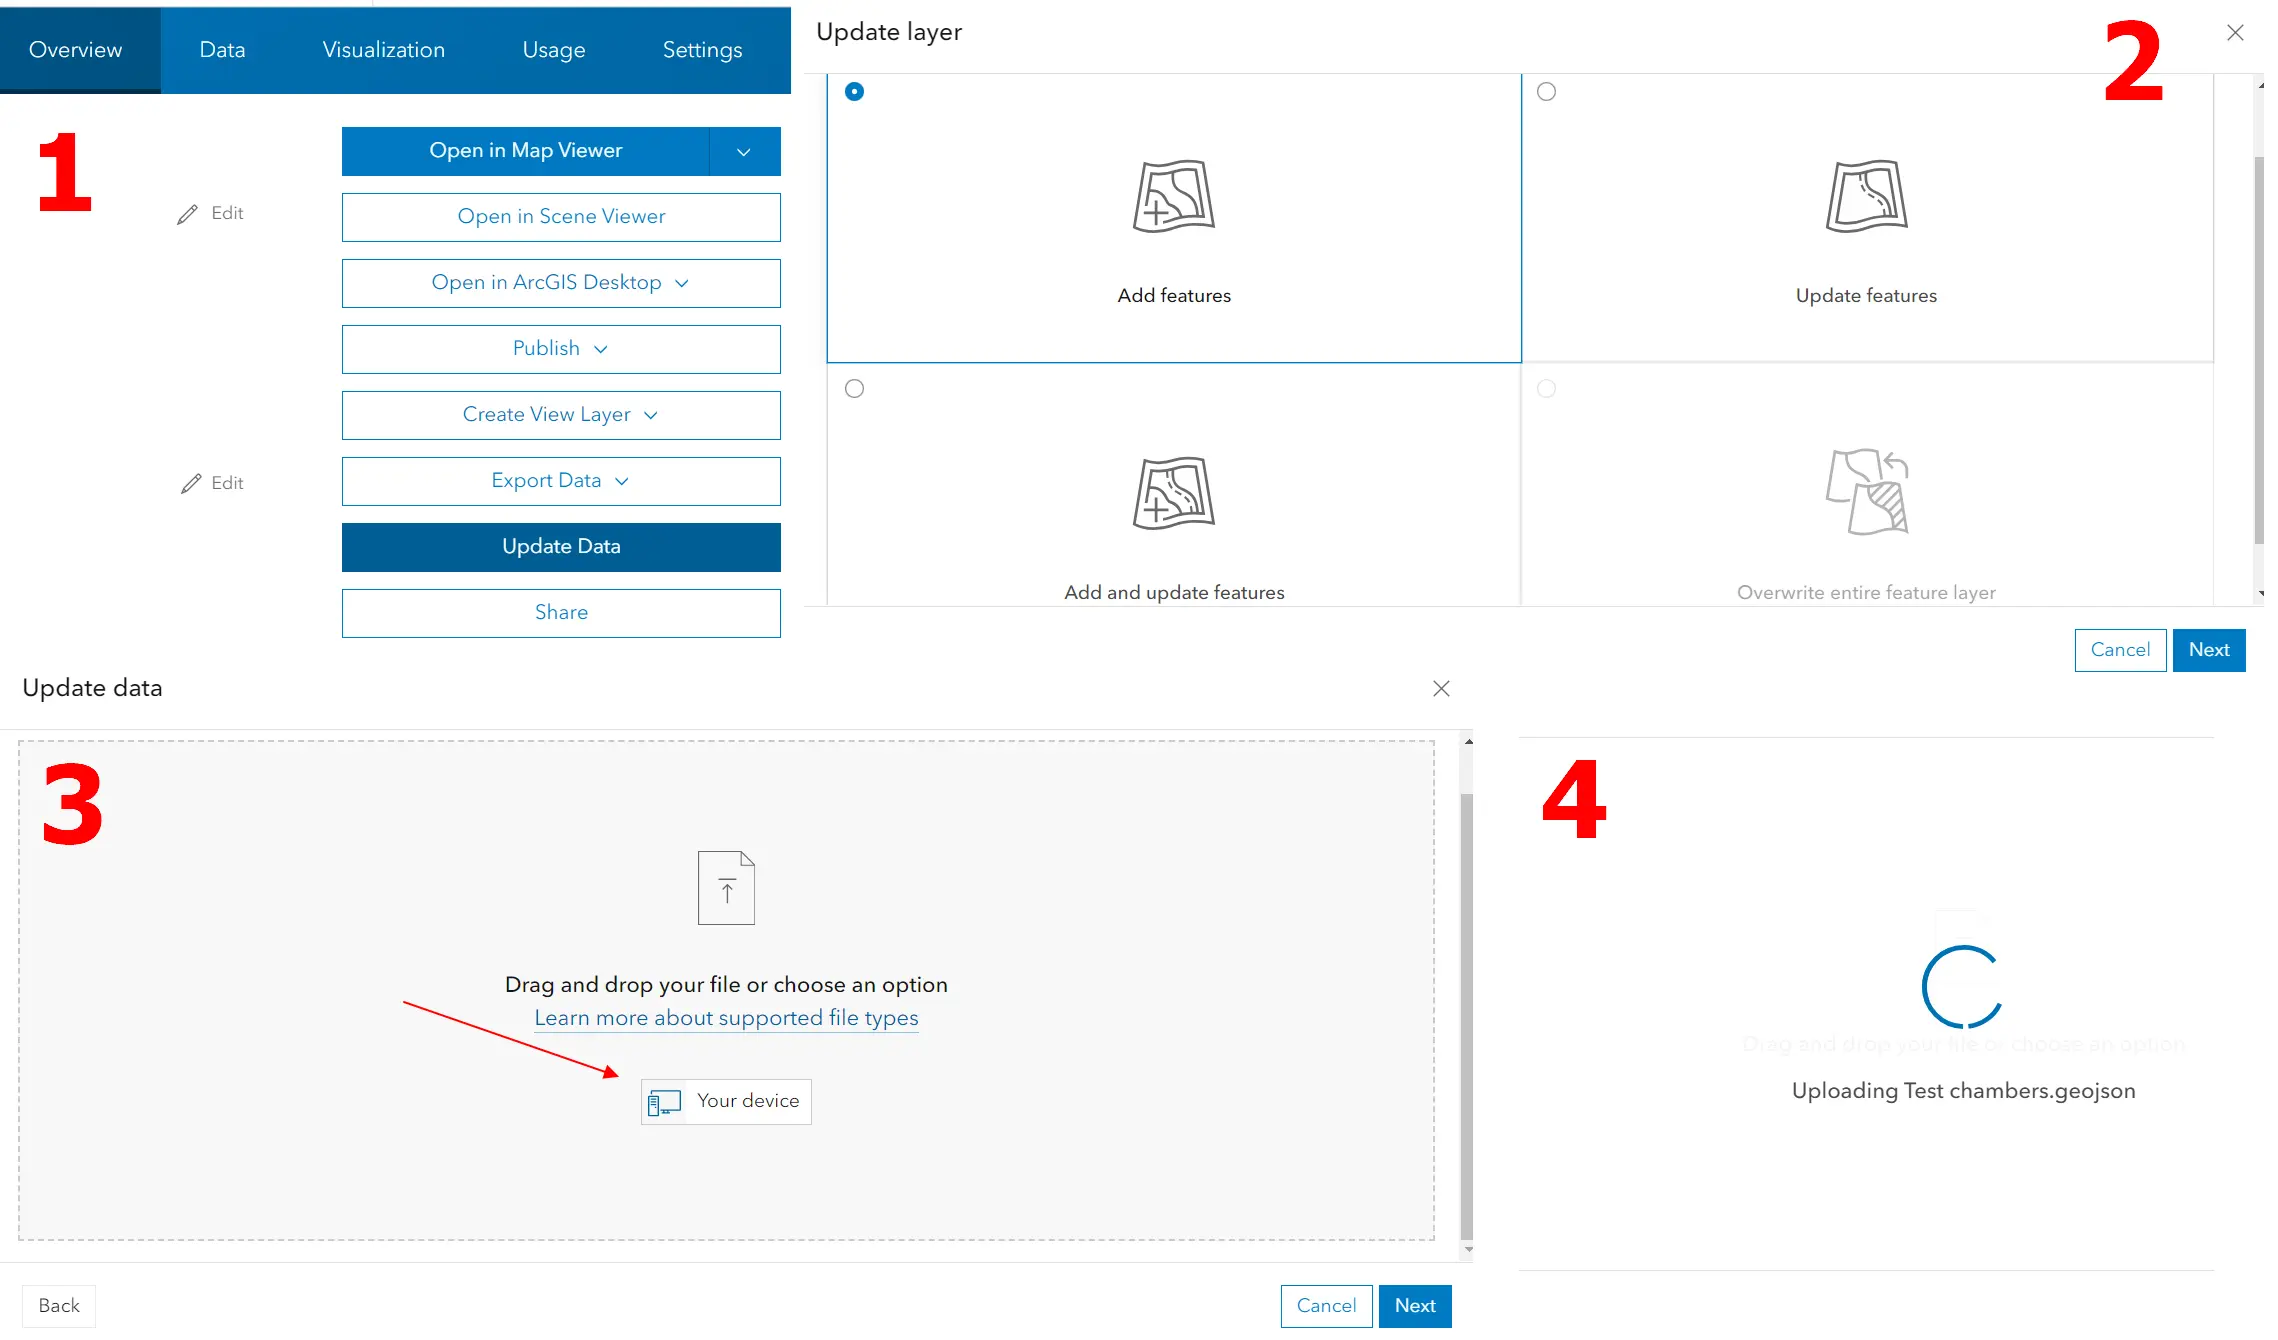
Select Update Data (1) from the main panel and choose the Add Features option (2). This is the only option you can use for now. You cannot Update features, because you have no features at all just yet. You cannot Add and update features because you should have some features already in too. The Add Features option refers to adding a feature to the empty layer. Update features can be made only in the situation when the features already exist in our layer. The Add and update features are dedicated to expanding our layer, as new features are appended to the existing list of features.
Your next step is to select the GIS-format file from the computer (3). It’s exactly the same box we know from adding layers as the file, discussed here. When our file is selected, just wait a while to load it to the portal (4). In fact, when loading small files takes too long, refresh the page and repeat the process. Loading big files can take time and we can do nothing with it.
Finally, when our file is downloaded, we can see the Update data window, where we should find the field matching the original one, created in our ArcGIS Online layer (Pic. 13).
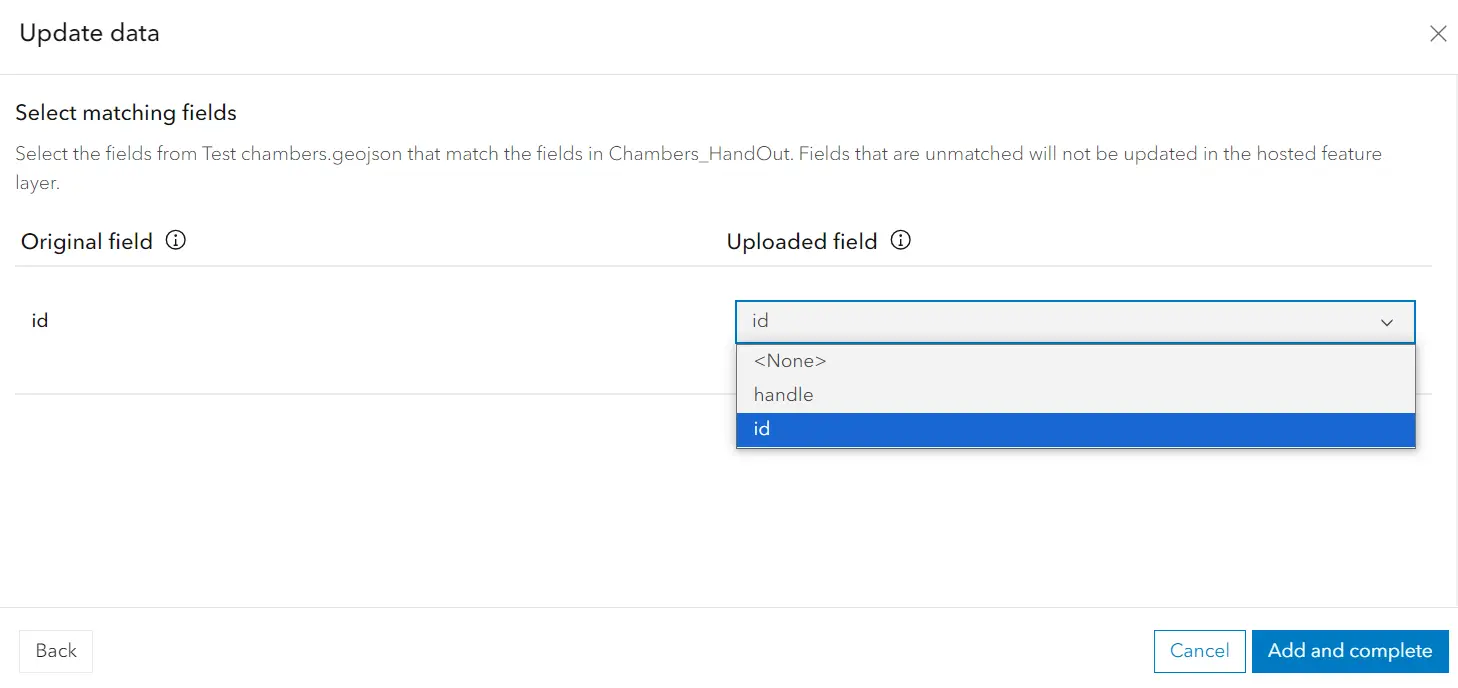
In the Uploaded field dropdown, we should find the field with unique values, prepared in QGIS upon loading to ArcGIS Online.
If you don’t see the column prepared earlier in QGIS, it means that:
– the saved layer hasn’t been reprojected,
– the column has the wrong data type (string instead of integer)
– layer doesn’t include fields with unique values
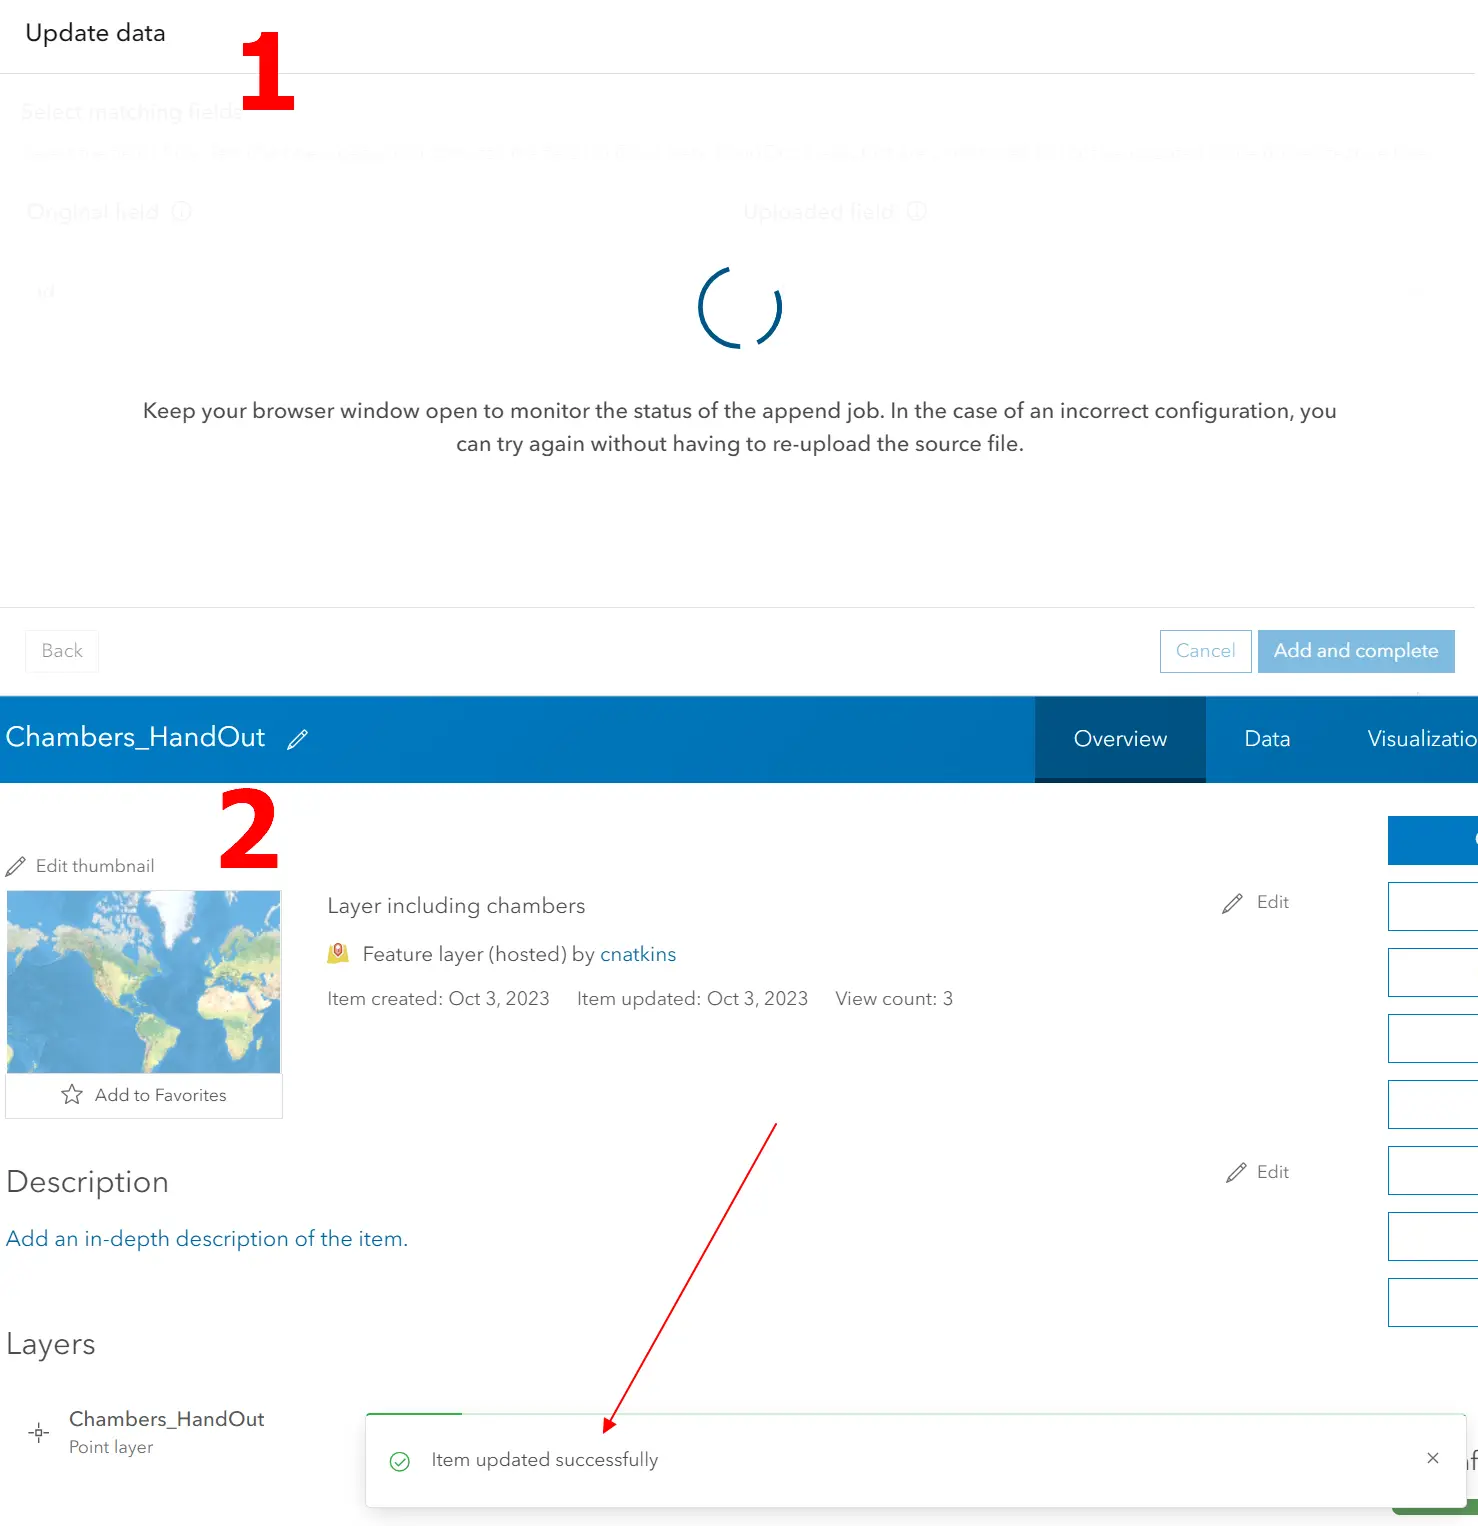
Assuming, that everything is alright, you can press the “Add and complete” button and wrap the process up. It will take a while, depending on the size of your file (1), although if you think, that the process takes far too long, the page refreshing and repeating the data update might be required. When everything is fine, you will be automatically back to the Overview tab with the information at the bottom, that your layer (Item) has been updated successfully(2)(Pic. 14).
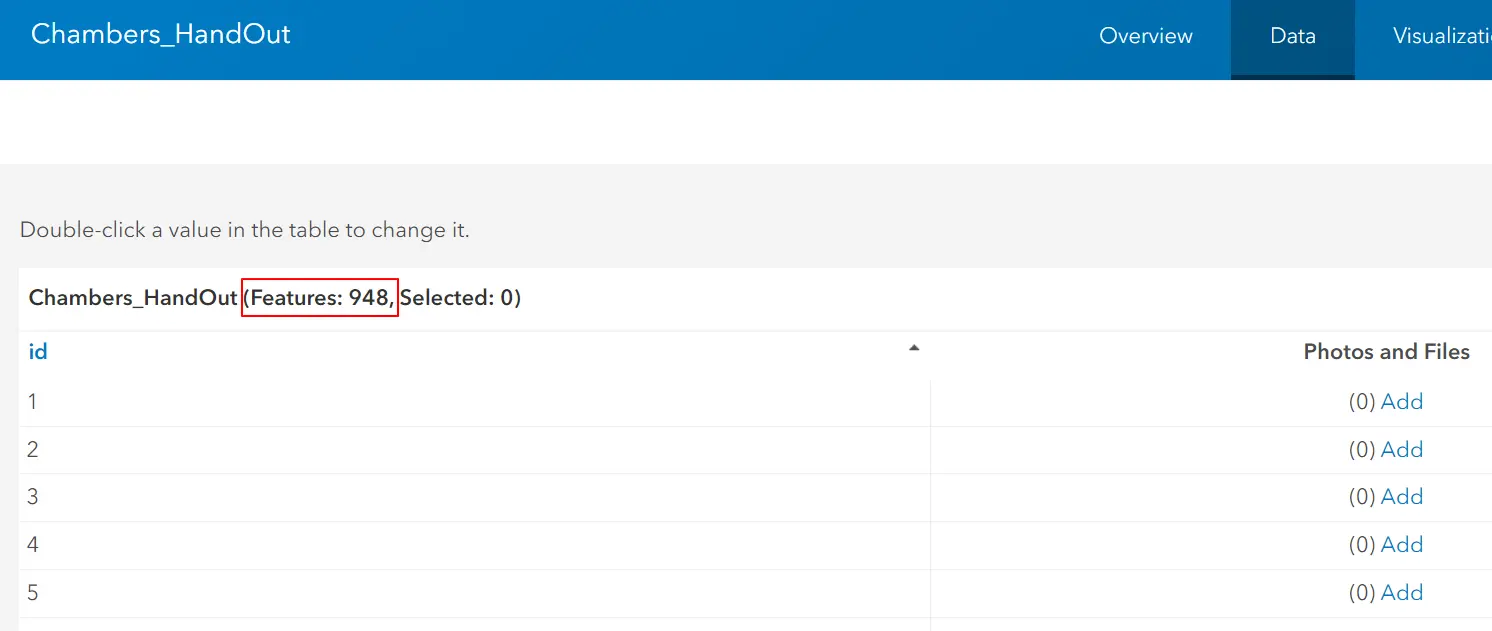
It’s good to go back to the Data tab and check. In the table, you should see all the items uploaded. By the way, the header says about the total number of items uploaded (Pic. 15).
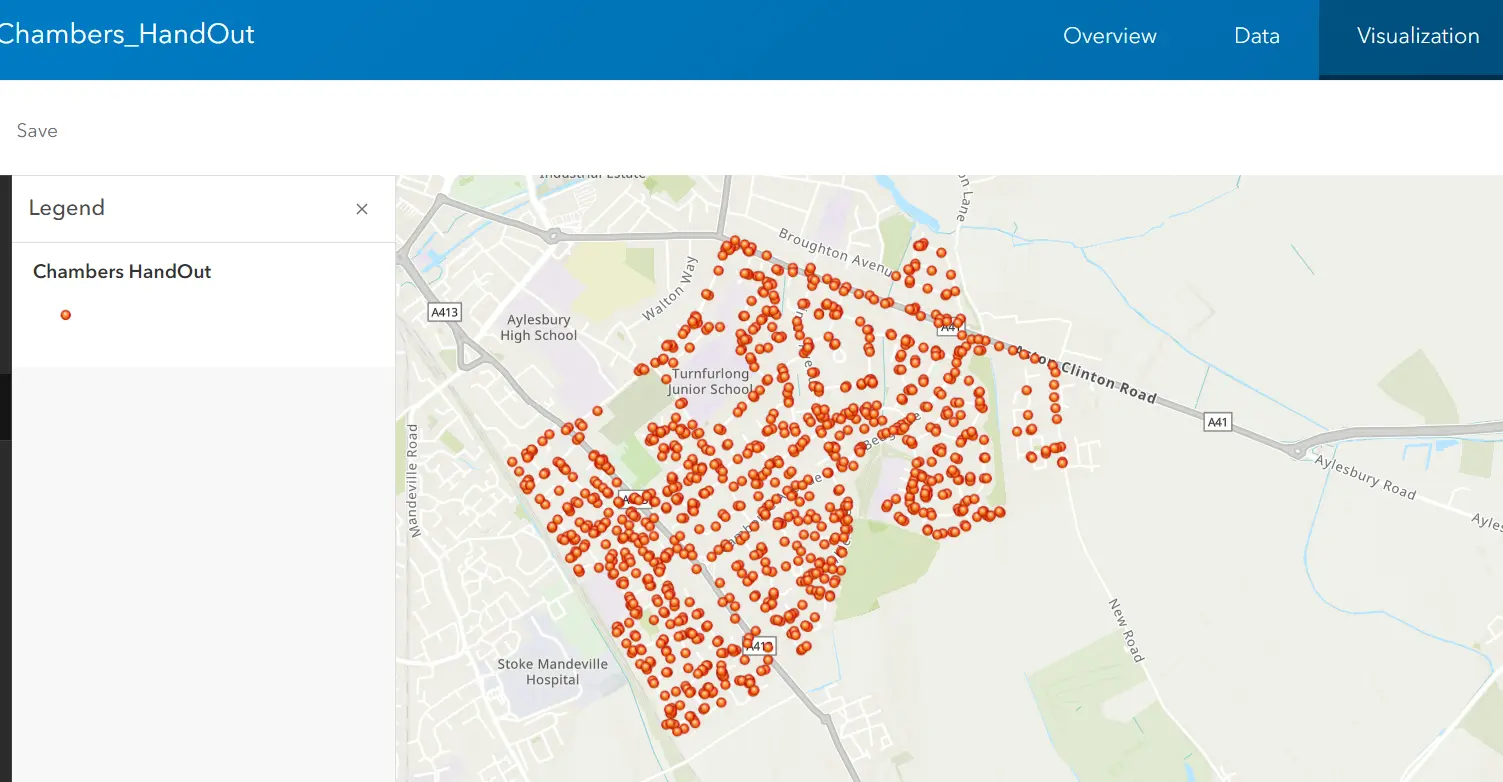
We can also check the Visualization tab and see the graphical interpretation of our layer, which is now ready for addition to the map (Pic. 16).
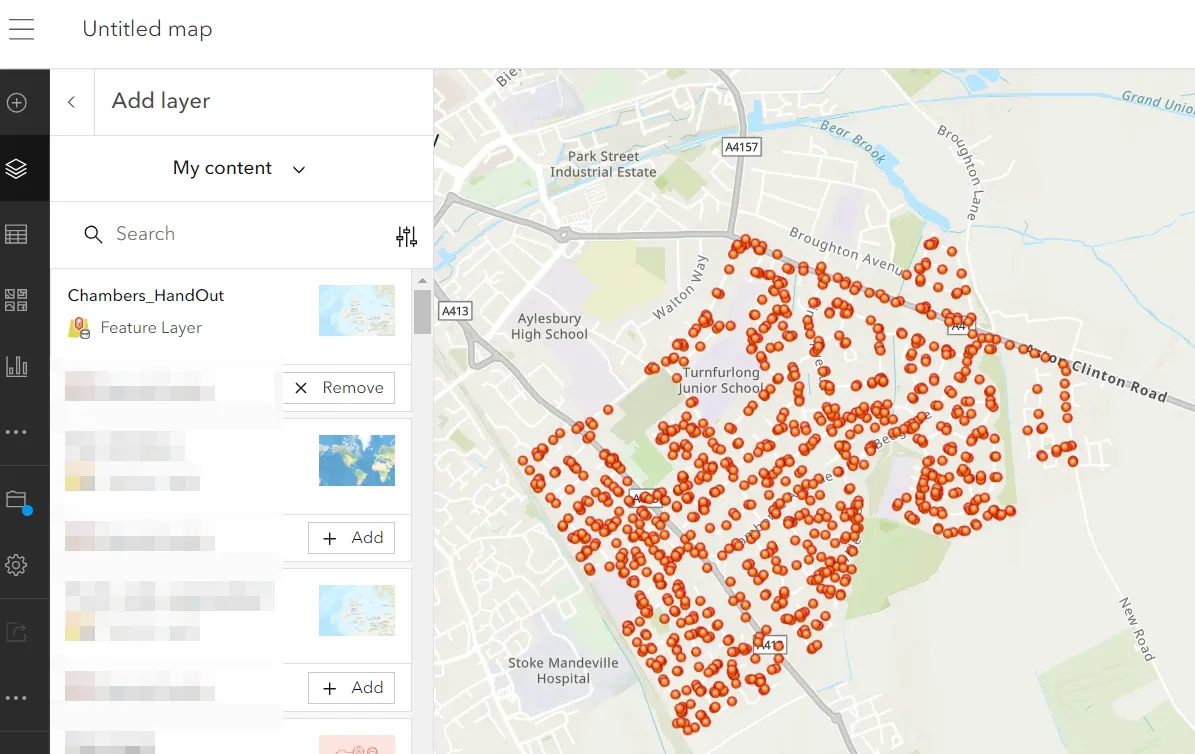
Finally, we can load our layer to the map (Pic. 17).
There is the very last step, which optionally could be done.
In these three parts, you’ve learned how to load different types of layers to your ArcGIS Online map. Next, you can browse the ArcGIS Online (AGOL) section for more information.
Mariusz Krukar