After a short adventure with Xiaomi Mi 8 128GB global version, bought by my wife I decided to get a newer model – Mi 9.
The smartphone is pretty much similar to its previous counterpart, although it has been upgraded with a few useful options. Traditionally I would like to cover the photography facilities in this device, although it won’t take as long as previously, because most of the stuff is pretty much the same as in the Mi 8 Global Version, presented more than half a year ago. I will focus on the things, that were recently implemented in Xiaomi’s world of photography. At the finish you will be redirected to the recorded screen grab, presenting all features both here and previously in Mi 8. Let’s crack on then.
- GENERAL PHOTO MODES
Xiaomi Mi 9 6GB 128GB (Global version) has mostly the same photo modes as the previous model Mi 8. Exactly the same is also interfaces, so someone, who previously had Mi 8 will get around very easily. Apart from stuff literally copied from the previous model Xiaomi Mi 8 6GB 128GB Global Version, there are new options available.
An undeniable feature of Mi 9 is a 48MP image option, which blew the minds of all users wanting to have this device on their own. Unfortunately, this is a dummy advantage, because the 48MP image is produced by pixel interpolation from the 16MP front camera (Pic. 1-5).

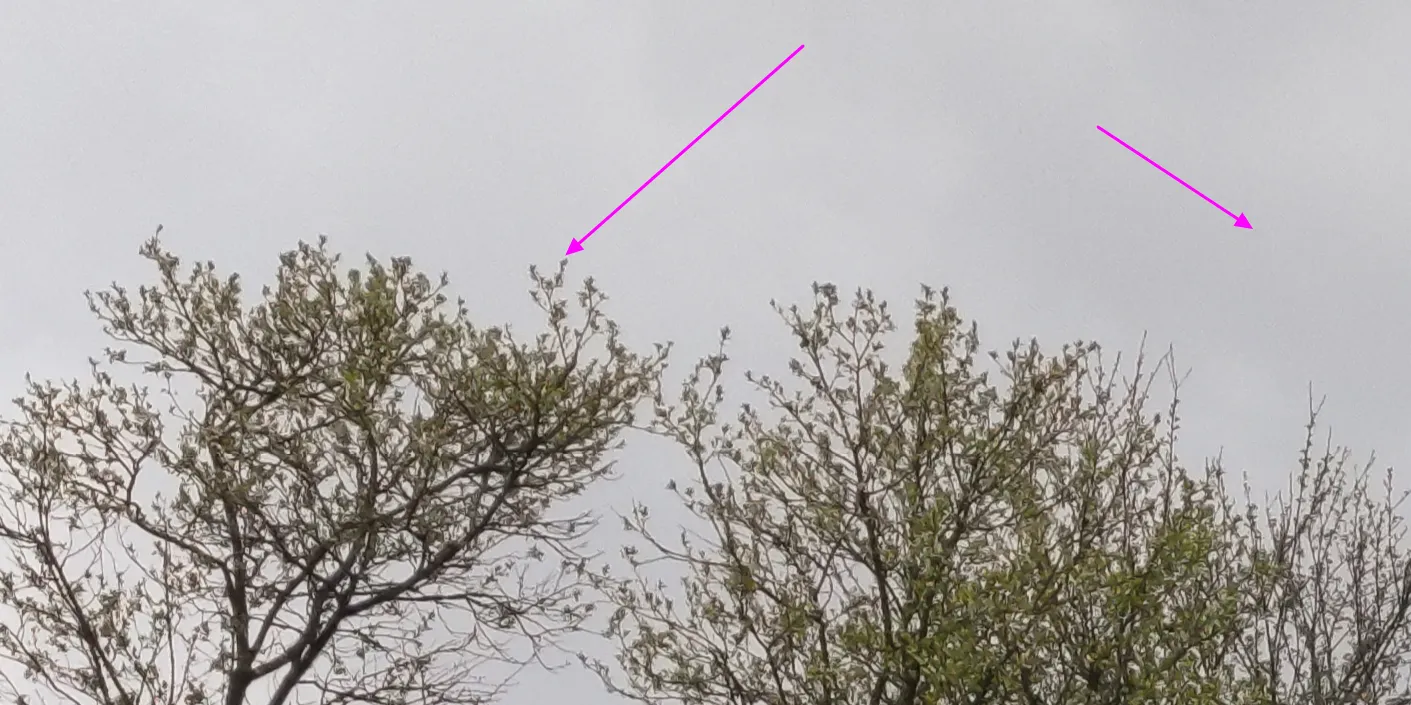
To be fair, the detailed view of the 48MP image doesn’t look bad. This is the effect of a good sensor 1/2″ instead of 1/2.55″ in the previous model. Nevertheless, the interpolation is still visible, especially in plain-colored areas, where the image doesn’t look perfect. It disappears once you make your picture smaller.
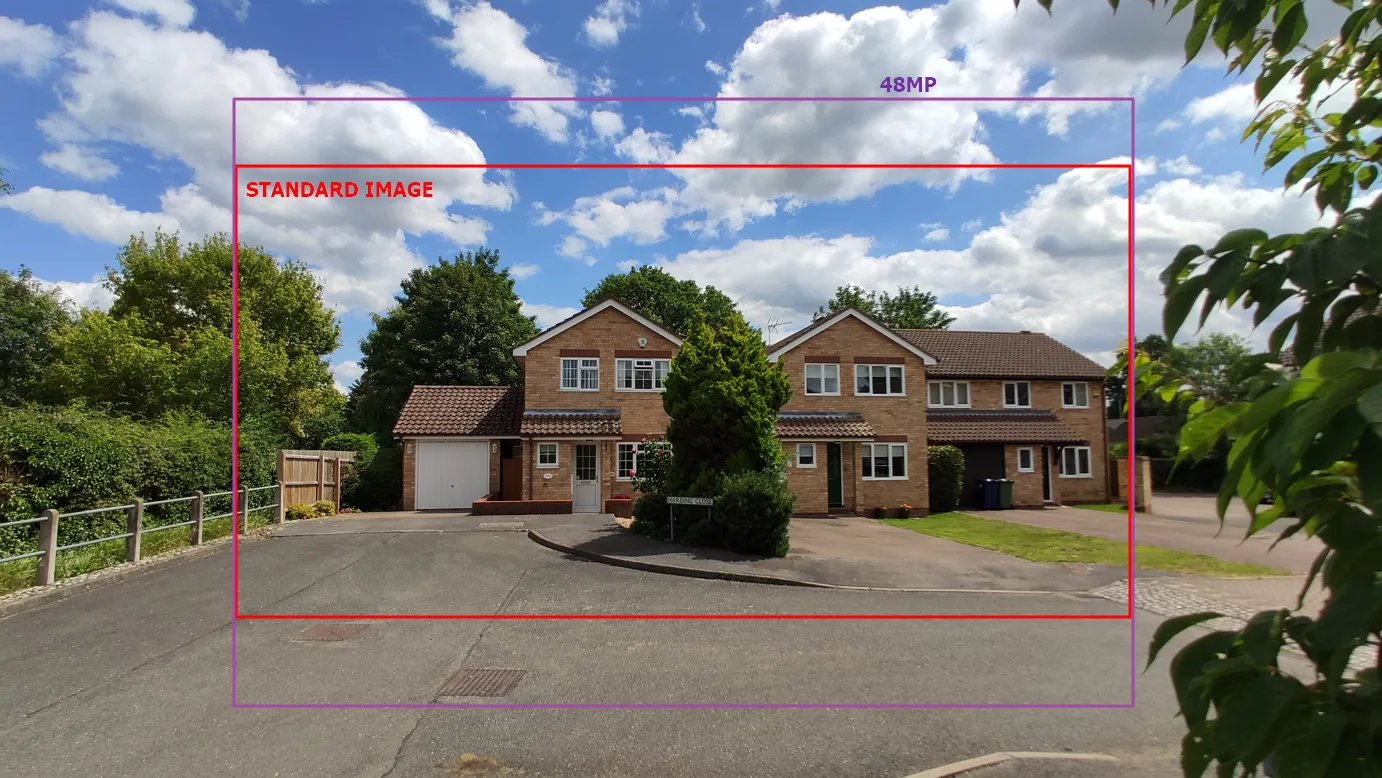
I don’t want to complain about it anymore, because using a 48MP photo option has another, very important feature, not really mentioned by producers. It can be used as a kind of wide-angle image (Pic. 6).
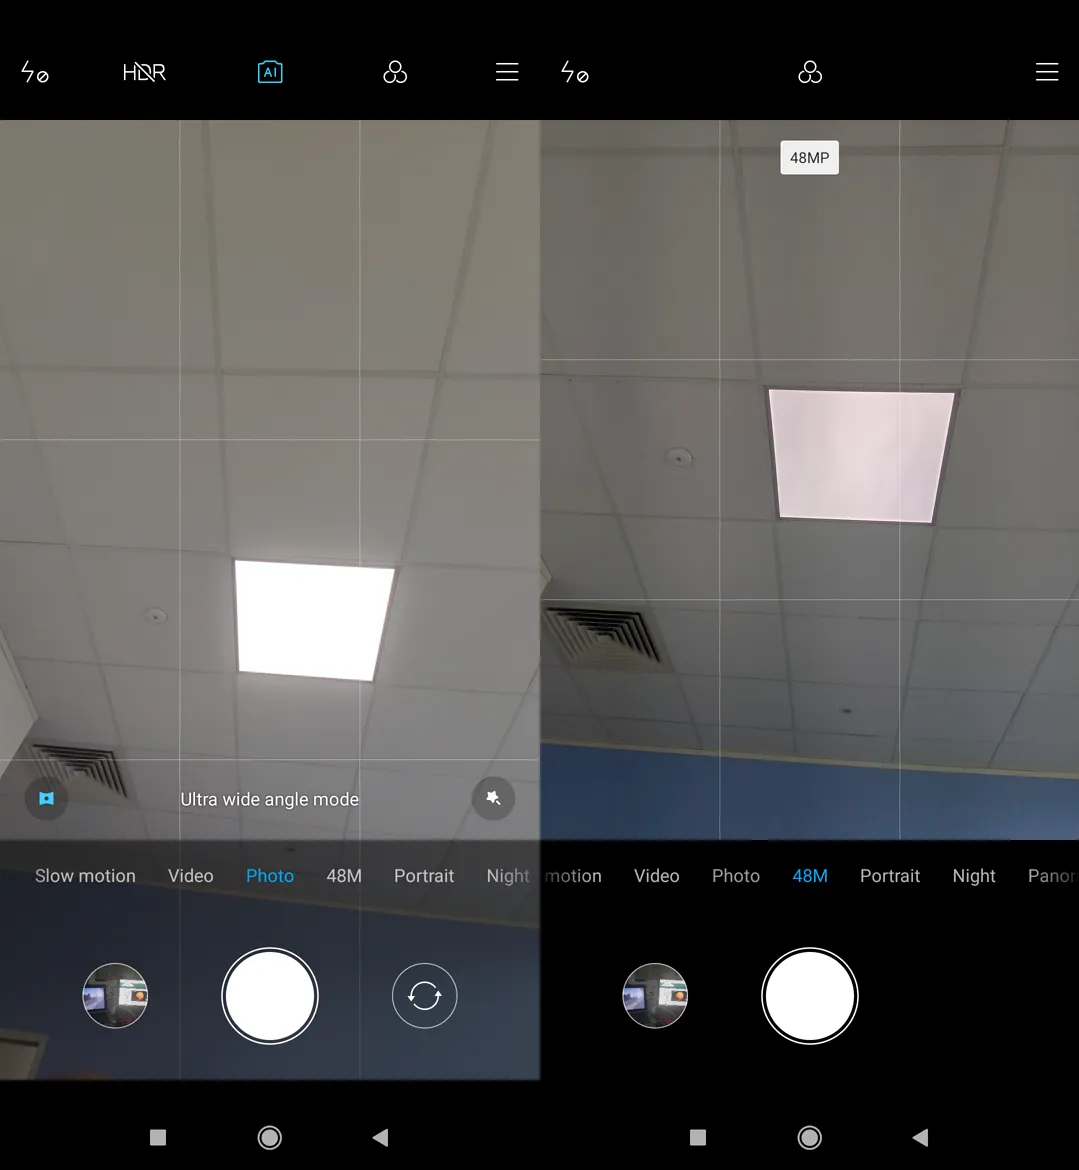
Even if is still a long way to achieve a serious wide-angle mode by 48MP image, it’s still wider, than the normal one, especially in the vertical axis (Pic. 7).
The Xiaomi Mi 9 wide-angle mode offers a 117-angle field of view. However, sadly I can say, that it cannot be really used in full-frame. Most external regions of the wide-angle image are blurry and unnaturally elongated (Pic. 8).
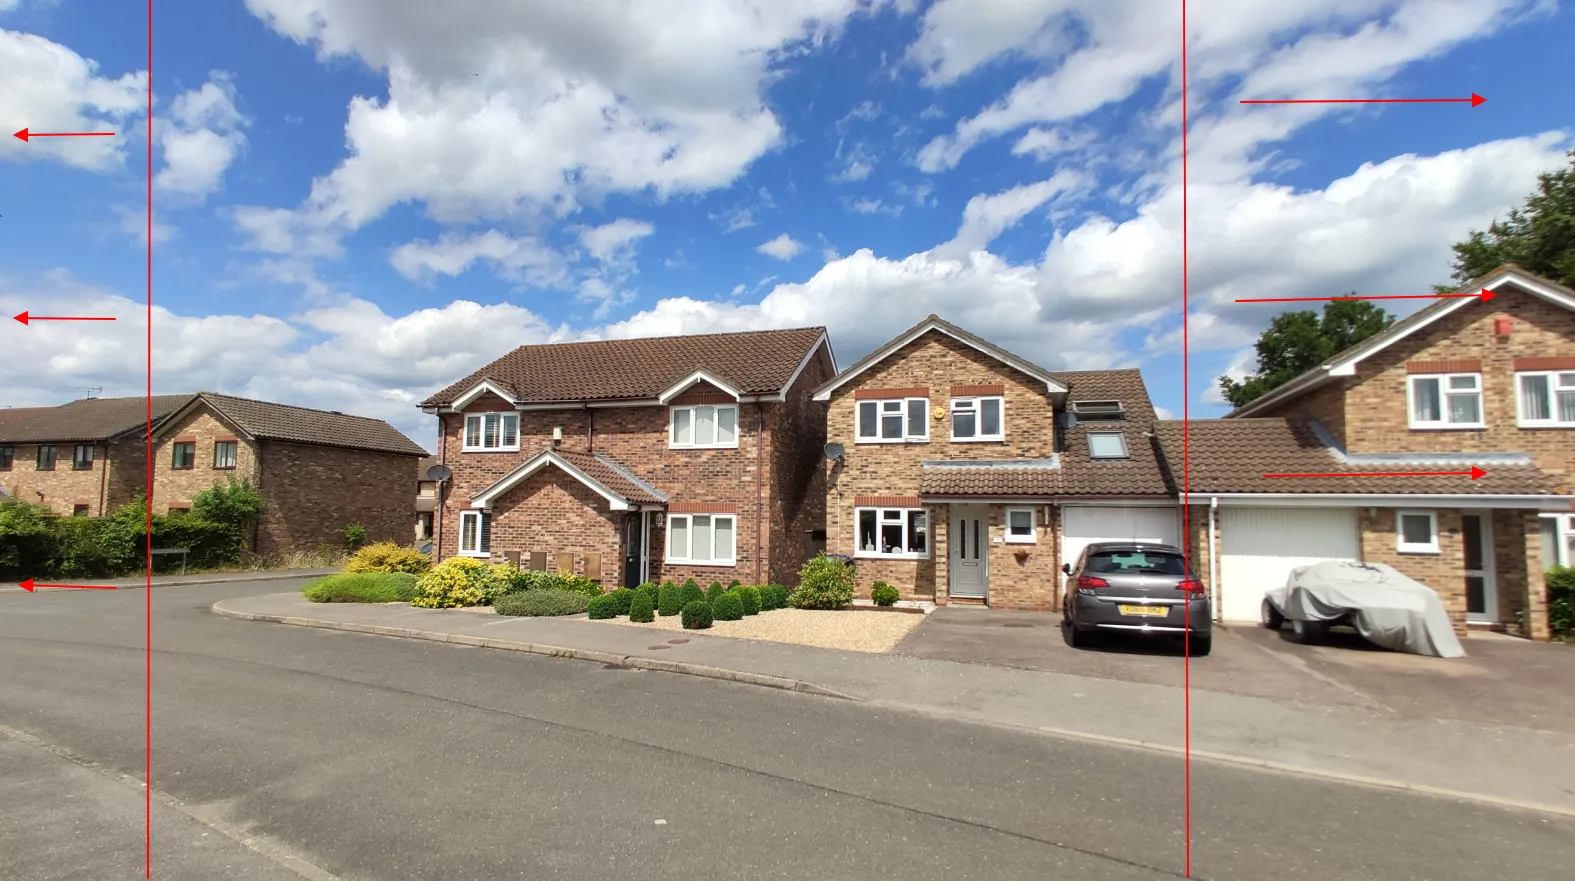
So, the producers of Xiaomi Mi 9 happily announced the wide-angle mode as a brand new feature, although everything is incredibly flawed. Watching the image above (Pic. 8) as well as the next few underneath (Pic. 9-12), we can quickly conclude, that wide-angle won’t be really useful in this model, unfortunately. That’s why I propose using 48MP instead to get an image a bit wider than the standard one (Pic. 7).
Going through the flaws of the wide-angle image in Mi 9 I would like to show you some details (Pic. 9-12).

Other features are the same as in Xiaomi Mi 8 6GB 128GB (Global Version)Xiaomi Mi 8 128GB (Global version) photo facilities, part 1 – general photo modes, so you can read more about them under the link above or watch the Mi 9 screengrab movie on my Youtube channel (see below).
At the finish of this section, let’s see some example images underneath:
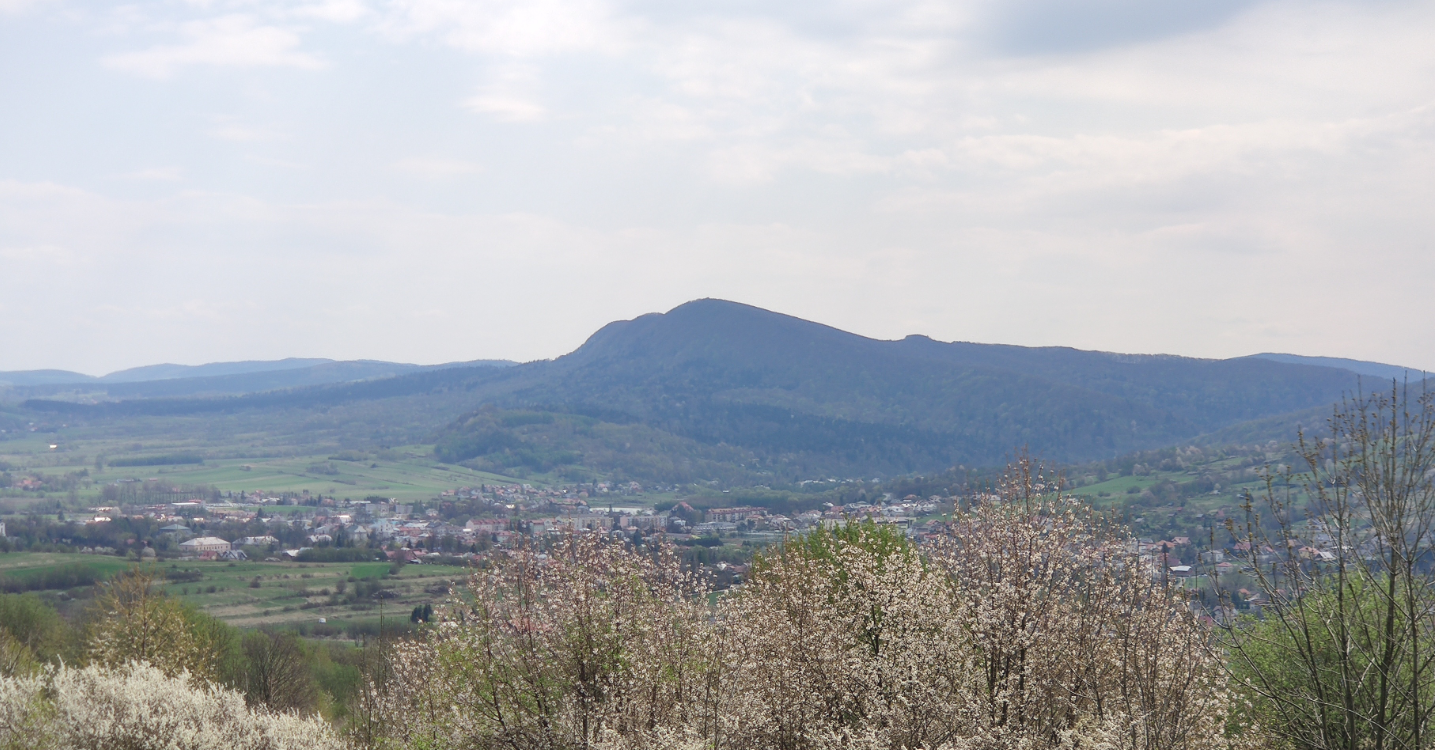


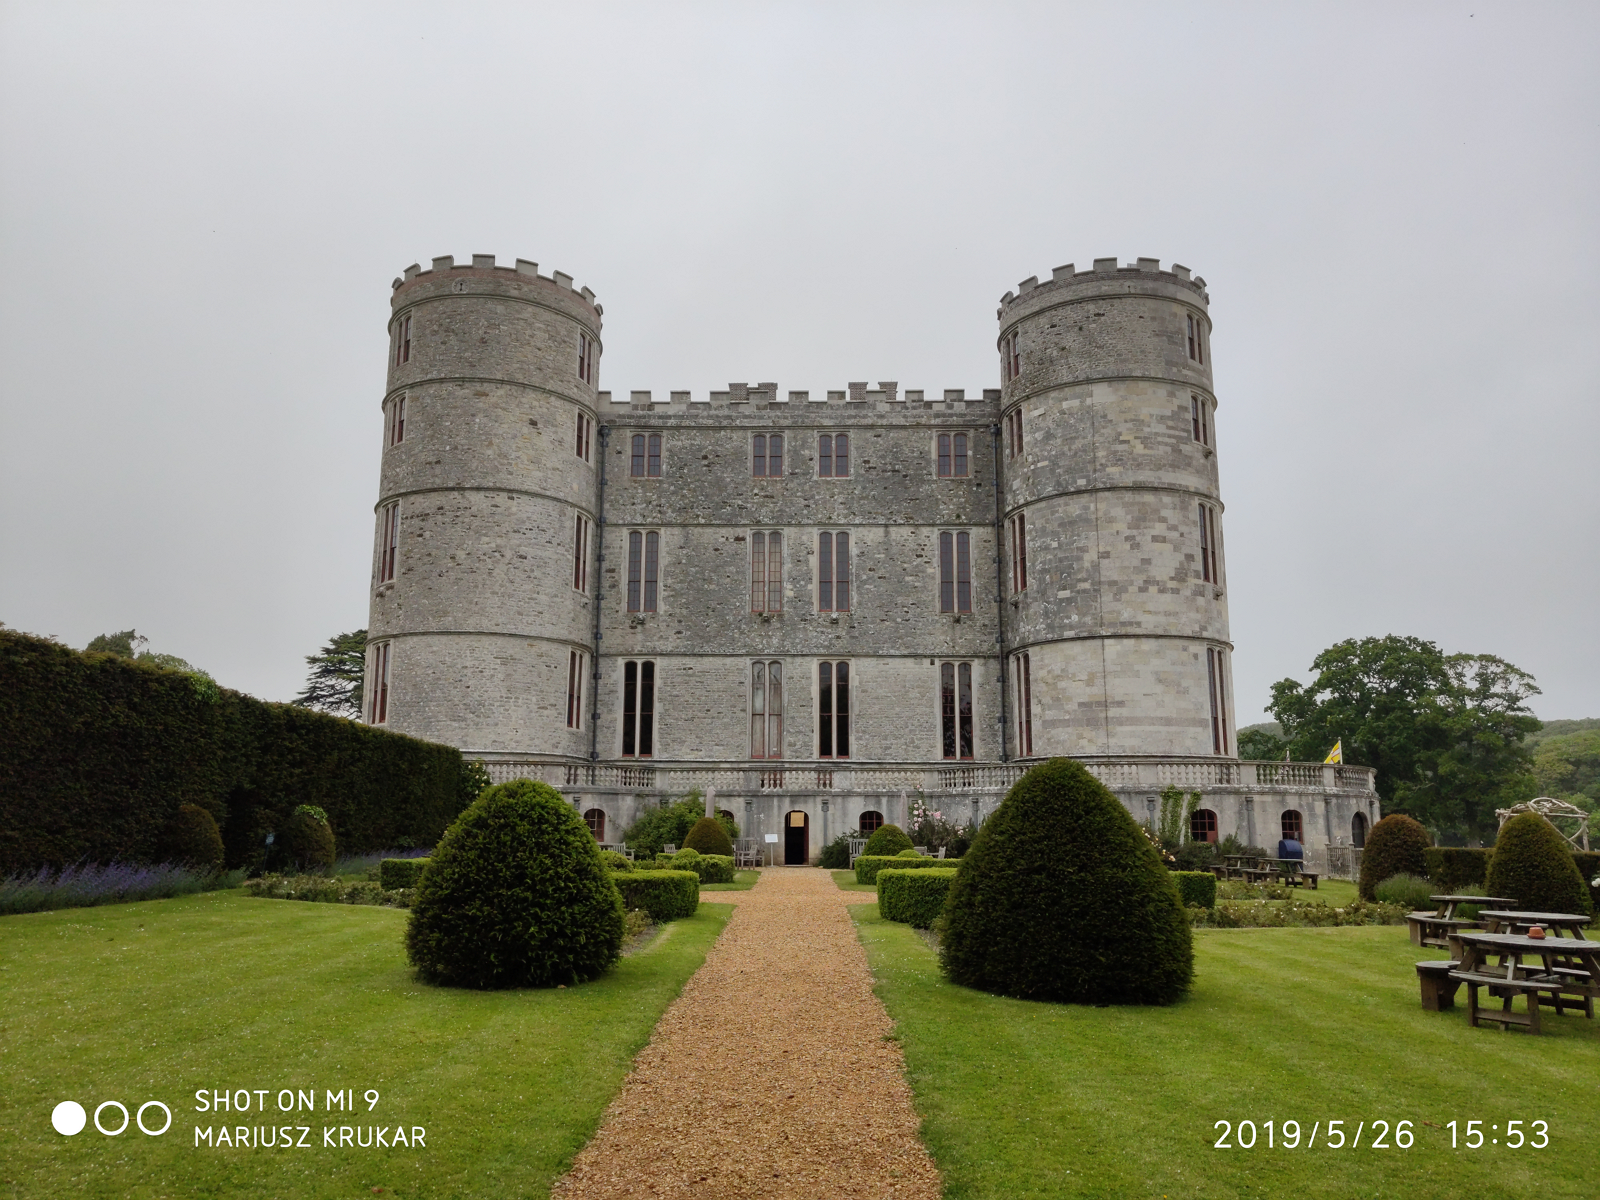
2. ZOOM AND MACRO FEATURES
All zoom and macro features in Xiaomi Mi 9 6GB 128GB (Global Version) are pretty much the same as in its predecessor – Xiaomi Mi 8. The difference lies in the digital zoom factor, which has been extended up to 10x (2×5) instead of 8x (2×4) in the Mi 8 device.
Considering the macro picture possibility, it can be achieved even by the 48MP image (Pic. 19-20). There is completely no option to gain it by wide-angle mode (Pic. 18).

The minimum distance, as we can put our device a front of an object is about 10cm. That’s good and much better than in Mi 8, where we were able to take images from about 25-30cm distance. It means, that even normal images can bring a better view, than in the previous model (Pic. 21,22).

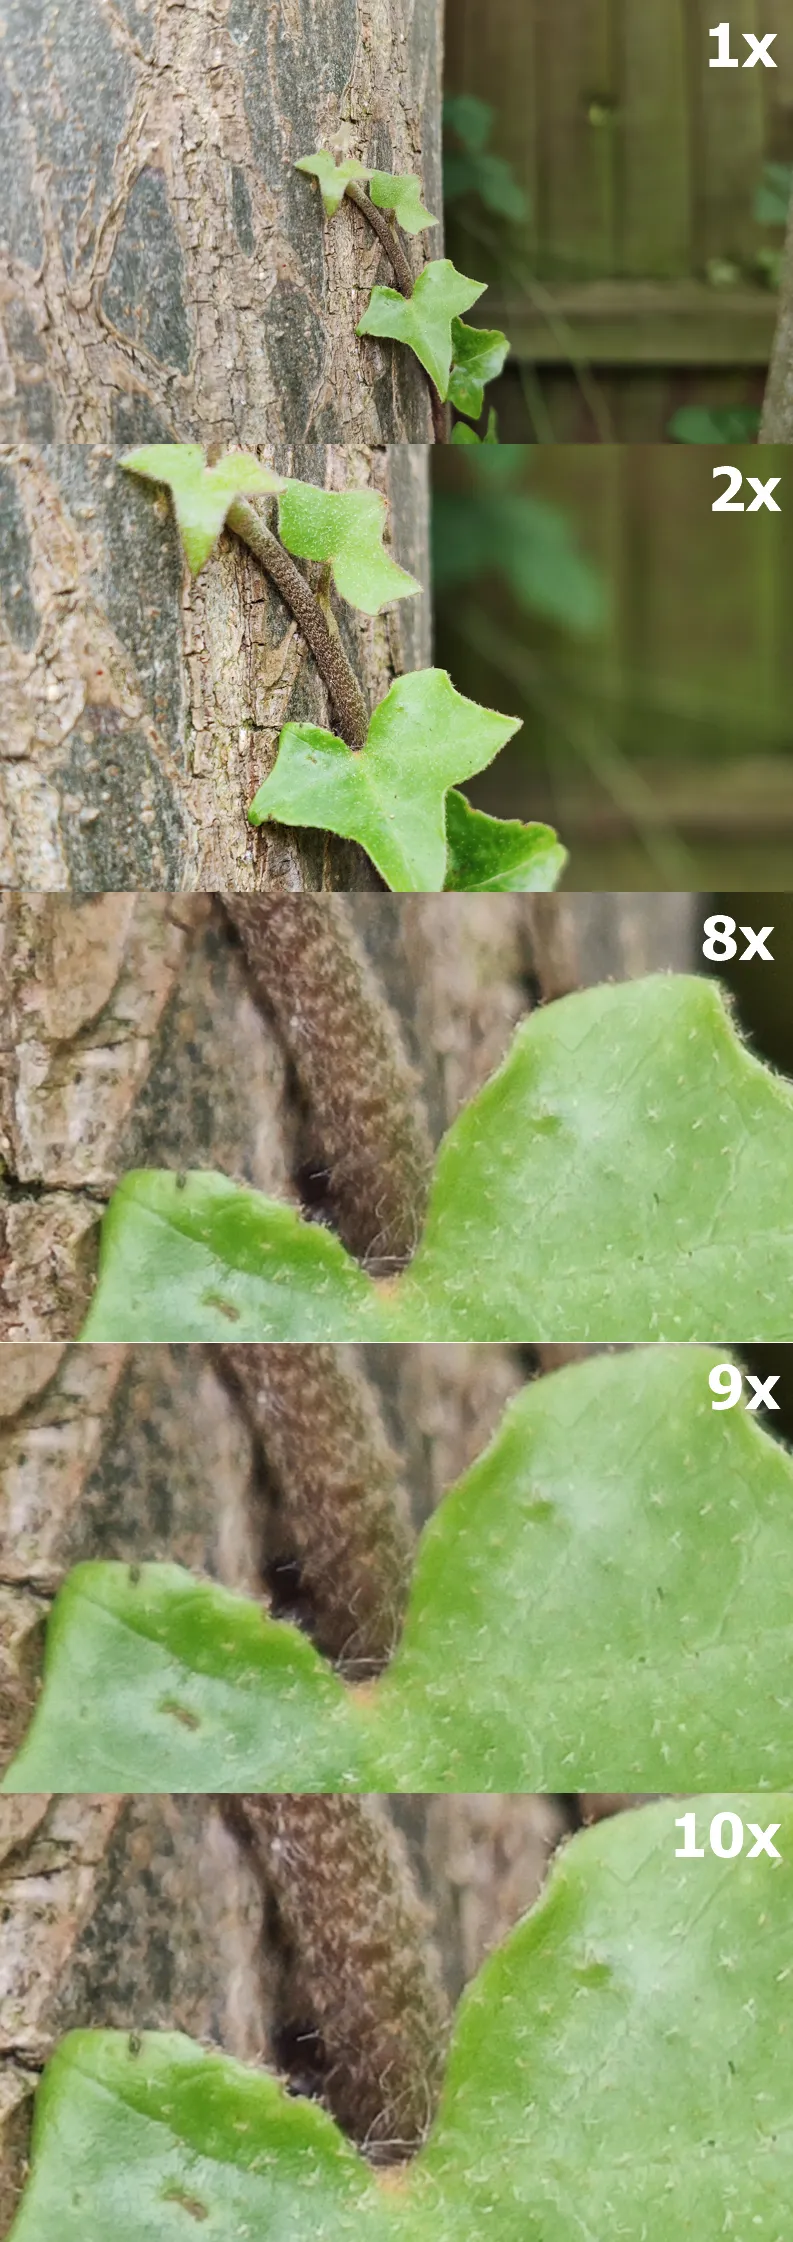

The zoom factor works exactly the same. Because Xiaomi Mi 9, as well as its predecessor, Mi 8, has only a 2x optical zoom camera, there is no possibility of having a better image. I even would say, that this 2x optical zoom is even a bit worse in Mi 9 than in Mi 8. Anyway, the biggest downside of Mi 9 Zoom is its disappearance in the Panorama photo mode! If you jump to my Mi 8 zoom camera test, you see, that there is a 2x zoom option also for panoramic pictures, which corresponds to the optical zoom factor in that device. In Xiaomi Mi 9 6GB 128GB (Global Version) this feature has been switched off, unfortunately.
Despite the lack of a zoom option in Panorama mode and a bit worse optical zoom camera in Mi 9, it remains a useful option, as long as you remember to set your focus correctly! Seeing my 8x zoom image below you have the best example of wrongly adjusted focus, which can make your image blurry, in spite of the camera quality (Pic. 23 – 25).
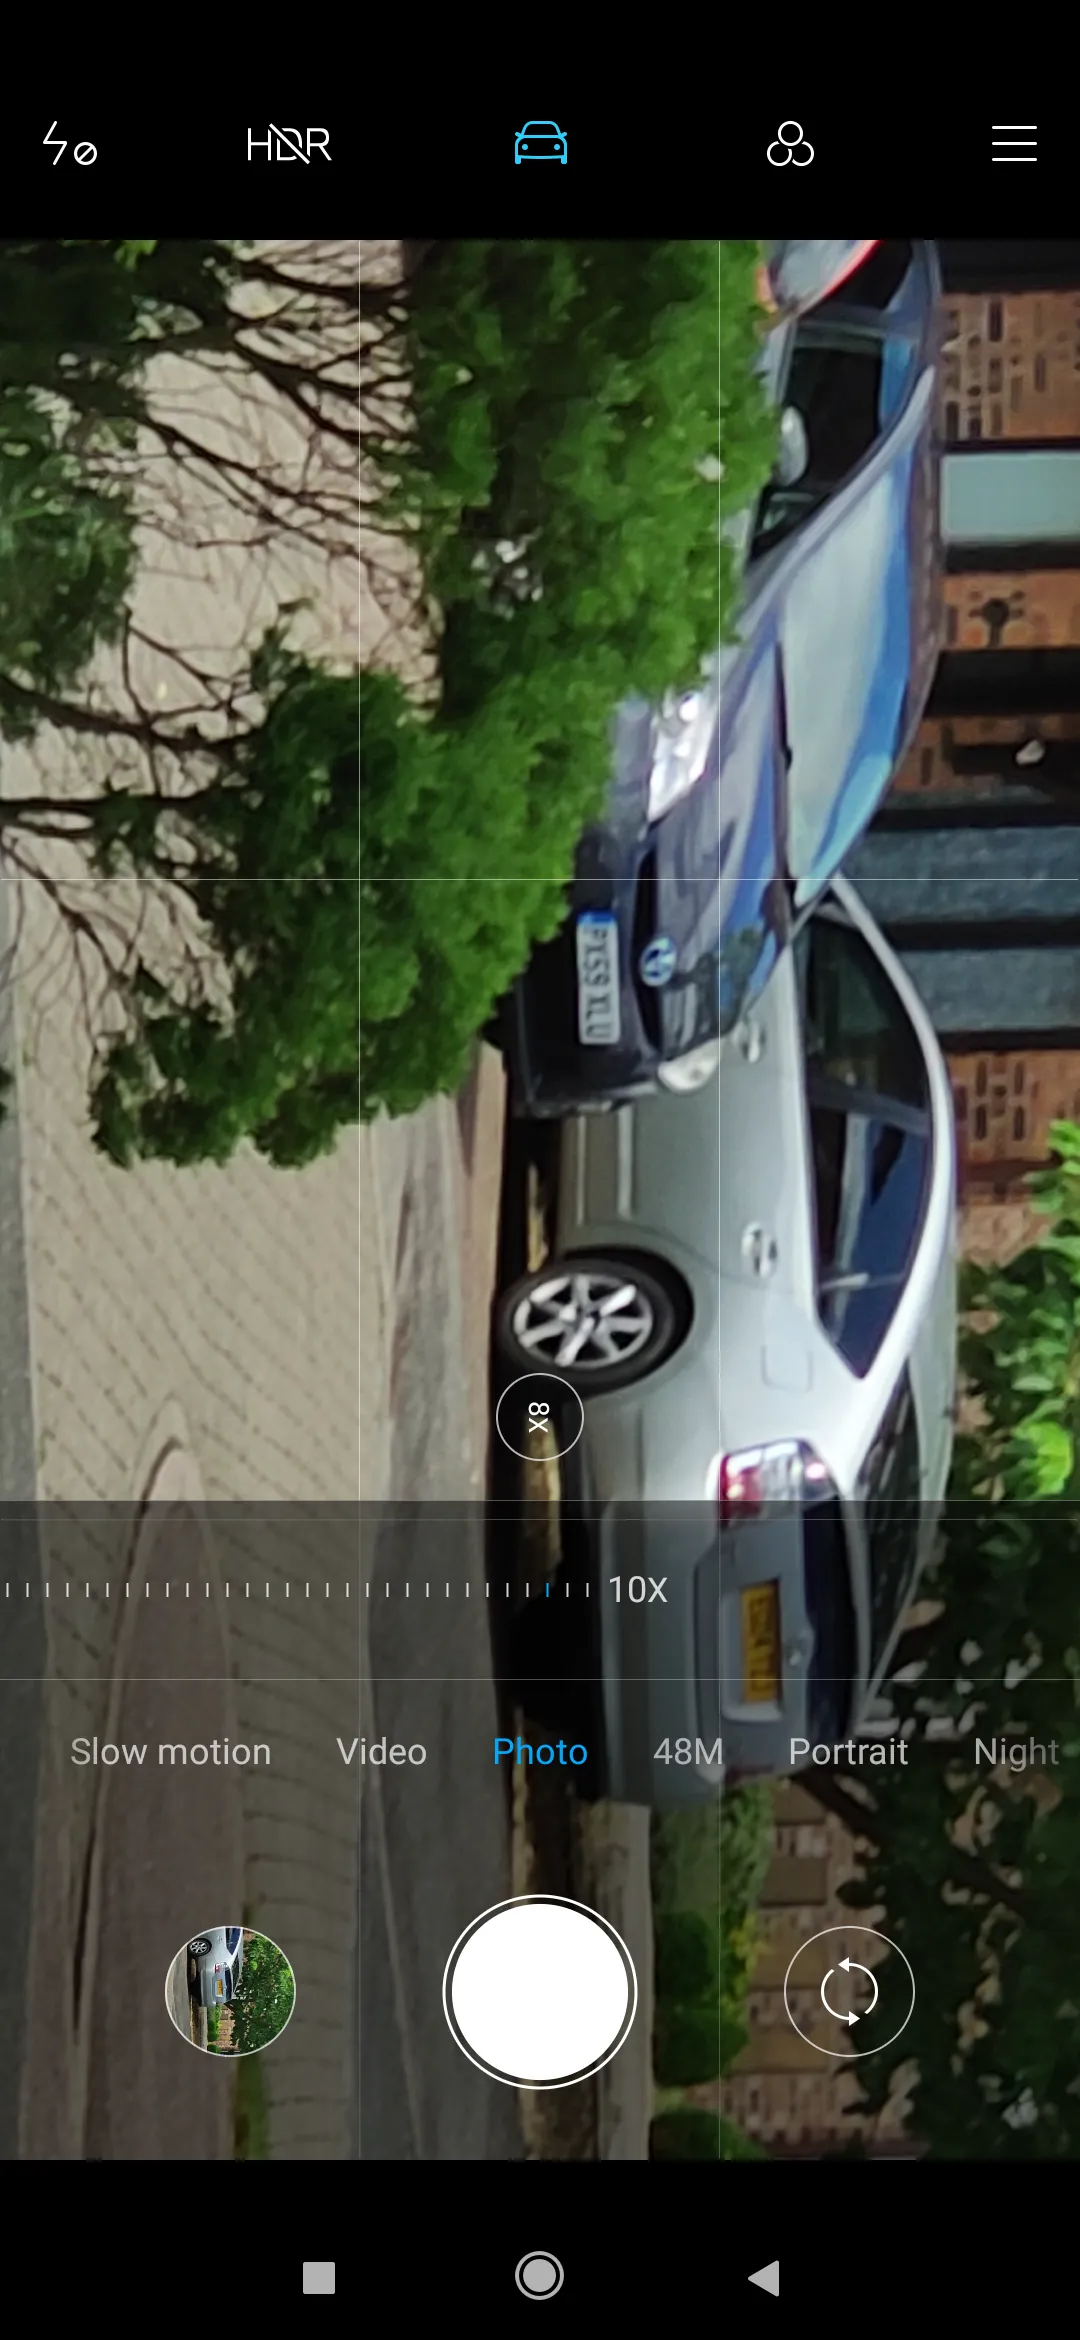
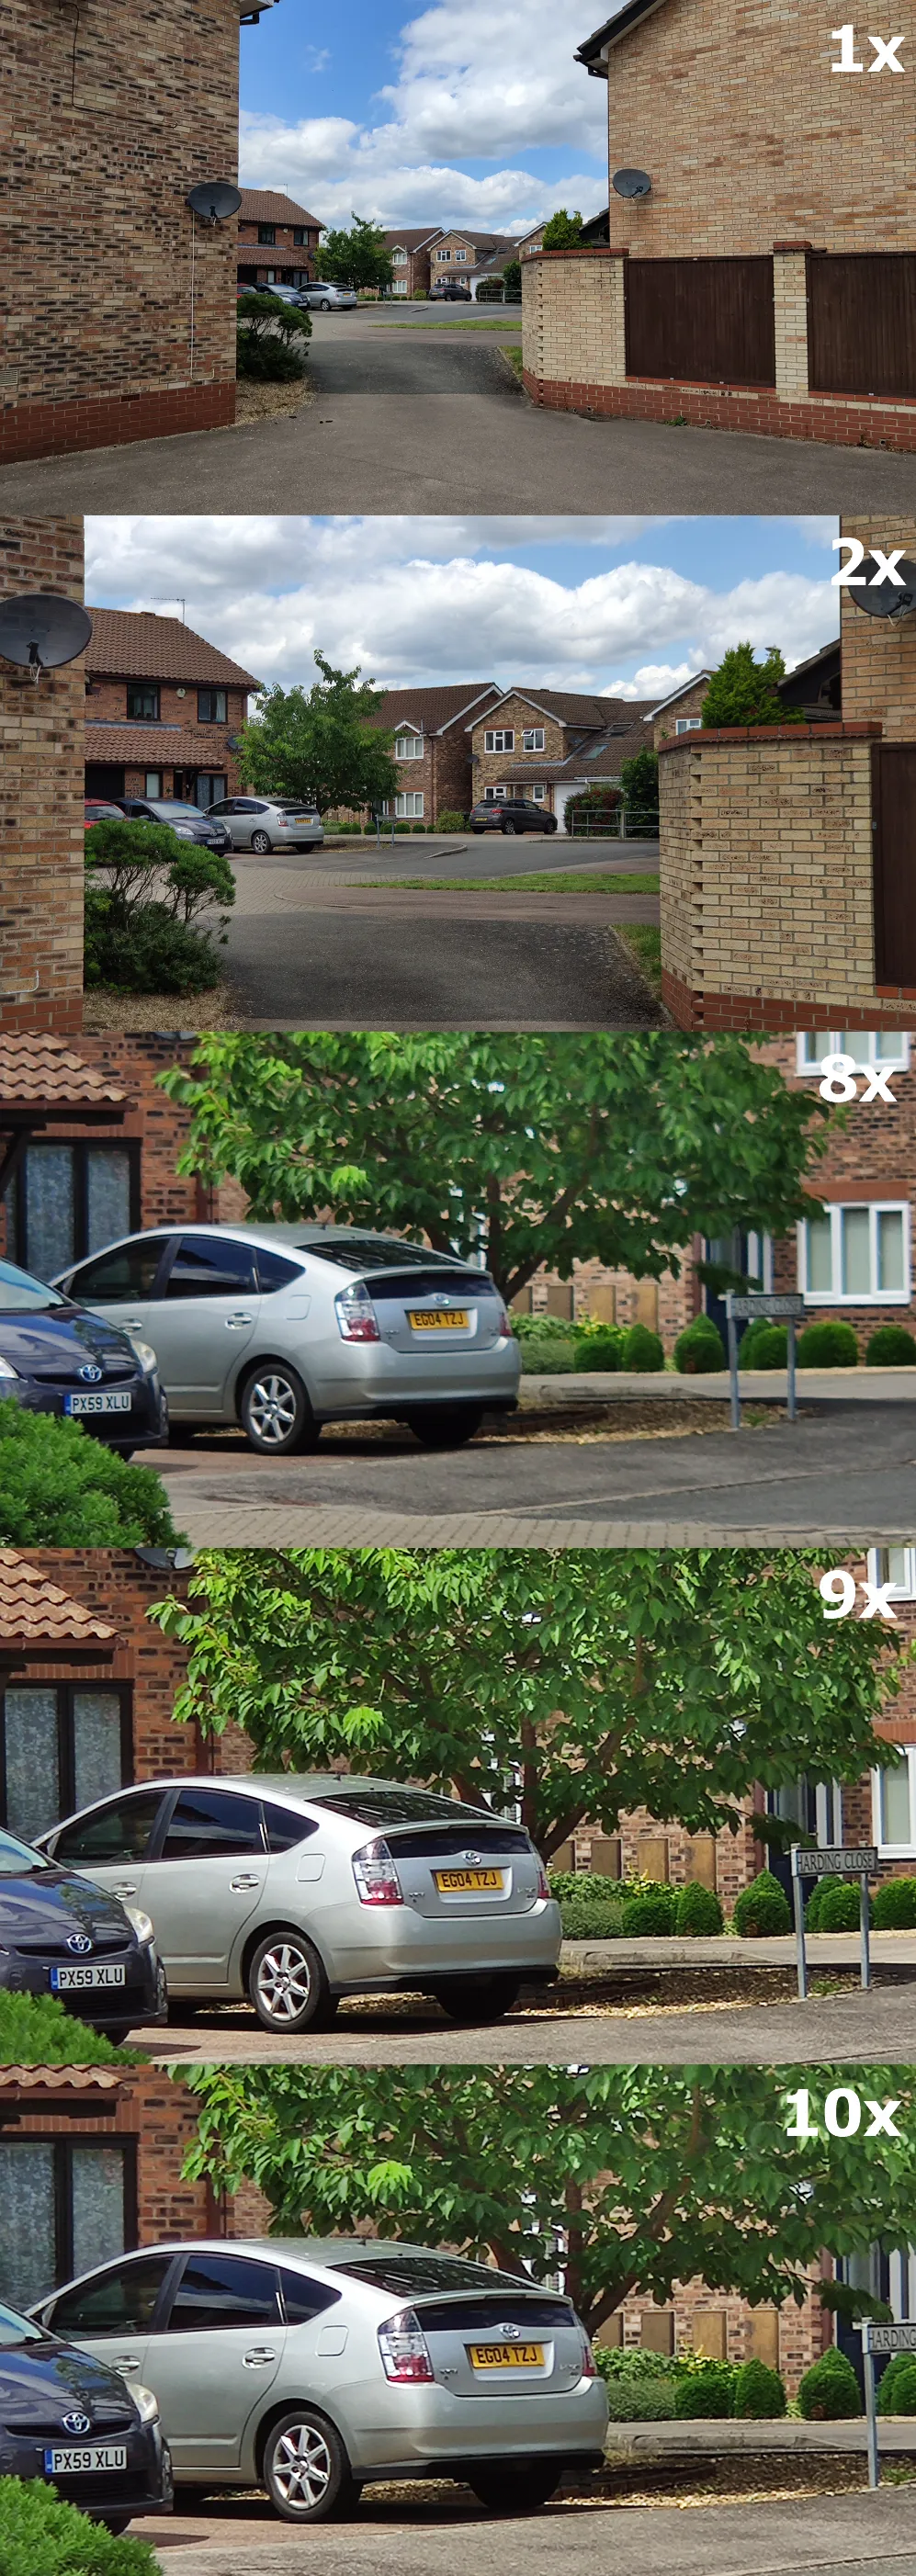

See also another example below (Pic. 26, 27).
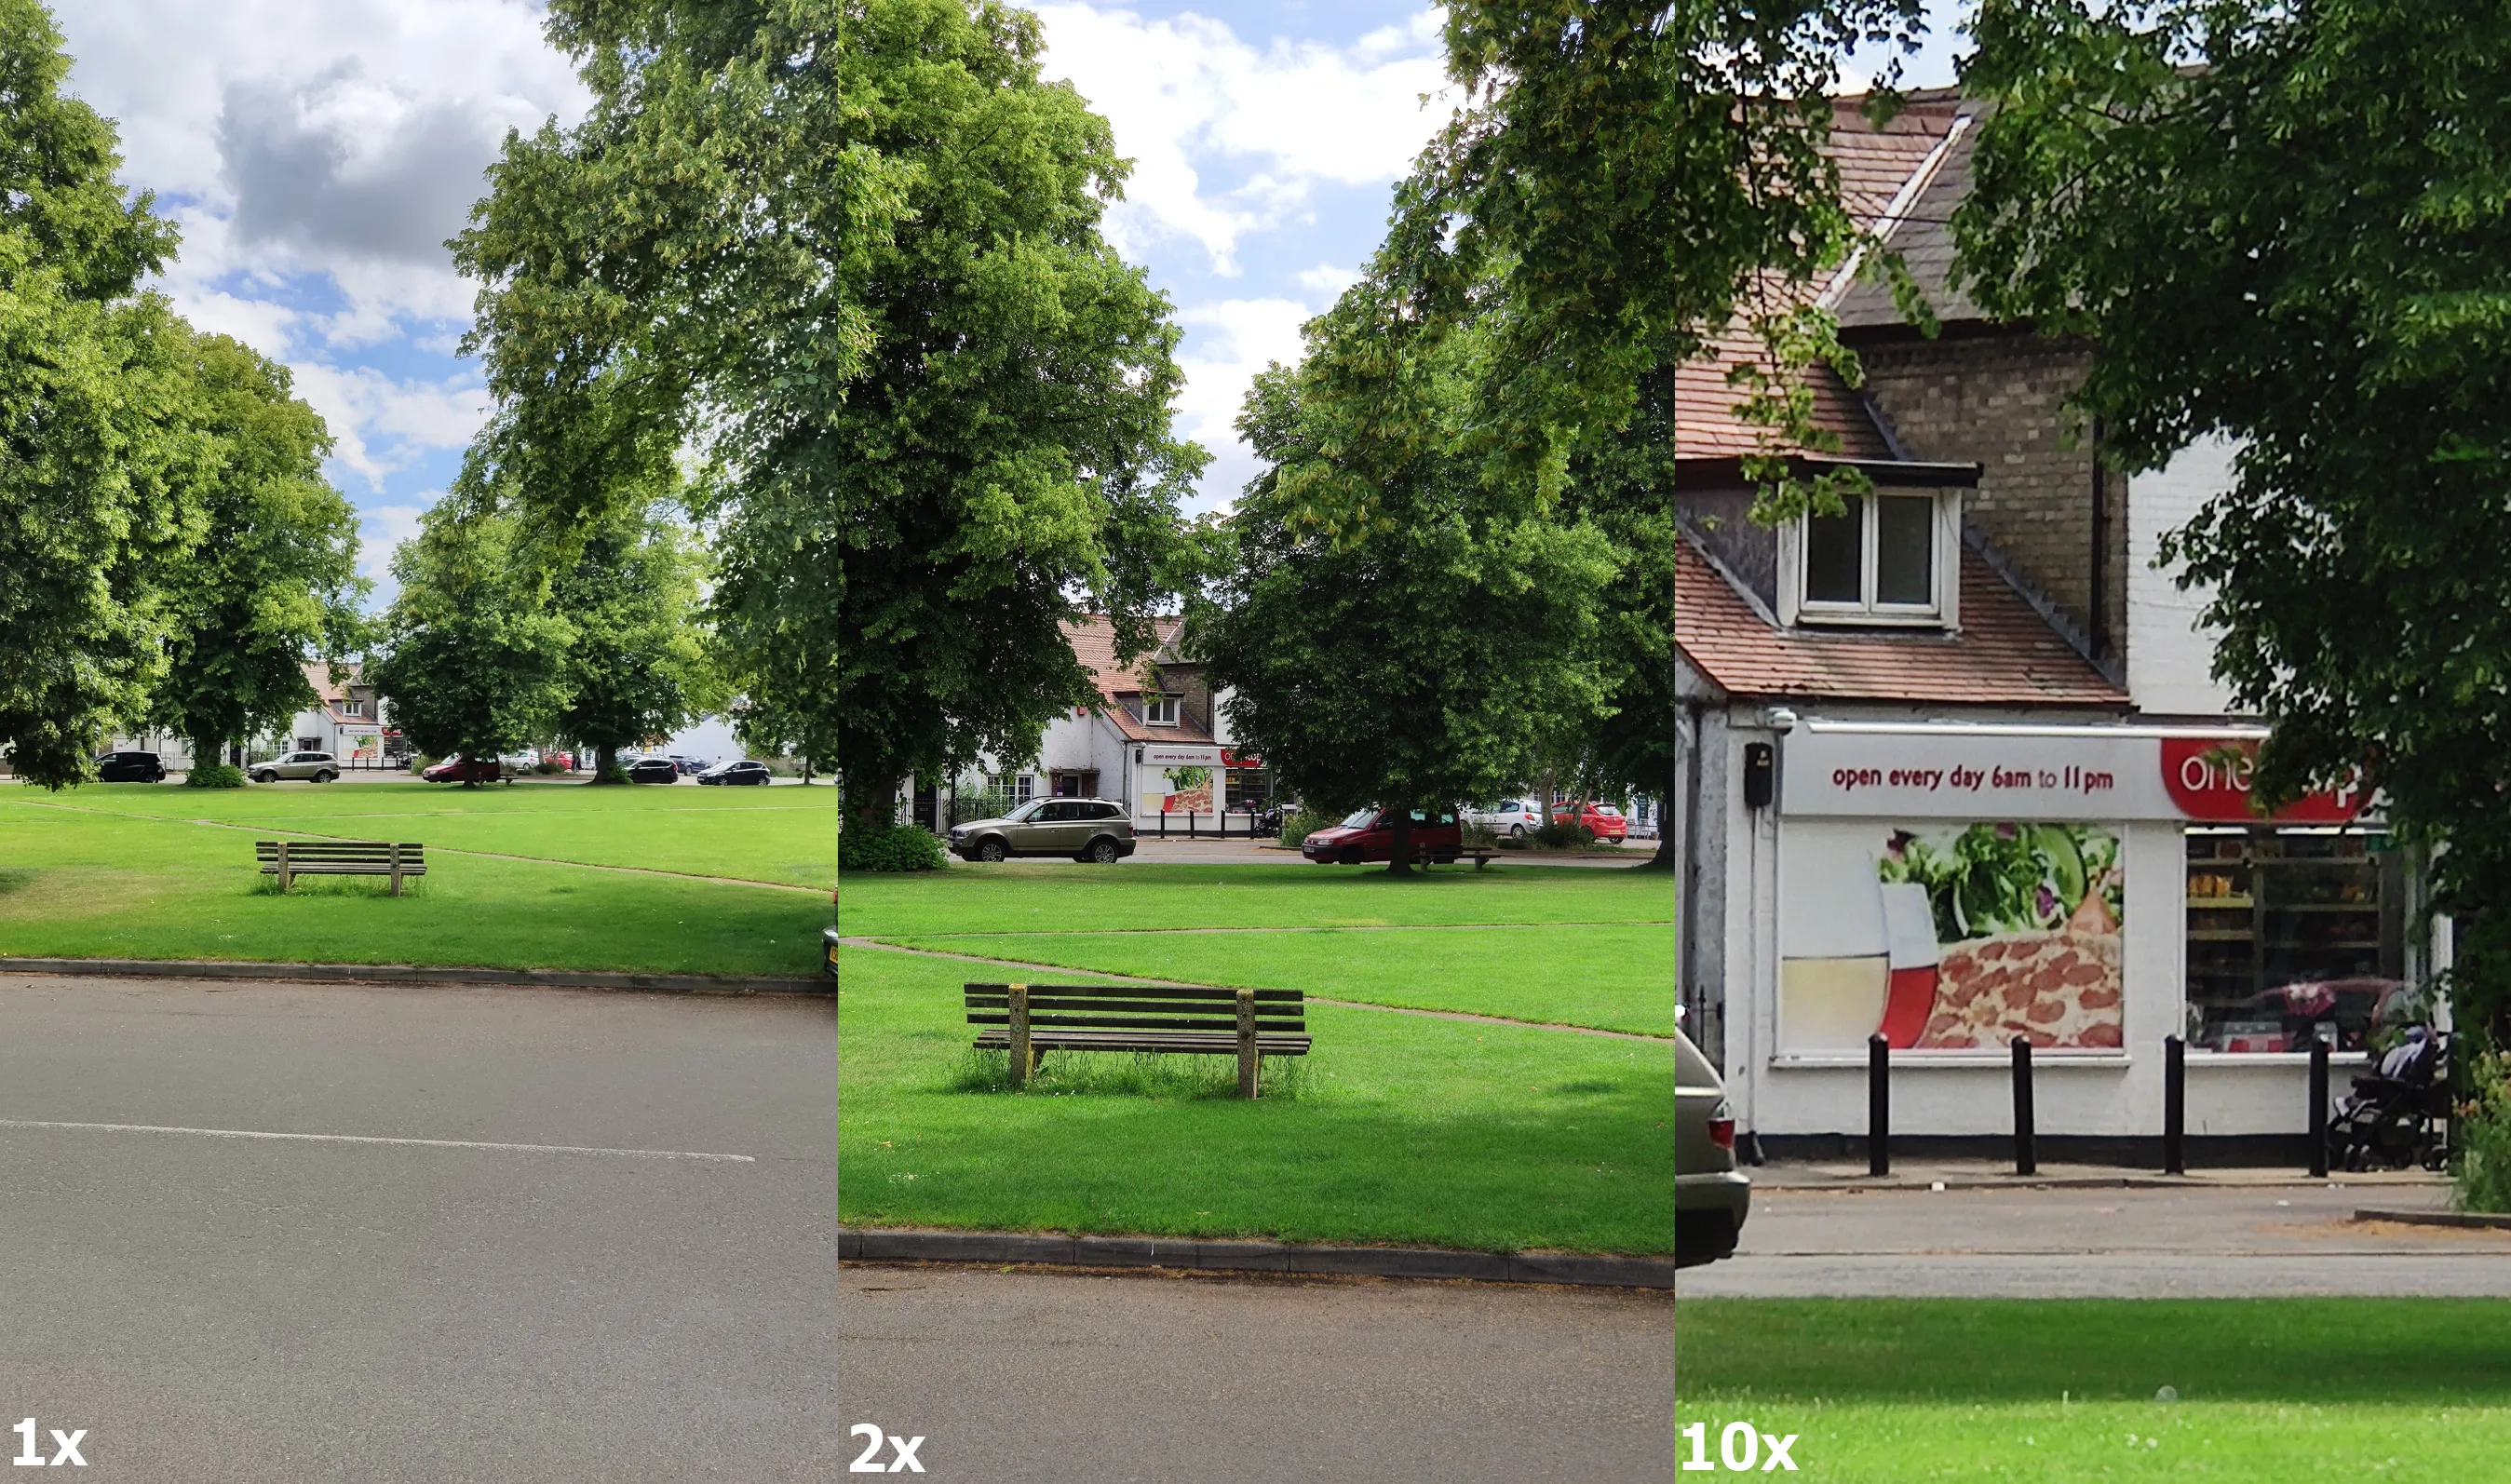
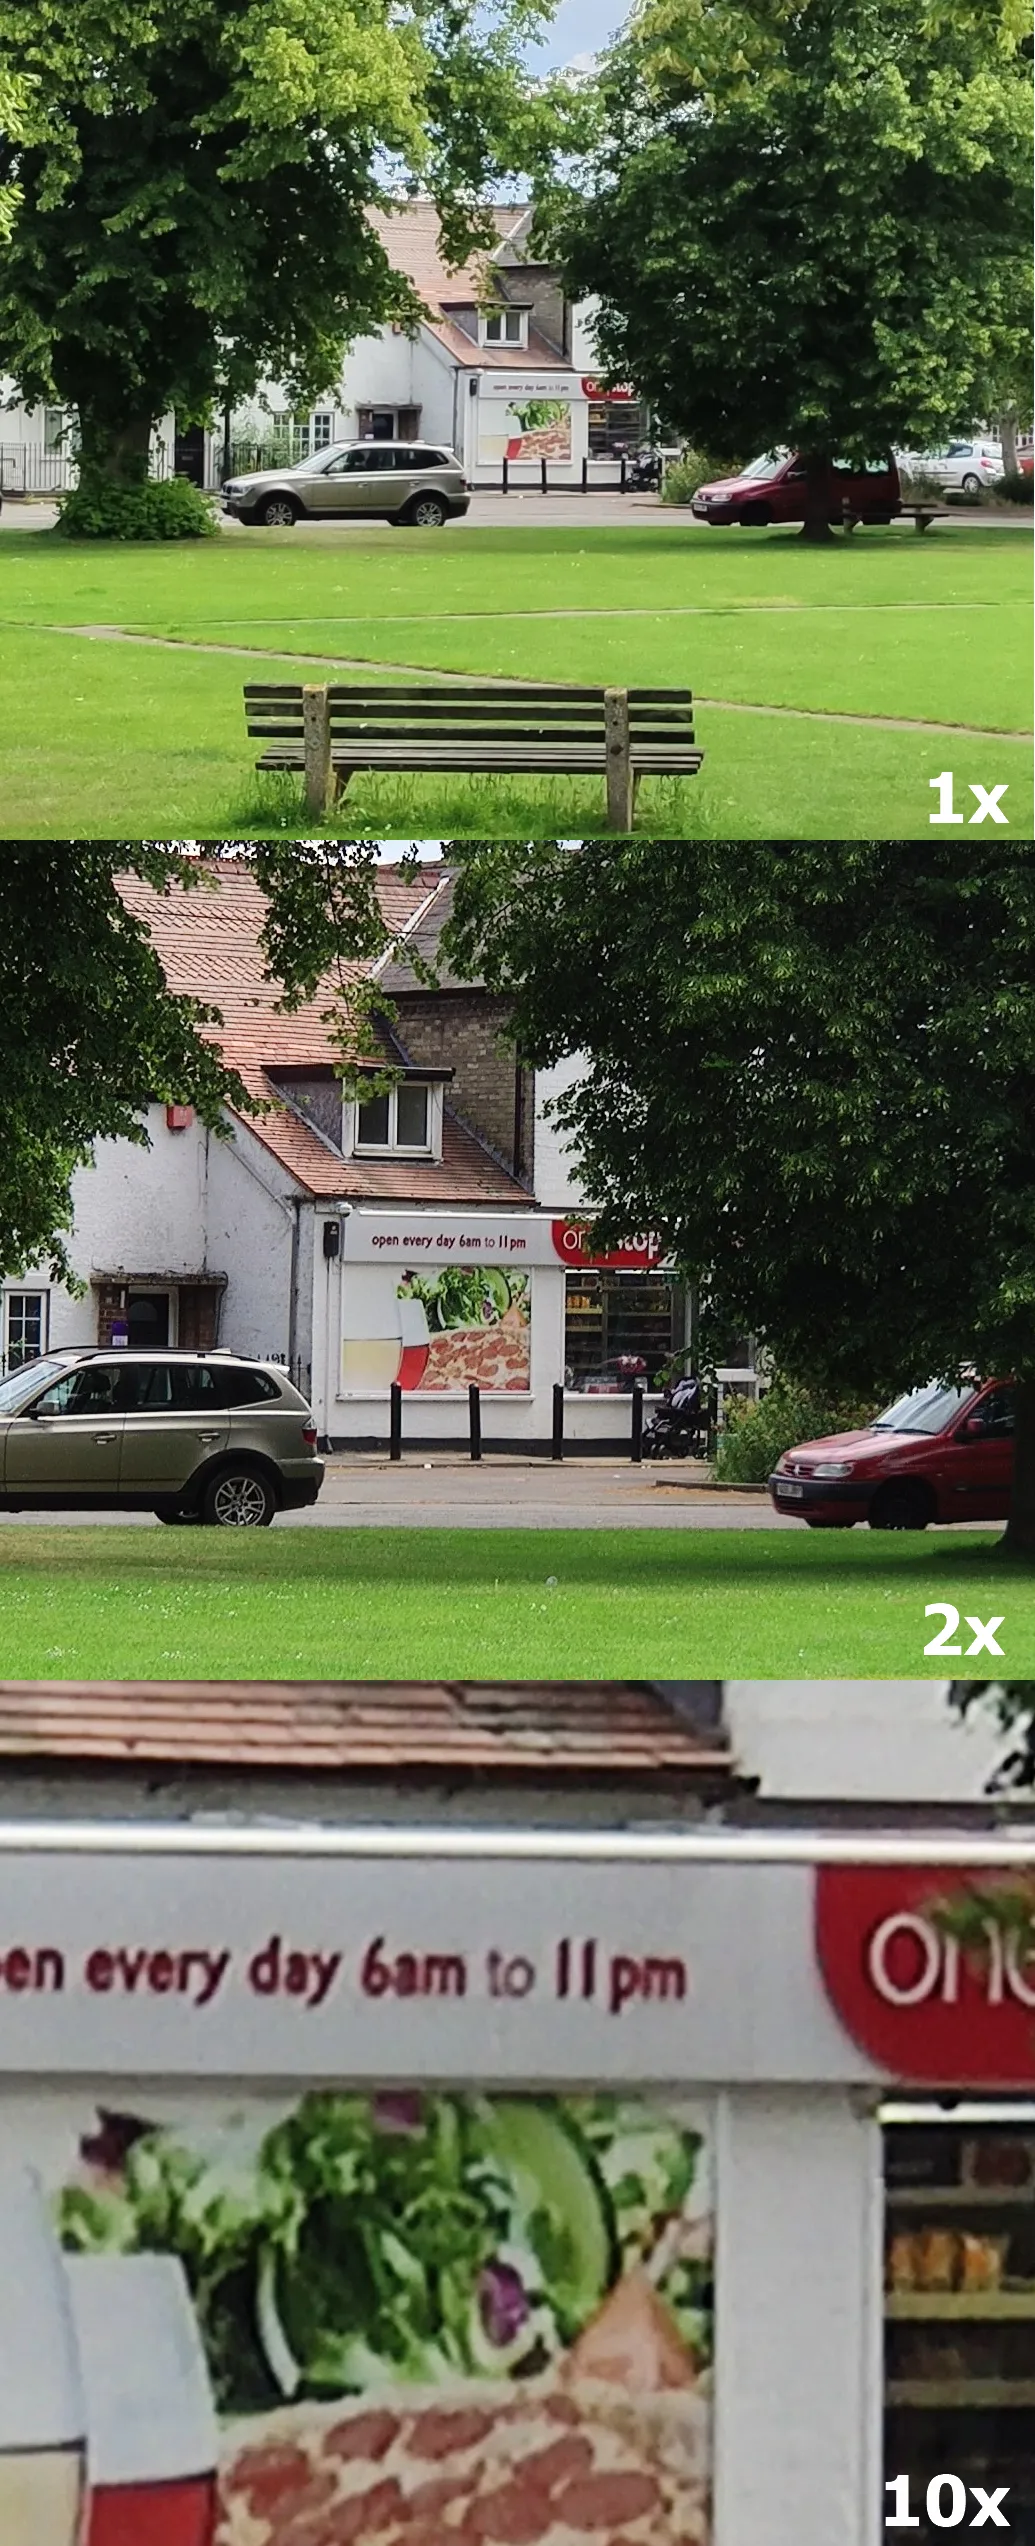
See also a couple example images below(Pic. 28, 29):

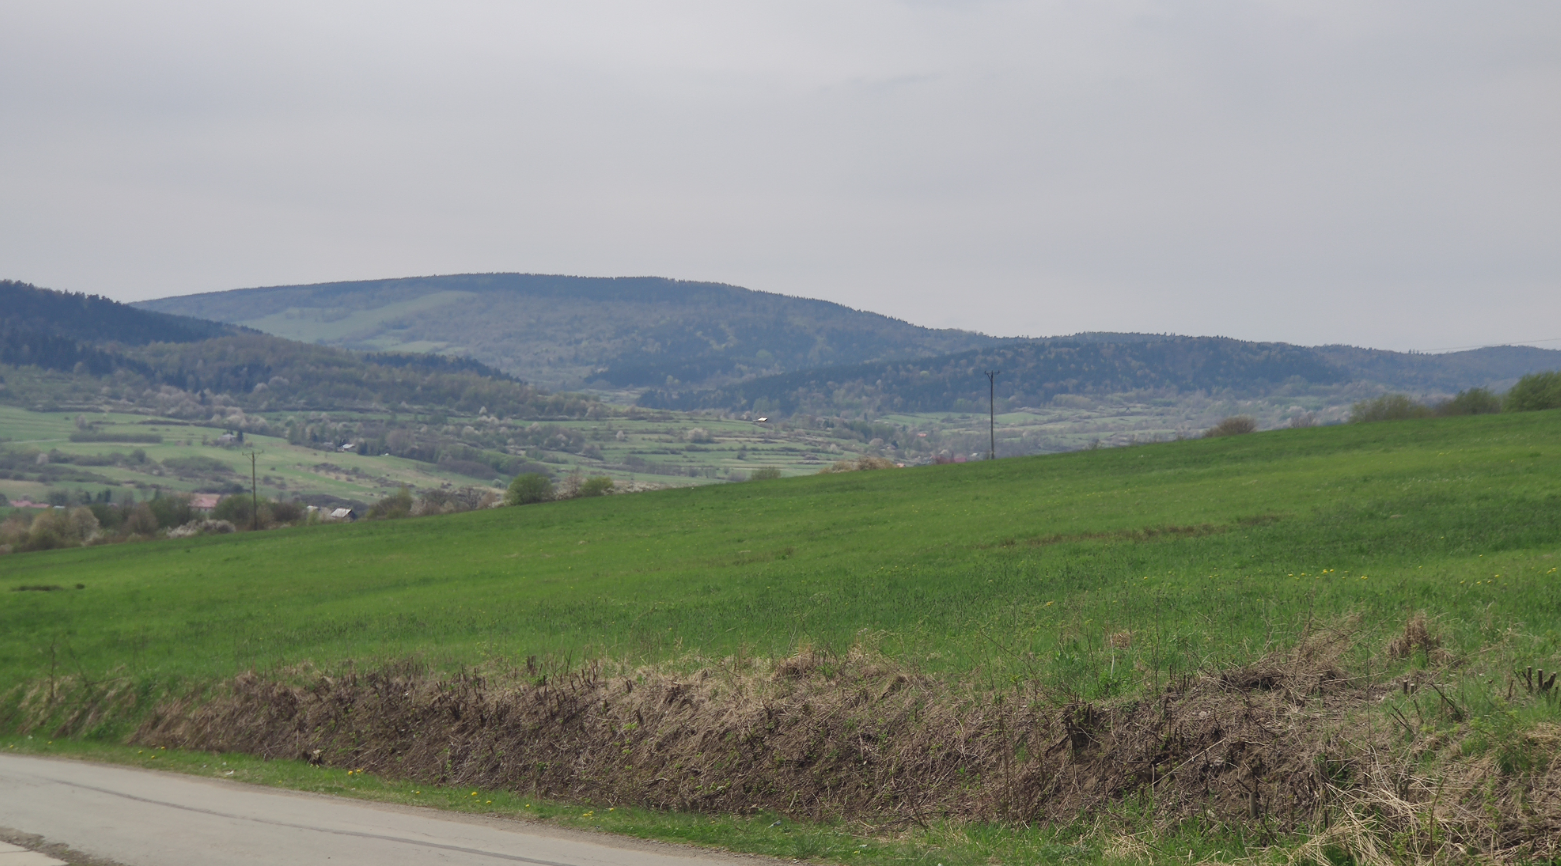
As a summary these both chapters, see the Xiaomi Mi 9 screen grab video below:
3. VIDEO FACILITIES
The video facilities in Xiaomi Mi 9 6GB 128GB (Global Version), likewise image options, are very similar, compared to the previous Mi 8 device. However, some of them have been developed, and thanks to this we can look at it mostly on the plus side. The biggest upgrade has been done with Slow Motion and Macro modes, which come separately in this device (Pic. 30), unlike to Xiaomi Mi 8, where they appear together in video mode.
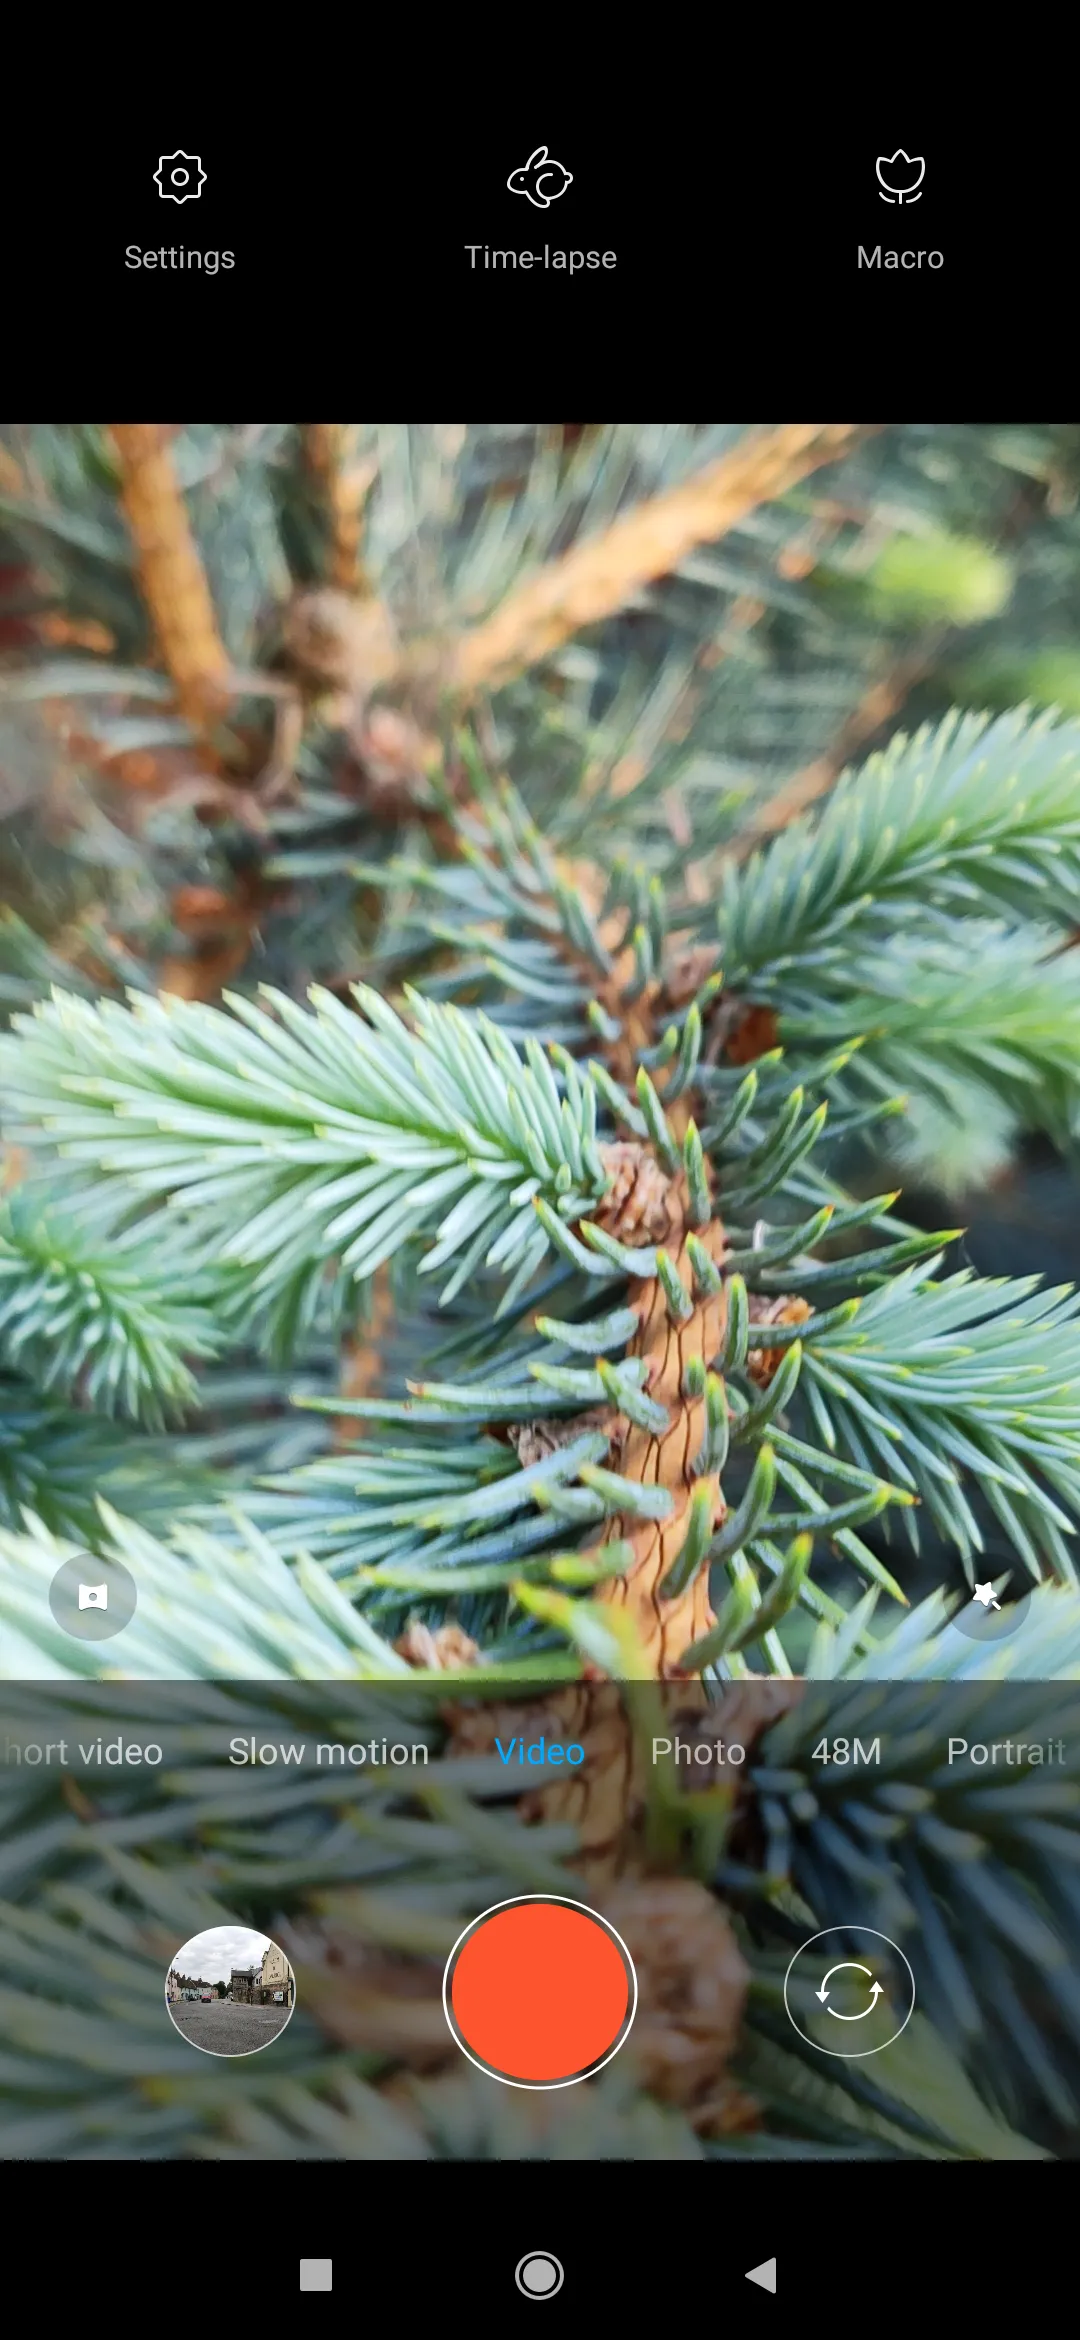
The Slow motion video is worth big attention because producers offered 3 kinds of slow motion in this instrument. You can make slow-motion with 120FPS, 240FPS, and 960FPS. “The fastest” slow-motion match to 120FPS and “the slowest” to 960FPS. We must remember, that under 960FPS the device is able to record no more, than 10sec of the footage (Pic. 31-32). In the last one, the slow-motion starts once the button turns into a white dot (Pic. 30). Be prepared a bit earlier if you want to catch a moment. It applies to all Slow-motion modes in Mi 9. You must start recording a few seconds earlier, which can be a bit awkward sometimes. Personally, I would rather have a similar Slow-motion technique to the previous, Mi 8 mode, where the slower movie starts from the very beginning, just after pressing the red button. On the plus side, in Mi 9 we can use three Slow-motion modes instead of only one.
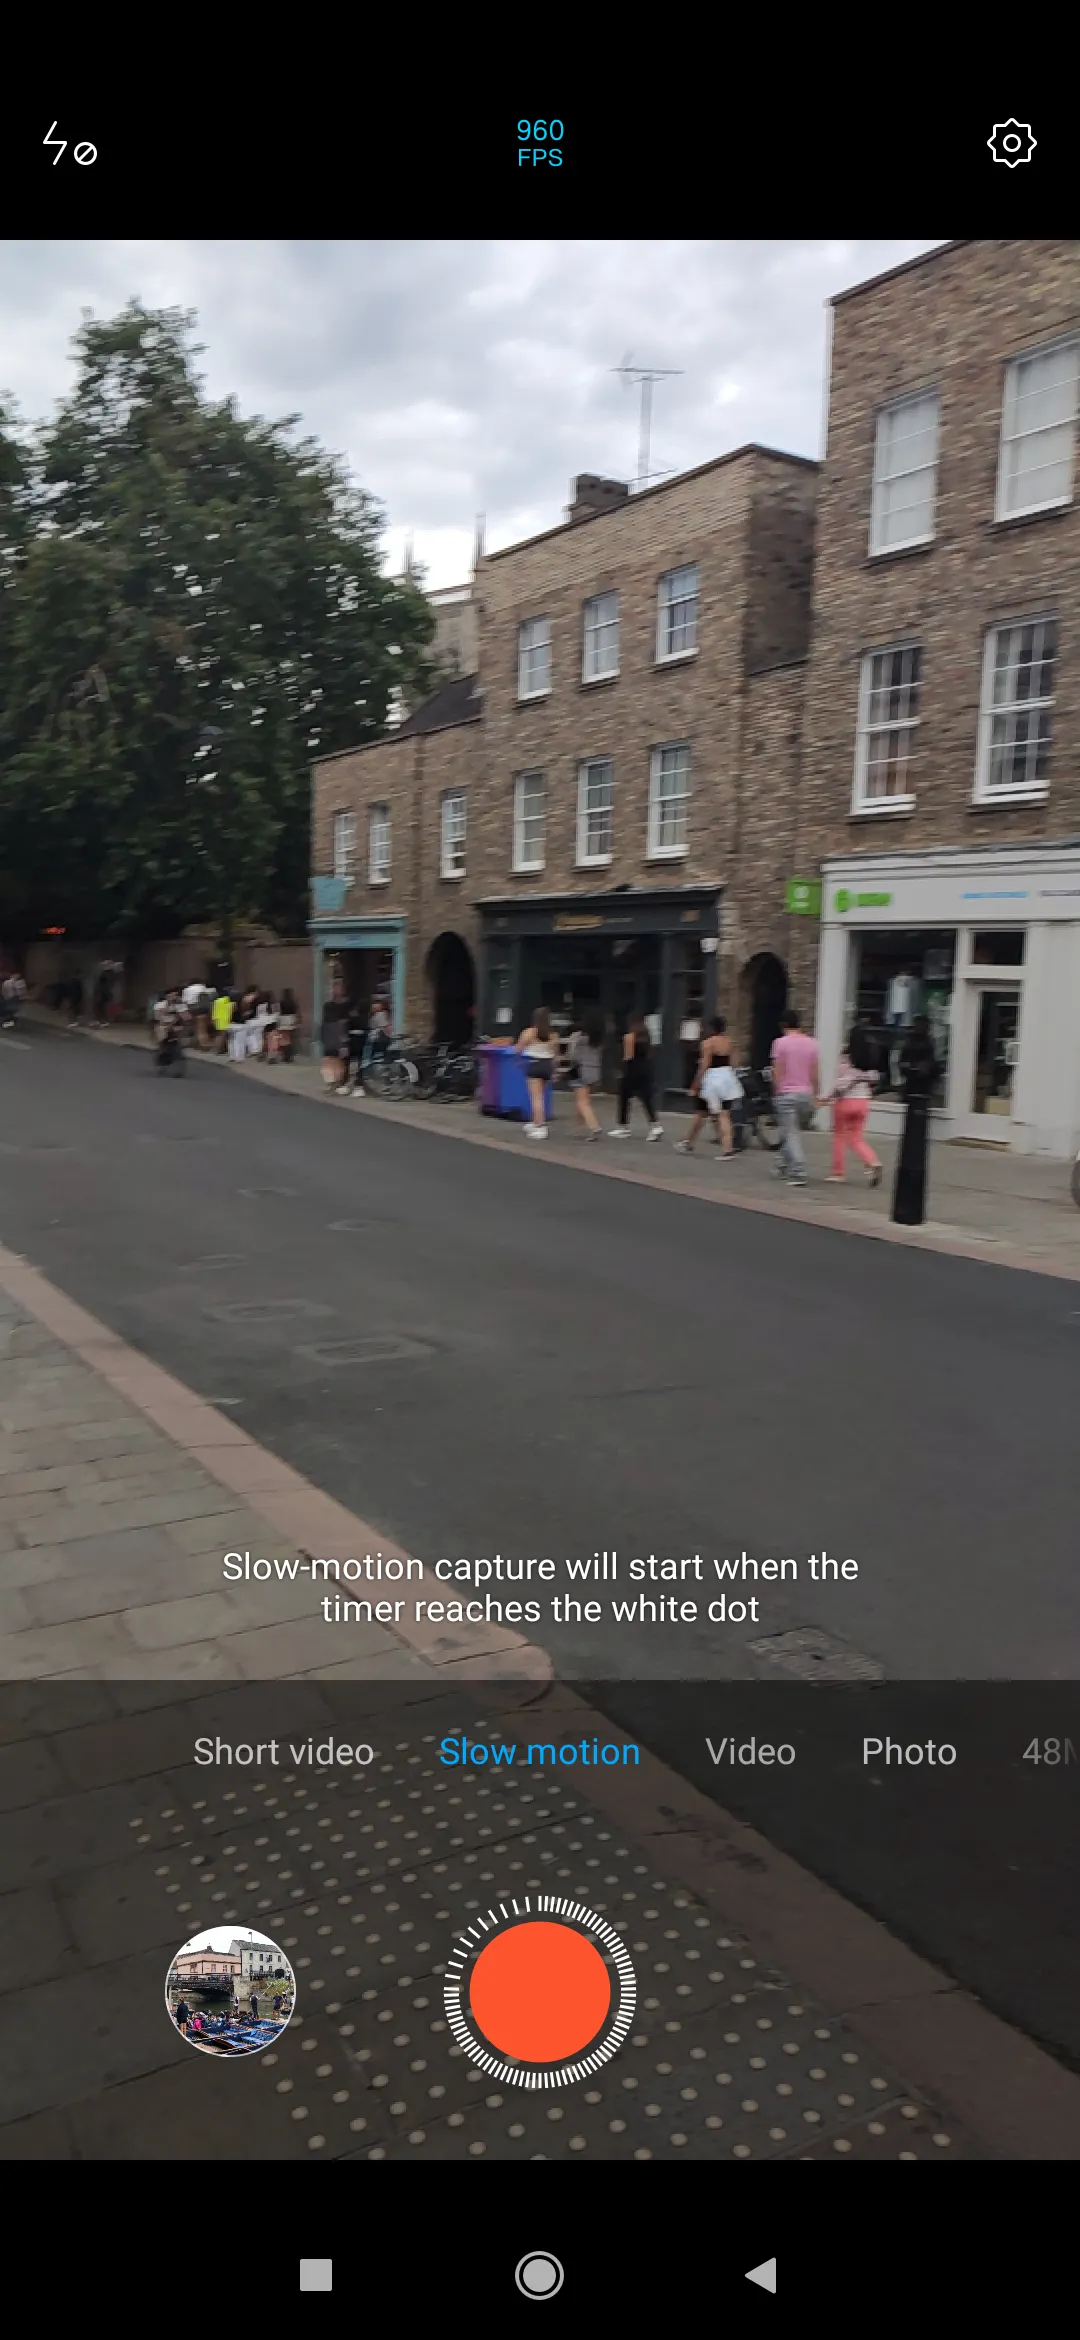
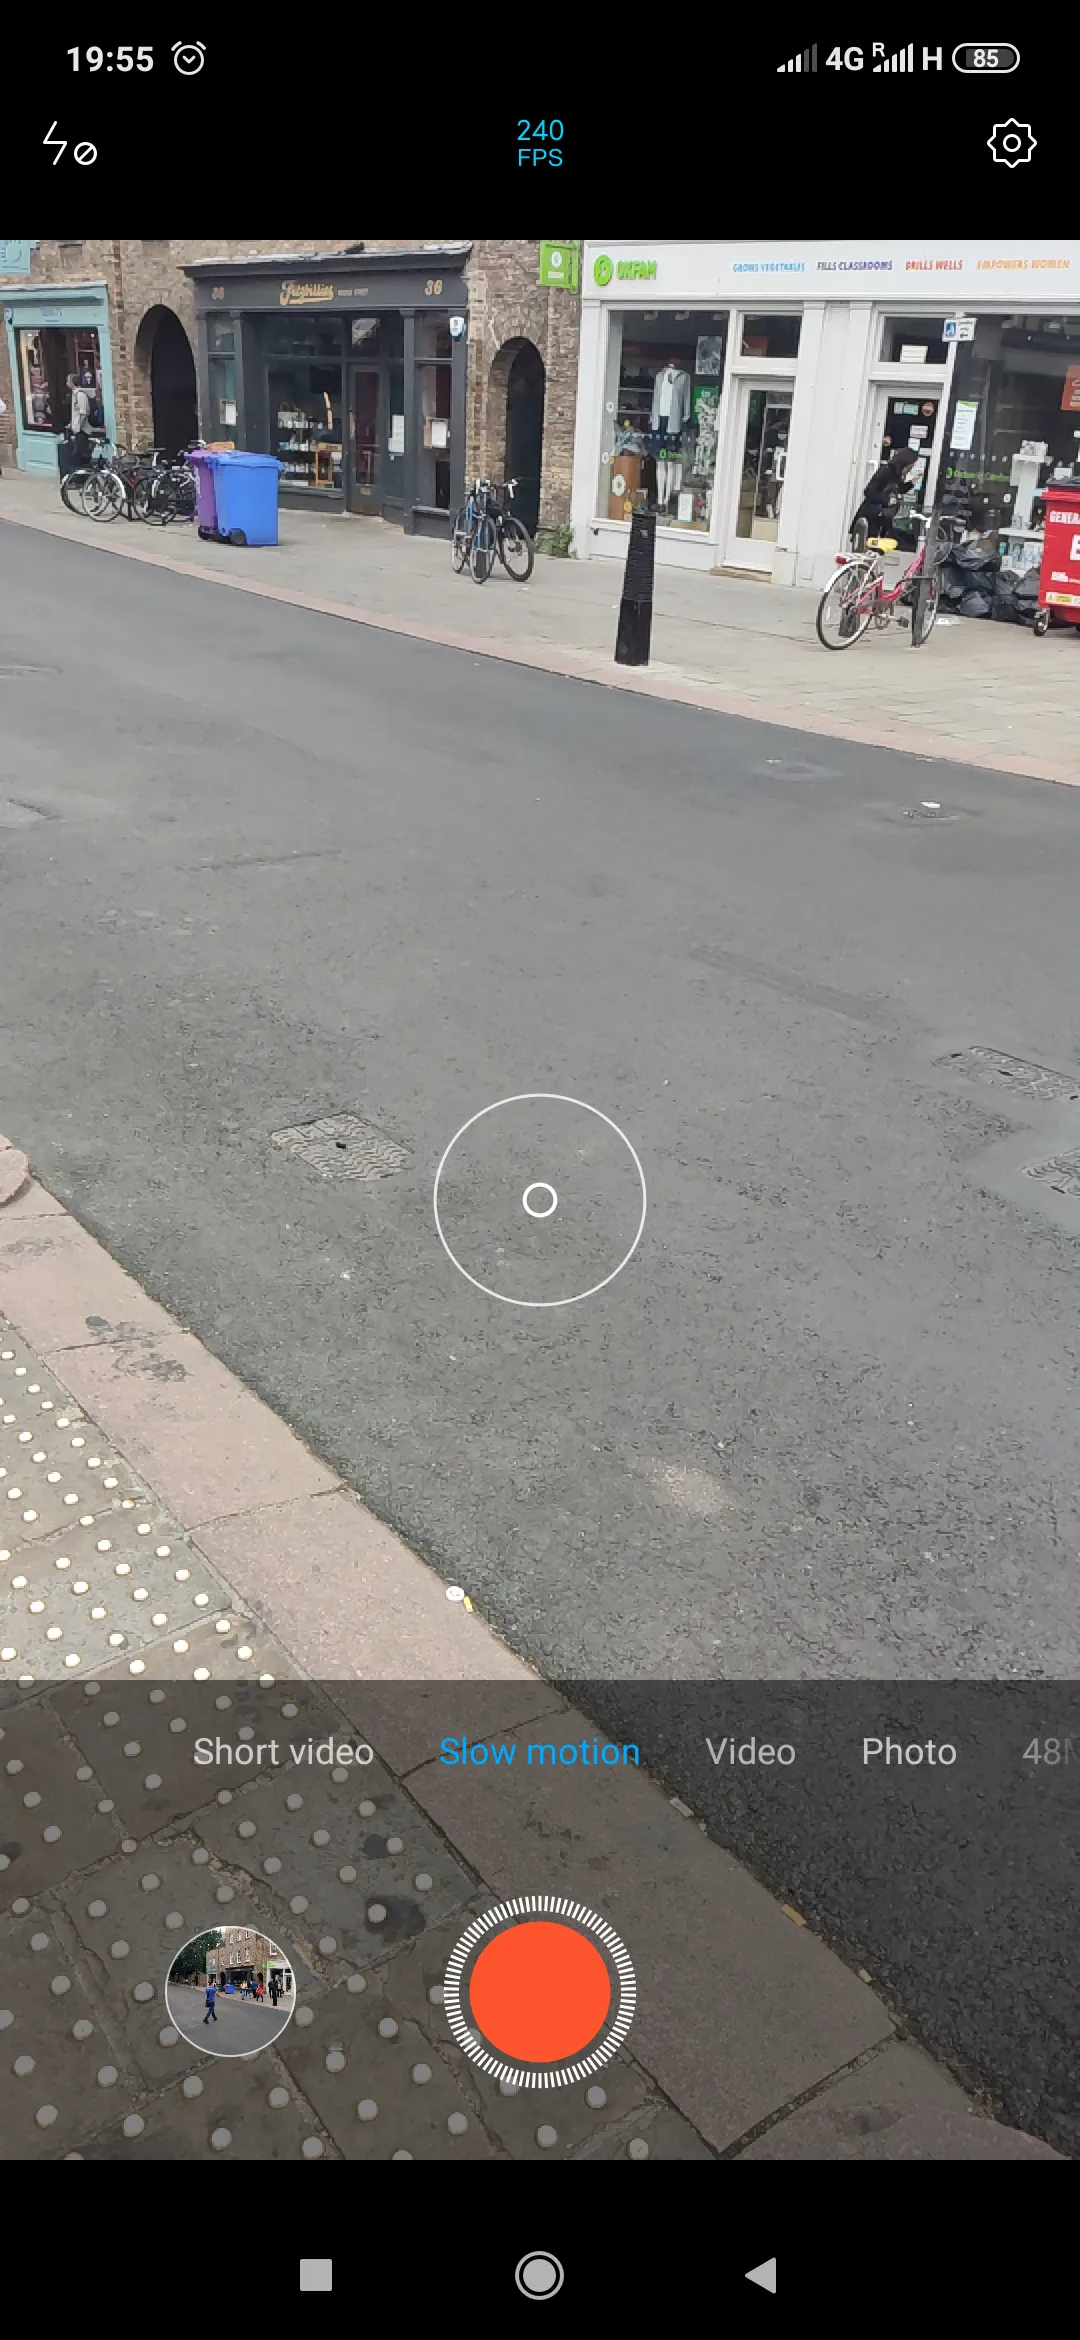
Using the Slow-motion mode in Mi 9 can be tricky for new users because, unlike the previous, Mi 8 devices, the footage is not been saved right after stopping recording!
The crude slow-motion footage is saved in the drive with extended default names, showing the “FPS” feature used when recording your movie (Pic. 33).
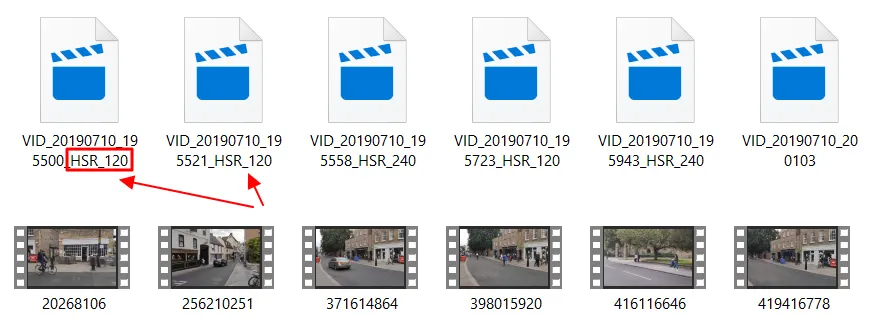
The output files come in pairs, where one counts exactly 10s and another one shows a rough time of recording (i.e 18s). To get slow-motion useful we must combine them together. Otherwise, you will see a static image only, which changes after clicking on the timeline in your movie player.
Fortunately, we can do the processing right after recording on our device. To do it, we should click anywhere on our screen to populate our slow-motion features (Pic. 34).
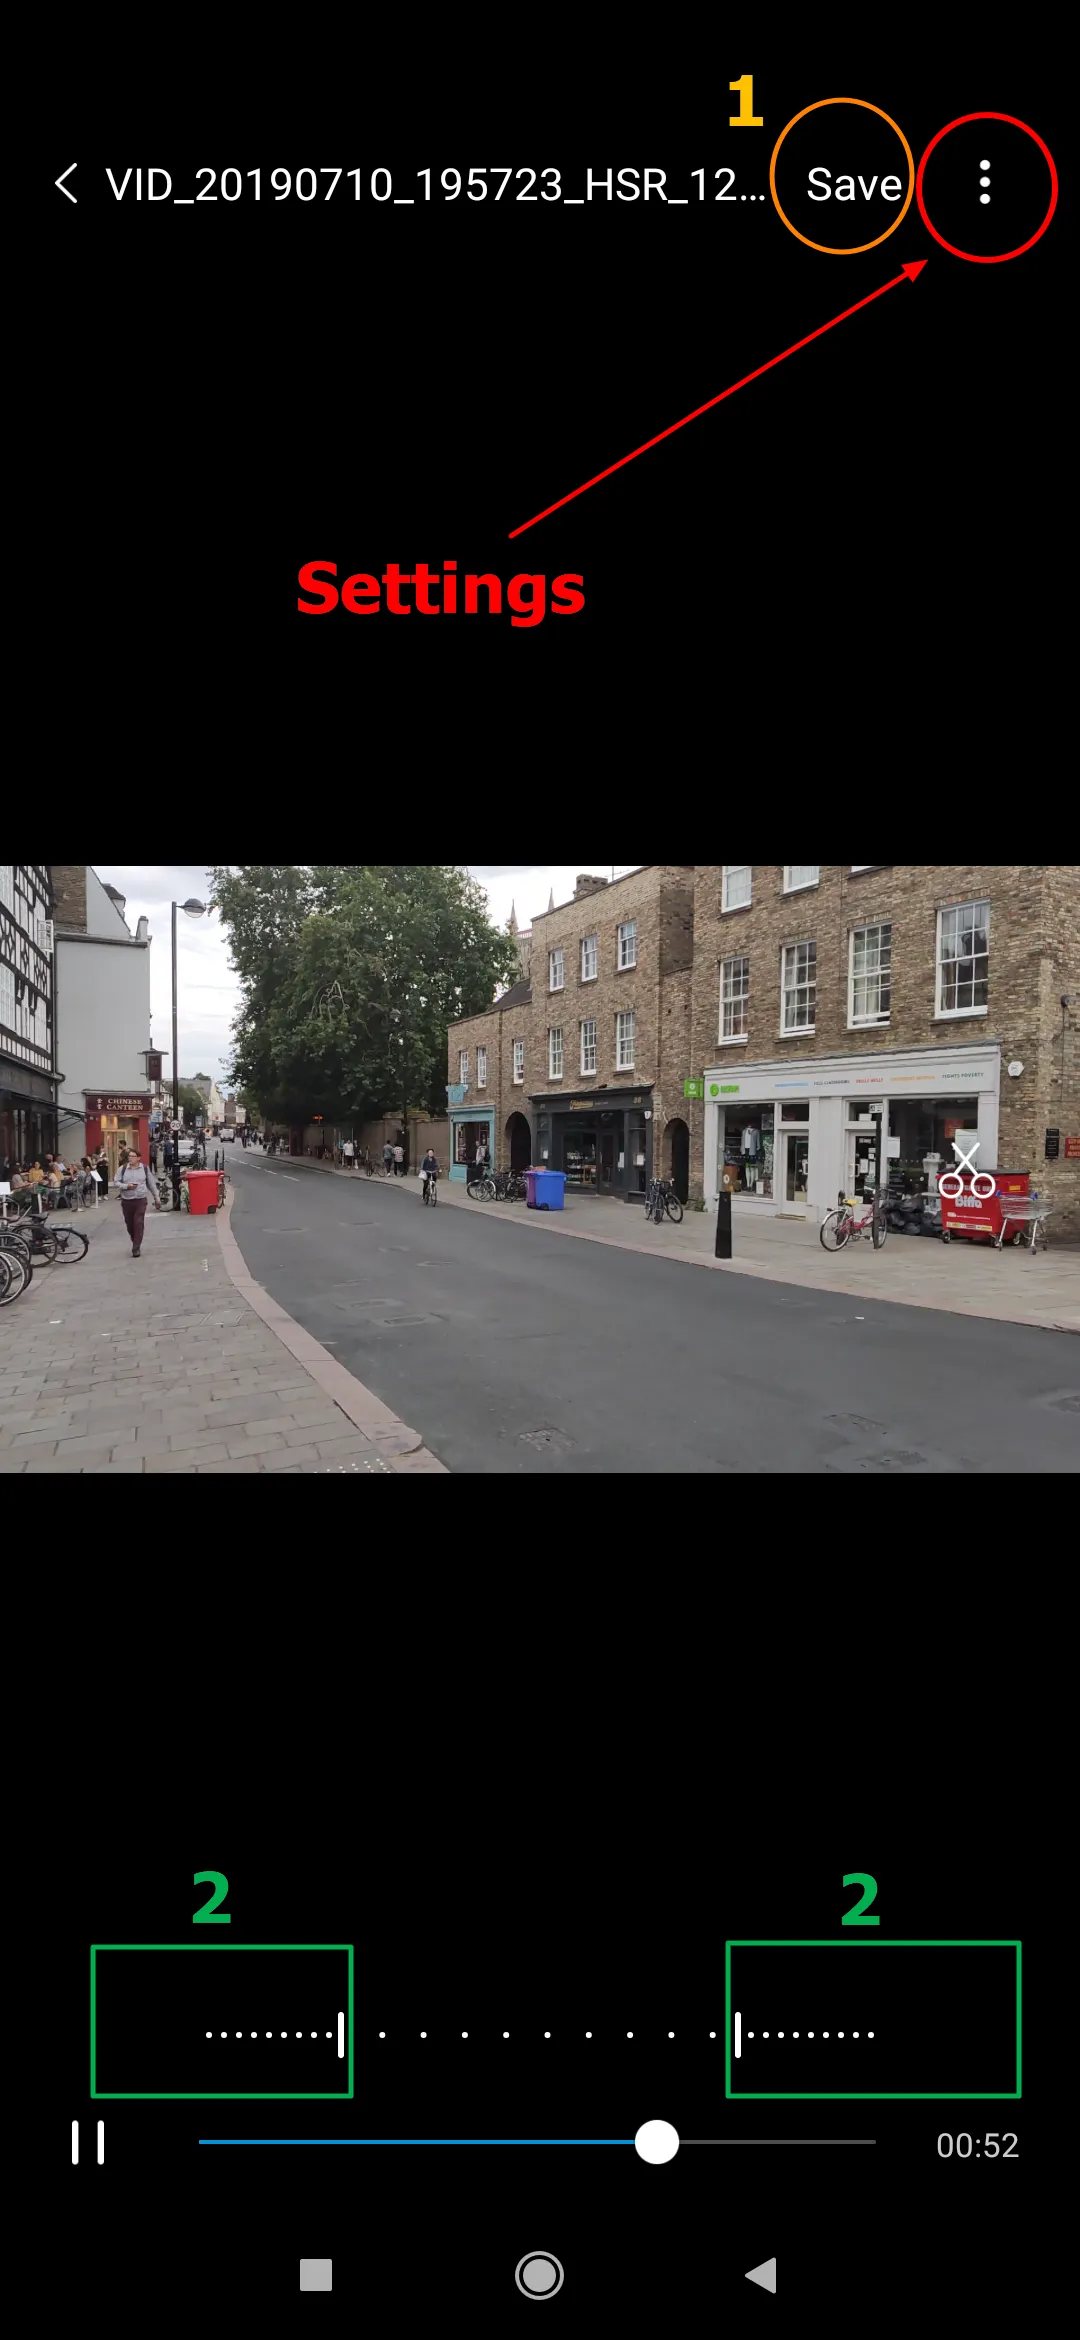
Before I start to describe all the edit & save options available in the Mi 9 device, I must flag up another feature, not really good in my opinion. There are external timeframes not covered by Slow-motion mode sensu stricto. As I told above, consider a 960FPS mode, which runs after a white button appears. It works analogically in another 2 modes too. If you want to cover some important moments in your slow-motion feature you have to predict them before. Usually, the best time is 10s (according to the one crude file length shown above in Pic. 33). Throughout this time both after the start and before the end of our footage, Slow motion doesn’t exist. Mi 9 covers it as an ordinary video. The green boxes show exactly what parts of our footage include a Slow-motion mode. There are more rare dots in the section between the external ones, more congested.
Every single movie recorded in 120 and 240FPS Slow motion mode will include this feature, unlike 960FPS, which has it only at the beginning.
Before saving our slow-motion video it’s good to make some simple adjustments, available in the “Settings” option (Pic. 35, 36).


Personally, I would rather avoid changing your footage feature on the “full screen” mode, because it may come unpleasingly stretched.
Once you are happy with your slow-motion footage, you can press “Save” in order to process your video.

In the 960FPS we have an exception because our files don’t need to be saved in the device (Pic. 38). What you can do is only change the settings, and volume or take a snapshot. The same options you have after your slow-motion movie processing in this device.

If you wish to see sample videos made by Xiaomi Mi 9, see below:
4. IMAGE PROCESSING OPTIONS
This section remains the same as in Mi 8 devices, so the description is not needed. If you want to know more details about the image manipulation options available on both devices, visit this link or watch the screengrab below:
At the finish, I would like to show you a few example pictures processed by Xiaomi Mi 9 6GB 128GB (Global Version), a bit more than previously in Mi 8.


Mariusz Krukar
Links:
- https://www.dxomark.com/xiaomi-mi-9-camera-review/
- https://www.techradar.com/uk/reviews/xiaomi-mi-9
- https://www.trustedreviews.com/reviews/xiaomi-mi-9
Read also:


