
How to make an isochrone map in Google MyMaps quickly?
The Isochrone map shows how much time we need to travel between one location and another. This kind of map is very useful in geography, hydrology, transport and urban planning. In this article, I focus on transport planning only.
There are a few major services, offering the isochrone map generations “for free” relatively quickly. Unfortunately, the .kml file option is payable. Anyway, if you want to see these web tools, I have listed them below:
1. Route360.net (today – the Targomo service) – In my opinion the best isochrone map generator for quick use. Unfortunately, you can put max. 3 locations and 120-minute travel time.
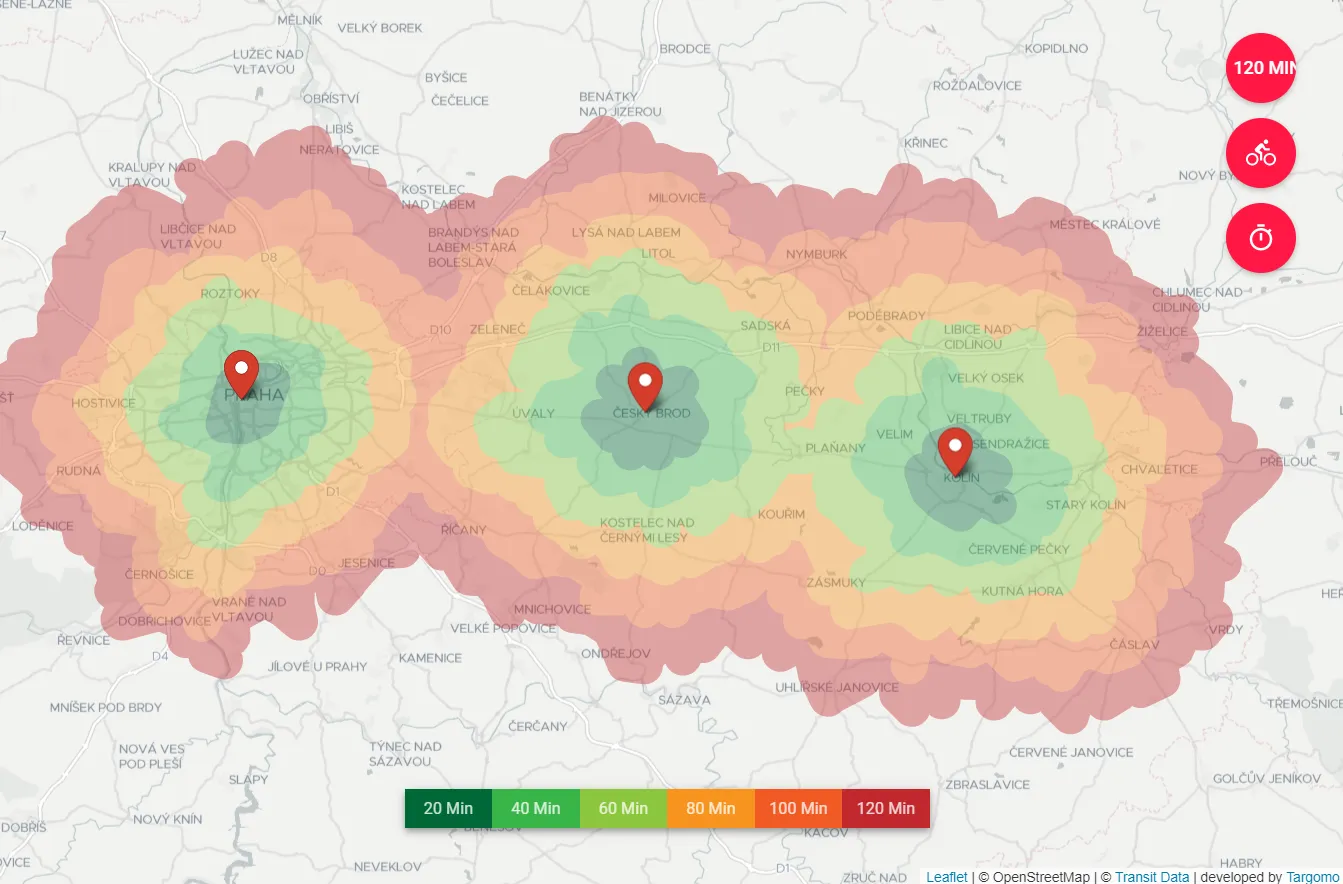
Pic. 1 An example isochrone map from Route360.net
2. Oalley – how far can I go? – another very good tool, which allows us to generate at least more than 10 single locations with various travel times up to 12h55m, which is perfect. Unfortunately, again, a .kml download is paid.
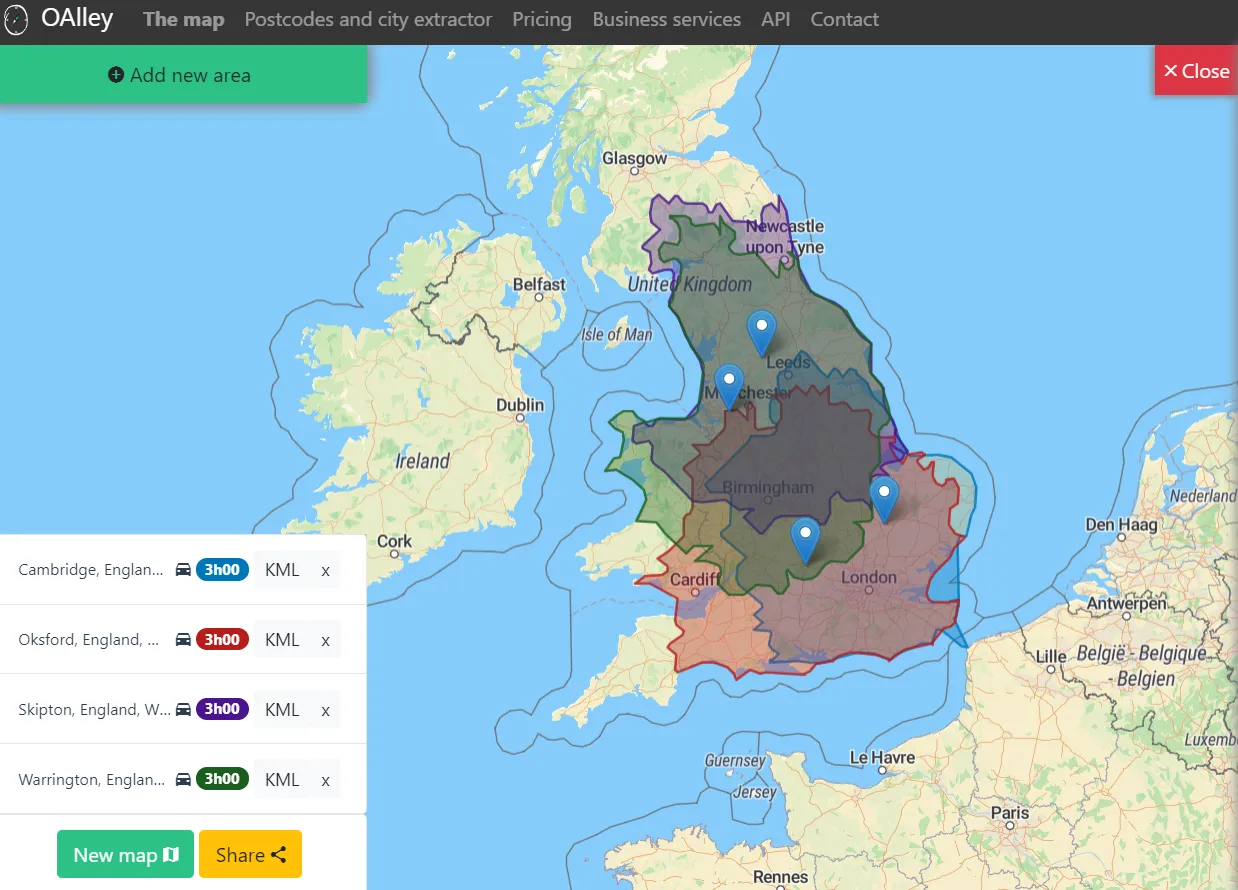
Pic. 2 Oalley isochrone map example.
3. Iso4app.net – A good tool with isochrone generation for up to 5 hours, when you owe at least a free API key. Otherwise, you can make only a 10-minute drive to isochrone. It’s good to mention, that this web tool can save our work in a .kml file, but NOT in the free version.
Pic. 3 Iso4app.net isochrone map example.
4. App.Traveltimeplatform – “free” and “the quickest” isochrone generator on the web. I can’t agree with it. You can generate isochrones up to 1h30m – 2h00m placing 3 single locations only. No option to save it as an external file at all.
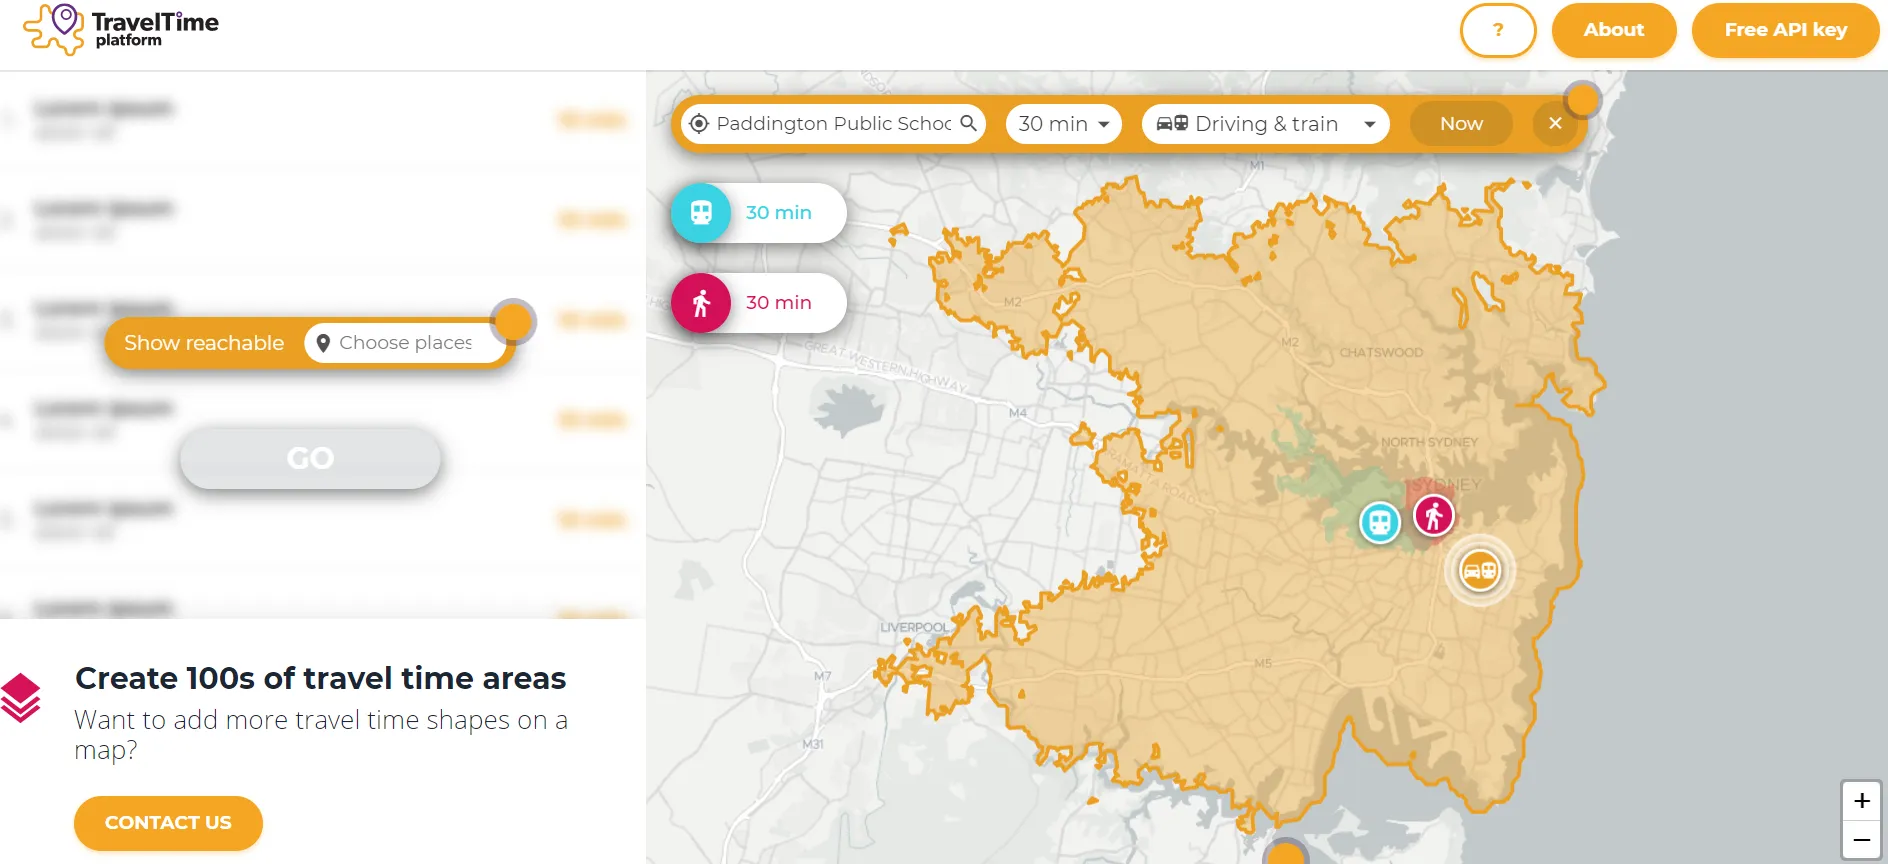
Pic. 4 App.TraveltimeMap platform isochrone map example.
5. OpenRouteService – finally, a free web tool, where we can generate the isochrones quickly. See more details underneath, because this is what is an article about.
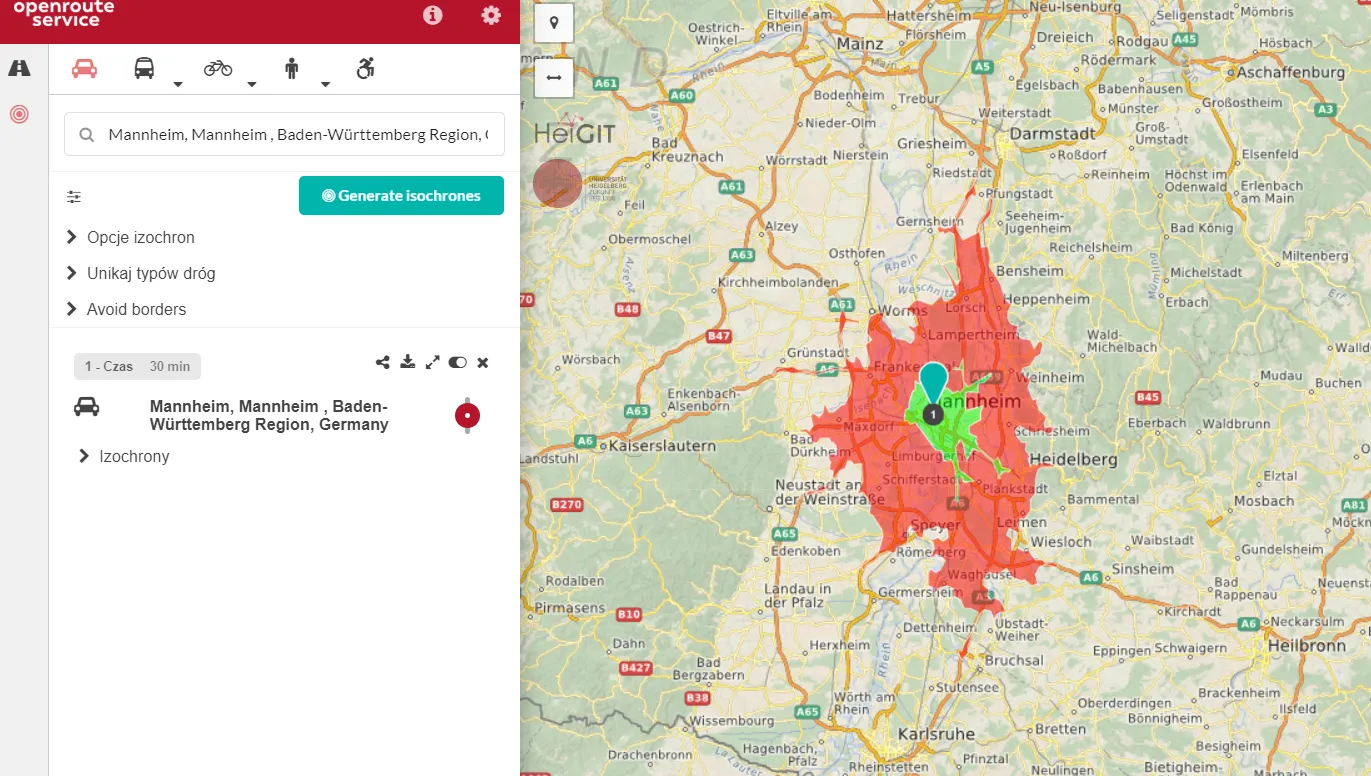
Pic. 5 OpenRouteService isochrone map example.
Apart from the tools directly designated for isochrone map generation, there are at least a next few, where a reachability service is to be done for some particular locations:
– WithinHours – you can get a list of towns within some particular travel time,
– Mapumental Property – generating travel time maps for UK postcodes,
– BusinessMapCentre Drivetime Tool – finding the off and on-peak best route from a particular postcode,
– Mapnificent – an isochrone map generator for tens of cities given worldwide (Pic. 6).
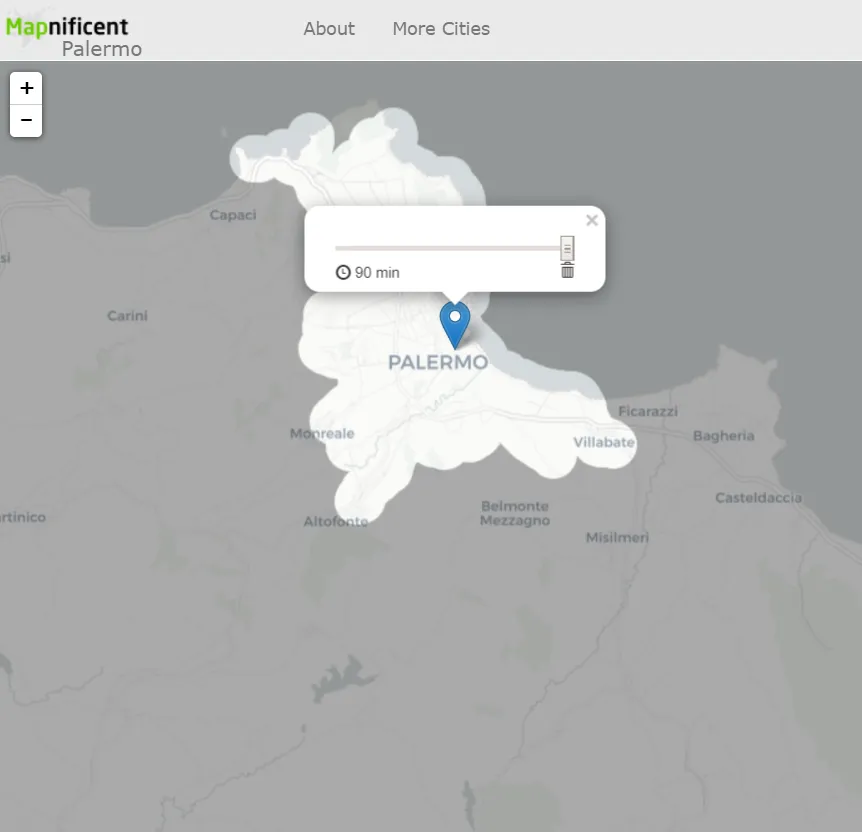
Pic. 6 The Mapnificent service, max. travel time generation is 90 minutes from a particular location.
– Emptypipes Europe Isochrone Map – a good reachability onlook on some capitals in Europe and other continents (Pic. 7) up to 22 hours drive.
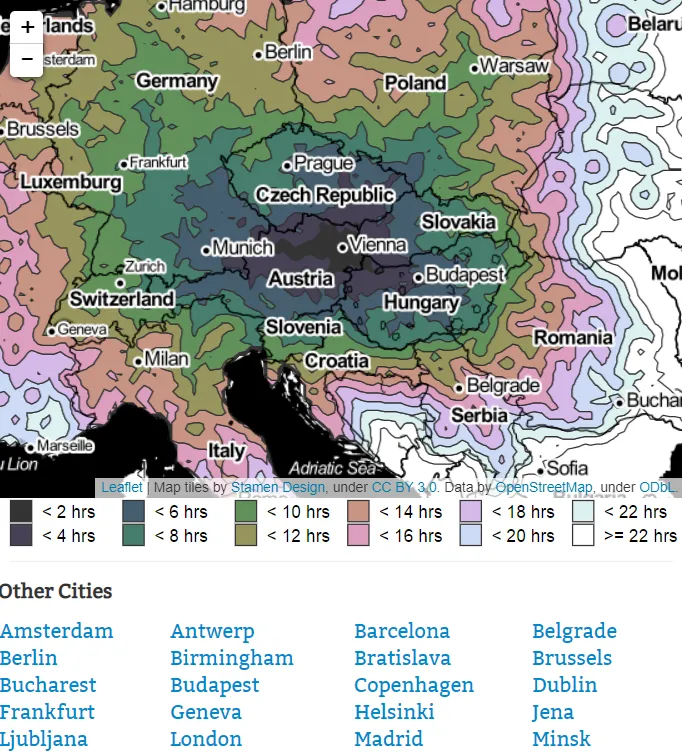
Pic. 7 Isochrone Map with 22h drive time, available on Emptypipes.org.
About this last one, I will tell more in the future, about when to develop an issue with Isochrone Maps API, widely available and getting popular.
Today, for this example being, I would rather focus on the easiest way first. It’s going to be useful for people not familiar with coding and GIS software.
To crack on, let’s back to the OpenRouteService first. This is the service, from where we can get the data outside.
1. To get the isochrone map ready, we should click on the dot on the left (Pic. 8).
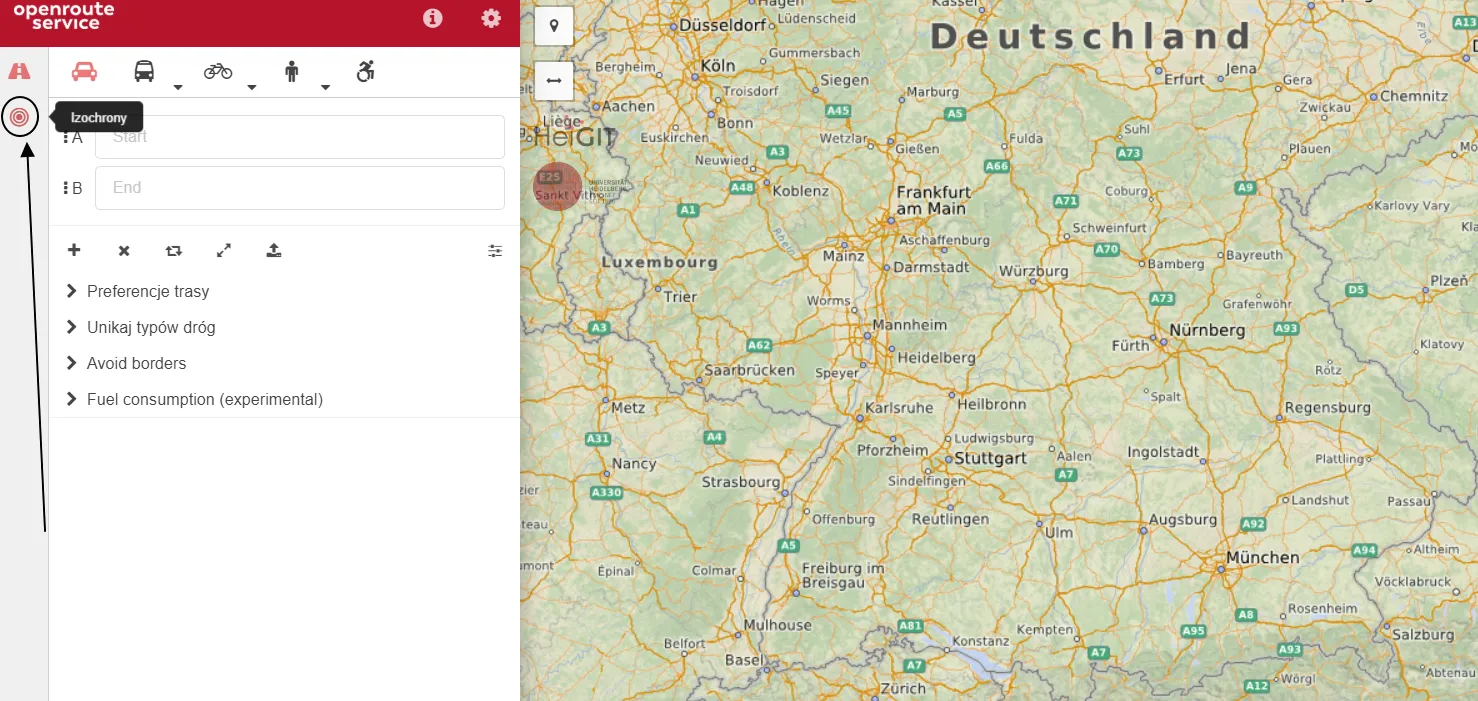
Pic. 8 An “Isochrones” option in OpenRouteService.
2. You will get an isochrone map instantly once find your location (Pic. 9).
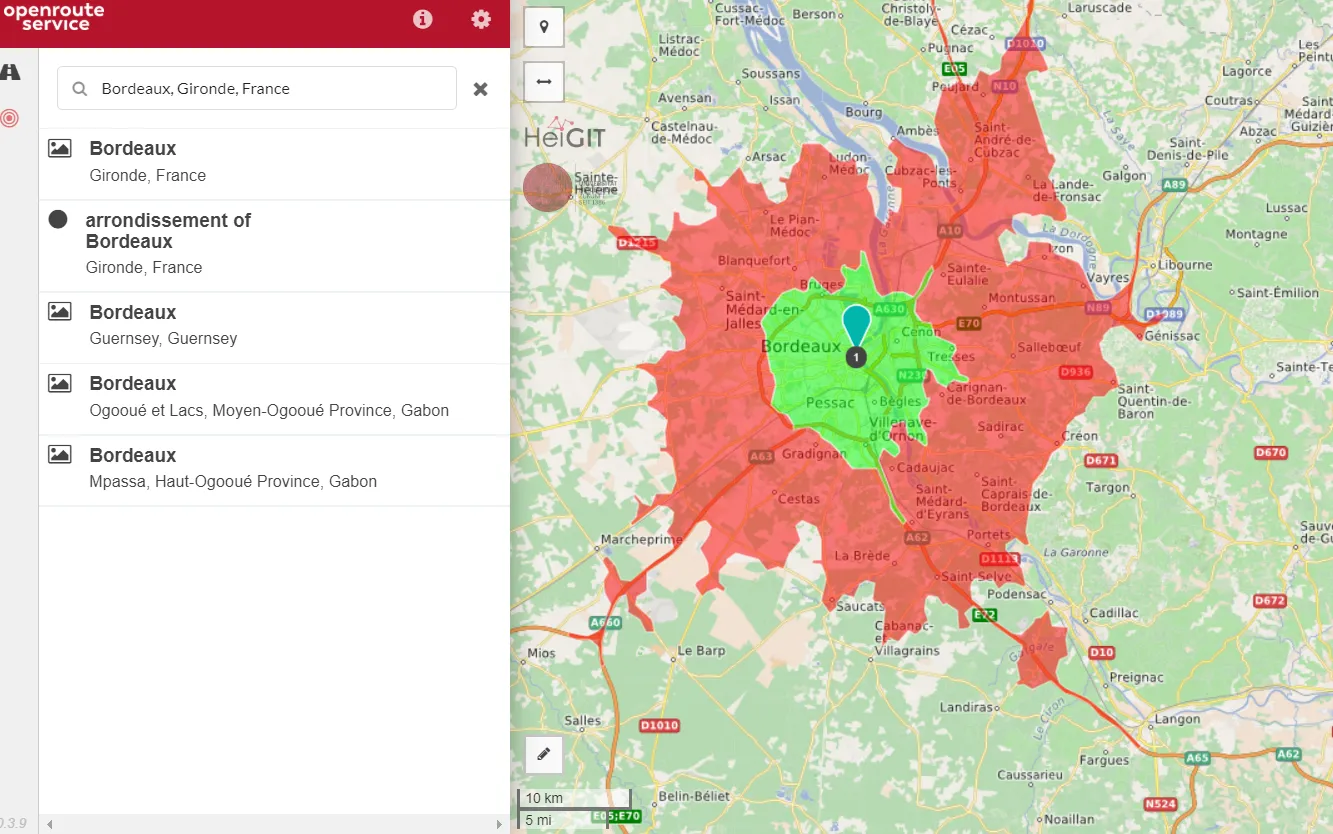
Pic. 9 An instant isochrone map done by OpenRouteService.
In the first stage, our isochrone map is a default. However, we have a couple of options to change its parameters slightly (Pic. 10).
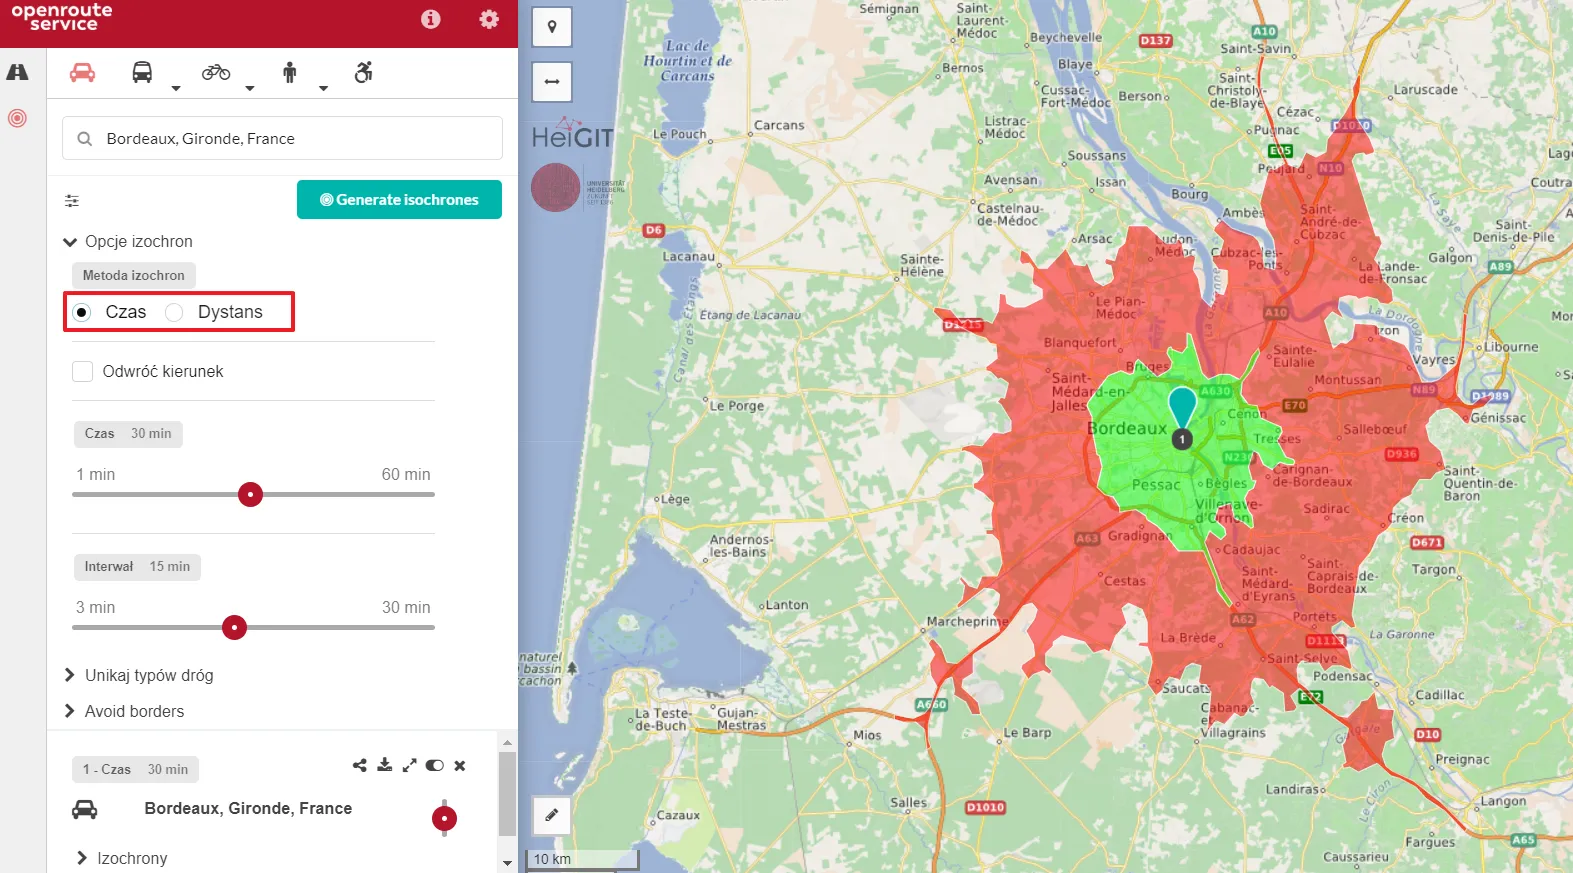
Pic. 10 Two basic parameters changeable in Openrouteservice: Time and Distance.
3. Knowing the changeable parameters, you can adjust the isochrone map to your needs. Unfortunately, these options are restricted to 60min/100km with a max of 10 intervals (Pic. 11).
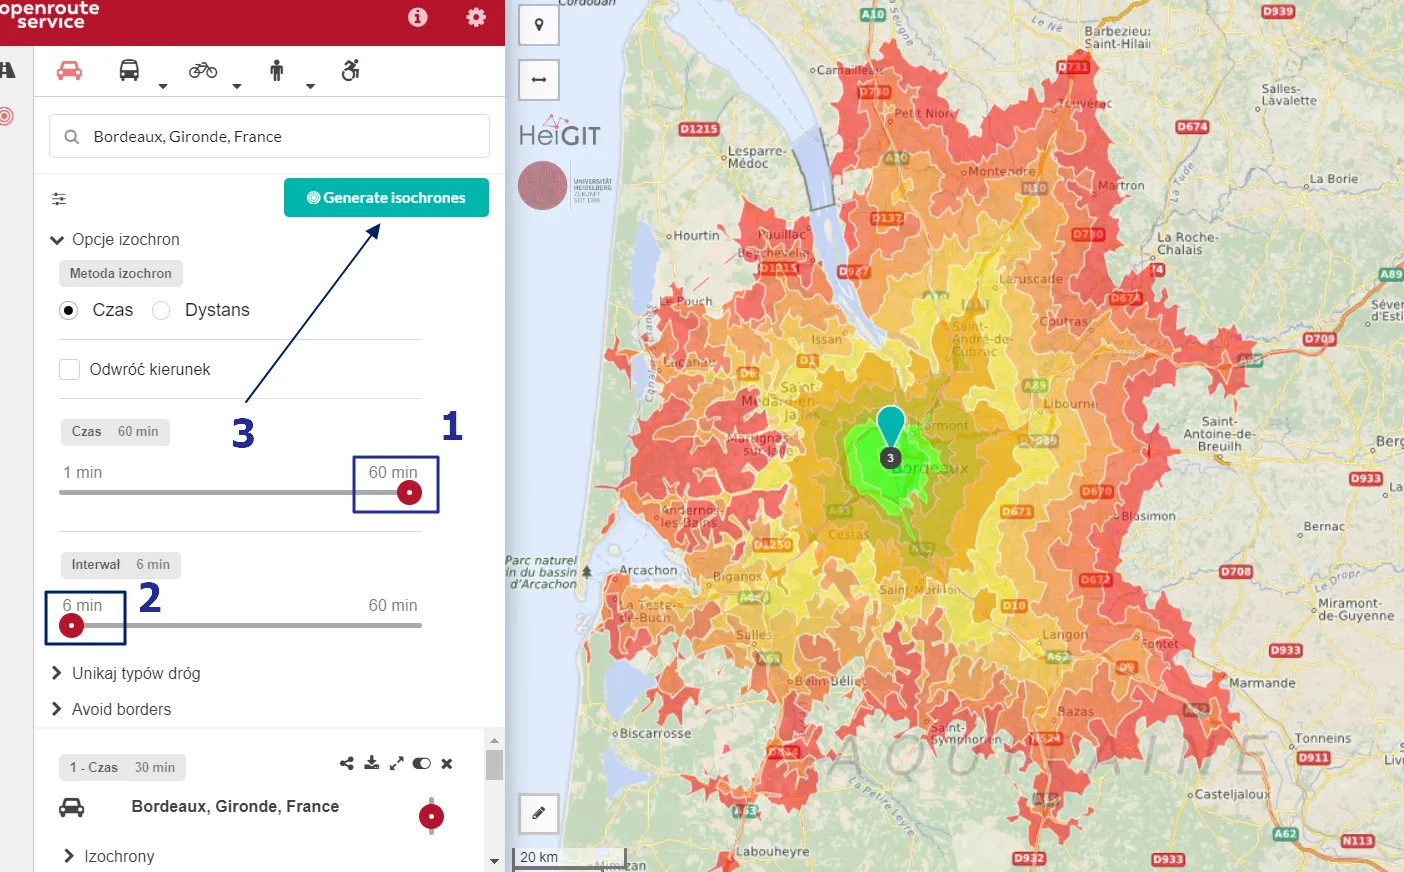
Pic. 11 Isochrone map options in OpenRouteService, where: 1 – Time (max value = 60min) or Distance (max value = 100km); 2 – Interval (Max 10); 3 – The “Generate isochrones” option.
When you generate the map, as you want. You should get the result as per above (Pic. 11). It doesn’t mean, that you definitely must use all intervals generated. Just take a look at the table at the very bottom and double-check your values (Pic. 12). They still can be removed, when necessary.
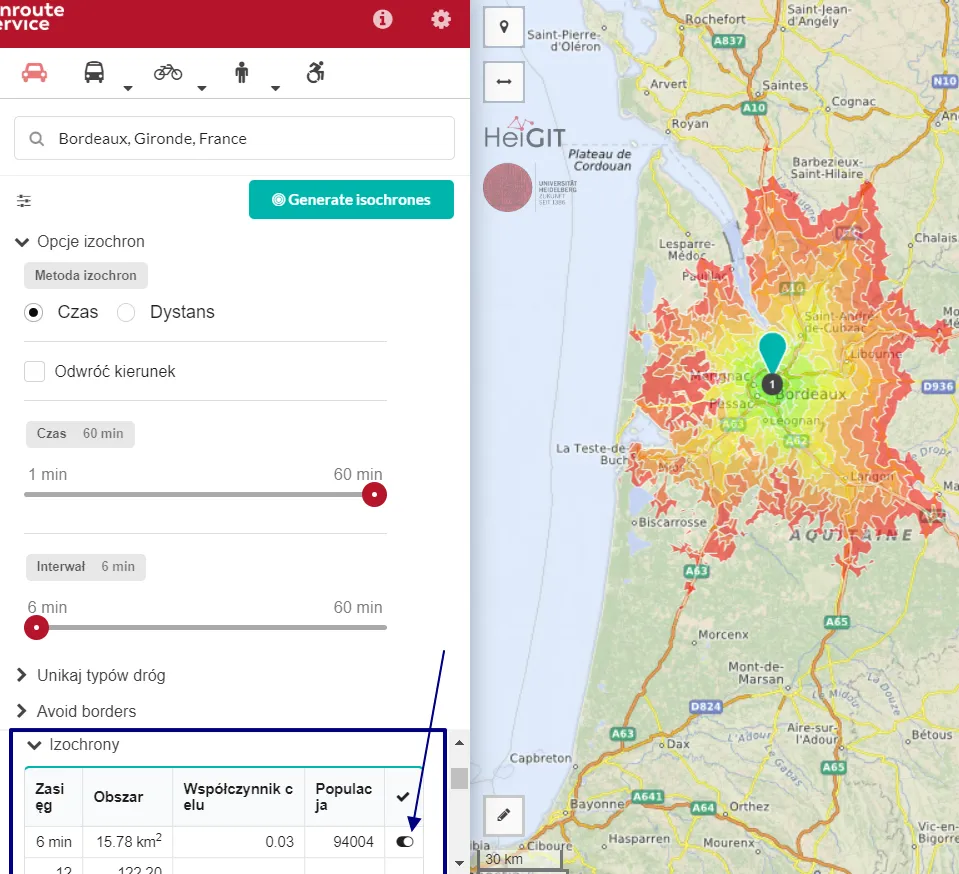
Pic. 12 An isochrone intervals choice in the table underneath.
Apart from the reachability time interval you also have other useful information like area (square km), destination factor or population within the travel time interval, which can be interesting.
4. Taking into account, that everything with your map is alright. You can download it as a file on your hard drive (Pic. 13).
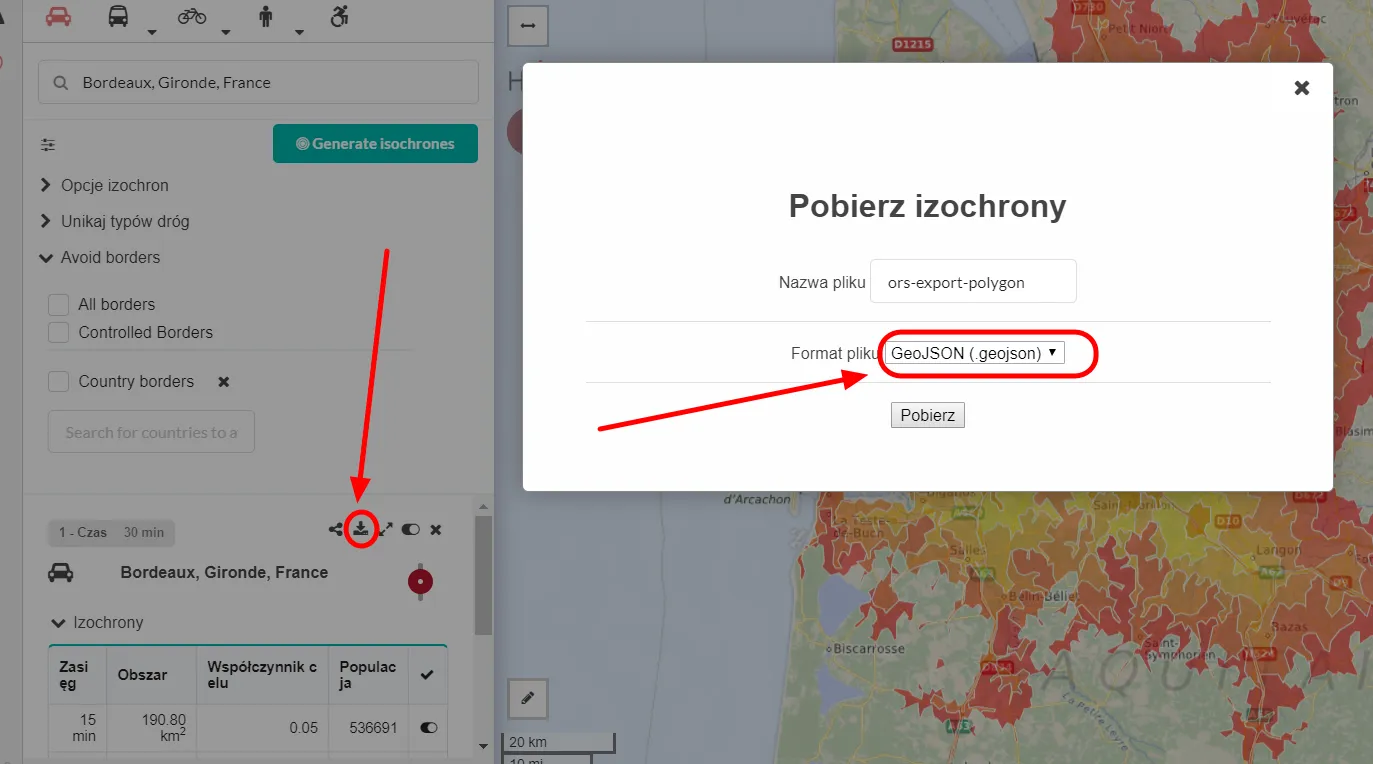
Pic. 12 OpenRouteService isochrone map download.
The only downloadable format is.GeoJSON, although trust me, it’s fair enough for further manipulation. You can also change the name of your file just above if you want.
5. Next, one the Geojson.io web tool and load your GeoJSON file (Pic. 13).
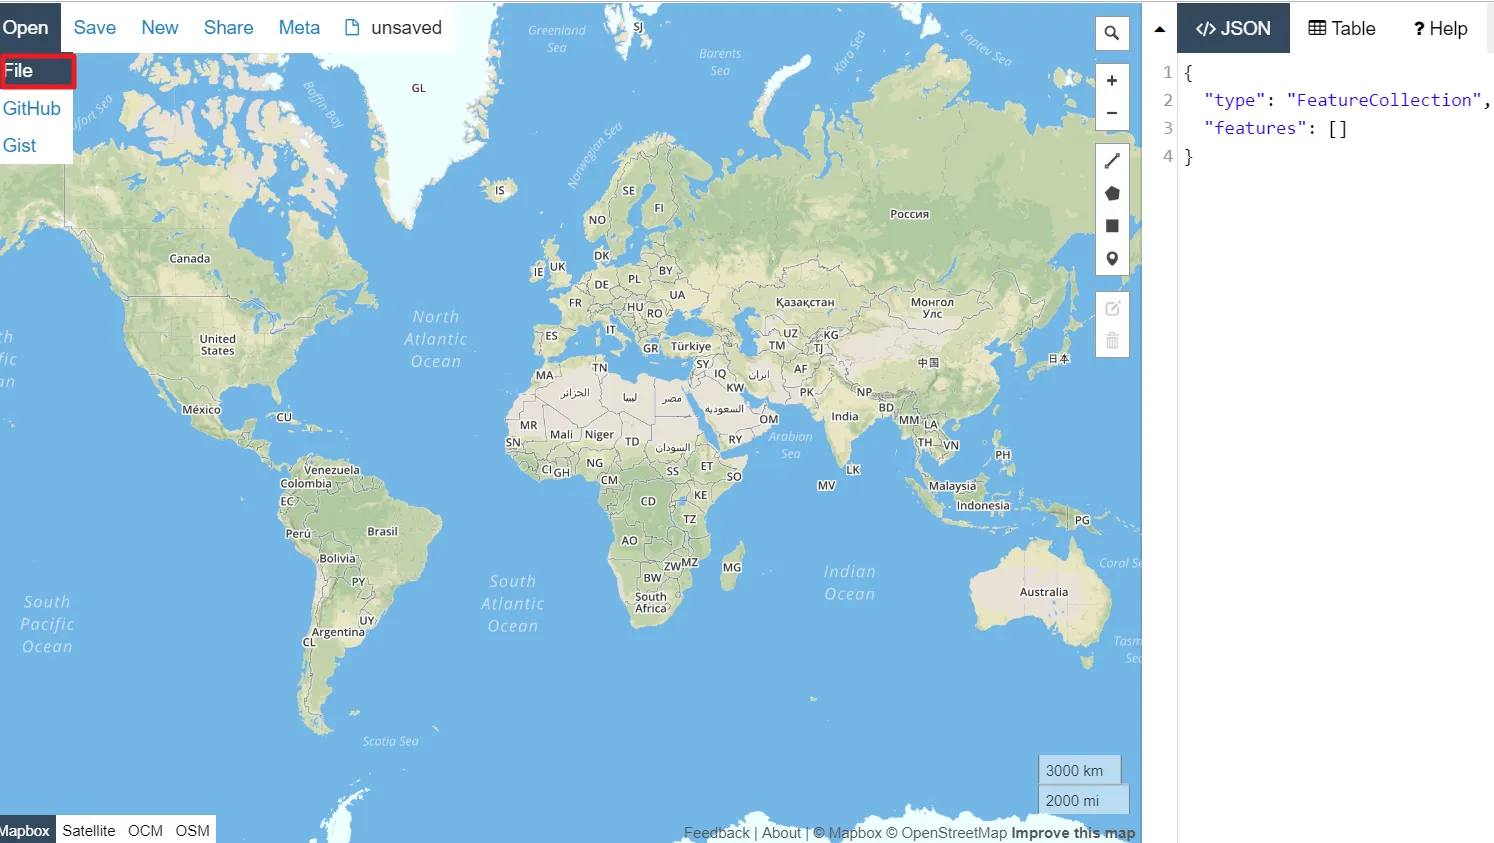
Pic. 13 Upload your GeoJSON file into the GeoJson.io web tool.
6. In the result, you should get exactly the same shape, as you saw in OpenRouteService previously (Pic. 14), but colourless.
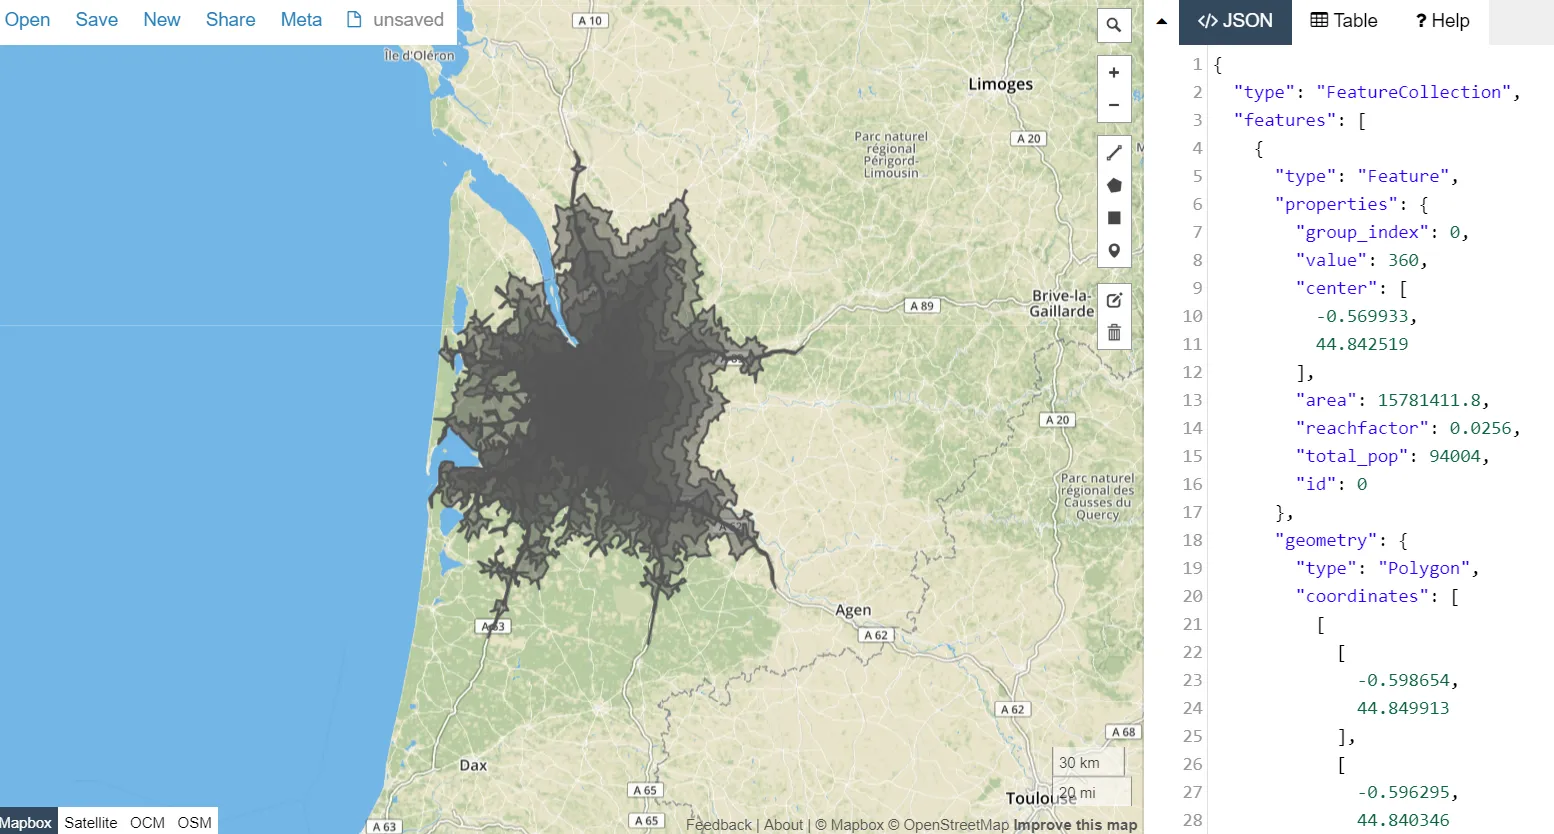
Pic. 14 Our isochrone map, generated in OpenRouteService is now available in the GeoJson.io web tool.
Our map in GeoJson.io contains both visual stuff and the GeoJson code, which is not needed for our purpose. I will write more about it in the future.
7. Our next step is saving the map as a .kml file, which we can do straight away in this web tool. It means, that GeoJson.io represents such a converter feature. Apart from .kml, you can also save the file in different GIS formats (Pic. 15).

Pic. 15 Saving the file in GeoJson.io is possible with the following GIS formats.
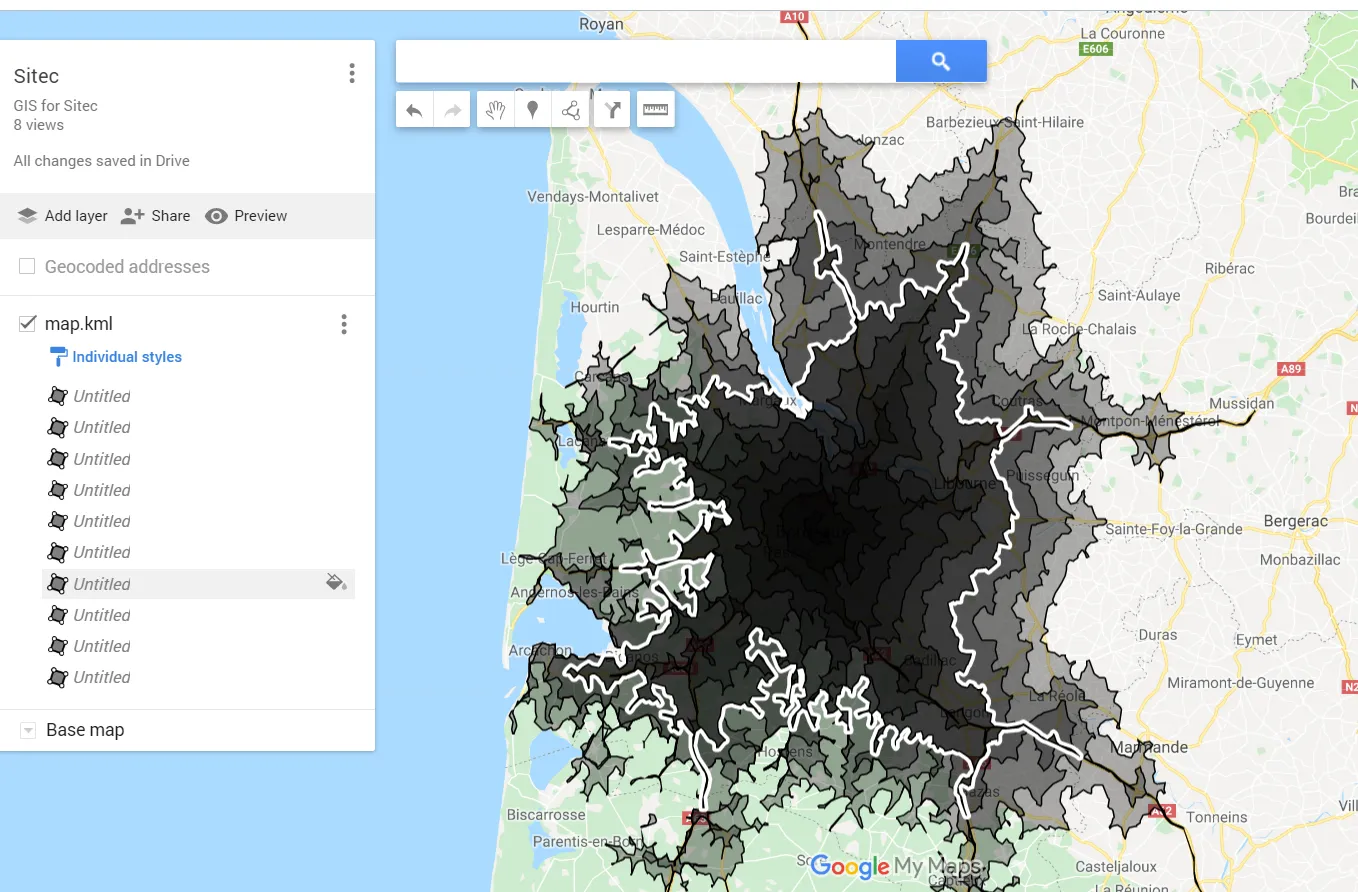
8. Once you get your .kml file on your hard drive, the next step will be uploading it into Google MyMaps. Thereafter, initially, your isochrone map is ready! (Pic. 16).

Pic. 16 An isochrone map imported to GoogleMyMaps.
9. I am pretty sure, that this crude map won’t meet your expectations, especially in colouration. There is a simple way to customize this reachability map for your own purpose (Pic. 17-19).
Pic. 17 Single-layer (isochrone) edition in Google MyMaps.
First of all, take a look at your side legend. In GoogleMyMaps you can find every single layer (isochrone) building up your total travel time map. Hovering one of them on the legend triggers a selection on the map too, making it easy to identify (Pic. 17). Next, you can adjust the selected layer to your purposes by changing both colour and description (Pic. 18, 19).

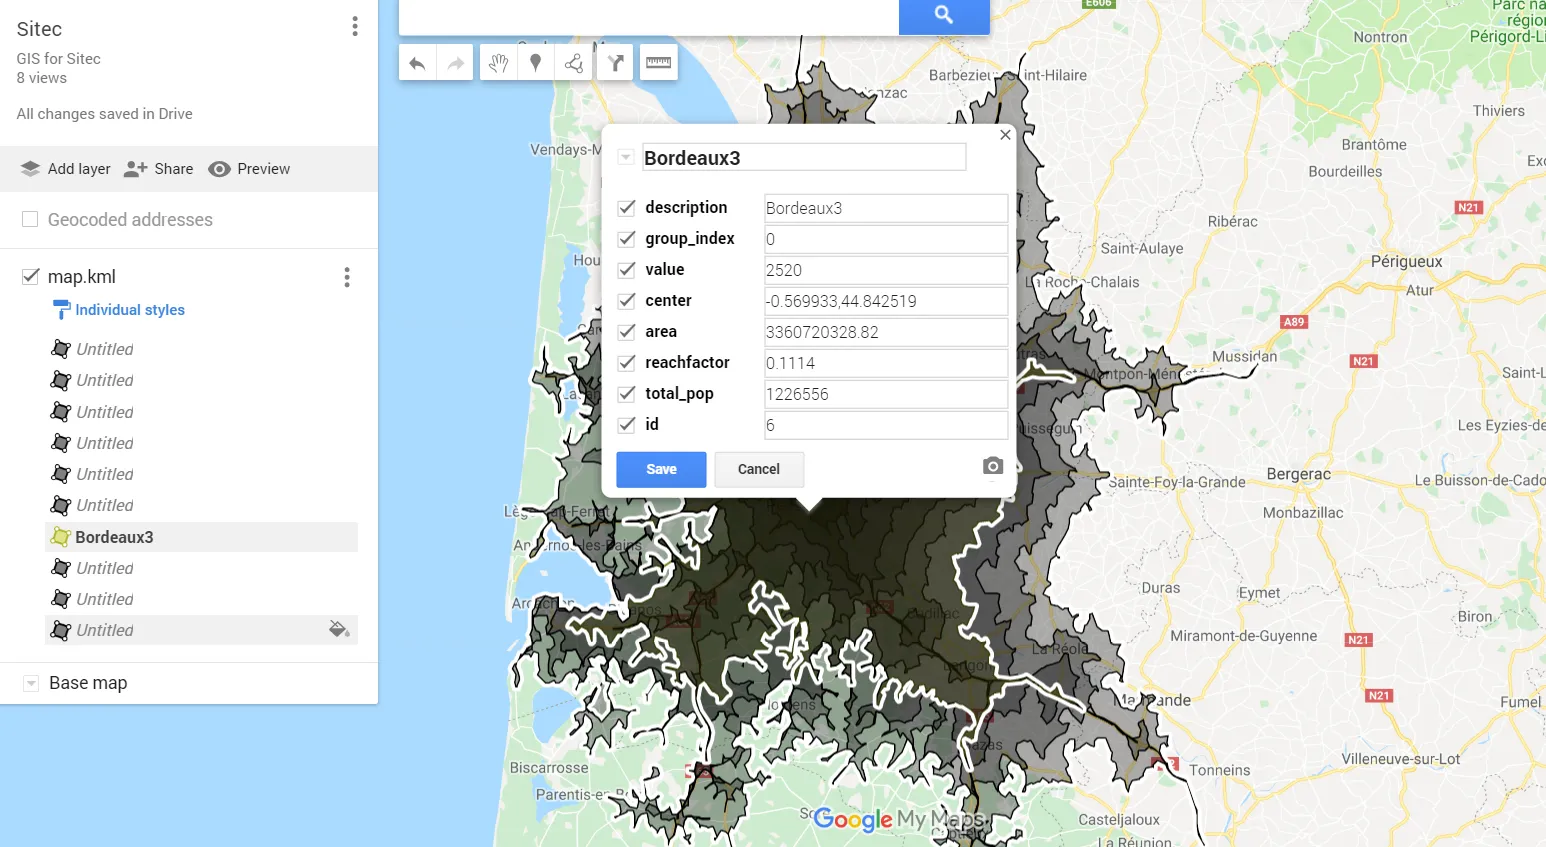
Pic. 18, 19 – Editing a single isochrone in Google MyMaps by changing the colour and the description.
Your altered layer eventually changes the appearance of the legend on the left (Pic. 19). Both the colour and description have been modified instantly.
But it’s not a finish. I will show you my example down to the end (Pic. 20-22), making the isochrone map neat. Apart from a whole layer, you can also change the border of every single isochrone. Thanks to this you may distinguish some prominent areas within a whole map (Pic. 20, 21).
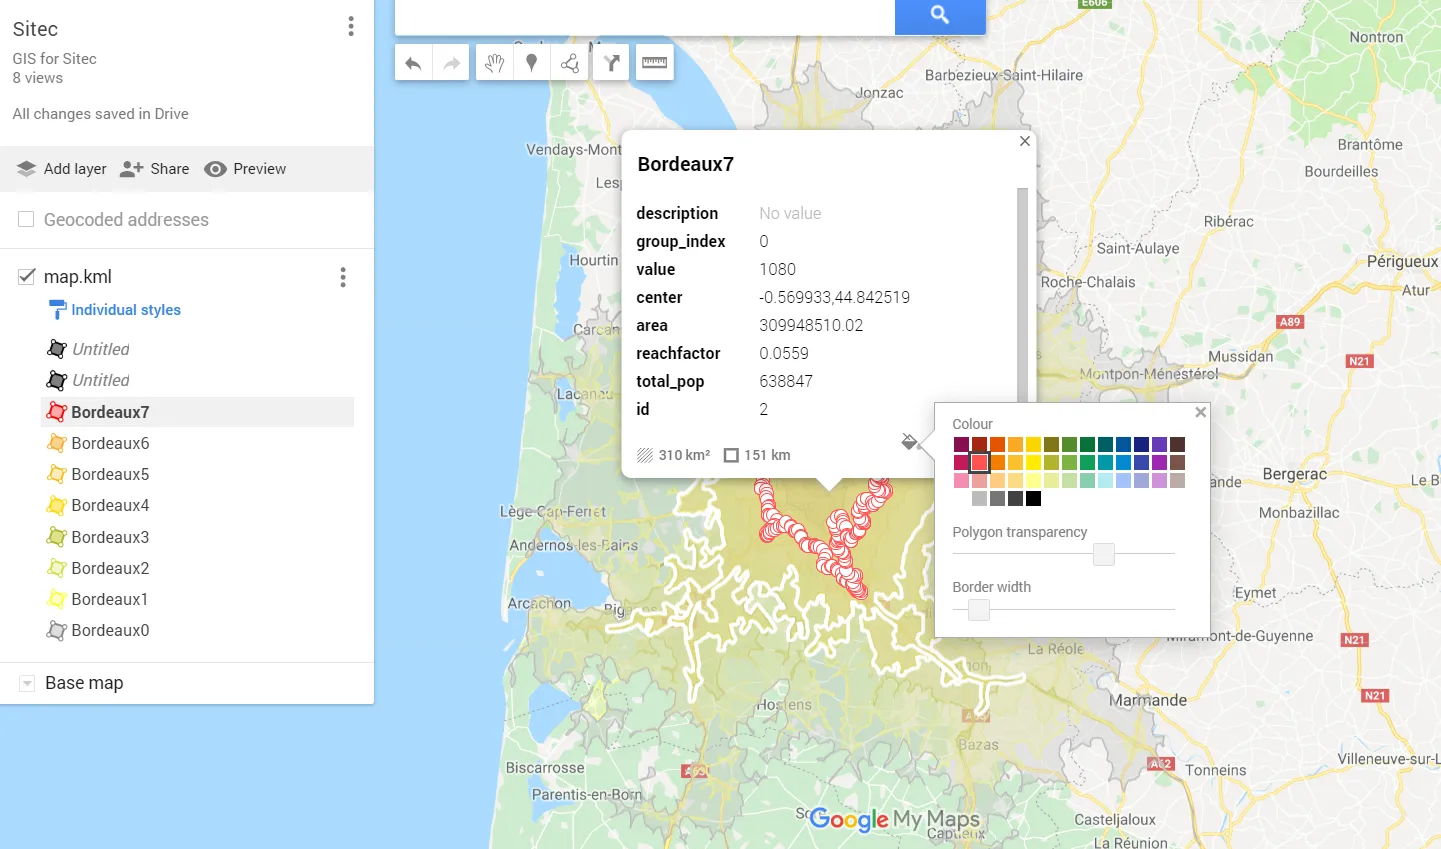
Pic. 20 Isochrone Map in Google MyMaps – change border properties of the single isochrone layer.
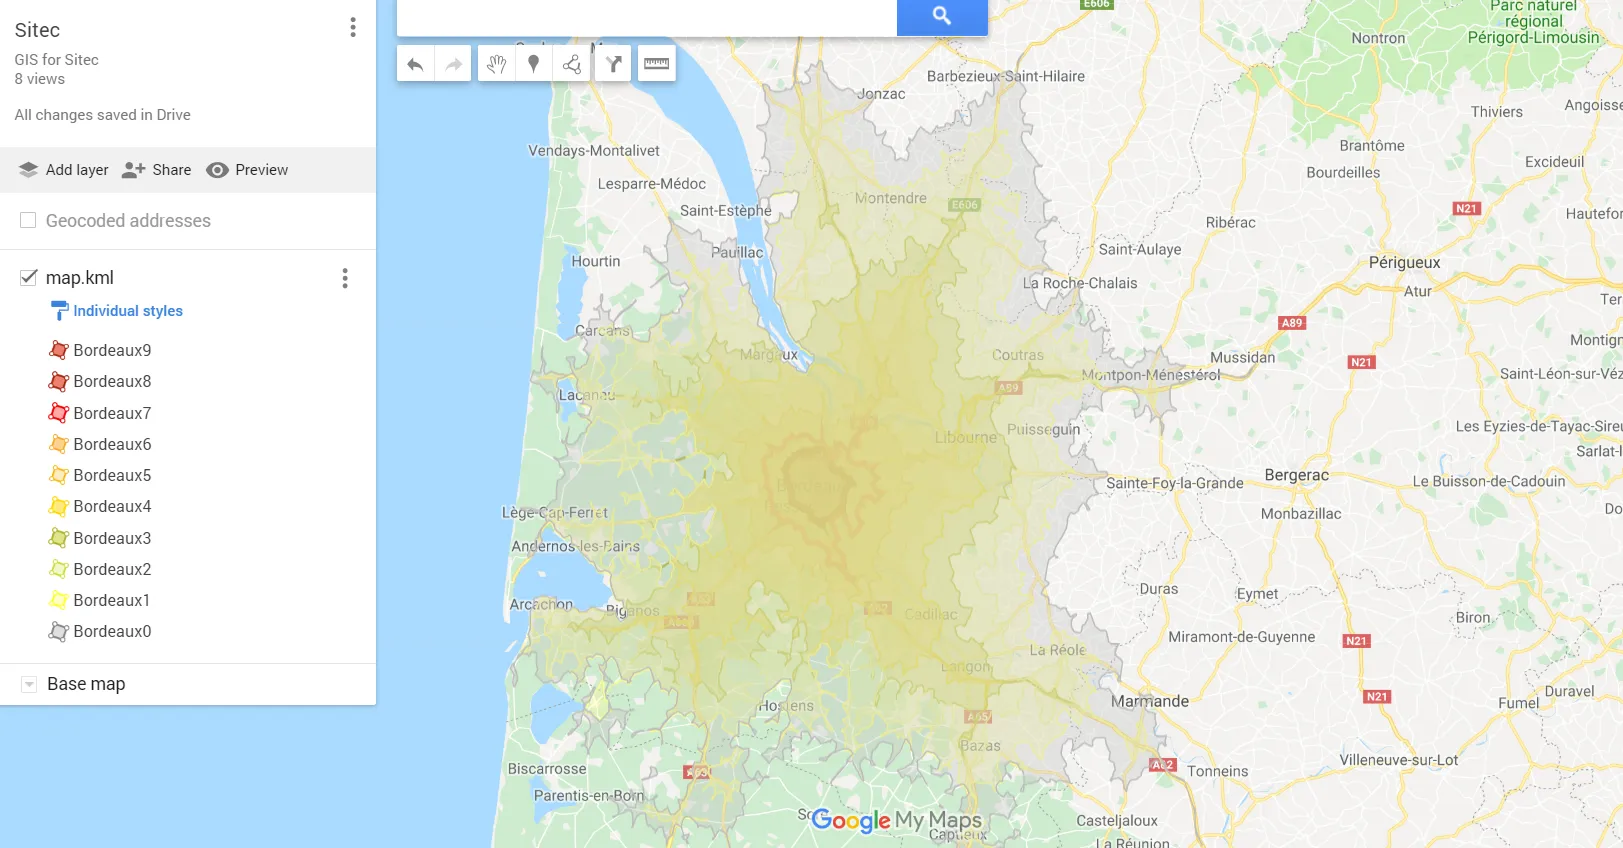
Pic. 21 An isochrone map created in GoogleMyMaps, without a proper layer order so far.
The very last step is changing the layer order, according to their prominence (Pic. 22). Then we have finished our customization successfully.
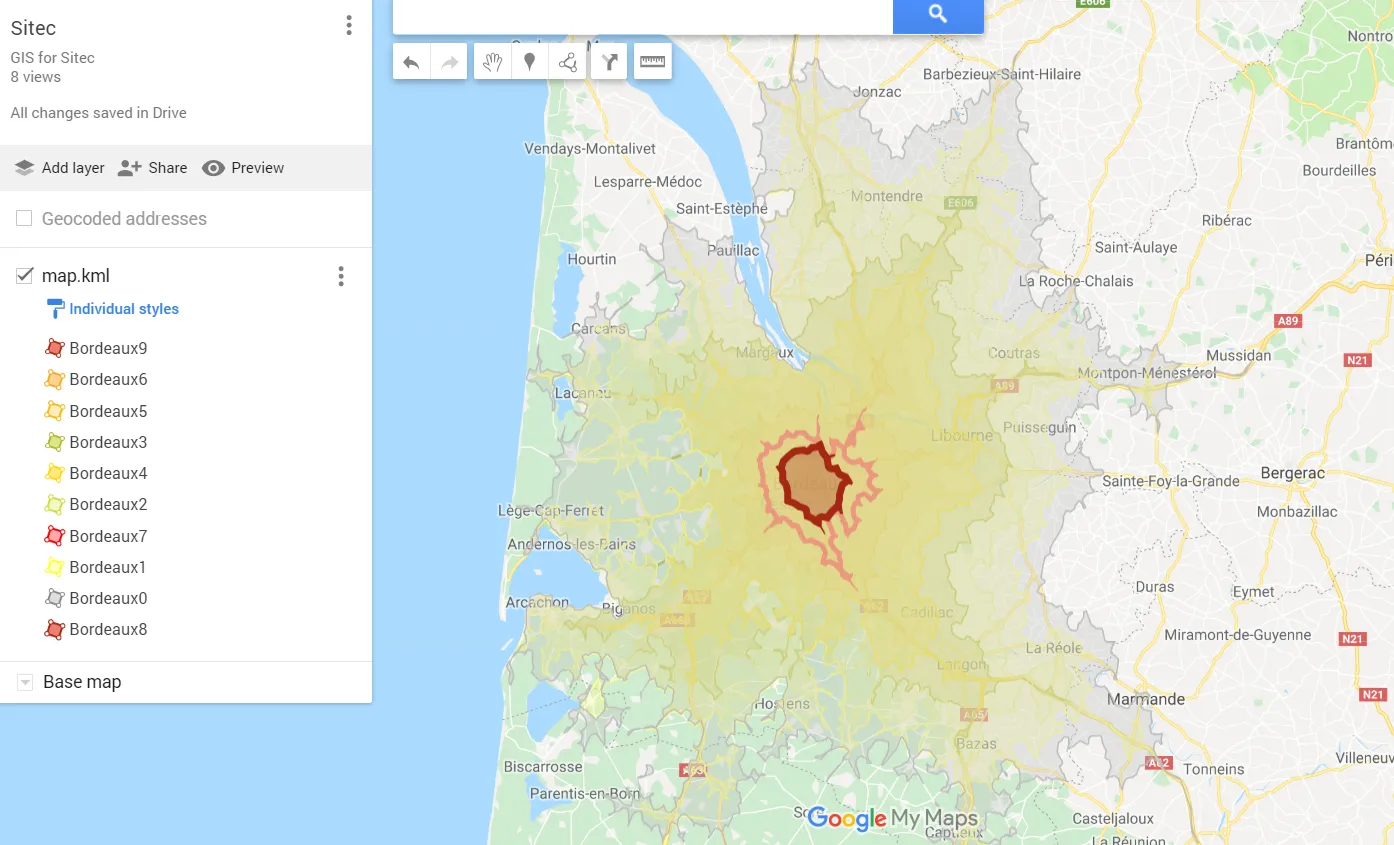
Pic. 22 Fully customized isochrone map in Google MyMaps.
Another way to customize this kind of map and its further place in Google Earth has been widely discussed in this article.
This is one reasonable way to present an isochrone map quickly, without coding skills. Unfortunately for more advanced purposes, knowledge of programming will be required, at least in the JavaScript API section.
I have presented one of many ways of reachability map preparation. This topic is going to be widely developed in the future, because of the high necessity of awareness of the road traffic impact on ordinary life. I would like to focus on a travel time map covering multiple locations, finding the most convenient way to present it.
Mariusz Krukar
References:
Links:
- Drive time isochrones – Finnish airports
- http://geojson.io
- https://alternativetransport.wordpress.com/2015/05/07/what-is-an-isochrone-map/
- http://www.digital-geography.com/comparing-isochrone-apis-an-insight-into-different-providers/
Wiki: