
Google Maps, as well as Google Earth, are very useful tools in terms of location finding. A user can find a proper address quickly in any place in the World. Sometimes we are obligated to find multiple locations for different purposes. Then it can be a problem for someone, who must have a multitude of locations in a really short time. There are some solutions shown on the web on how to input a lot of addresses into Google Maps, however, in my opinion, they don’t show the quickest way of this process. I would like to show you the quickest and most convenient way to input multiple locations from Excel to Google Maps and Google Earth at once. Moreover, the aim of this article is also to show the ways, that we shouldn’t do when transferring location data to Google Maps.
We can input the multiple location data in 2 ways: as a full address (property number, street, postcode) or only a postcode (valid for some countries like the UK). Inputting the street with property numbers only for a particular location may not make sense, especially in big cities, where streets can be repeatable (e.g. Like Budapest). Let’s get started then.
I will show you the process in a few steps, which you can follow afterwards. Firstly I consider the task with full address details only.
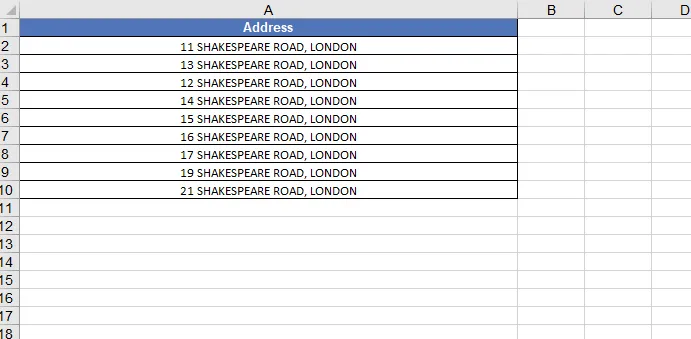
- There is an Excel spreadsheet underneath, where you have a column with the full address (Pic. 1). It’s good to keep this column as it stands. All address elements are comma-separated and better to leave it for the time being. Once you divide this data into more than one column then your address may not be shown in Google Maps properly. Why? You will read about it later in this article.

Pic. 1 An address list in Excel, ready to input onto Google MyMaps. 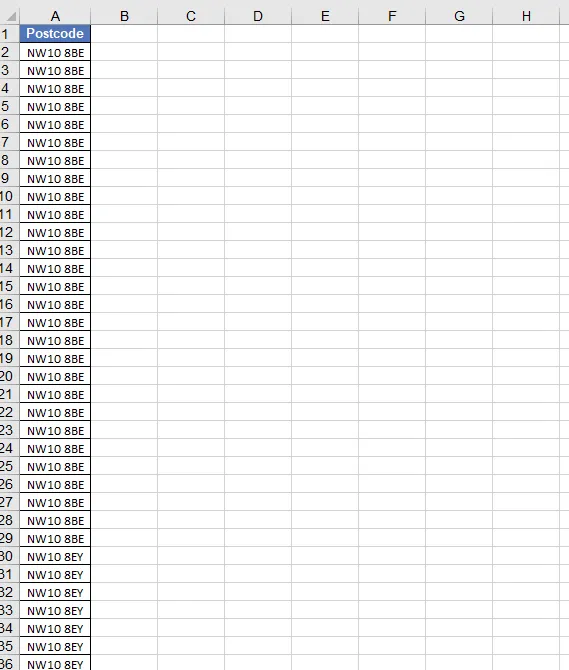
Pic. 2, 3. Alternative ways to prepare the address list in Excel, at least for UK addresses. 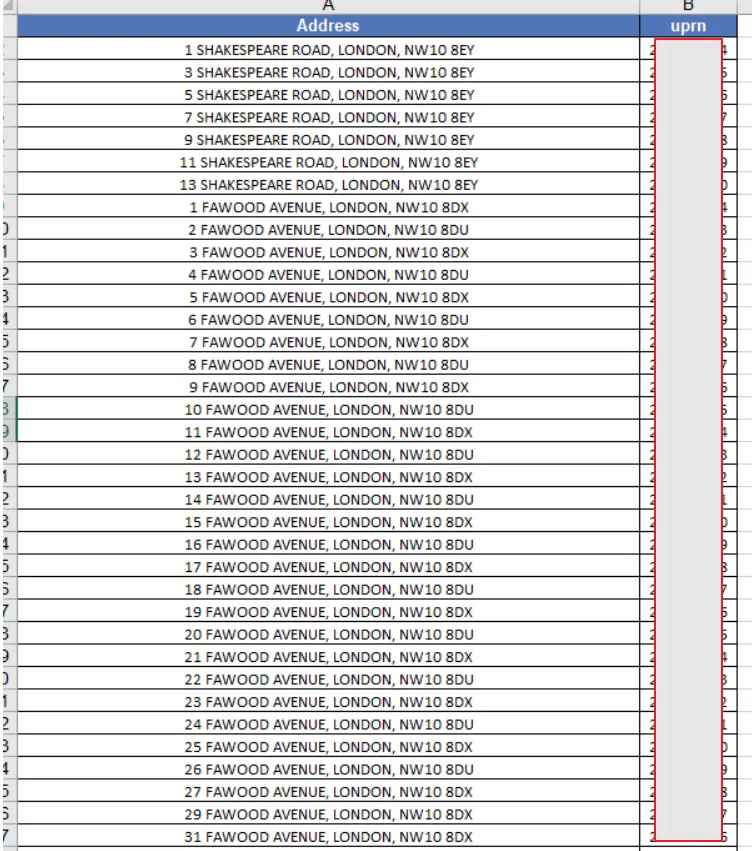
Pic. 4 Google MyMaps allows us to put a few columns. Make sure, that they are nice and tidy as per in the picture above. - Open your Google MyMaps account or create it first, if you don’t have it yet. Next, create a new map with the name that you want (Pic. 5). Then your new map will be opened automatically. Focus on the main menu located on the left side of the screen.
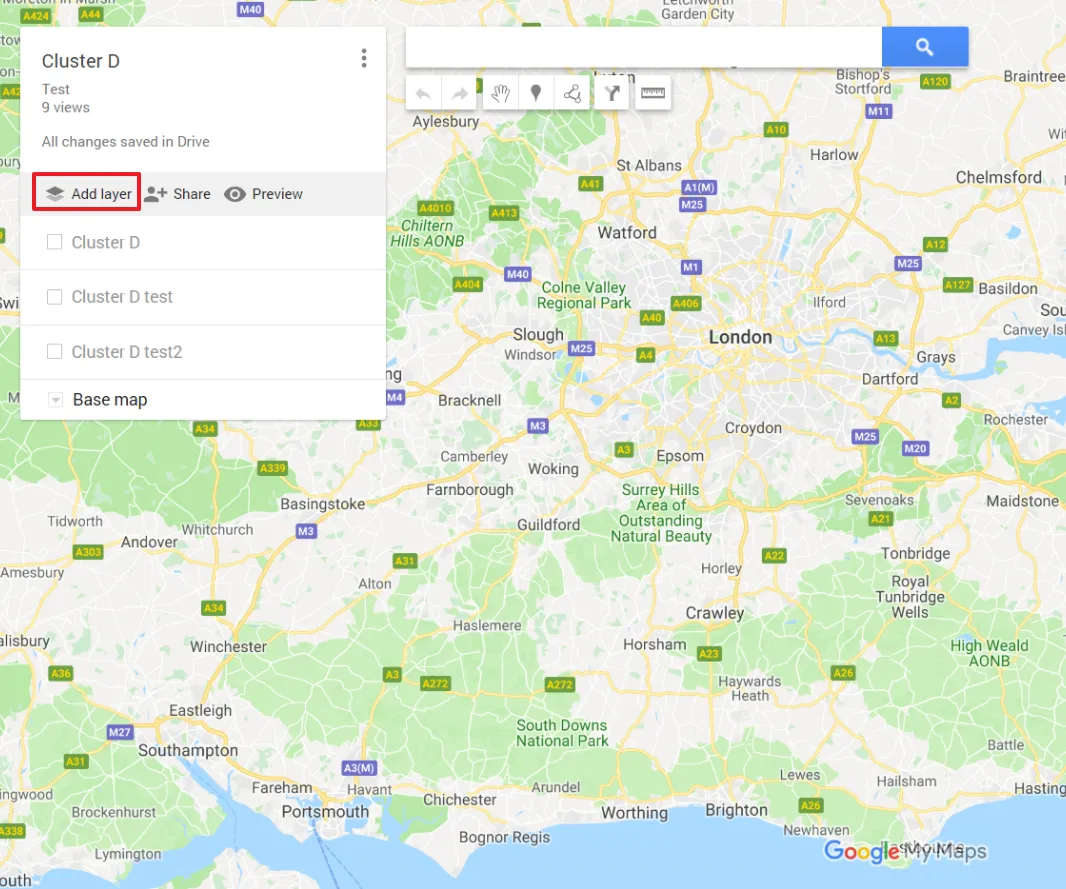
Pic. 5 A blank GoogleMyMaps template with the “Add layer” option marked. - Click “Add new layer” and next name it as you want or leave it without the name (Pic. 6).

Pic. 6 Changing the name of the layer in Google MyMaps. - Before you will import the data, go through your Excel worksheet and check if is everything fine or not (Pic. 1-4). I mean are the single addresses in the correct column or is it clearly shown, etc. Some mistakes are described later in this article.
- Click the “Import” link, located below (Pic. 7).
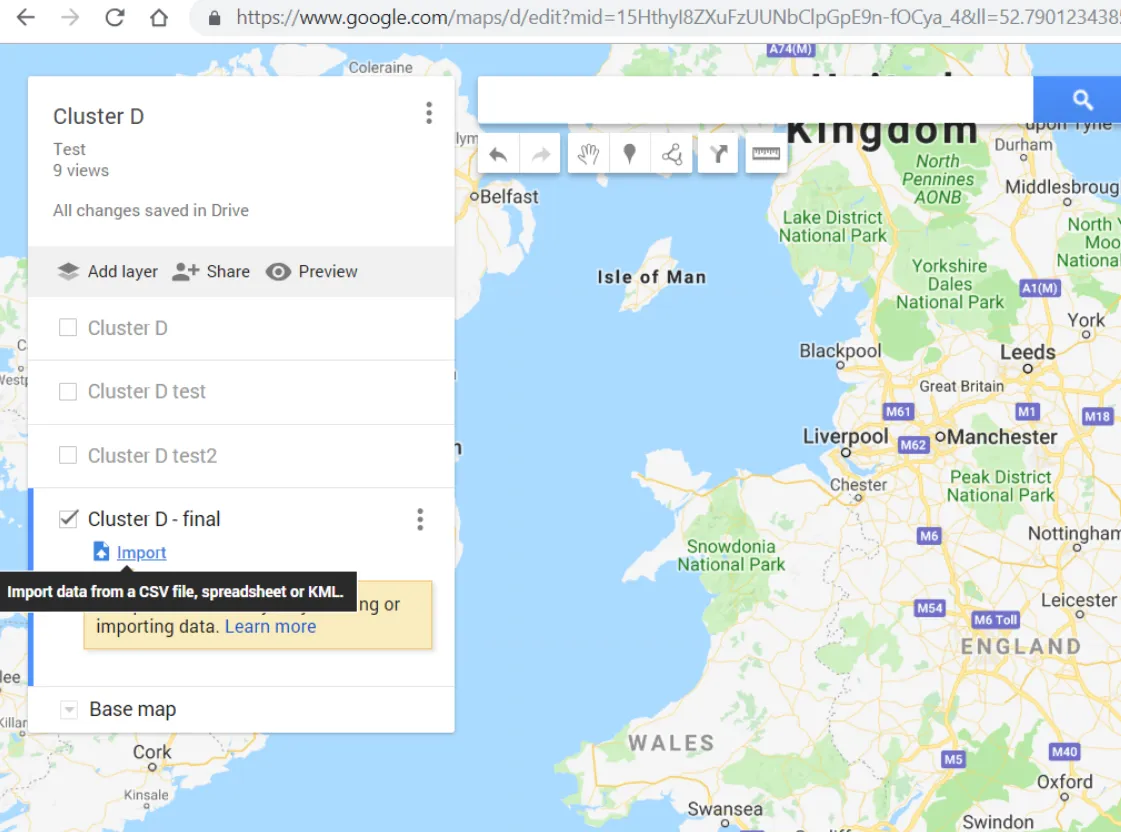
Pic. 7 The import option in Google MyMaps. - Once you get the “Import” box opened, drag your Excel file (Pic. 8). Alternatively, you can select the file from a path on your computer, but it won’t be the quickest option then.
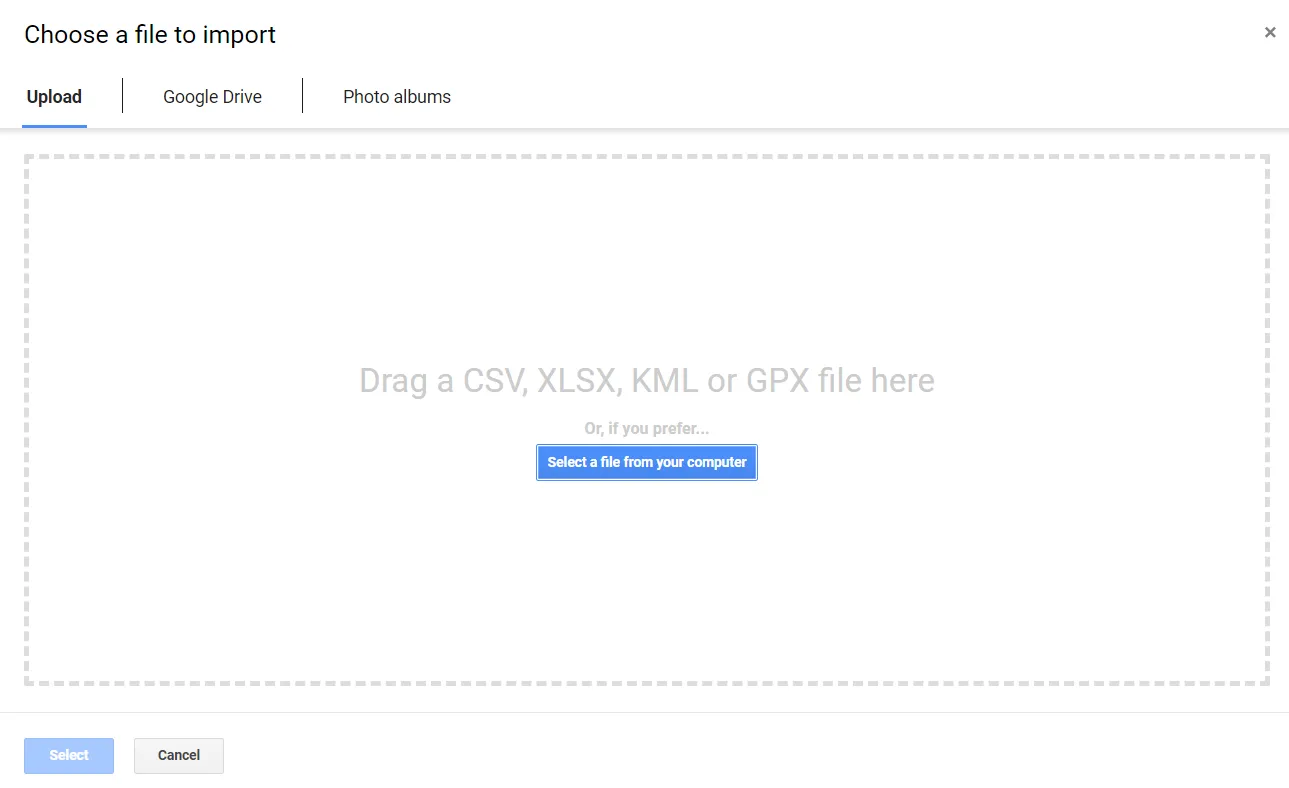
Pic. 8 Choosing the file to import in Google MyMaps. - Once you drag your file, the tool will ask about the main column, that data is going to be switched on as a placemark (Pic. 9-10). Obviously, when you decide to input more than 1 column.
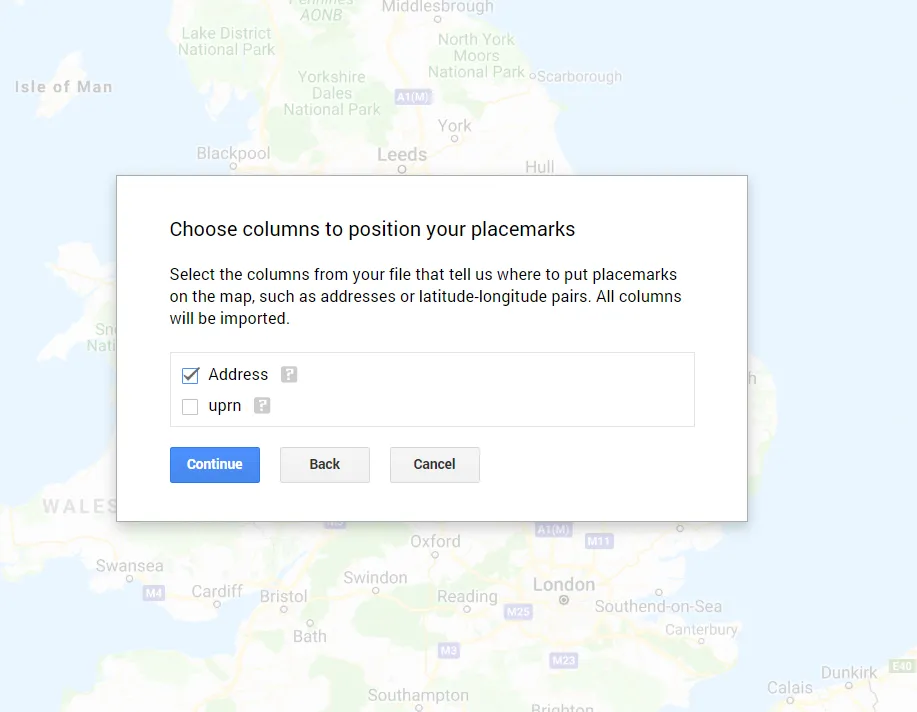
Pic. 9 Choosing columns to position your placemarks. 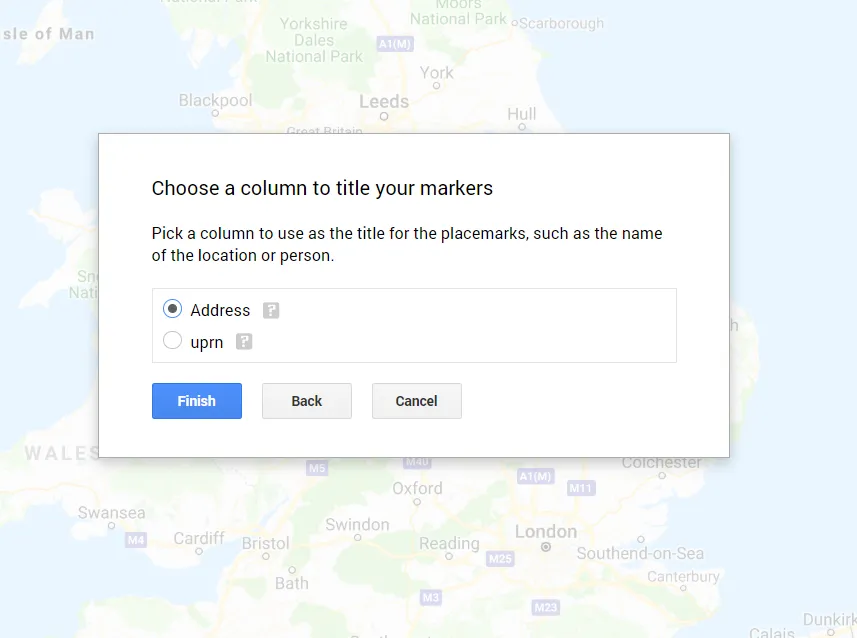
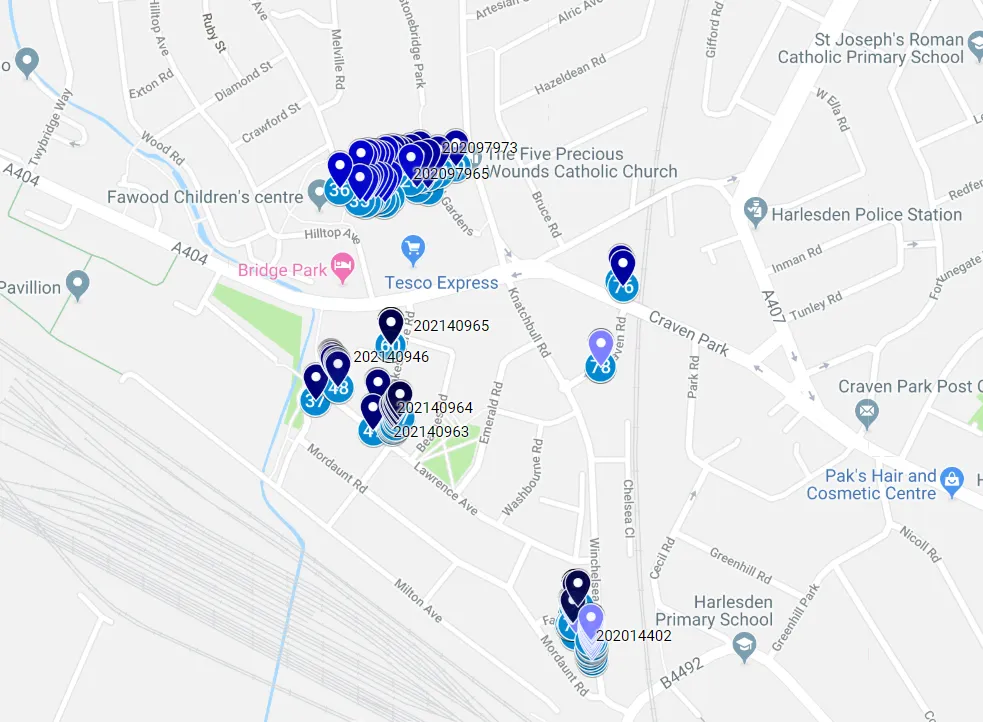
Pic. 10 Choosing columns to title your placemarks. - You should get your layer ready. See the effect on your map. Now you have all the locations from your Excel spreadsheet.

Pic. 11 The address data from the Excel spreadsheet is already been placed on your Google MyMaps layer. - The next step is up to you. If you are happy with locations placed on Google Maps you can go straight to point 12 in order to transfer them to Google Earth. If not, then you can change the appearance of your signatures. In this case, you must place your cursor on the list of your items, default called “All items”. When you do it, on the right side the brush signature should appear. Click on it to run more options (Pic. 12).

Pic. 12 Colour and signature settings option in Google MyMaps. - Once your items setting box pop up, then you can change both signatures and their colours as you want (Pic. 13).

Pic. 13 Colour and signature settings in Google MyMaps. - The other option is clicking on the “Uniform style” label, placed just underneath the name of your layer, where you have a few other options like a sequence of numbers, etc. (Pic. 14 – 16).
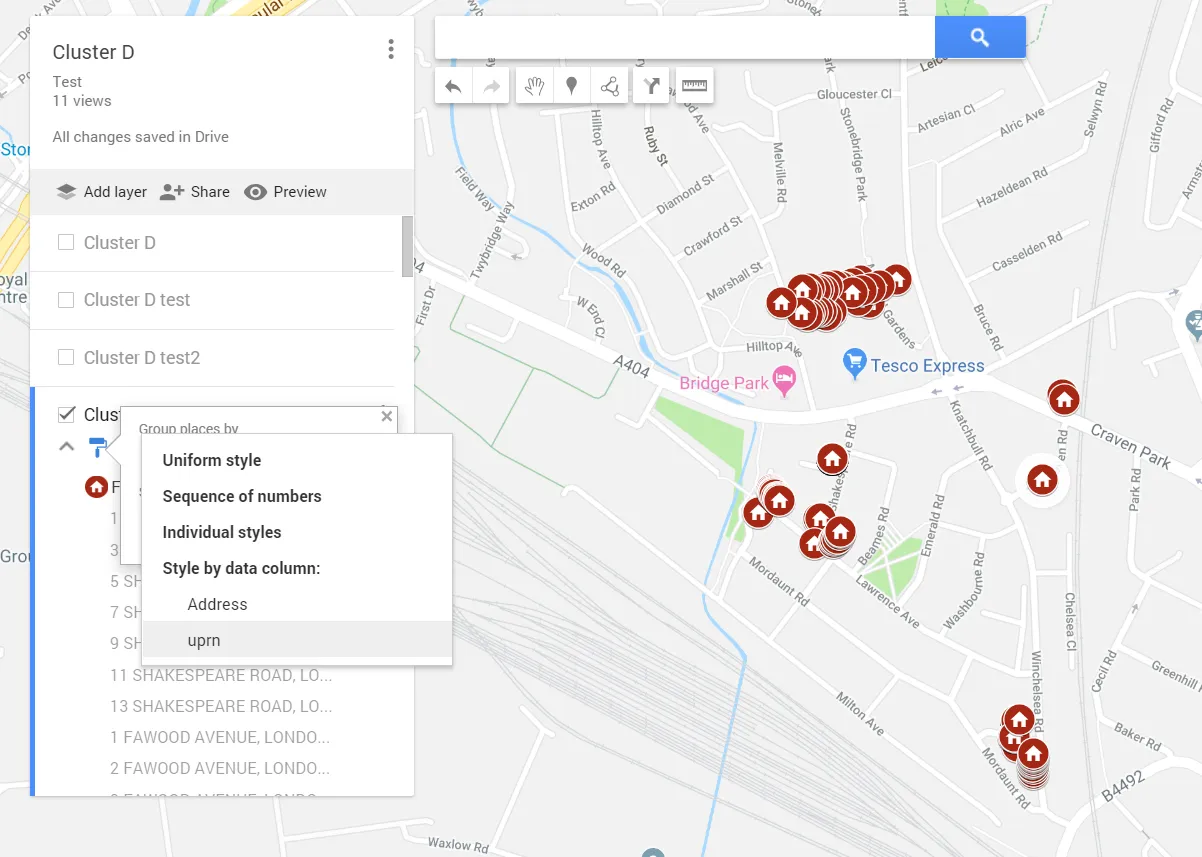
Pic. 14 The uniform style settings in Google MyMaps. 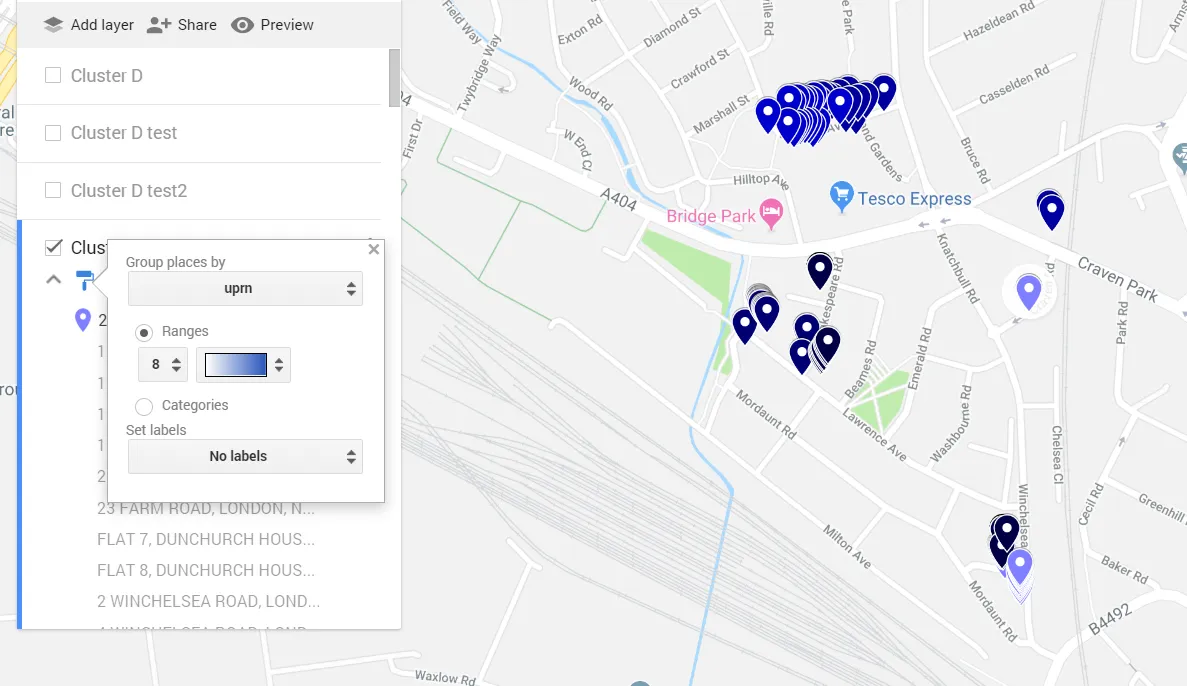

Pic. 15, 16 Styling by data included in one of the columns. - Your particular places are listed in the metadata table. Here you can do some amendments like data sorting or add up some columns & rows. Here you can also find the stuff quickly. A click on a particular address redirects you instantly to a place on the map (Pic. 17).
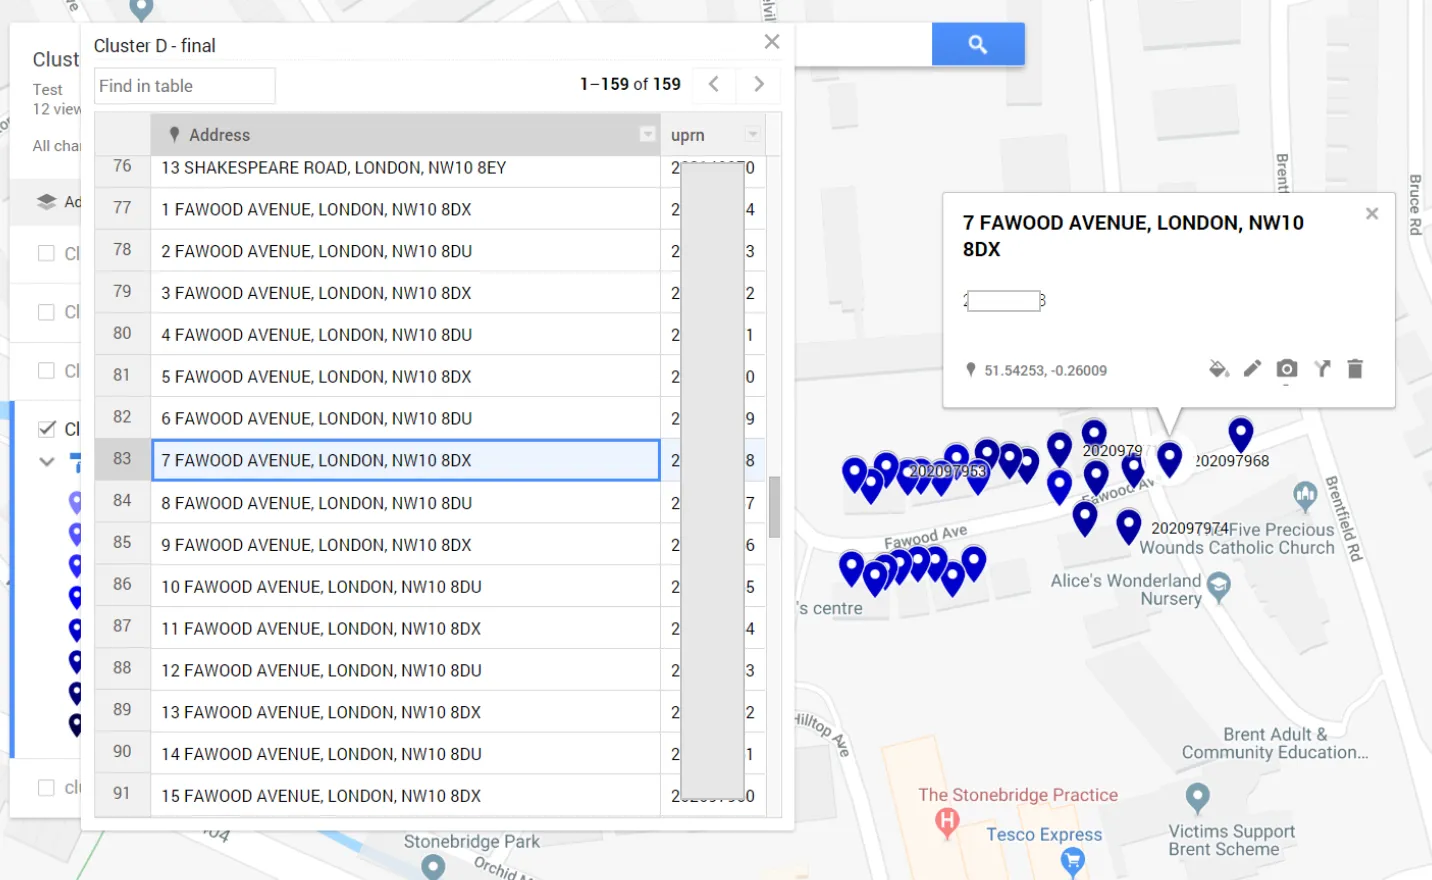
Pic. 17 When you have your data table opened, then after clicking on some random item you get it shown on the map instantly. - Sometimes we may encounter a problem with address location. Google sometimes is not detailed enough (Pic. 20).
Pic. 20 Google Maps defect – the addresses are not accurate enough sometimes. - The procedure is the same for addresses in different countries (Pic. 21, 22).

Pic. 21 A random address list for some flats in Krosno (Poland). 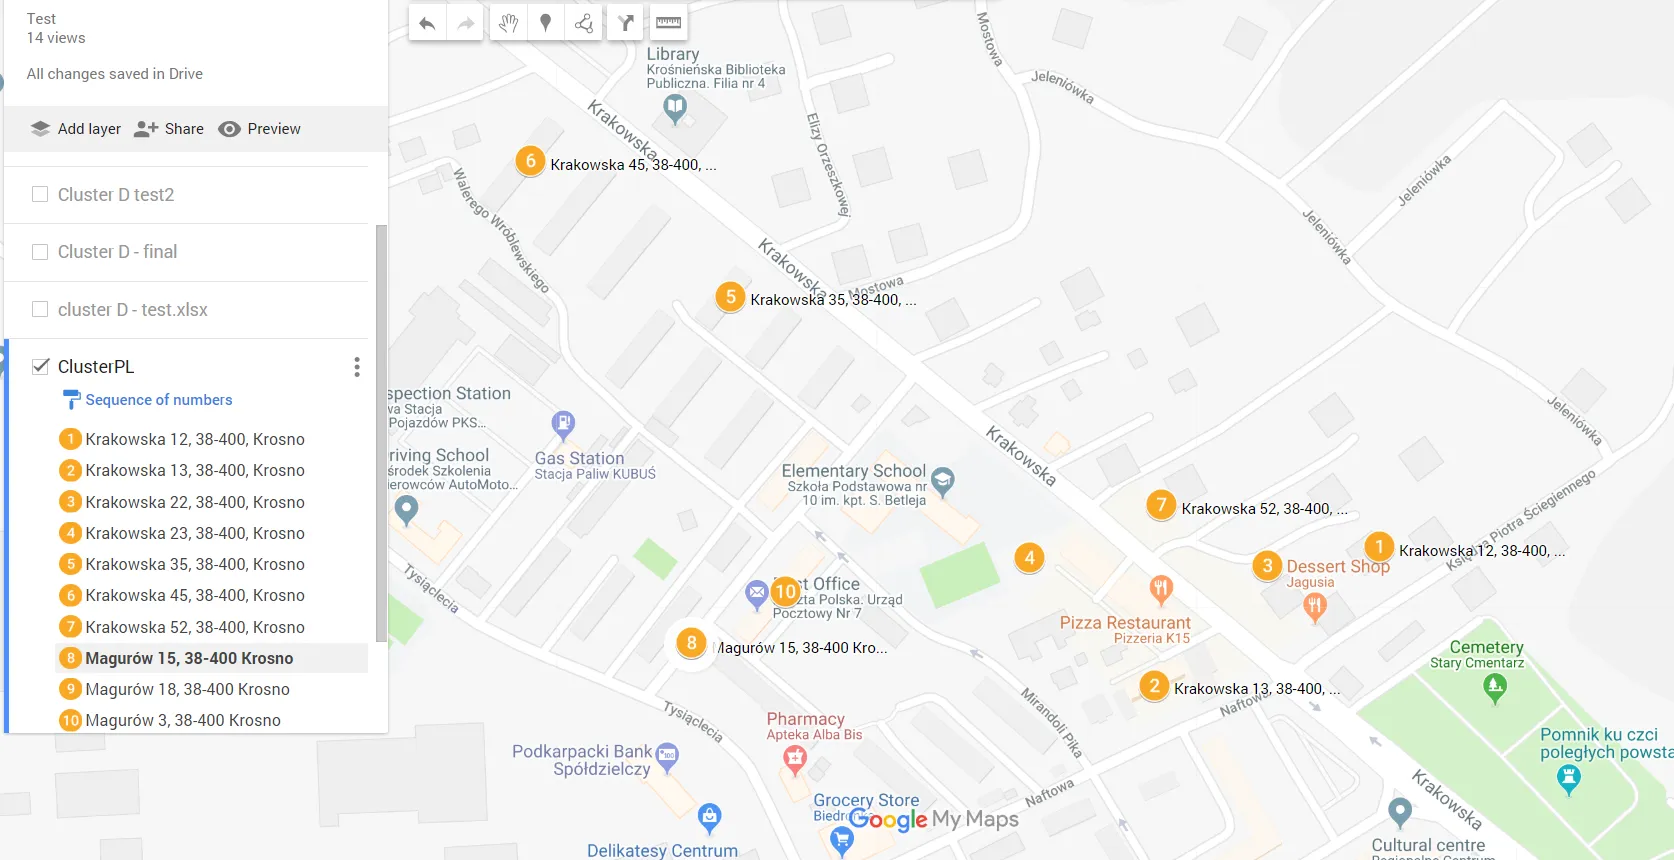
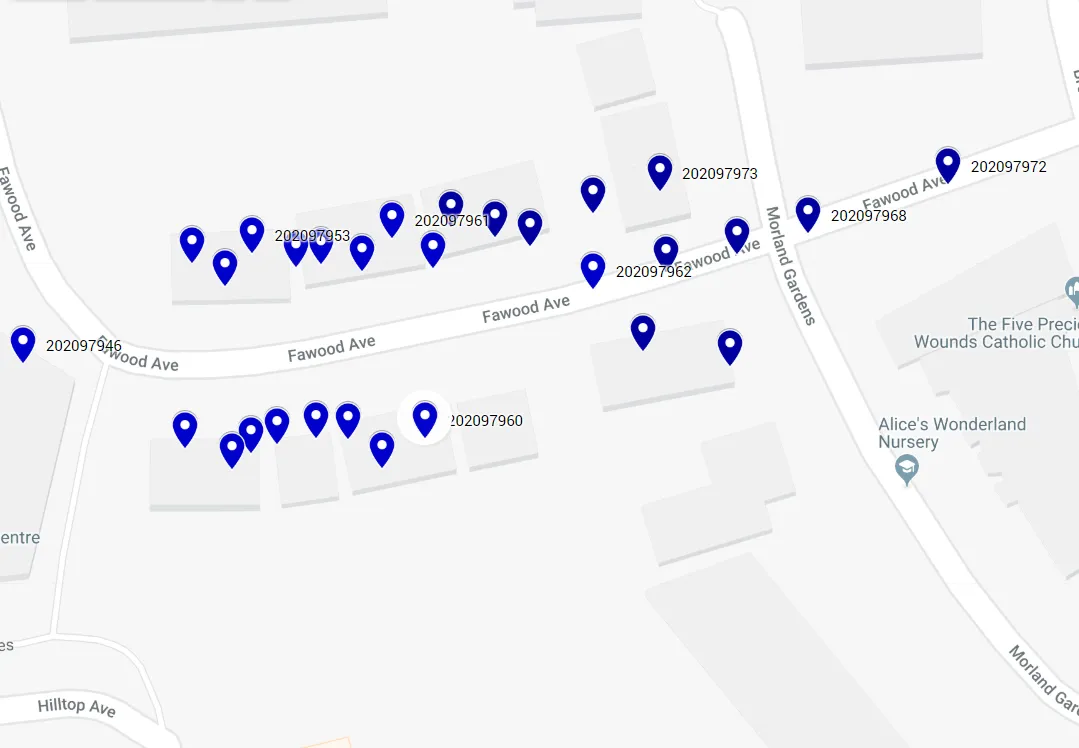
Pic. 22 …and their appearance on Google MyMaps. - Now let’s download our address map as a .kml file in order to open it in Google Earth or different GIS software (Pic. 23).
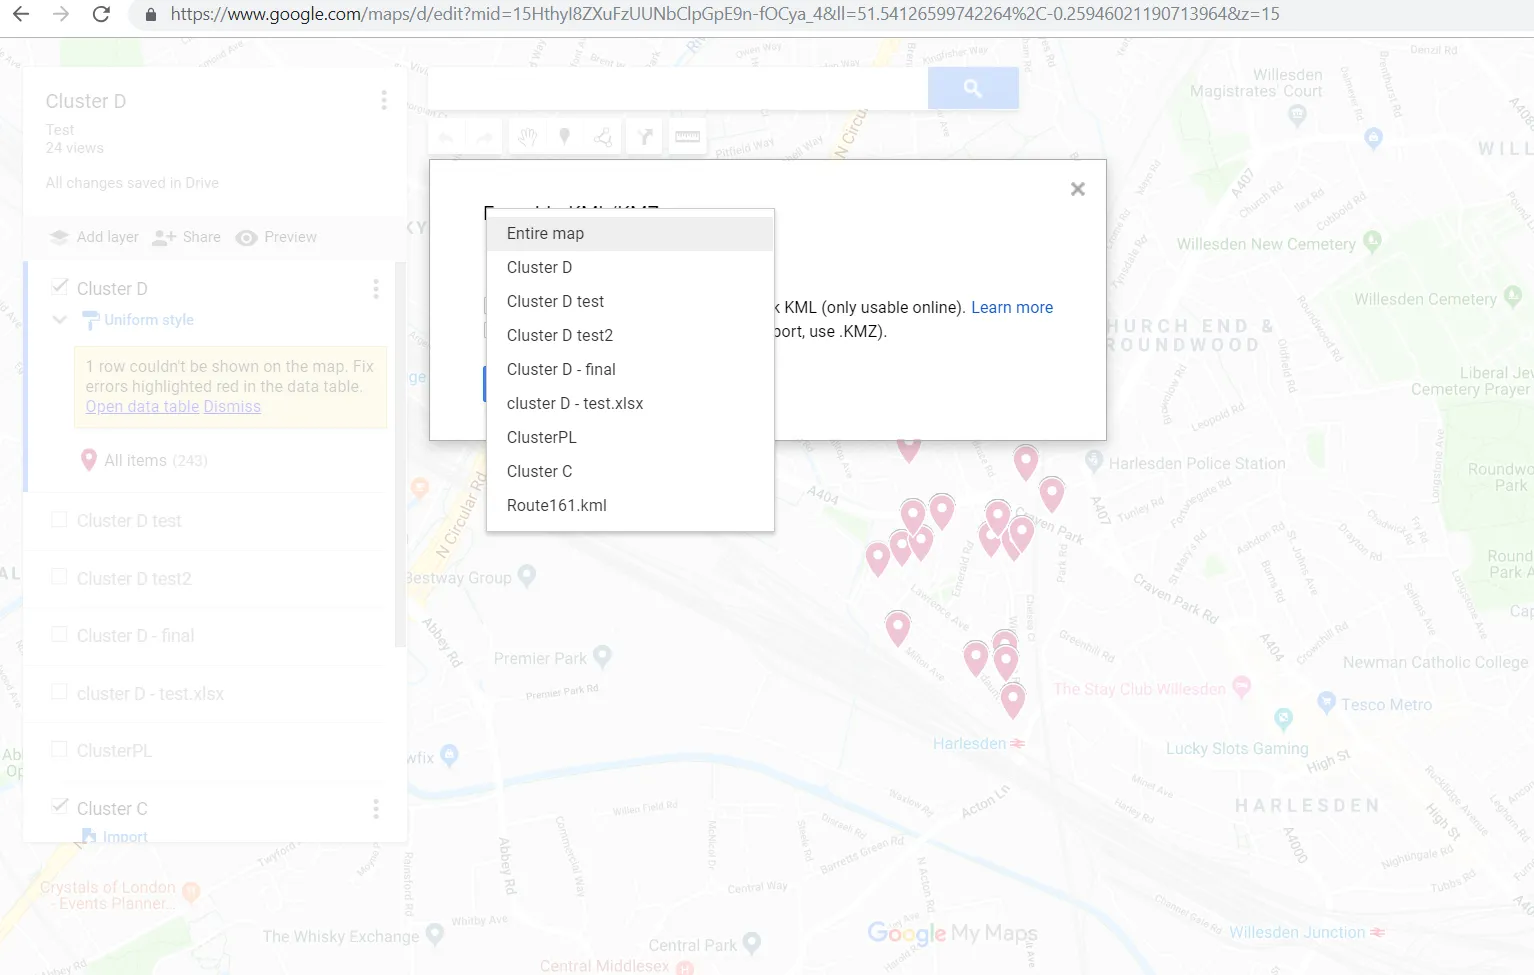
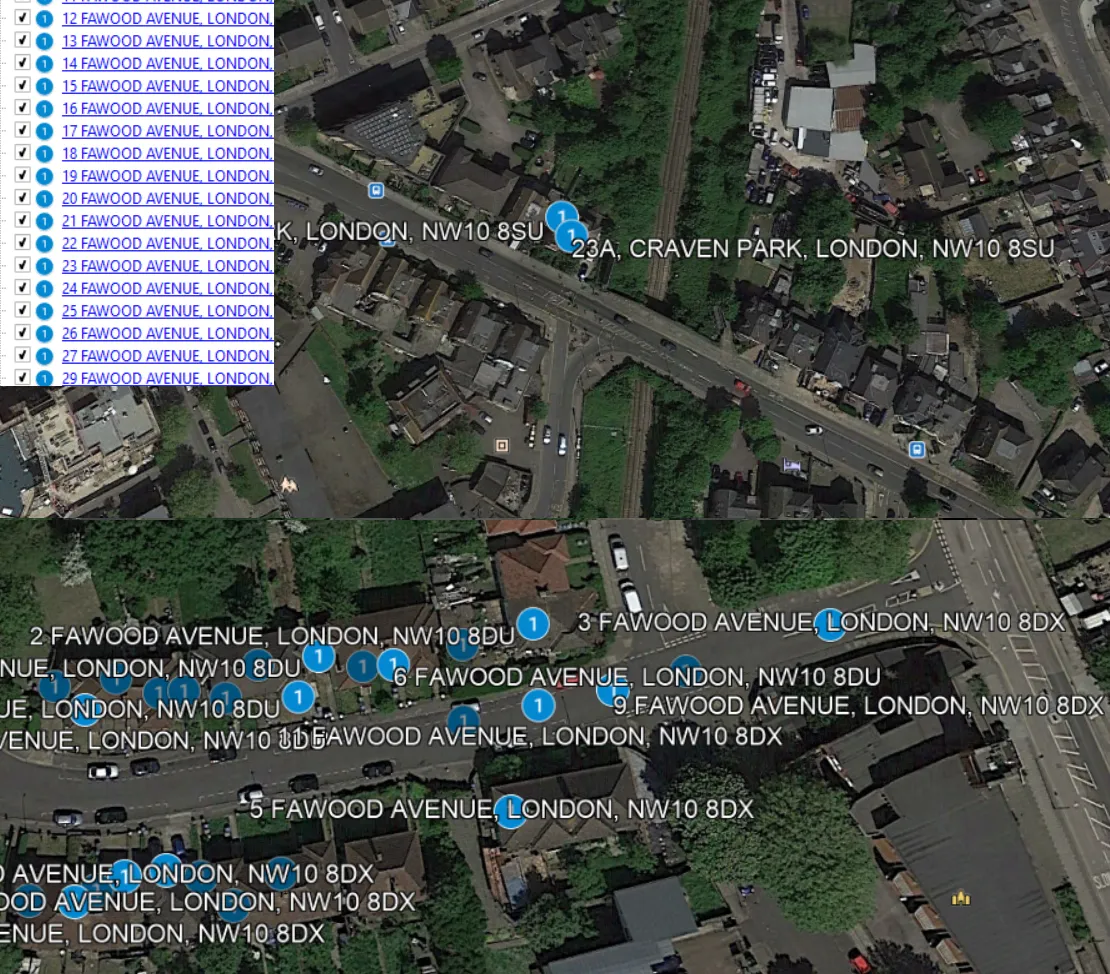
Pic. 23 A .kml/.kmz download options in Google MyMaps. You can create a .kml file from both entire maps, including all your layers or from a single layer only. - Once you select your own way to download the .kml file, it will be saved in your “Downloads” directory. Having it shown on the bottom left of your screen, as usual, open it. When you do this, your address list is going to be shown on Google Earth. Bear in mind, that a default zoom level may not meet your expectations, because a lot of labels located nearby are going to make their appearance really messy. However, everything is going to improve, when you zoom in (Pic. 24). Alternatively, you can remove some addresses from the list, comprising your .kml file (Pic. 24).
That’s all. You are done. Maybe the elaboration of this process was quite big, but trust me, you can do this whole process within 5 minutes!
The procedure shown above refers to the situation when everything is alright so far. If not, some errors appear, as usual. A major case, that can generate an error is nonuniform data in the address list. When your stuff is messy, then won’t be transferred properly into Google MyMaps (Pic. 25, 26).

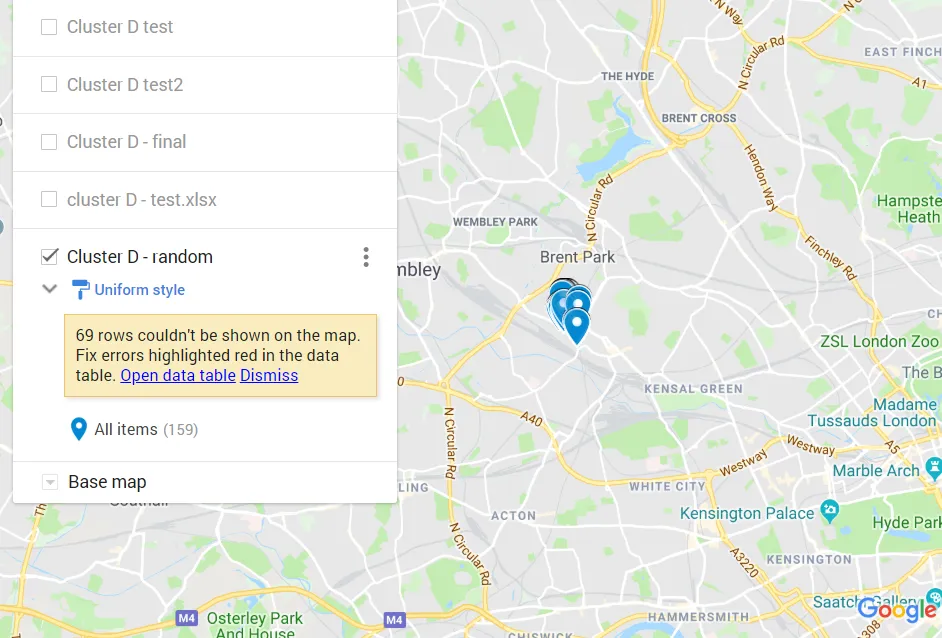
When the issue is too big, then you won’t see your addresses on the map at all. Google MyMaps also doesn’t like tabs with multiple columns, as I have mentioned above. These are rejected automatically.
Mariusz Krukar
Links:
Youtube:
Read also:
1. How to show the coordinate grids in Google Earth and Google Maps?