Easy way to create the KML files with Python
There are quite a few ways allowing us to create the .kml file for Google Earth and Google Maps. The solution presented here is not quicker, but for sure quite convenient for someone, who recently started his adventure with the Python programming language.
Here I would like to demonstrate to you how to create some random geographical points easily. In Python programming language we have basically 2 ways of creating the .kml file. The first way leads us to the code, thanks to which the .kml file can be created literally from scratch. The second one shows a much quicker option with using an already existing tool, including all relevant code files stored in the folder. I am going to deal with the second way because I believe most people are short of time.
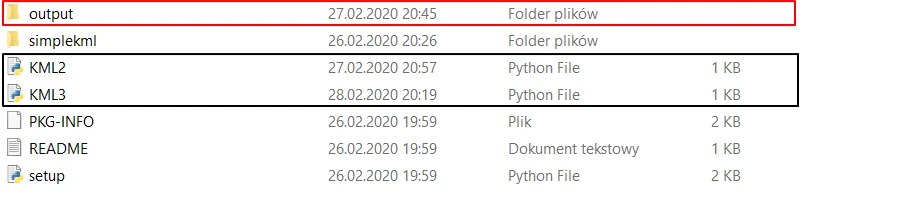
Well, the tool we can download from this website, and next extract all files from the zipped folder (Pic. 1, 2).

Pic. 1 SimpleKML download option.

Pic. 2 The full file tree, which you should get after the simpleKML v1.3.1. extraction.
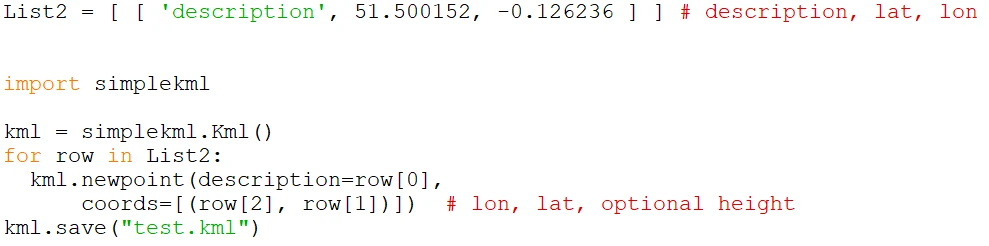
The “Setup” file is not for file creation. You must install some Python console, which can be for instance the IDLE Python 3.7. Next, create the new .py file and for the .kml file creating purpose write some small code, which can look like this (Pic. 3):

Pic. 3 Simple Python code for creating the KML file.
Another way to execute the .kml file from Python looks like this (Pic. 4):
Pic. 3 Simple Python code for creating the KML file – a different way.
Both codes must be saved into separate files and placed within the main SimpleKML tool folder (Pic. 5).
Pic. 4 New Python files with the saved code presented above. The red box shows a new folder created for the storage of the .kml files.
Along with these files, you can prepare the new folder in order to cache your newly created .kml files. The Python files with the code shown above must be located inside the major tool catalog when they can fetch the relevant Python code from the files based in the “simplekml” folder.
Now, let’s double-click on one of them – the KML3.py file. Right afterward, our .kml file is to be found at the bottom of our list, as we haven’t set the saving path in the code (Pic. 3, 5).
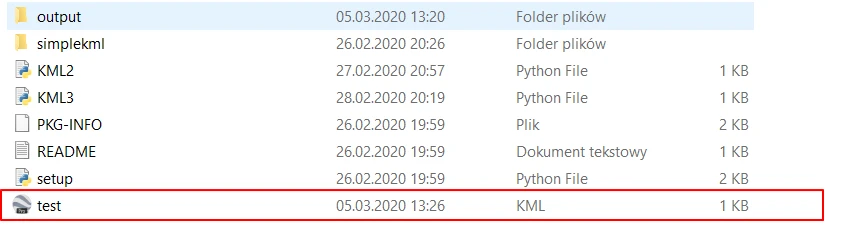
Pic. 5 Our new .kml file was created instantly by a Python script.
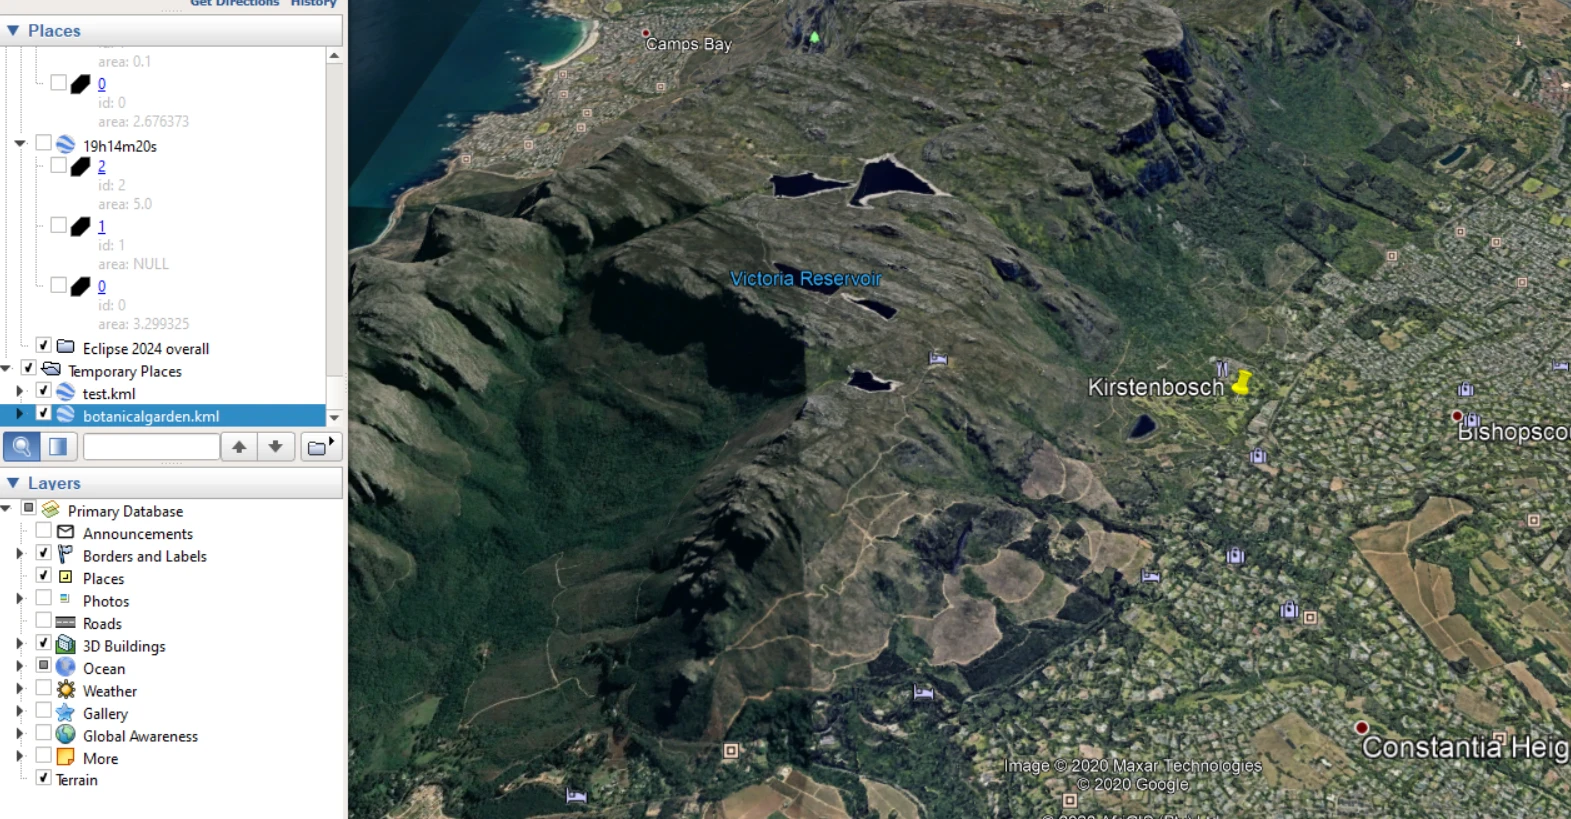
Now let’s double-click on our new .kml file and open it in Google Earth (Pic. 6). It appears as a yellow pin, with scant balloon information. We can put some description in the code (Pic. 11).

Pic. 6 The .kml placemark is displayed on Google Earth.
The other code also works fine, and we can find the file under the specified location (Pic. 7) established in the script (Pic. 2).

Pic. 7 newly created Python file in the specified location defined in the script.
Also, in this case, everything looks fine on Google Earth (Pic. 8).
Pic. 8 Another .kml file displayed in Google Earth.
OK, the first part has been done. Now I am interested in plotting into the code more than 1 placemark to show.
In the first code adding more than a few placemarks can be awkward. I copied and modified this code only once (Pic. 9).

Pic. 9 The Python code for 2 .kml placemarks.

Pic. 10 … and their appearance on Google Earth.
This code can be simplified. Instead of using each list separately, we can use the for statement, according to this explanation (Pic. 11). As a result, we can put more placemarks, keeping our code tidier.


Pic. 11, 12 – The Python code for multiple .kml placemarks and their appearance in Google Earth.
This code can be written in a different way. We can include the collection.namedtuple for the markers. In this event it would look like follows:


Pic. 11, 12 – The Python code for multiple .kml (2)
In Google Earth, the result is exactly the same.
Another code is more simplified (Pic. 13), where basically within 1 line you can place the .kml placemark with the most important features like description or name. On top of that, I did also some smallish HTML amendments, making the font bold (Pic. 14).


Pic. 13, 14 The 2nd Python code for two .kml placemarks, where one of them has a description in bold font.
Developing this code, we can add obviously the next files. However, the most important thing is, that you can easily expand this code on some styling. As you will notice, I used unique HTML features for each individual placemark. The last one was extended with the font styling feature, where I added an additional parameter (Pic. 15, 16).


Pic. 16, 17 Multiple .kml placemarks displayed in Google Earth. The code includes some additional HTML elements as well as Python .kml styling features. All of them have been bounded with rectangles.
Building .kml files in Python is not confined to placemarks only. We can also create lines or polygons. More details with ready code snippets are to be found here. I just presented some of these examples below (Pic. 18 – 21). You can try on your own, building your personal example.

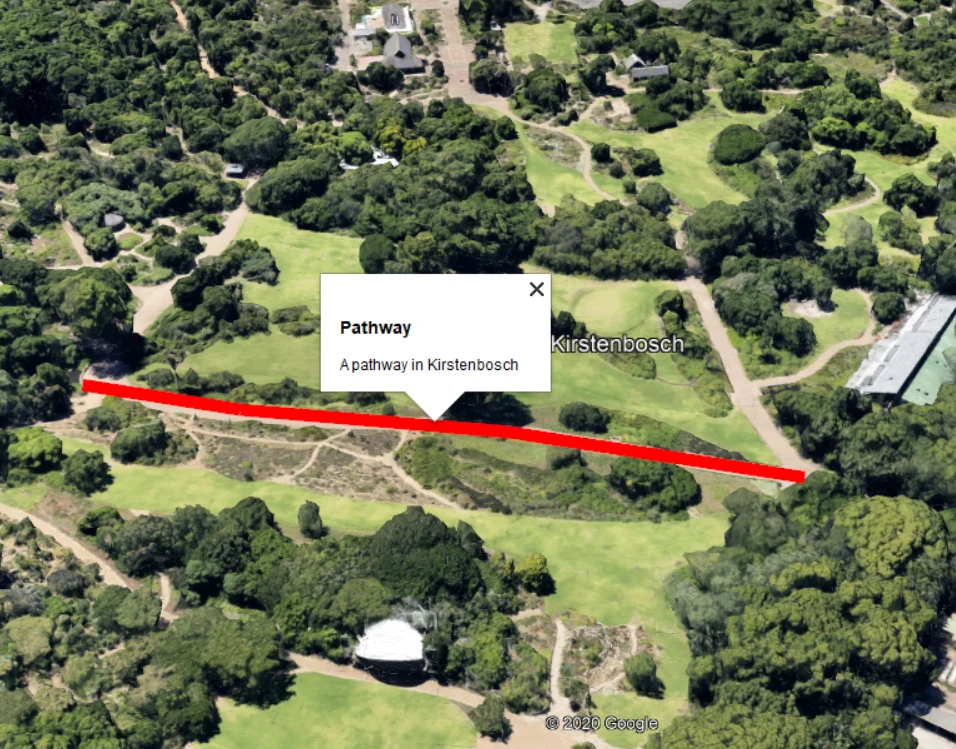
Pic. 18, 19 – The line in the .kml file was created with Python code.

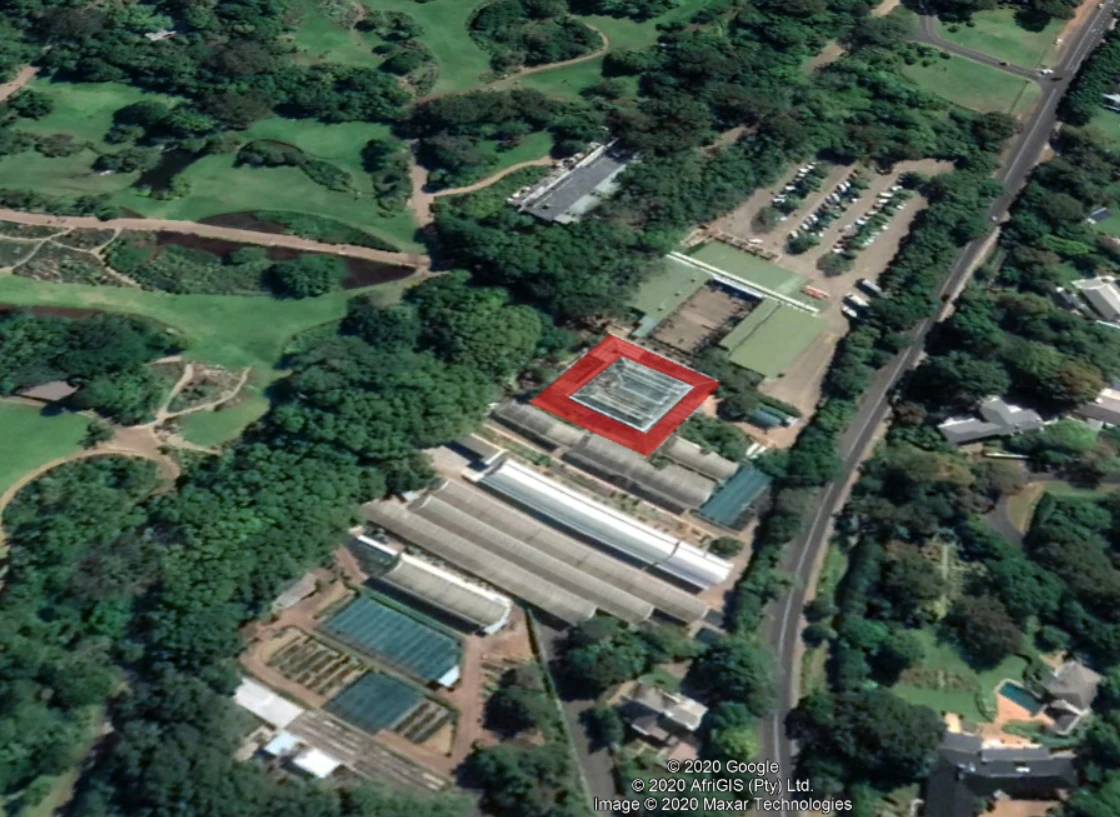
Pic. 20, 21 – The example of the polygon in .kml file created by Python.
Besides the best, I guess, the SimpleKML tool, there are other ones, where you can build your Google Earth placemark or object. They are:
– FastKML v0.11
– Clawpack v.5.3.1 (also .kmz files)
– PyKML v0.1.0
– GeotagToKML (creating .kml file from geotagged pictures)
Nevertheless, I would recommend you to stay with the SimpleKML tool, which appears to be the most popular and also kept up-to-date. The attention can draw only the last one from the list, which can draw your route based on the geotagged images, although this is a subject for further writing.
Mariusz Krukar
Links:
- Constructing the KML file from scratch in Python
- SimpleKML v1.3.1. documentation
- SimpleKML v1.3.1. download
- SimpleKML styling
- Python 3.7.0
- FastKML documentation
- FastKML v0.11
- Clawpack v5.3.1
- GeotagToKML
- GeotagToKML – details
Forums:
My questions: