Autofill elevation data for any QGIS point layer
In the recent text, I’ve shown you how to get the elevation data to QGIS without DEM. Imagine, that this is a track for equipping any point in QGIS with elevation data regardless of its location on our map. Maybe it’s not that useful when our point layer is restricted to some small area bounded within i.e. 10-20km, but if our points are spread across a whole continent, for example, this method can save a lot of time for you.
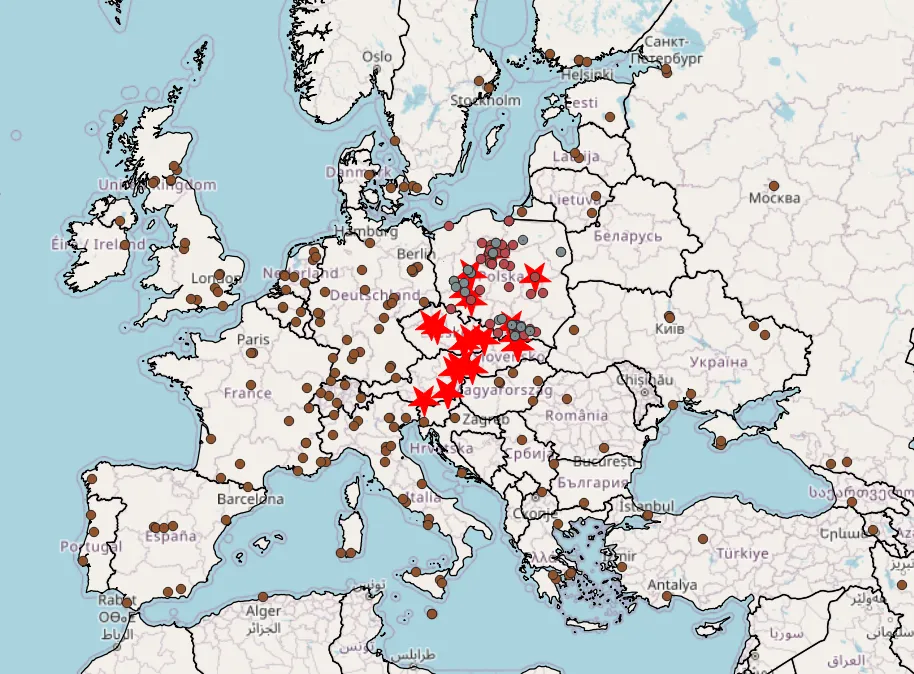
Pic. 1 Various points are located far away from each other as the point layer covers a whole world.
The image above shows the situation I would like to describe here. Our layer has massive extents over i.e. a continent. In this case, is rather impossible to execute the elevation data from just one DEM file. These files, in fact easily downloadable are restricted to smaller areas (Pic. 2).
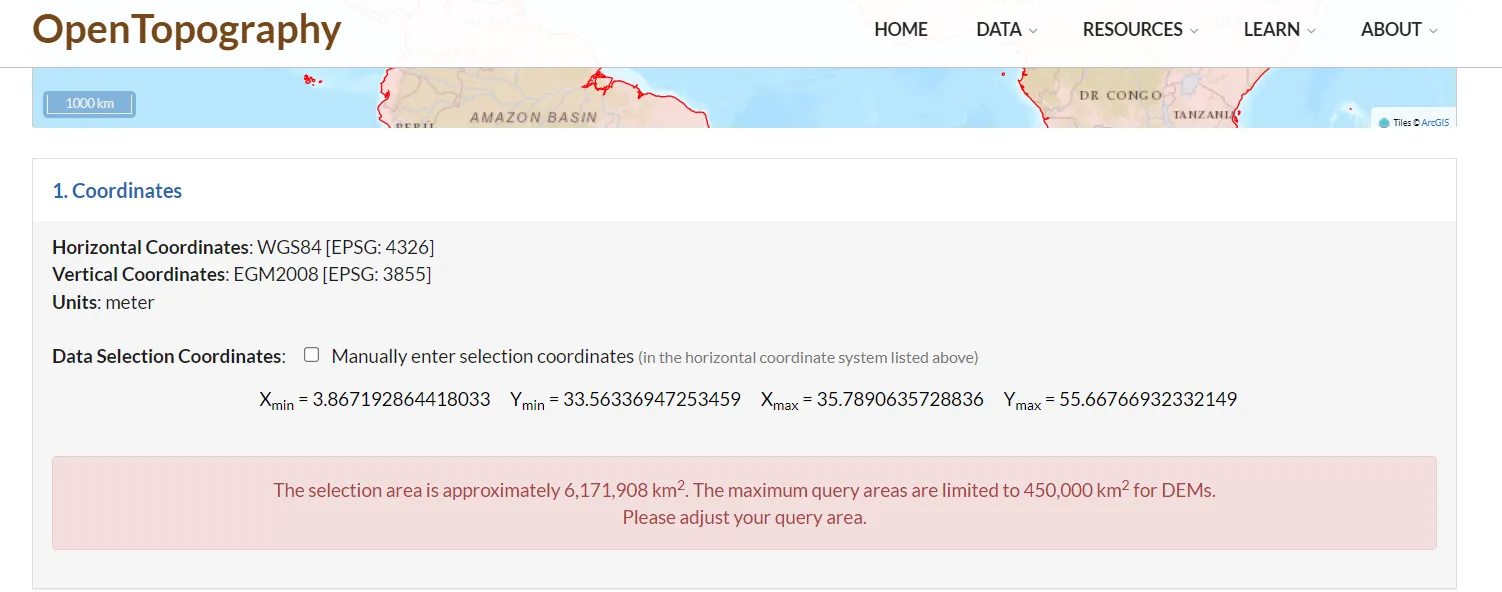
Pic. 2 OpenTopography.com DEM area download error driven by too large area selection.
Therefore it’s essential to apply another method, which would allow us to equip all our points with the elevation data without this whole hassle. As per my previous article explaining a very similar issue, we know, that elevation received from the Terrain mode in Google Earth rather not vary that much from the SRTM data utilized by GpsVisualizer.com. So I will stick to this website again, but the way of acquiring the elevation data will be slightly different. Let’s get started!
1. Open the attribute table of your layer and provide the ID number for the description column (Pic. 4). If the column doesn’t exist, create it. If something already exists in this column, move it to the other column (Pic. 1 – 3).
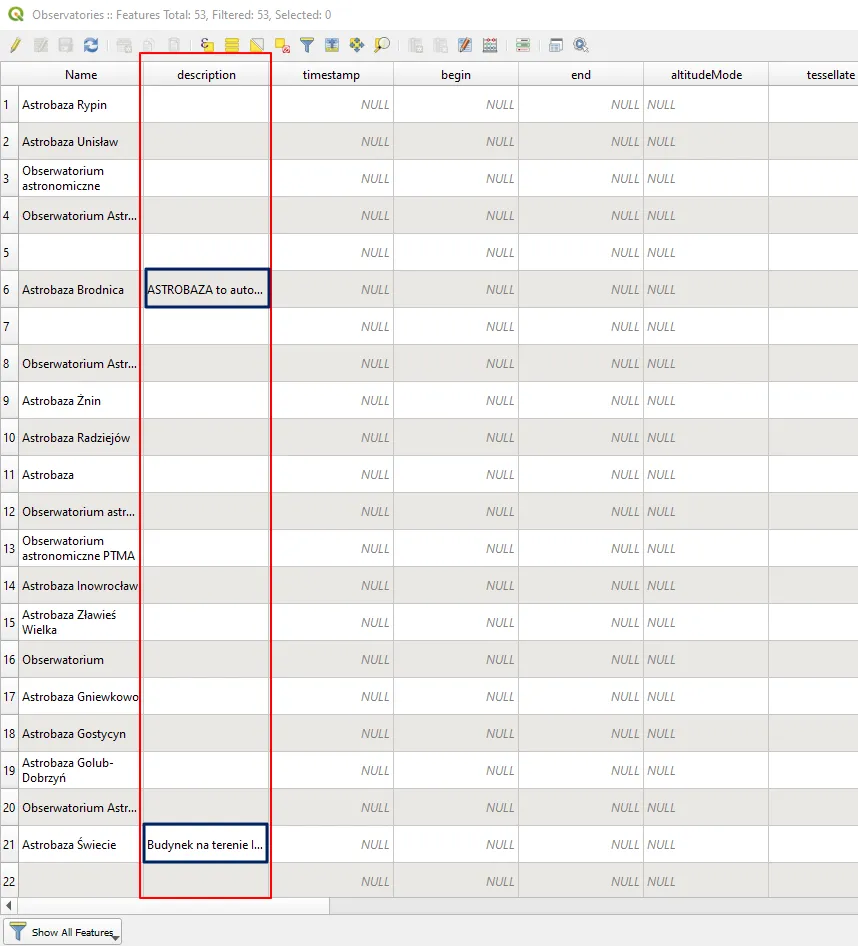
Pic. 1 Description column details.
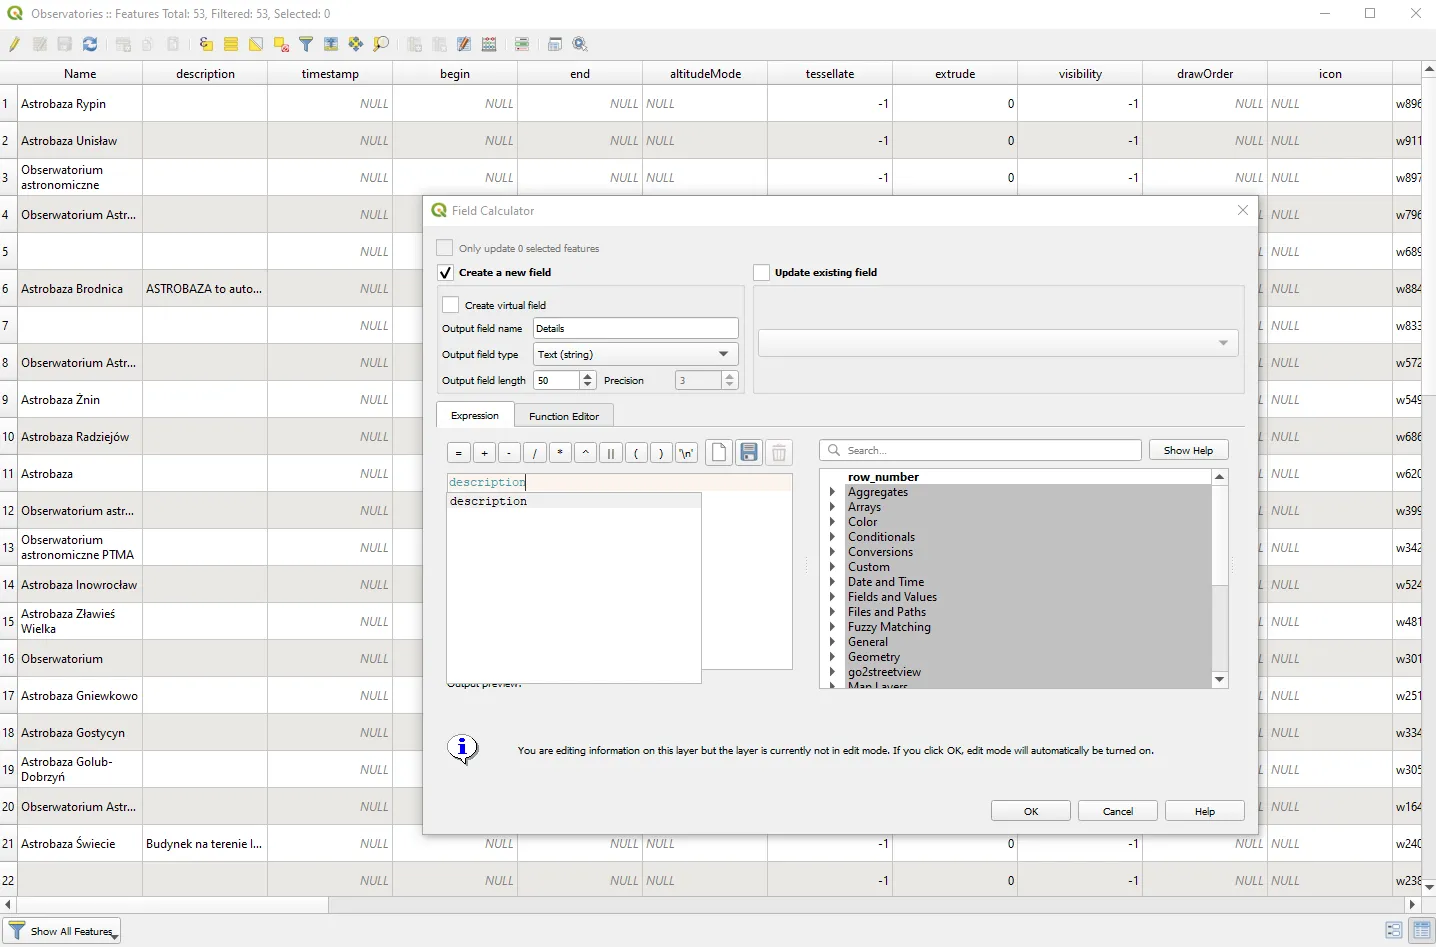
Pic. 2 Creating a new table via expression builder and transferring the description data to it.
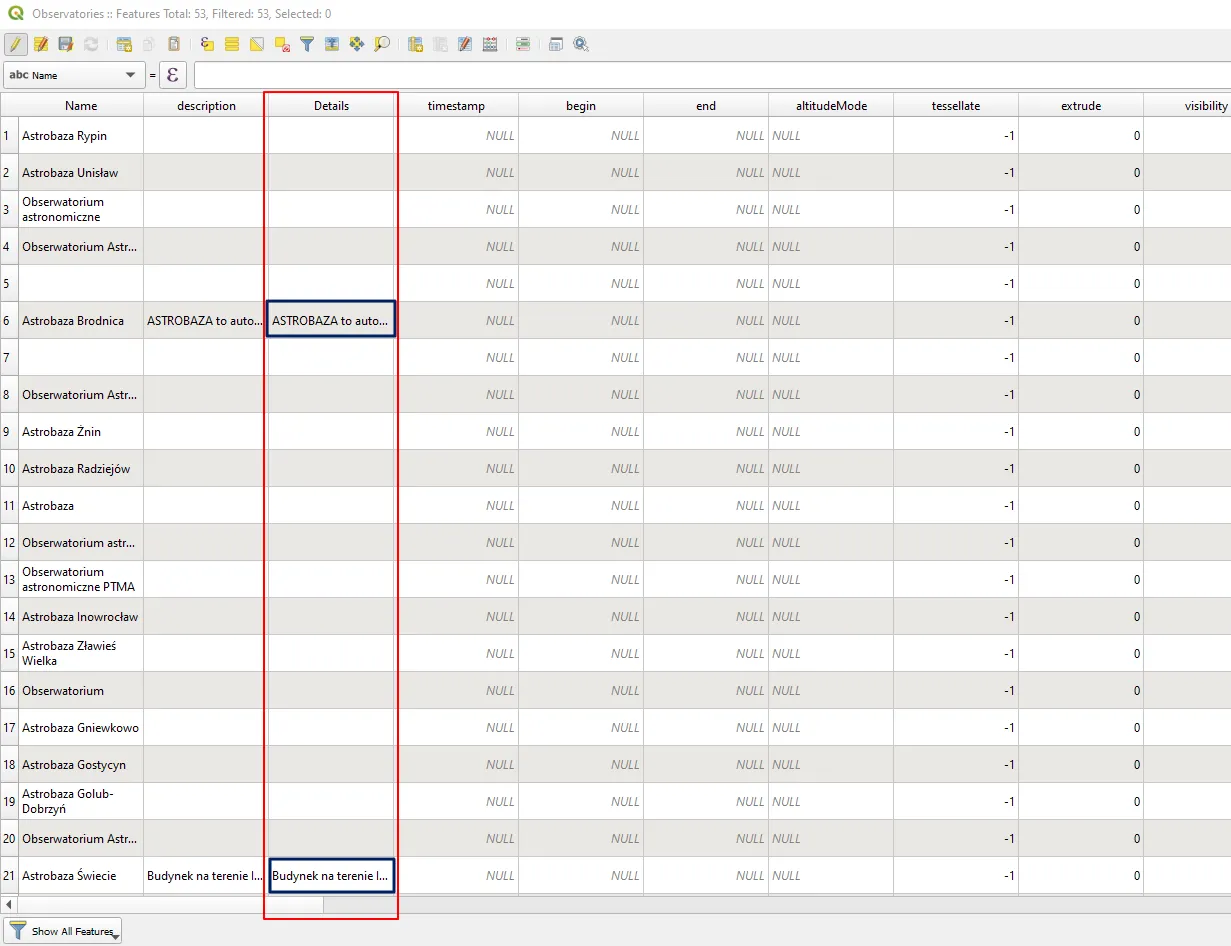
Pic. 3 New “Details” column was created with all the data transferred from the Description column. Next, after using the “Organize Columns” option moved to just behind the description column.
The ID number can be provided simply by the $id expression in the builder (Pic. 4). Afterwards, we will have the unique ID number assigned to every input. We can organize it later, but it’s not necessary.

Pic. 4 Assigning unique ID value for every item.
2. Export your current layer as the .kml file. Make sure, that you’ve chosen the WGS84 system, in which the Keyhole Markup Language operates.
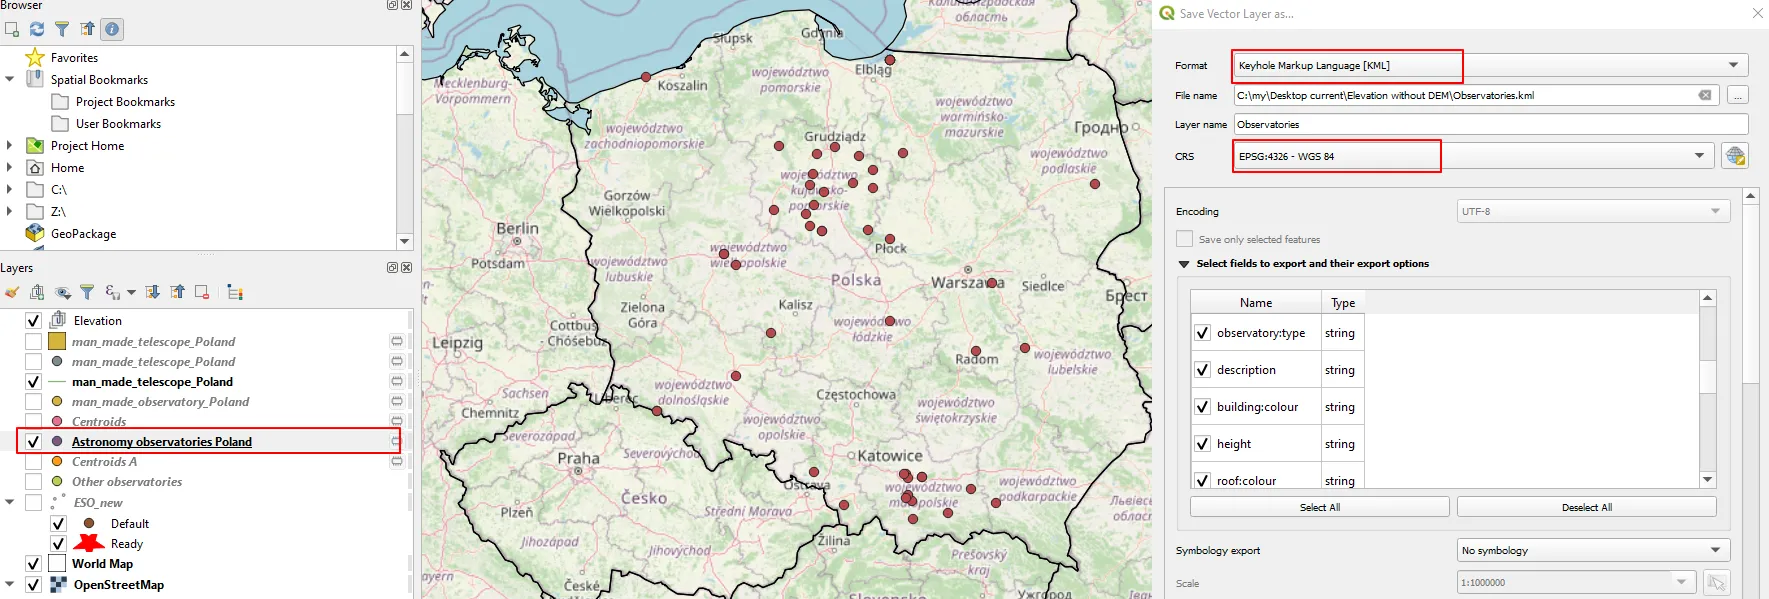
Pic. 5 Export the point layer as a .kml file from QGIS.
3. Import your file to GpxVisualizer.com, next hit the “Convert & Add Elevation” button making sure, that the .gpx file extension is selected (Pic. 6).
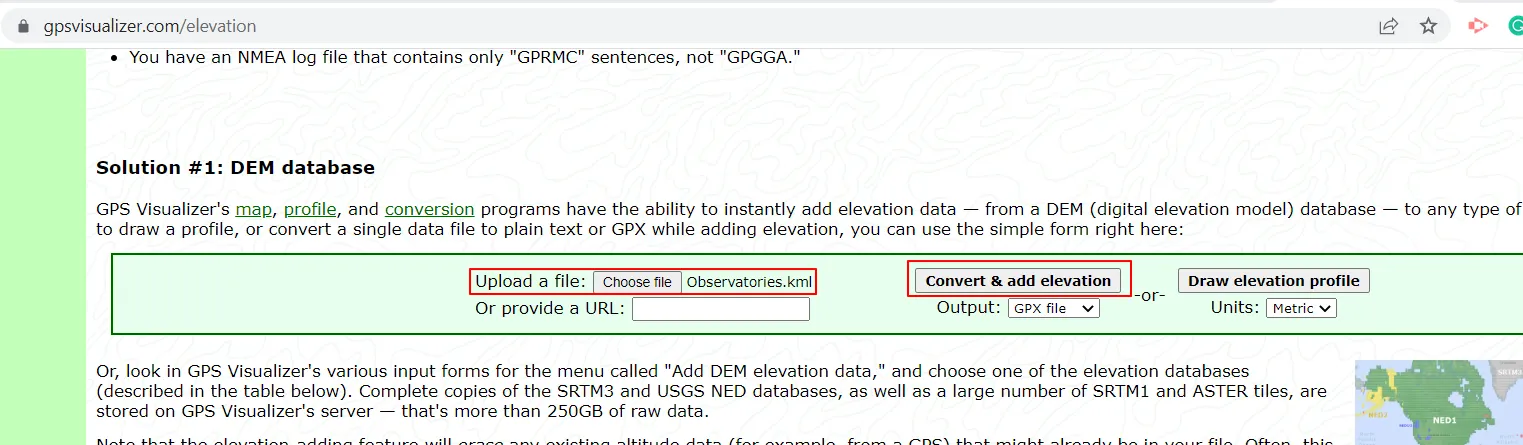
Pic. 6 Converting our .kml file with “Add elevation” option.

Pic. 7 GPS Visualizer conversion output. Worth looking at the XML tags: 1 – <ele> – information about elevation; 2 – <name><desc> the information about our object.
Now we are reaching the moment, where you will understand why creating (or equipping) the description column with a unique ID number was legitimate at the very beginning. This is because we have to match at least one layer of our column with the column created by the converted .gpx file. Because the column name doesn’t represent exclusive data leaving even some items empty across the whole table, we need to define another column with will have these values, and what is most important – will fit the column generated by the .gpx file. In our case, it’s the description column, which after conversion falls as desc retaining all the unique values provided (Pic. 9).
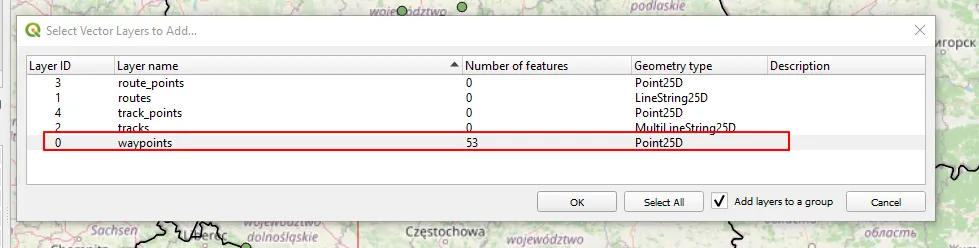
Pic. 8 Import the converted .gpx file to QGIS. Just the waypoints layer is needed, as the other ones are empty.

Pic. 9 QGIS waypoint layer from imported .gpx file to QGIS, where: 1 – Elevation data (the ele column); 2 – Item name (the name column), 3 – Unique ID number provided earlier to our description (now the desc) column.
Now, as you might have noticed, the previous description column has been superseded with desc retaining all the unique ID values appropriate to the object (point) name and its elevation provided.
4. Join the Waypoint .gpx layer with the layer you are working on. You can do it by right-clicking on your layer -> Properties -> Joins and in the dock window choose the new .gpx point layer as the joining layer and description as a join and target field. In your .gpx layer, it will be the desc column, but everything is the same there, so it will work. In the joining section, we should choose the ele column which contains the elevation data (Pic. 10).
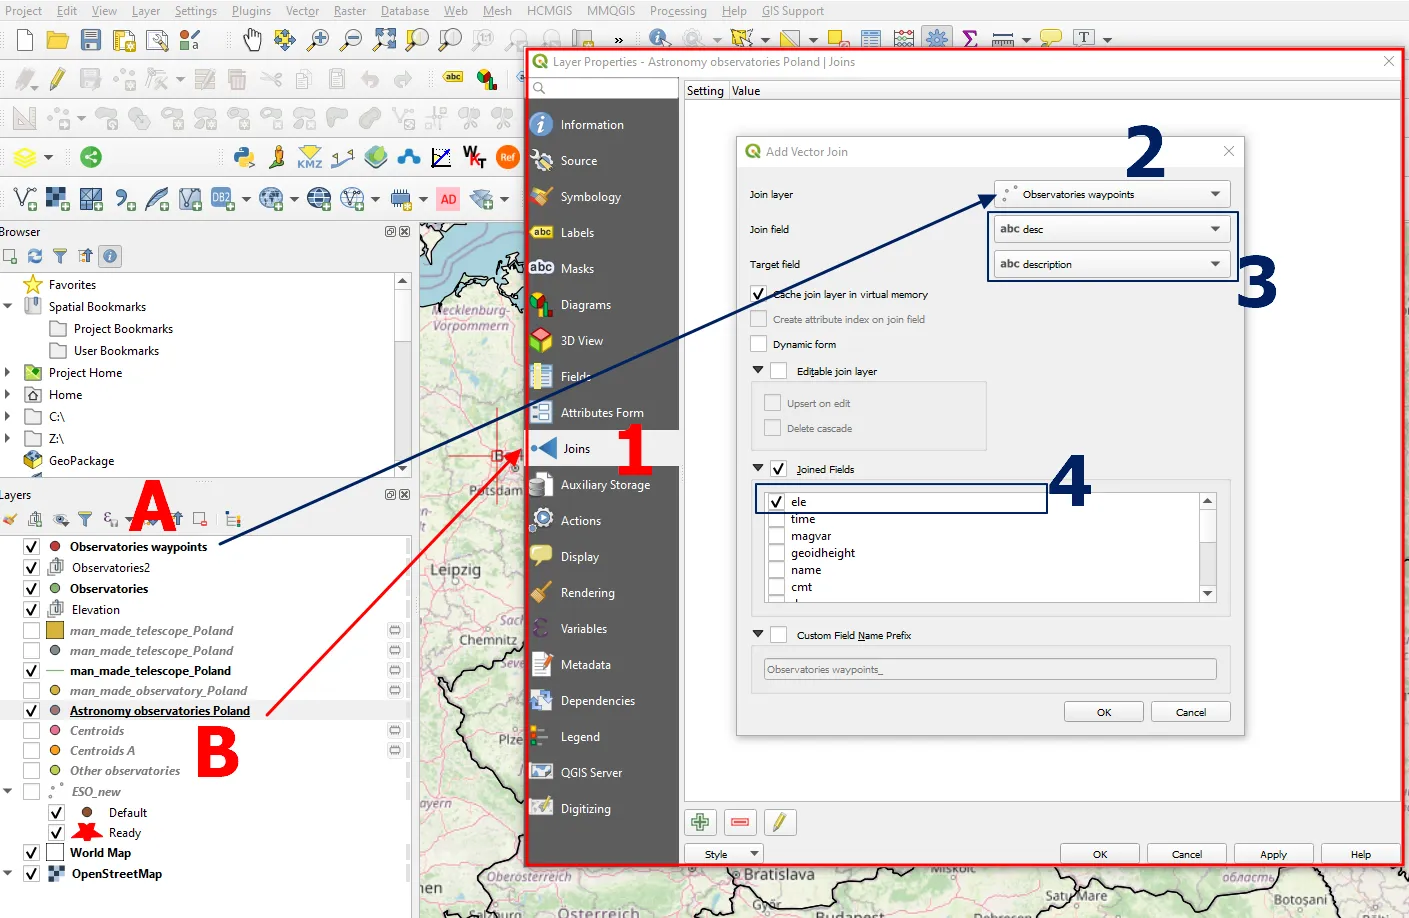
Pic. 10 Providing elevation data from .gpx file in QGIS by joining fields, where: A – The .gpx point layer converted in GPS Visualizer and imported to QGIS; B – the layer we are working on; 1 – The Joins option; 2 – Join layer selection (the .gpx point layer); 3 – Join & target field selection (desc and description columns with the same content); 4 – Selecting fields to be joined (the ele column with elevation data).
5. Finally our joined elevation field should correspond to the proper place, defined by the unique ID value (Pic. 11).
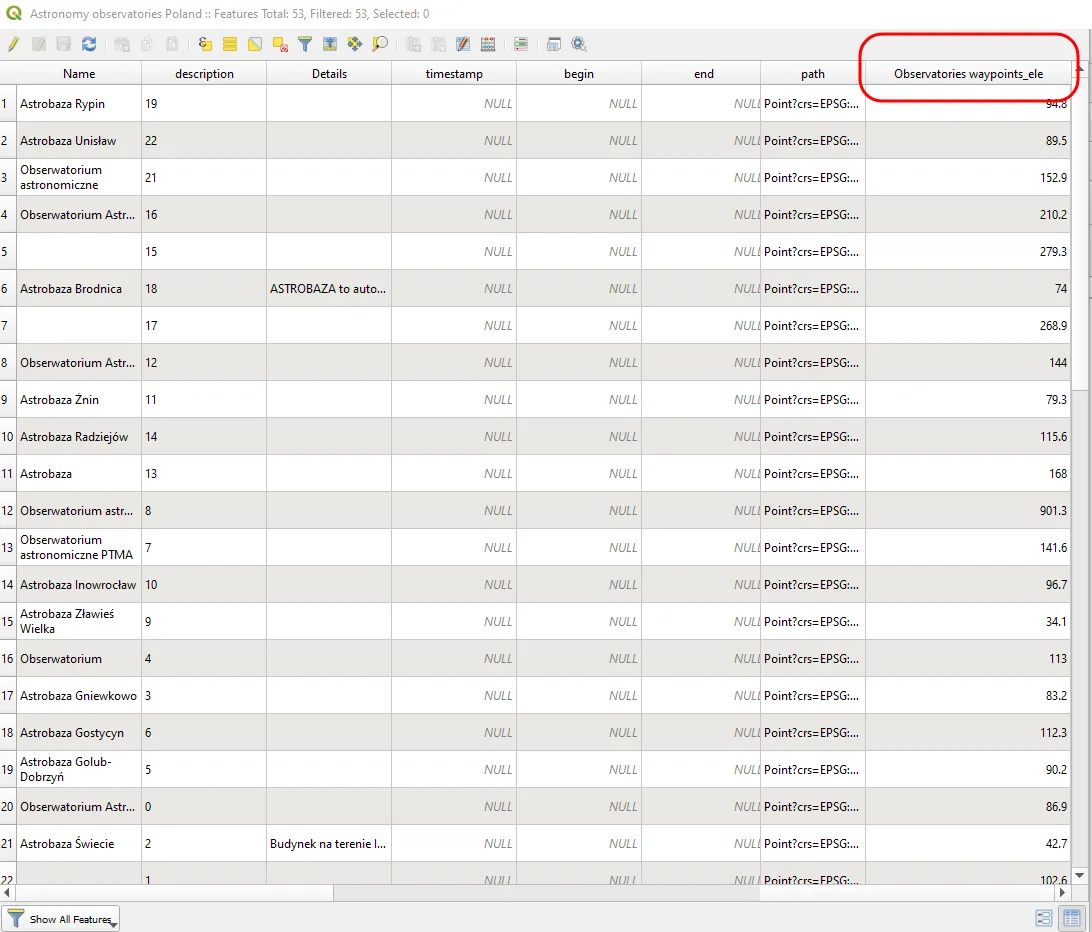
Pic. 11 The elevation data has been joined to our current layer.
The name of the column comes as defined at the joining stage. We can define the Custom Field Name Prefix (Pic. 10), but it’s not necessary. The very last step is saving this layer by joining the ele field as the separate layer and carrying on working on your project.
As you might come to the conclusion, downloading the Digital Elevation Model in order to extract the elevation data for our point layer is not a mandatory thing. You can omit this step simply by passing your point layer file via the GPSVisualizer.com tool, which will provide this elevation data for you.
Mariusz Krukar
Links:
- Terrain analysis in QGIS.html
- https://urs.earthdata.nasa.gov/
- https://plugins.qgis.org/plugins/OpenTopography-DEM-Downloader/
- https://agualabs.edublogs.org/2022/02/14/new-open-topography-dem-downloader-plugin-for-qgis/
- https://opentopography.org/
- https://opentopography.org/news/new-opentopography-feature-bulk-dem-download
- https://www.geodose.com/2018/02/how-to-download-srtm-elevation-data-qgis.html
- Gisgeography.com: 5 Free Global DEM Data Sources
- http://www.webgis.com/
- https://gisrsstudy.com/download-dem/
- https://hatarilabs.com/ih-en/downloading-a-digital-elevation-model-nasa-from-nasa-earthdata-tutorial
- https://search.earthdata.nasa.gov/search
Forums:
Youtube: