
How to highlight a multiple KML placemarks in Google Earth?
An element or text hover effect is known i.e. from HTML and CSS languages. What is interesting, this effect can be achieved also in .kml files. Sometimes, when we have a lot of placemarks with the same (or different) icon can be easier for us, when we move a cursor on the placemark, in which we are interested.
For this purpose, you need only a program to edit an XML code (i.e. Notepad++) and make small amendments!
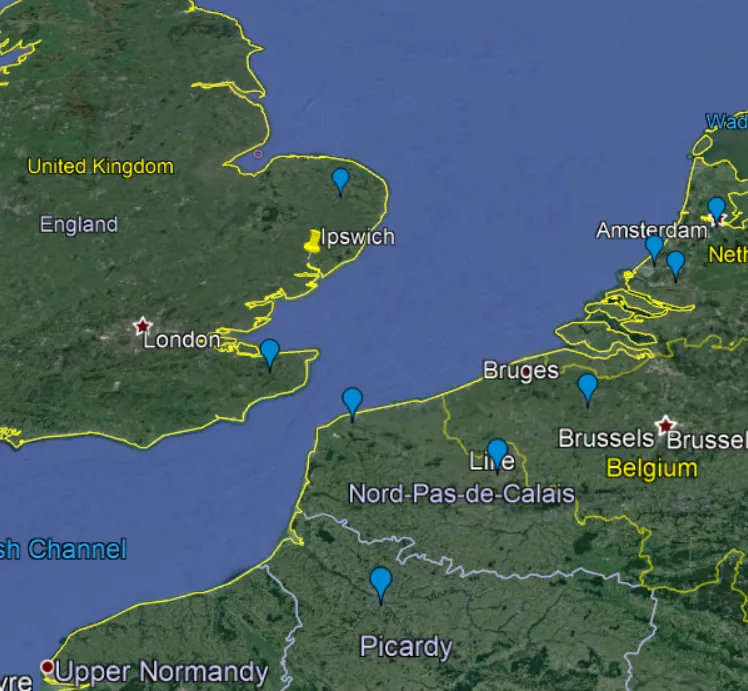
At the very beginning, I prepared 10 single placemarks, showing cities in Western Europe (Pic. 1).
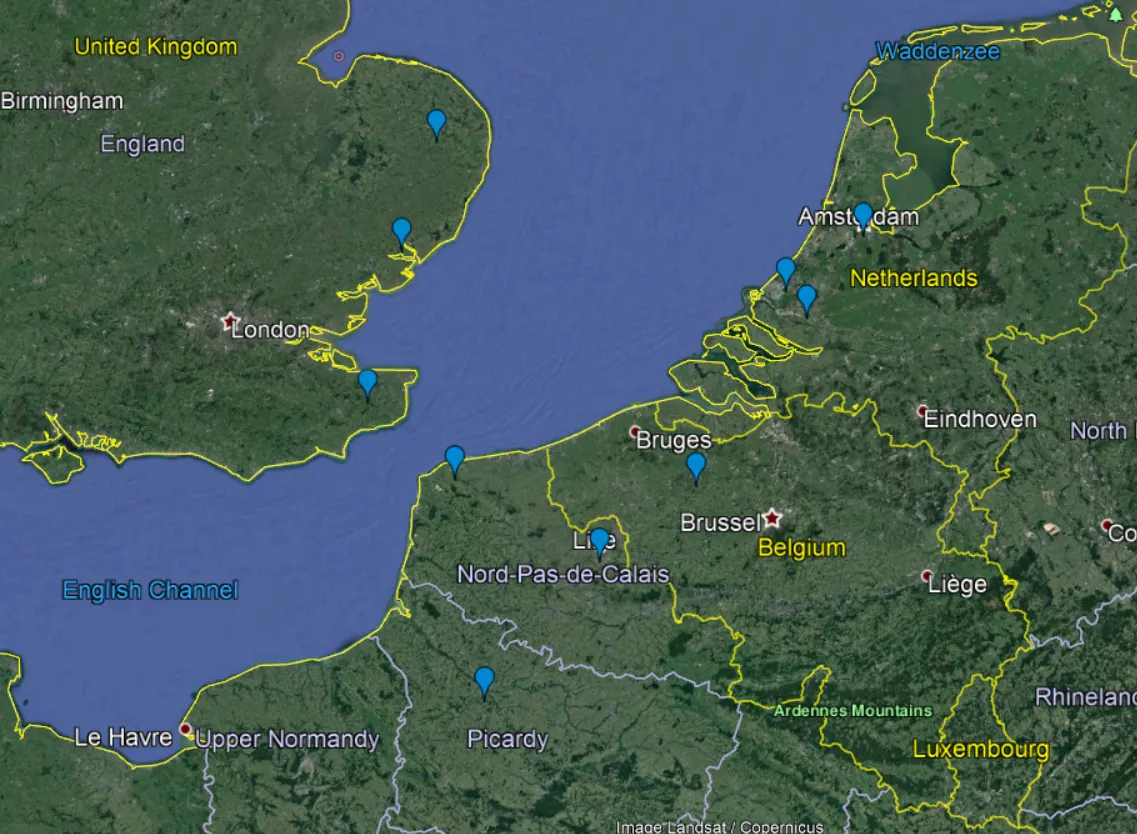
Pic. 1 10 random placemarks in Google Earth
Next, go to the XML code and see, what can we change swiftly in order to get them highlighted after you hover over the cursor (Pic. 2).
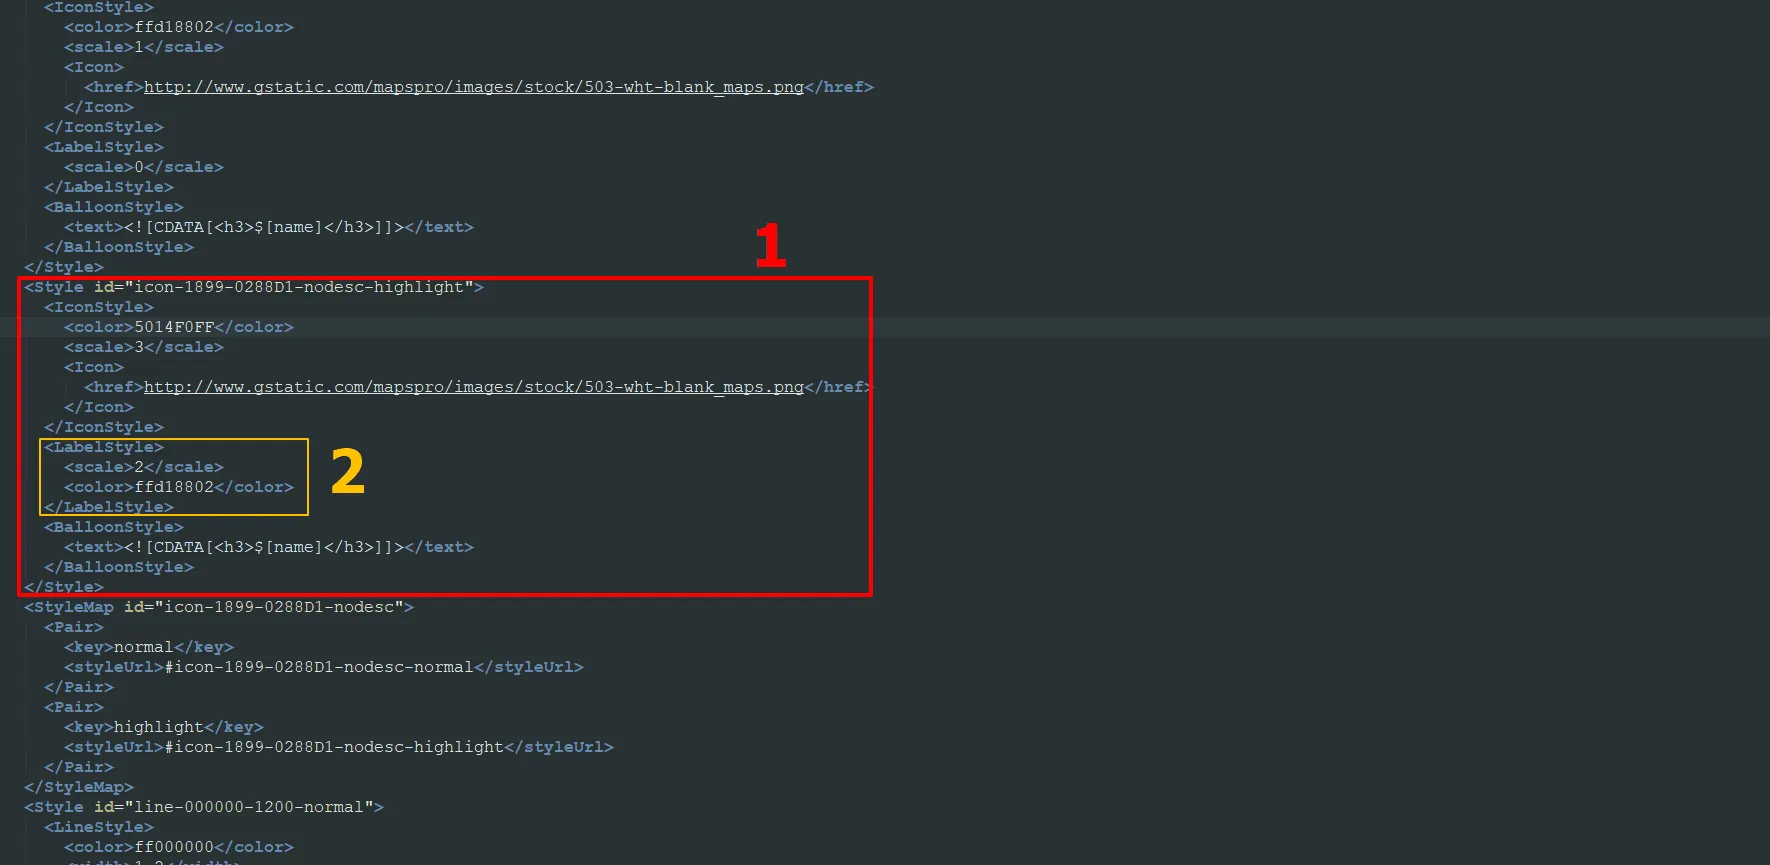
Pic. 2 A piece of XML code, that must be changed in order to highlight your placemark when hovering it. 1 – A ” box, which refers in general to the placemarks being hovered by the cursor; 2 – The ” section, where we can set both font color and size of the name, which pops up under hovering.
Let’s go through these highlighted sections: The most important things here are ‘<IconStyle>’ and ‘<LabelStyle>’. Digging down into them interesting elements will be: ‘<Scale>’,‘<Color>’, and link to the icon shape.
Firstly I changed the color of my label and its size, setting 3 for ‘<IconStyle>’ and 2 for ‘<LabelStyle>’.
Let’s see the results then (Pic. 3).

Pic. 3 One of our placemarks has been highlighted after hovering.
Everything looks good, but our placemark looks too translucent, as you possibly spotted. So we must do something small to make it opaque. Small color code changes are required in order to set it to hex transparency. In our case, we would like to have it completely opaque, although there are quite a few other options available. Our alterations can be made in the relevant software (Pic. 4) and seen on Google Earth afterward (Pic. 5).
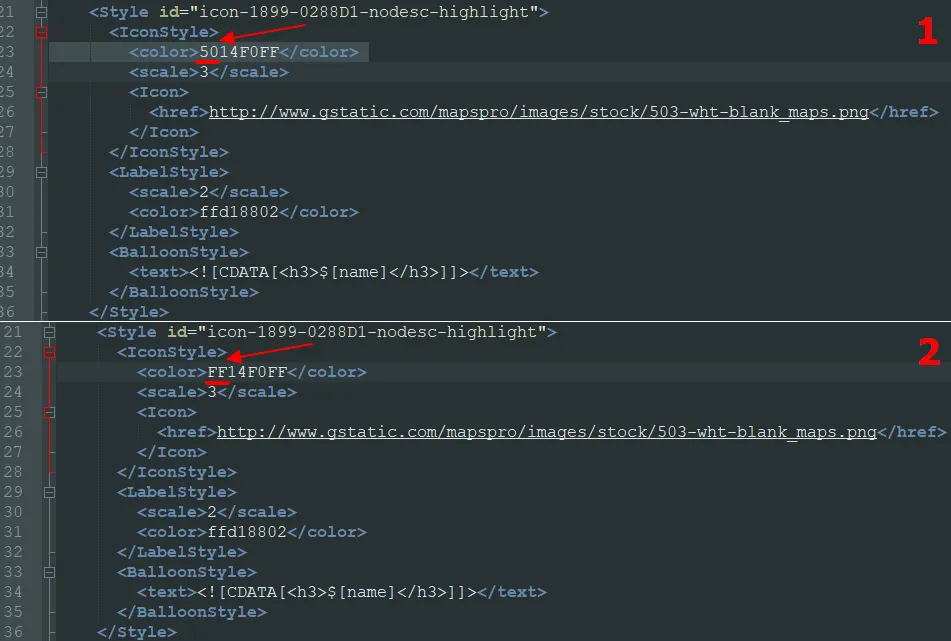
Pic. 4 Setting color hex transparency in .kml file using Notepad ++: 1 – Color before changes; 2 – Color after changes. Red stuff shows you a part of the code, which must be changed.
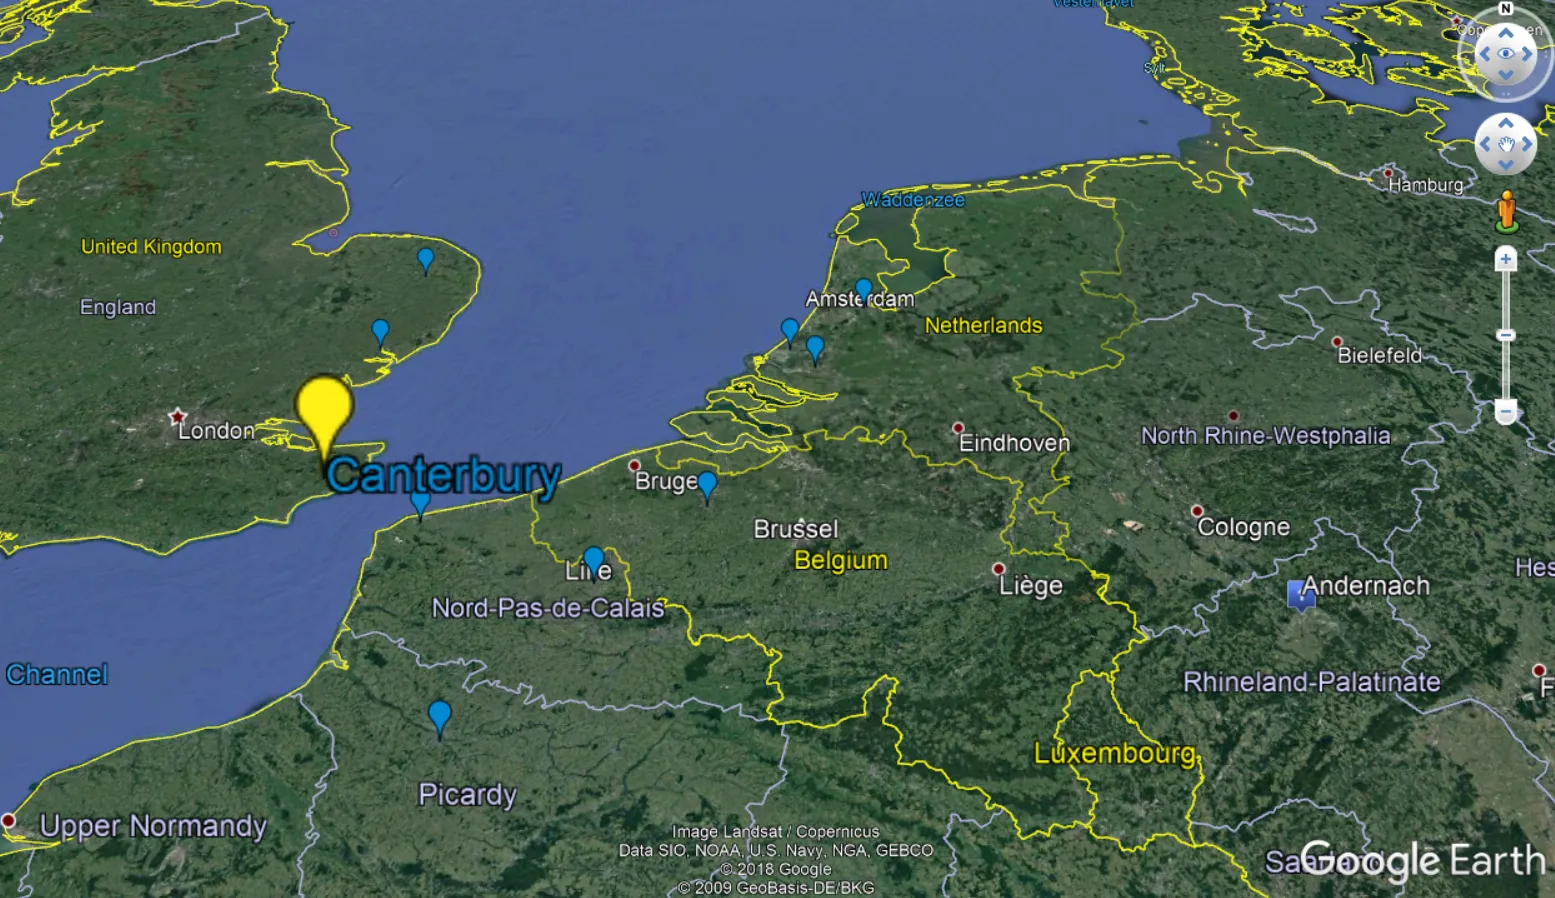
Pic. 5 Highlighted placemark already presenting an opaque color in Google Earth.
Another thing, which is changeable in the .kml placemark is an icon. Obviously, you can do it at the very beginning, using an interactive map builder. If you won’t do it at this stage, there is no problem. This issue can be also altered via XML editor. However, you must have a proper URL address for the icon, which you want to use. It can be an icon from Google or from another icon source. There are a few icon bases available on the web, from where you can pick up the most needed one. You can save them on your hard drive. Next, you must upload them on the web server first in order to generate a link to them, which will be applicable in the .kml file.
Once you do this, just replace the link in XML code as per below (Pic. 6) and enjoy your new icon, which appears as a highlight (Pic. 7).
Pic. 7 Icon link replacement in the XML code for the .kml placemark highlight.
Pic. 8 The .kml placemark hovering after the icon link change.
Great! Our icon is coming when we are hovering over a random city. If you wish to change the color, then you can back to the code and replace the color description. Remember about the hex color transparency too. Thereafter open your .kml file in Google Earth and see the results (Pic. 9).
Pic. 9 Both icons and colors have been applied for our .kml placemarks highlight.
The last thing, that comes to mind is the possibility to make a unique highlight for every single placemark. We have the same highlight for every placemark so far. It’s fine when you just want to know, which one particular are you hovering over right now. If you want to take a step ahead and collocate your placemark with some main feature, like Paris with the Eiffel Tower or Miami with Miami Beach, etc., then you can differ your highlight, making it unique for every single or at least group of your placemarks.
To do this you must copy quite a big section of your XML code and paste it underneath. It will make your .kml file harder to read through, although you must remember a few changes in the IDs (Pic. 10).
<Style id=”Canterbury-normal”>
…
</StyleMap>
This is the stuff, that you must copy, as I did (Pic. 10). Next, you can change a default ID, expressed by random codes into your name, easier to recognize.
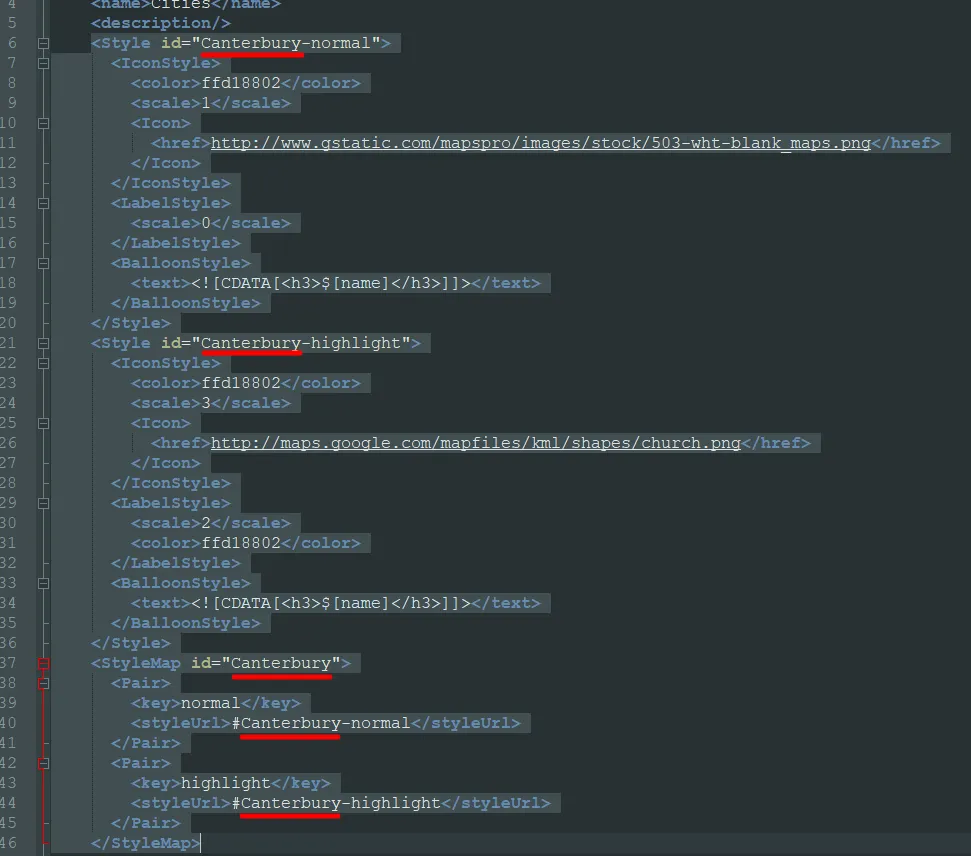
Pic. 10 Changes the IDs in XML code (marked red) in order to make the placemark highlight unique.
Let’s crack on with another one (Pic. 11).
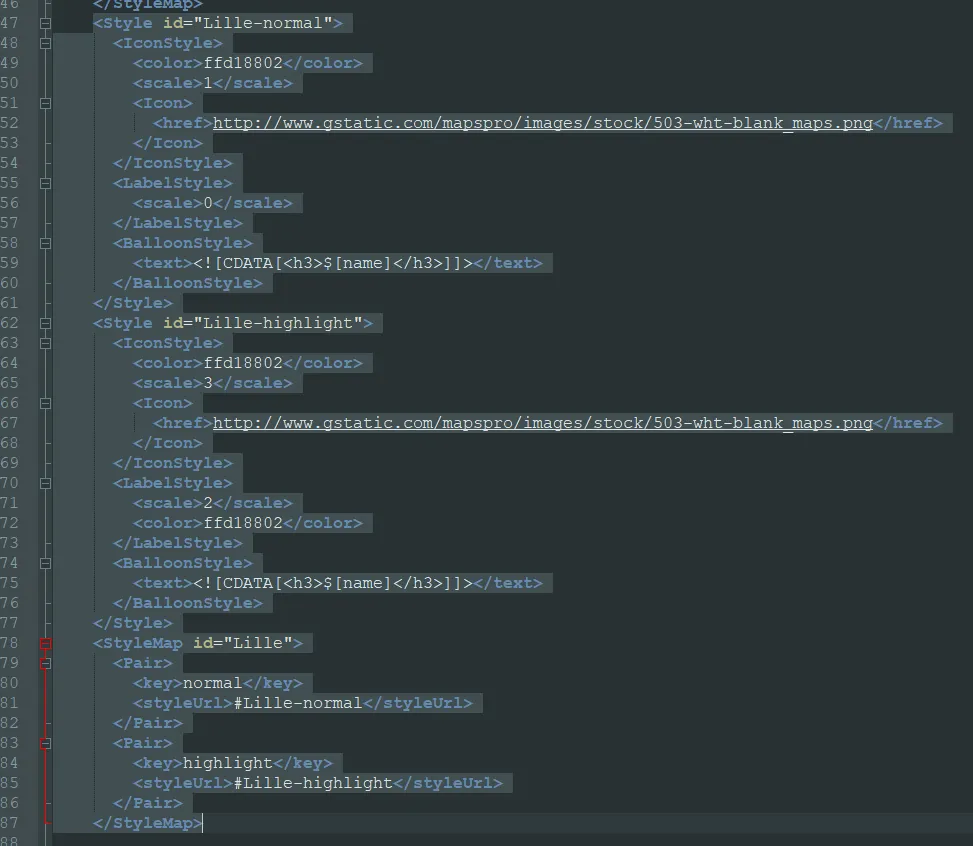
Pic. 11 Unique highlight icon for .kml placemark – An XML code alteration.
Remember to input your ID also in the ‘<Placemark>’ section, located below in the XML code. Otherwise, you won’t have a good result (Pic. 12, 14)
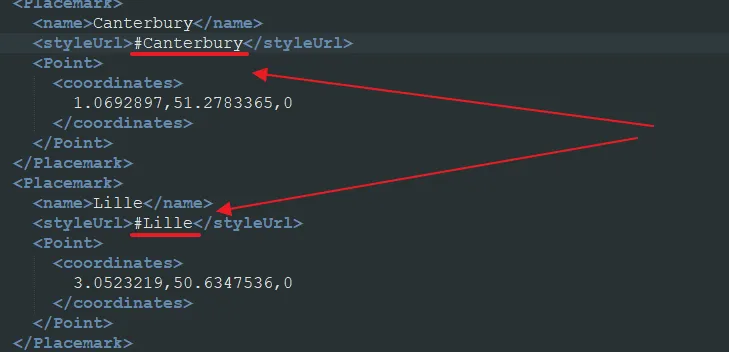
Pic. 12 The .kml placemark ID change is very important when you change the ID for an icon and map above.
As a result, you should have unique icons when you hover over the placemarks (Pic. 13).
Pic. 13 Unique highlights for the .kml placemark in Google Earth.
What about if you are wrong? If you, for instance, forget to change the ID for your placemark or miss at least one letter, then you will get a default placemark icon in Google Earth (Pic. 14).
Pic. 14 One placemark must have been written wrongly. As a result, it appears as a default icon in Google Earth.
At the finish, I would like to add, that a separate ID for every single placemark or group of placemarks refers also both to the ‘<Description>’ as well as the ‘<BalloonStyle>’. It means, that you can make your general content unique for these groups of placemarks. Read more about it in my previous article Content management in KML files.
Mariusz Krukar
Links:
- KML file colour picker
- Custom icons in Google Earth
- https://mapicons.mapsmarker.com/
- Styles for highlighted icons
Forums:
Youtube:
Read also: