
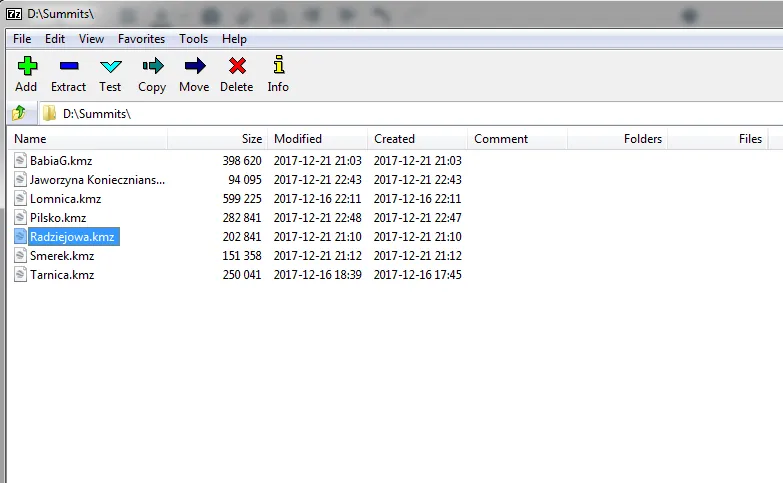
Using Heywhatsthat.com to generate a multiple summit-perspective views in Google Earth – part 2
In this part of the article, I would like to say more about multiple summit-perspective views in Google Earth. First of all, previously I have described largely how to manage the heywhatsthat.com panoramas in Google Earth. Now you will see how to put a few summits into your Google software and manage them correctly.
Let’s start then. In the first part of this article, I have shown you how to generate your own panorama on Heywhatsthat.com. However there is an option to choose an existing panorama (Pic. 1) and make some steps a bit quicker. Not all summit views are included, but you can find the main peaks in mountain communities.
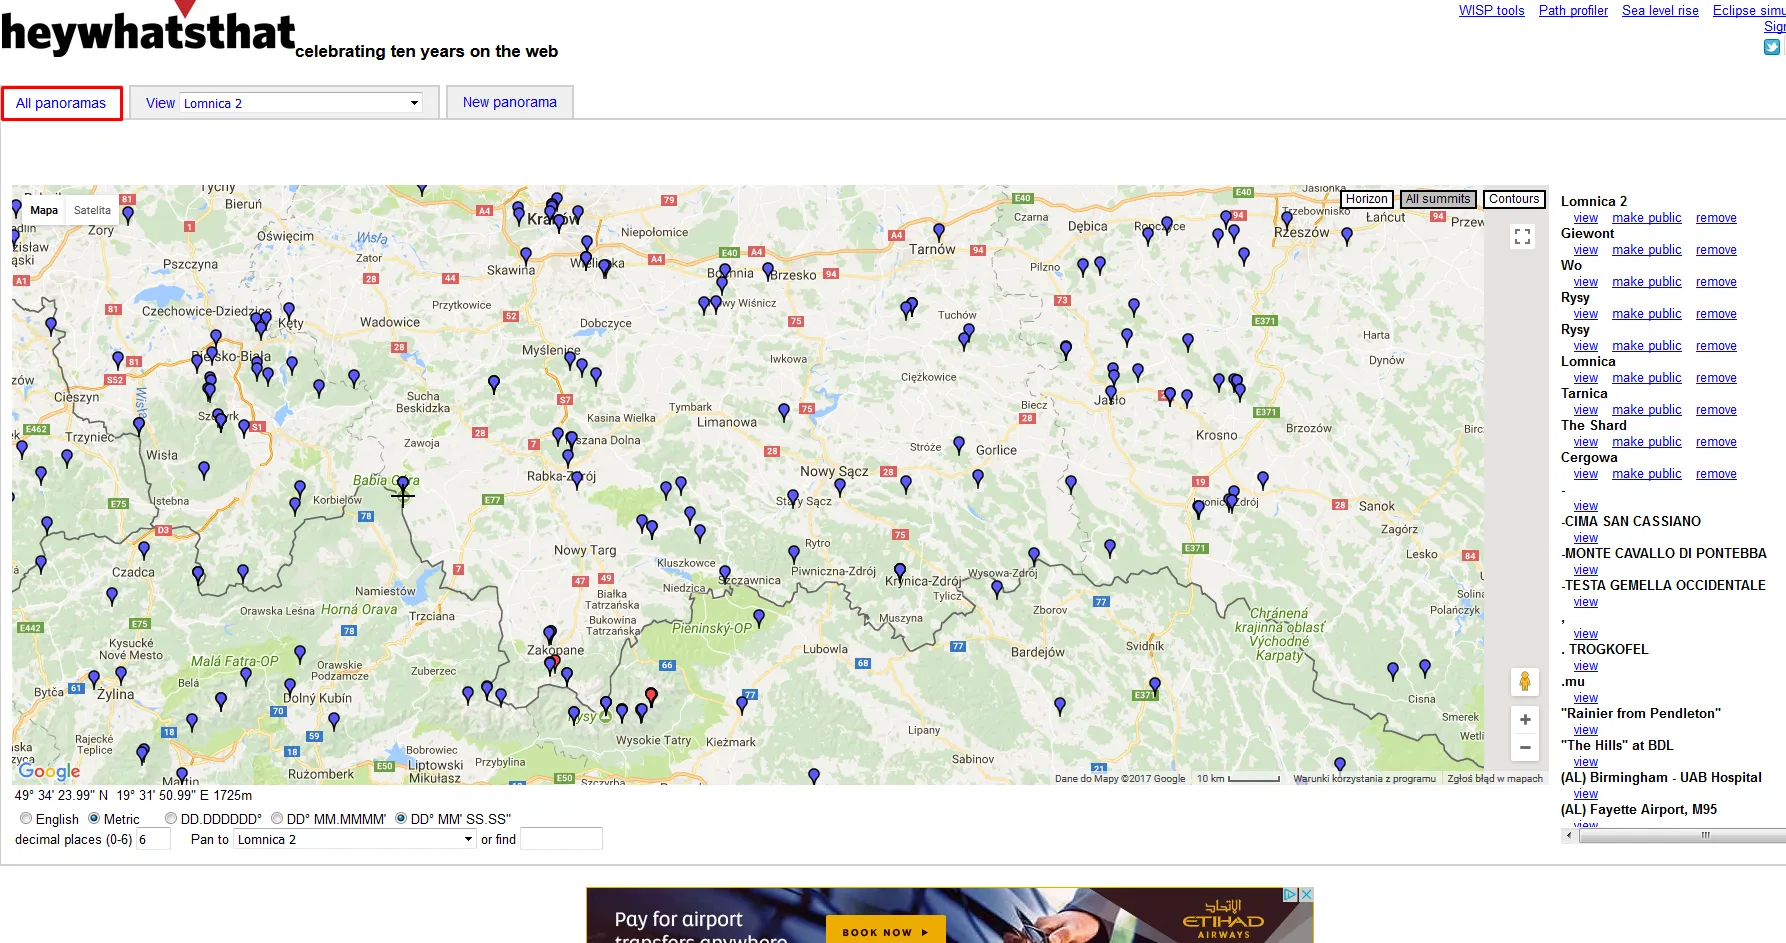
Pic. 1 Panoramas provided by Heywhatsthat.com for Polish Carpathians.
When you find your peak, then click on it and go to the “View” option (Pic. 2). The summit view will be automatically generated the same as you would create it yourself.
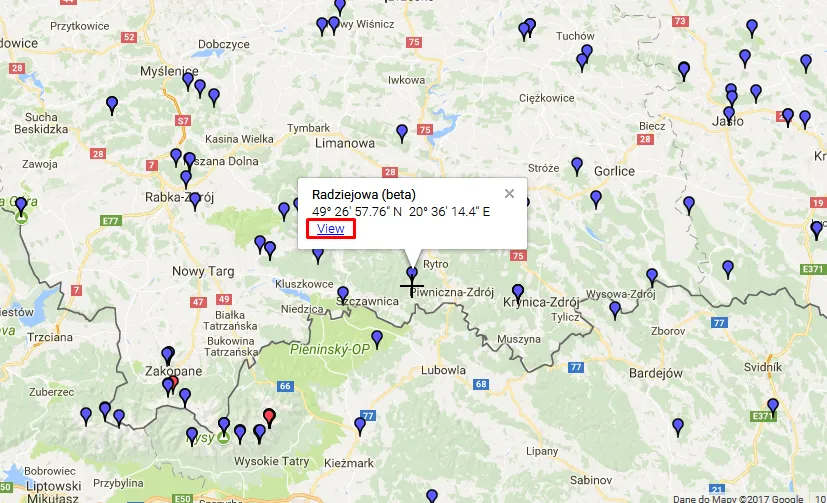
Pic. 2 Select the summit, that you are interested in and click View.
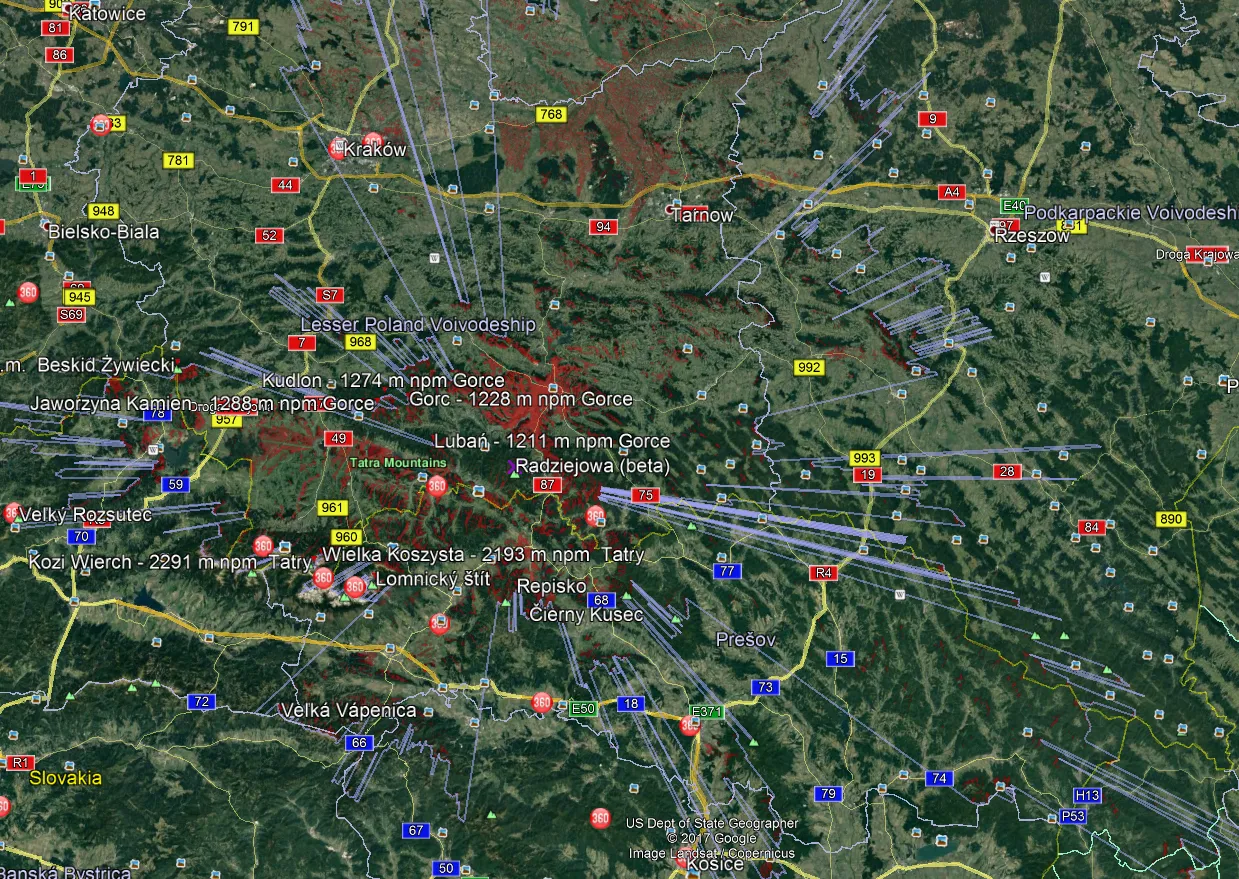
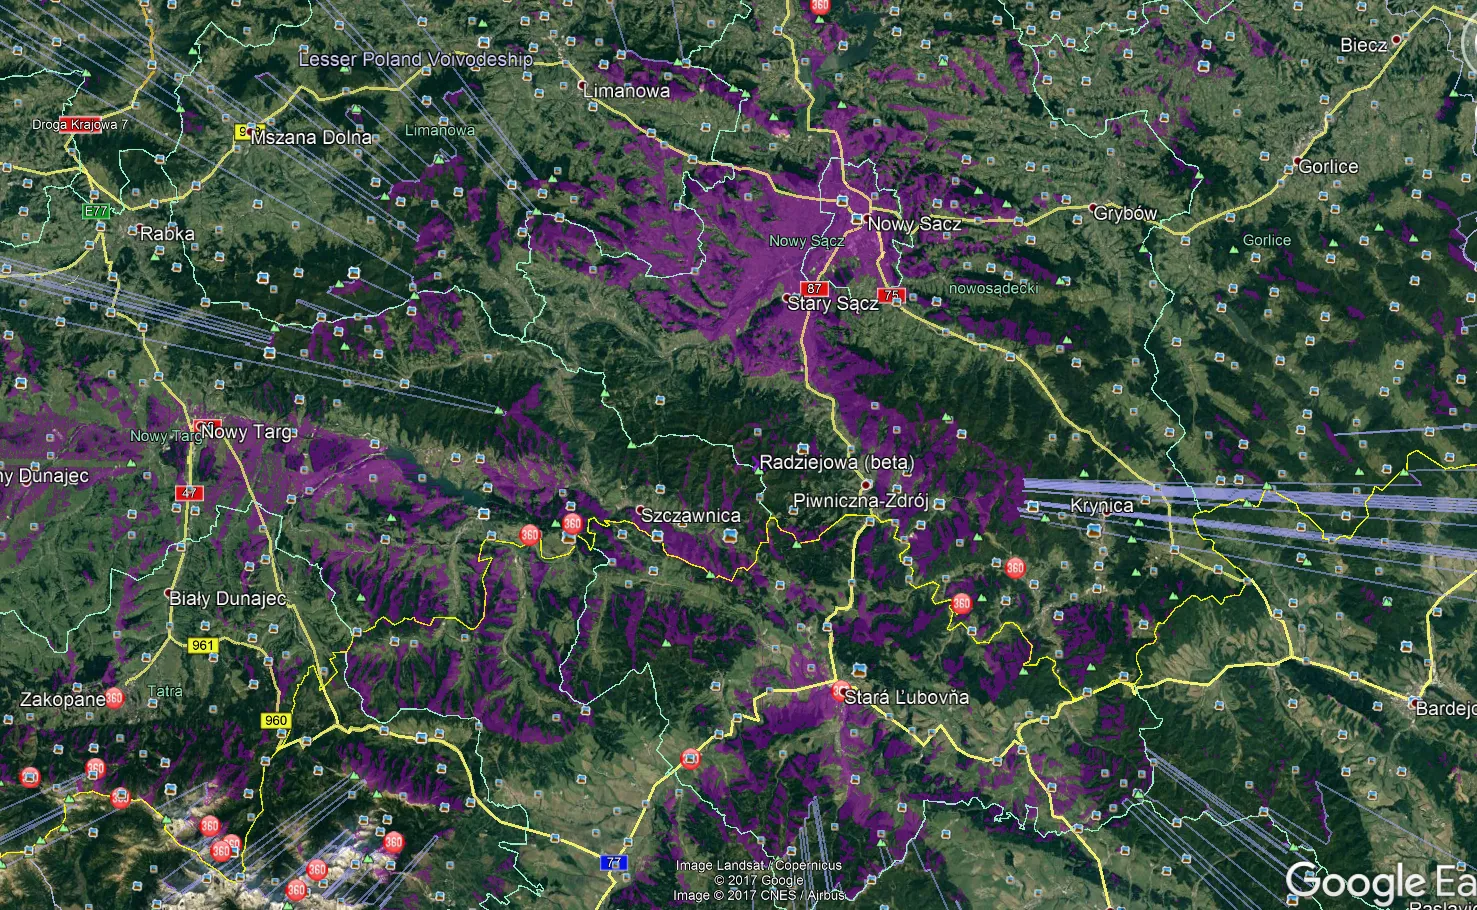
Pic. 3 The Radziejowa summit visibility cloak on Google Earth.
You have got your summit perspective view in Google Earth marked red, which is basically provided by the Heywhatsthat.com page.
Let’s green it off. Read below what should we do with it.
First of all a brief explanation of what is the difference between .kmz files and .kml files.
As you know both can be used on Google Earth. The difference is, that a .kml file provides a simple Google Earth file for you whilst a .kmz file includes a pack in which simple files have been built up a whole Google Earth object. We can take a simple insight into all elements using the left toolbar in Google Earth (Pic. 4).
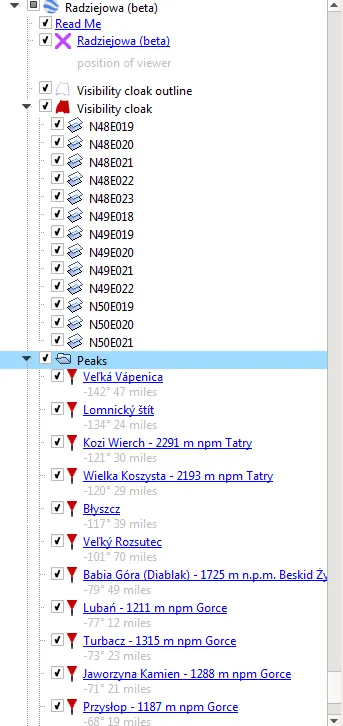
Pic. 4 The Radziejowa summit with all elements consisted of a .kmz file.
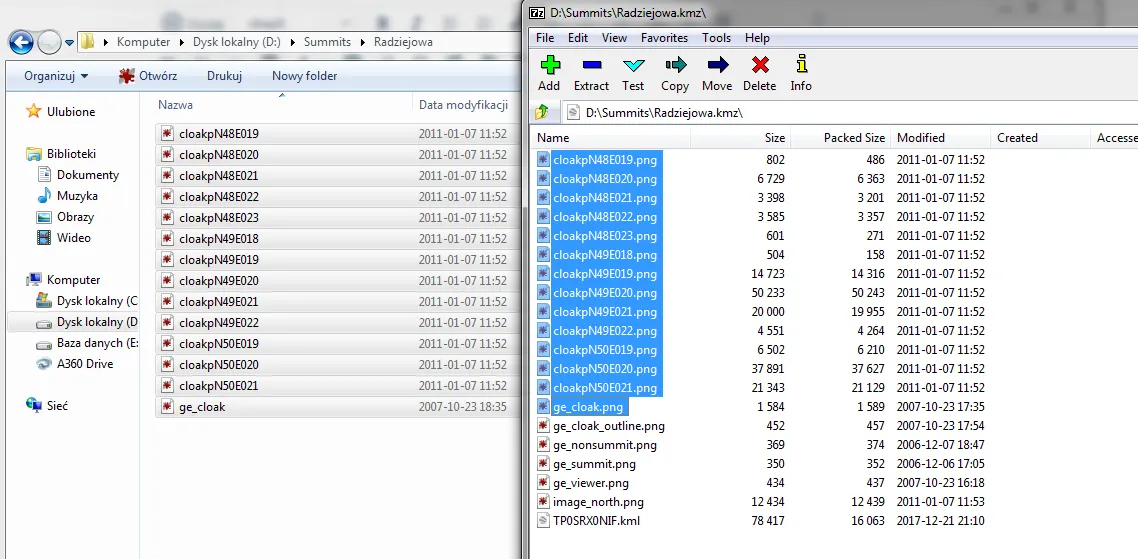
We cannot really edit those elements. To prepare them for your needs you need to use the 7Zip File Manager software (Pic. 5).
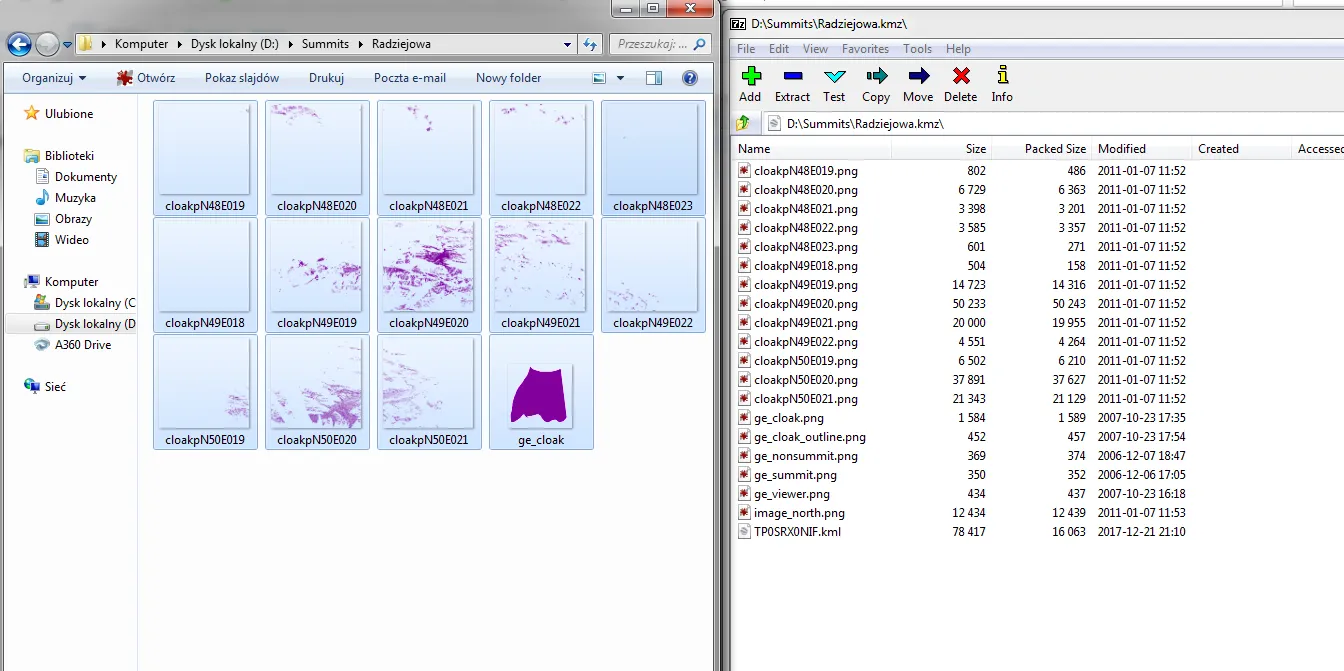
Pic. 5 The 7-Zip File Manager with all summits considered. The “Radziejowa” file is going to be the first one.
Once you double-click on the file you open it and see all the stuff consisting of your newly generated summit-perspective view on Google Earth (Pic. 6).
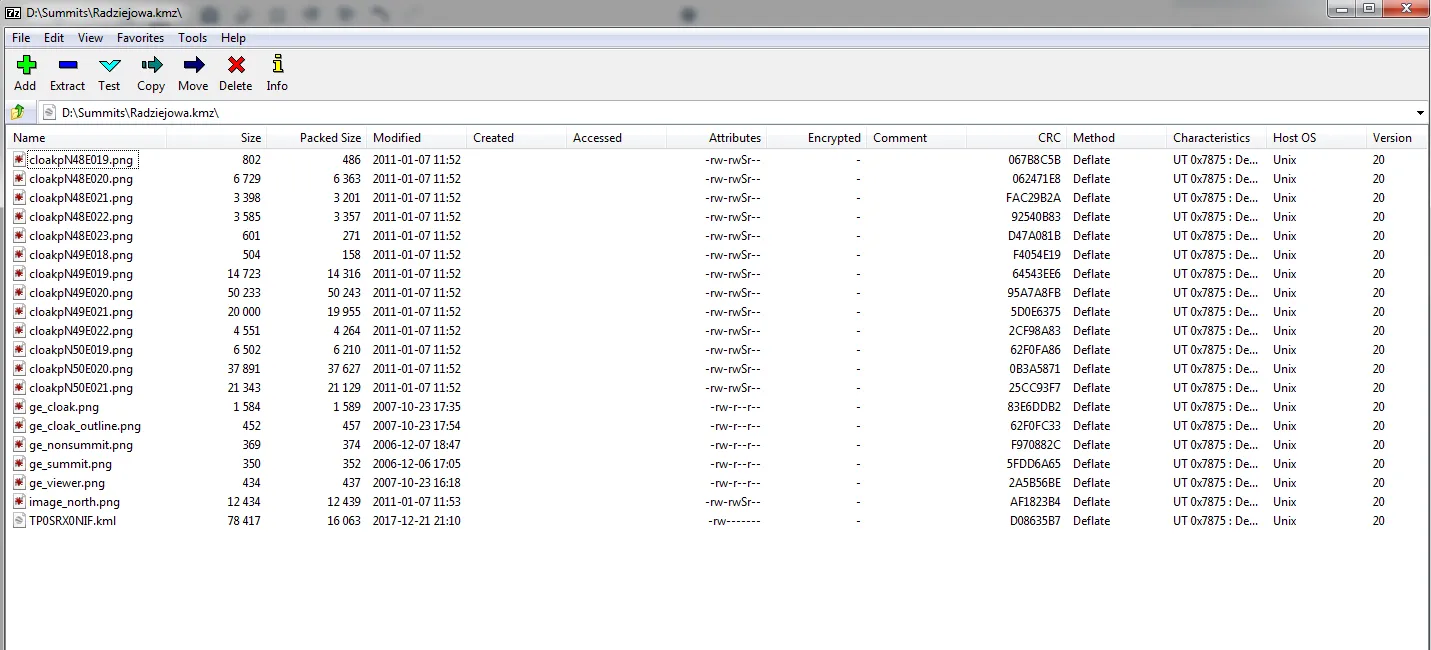
Pic. 6 All files consisted of the “Radziejowa.kmz” file seen in the 7-Zip file manager.
Let’s look at all the .webp files, that you will be able to edit soon. I would like to describe to you shortly every file included. You can have insight into all files even without extracting them (Pic. 7).
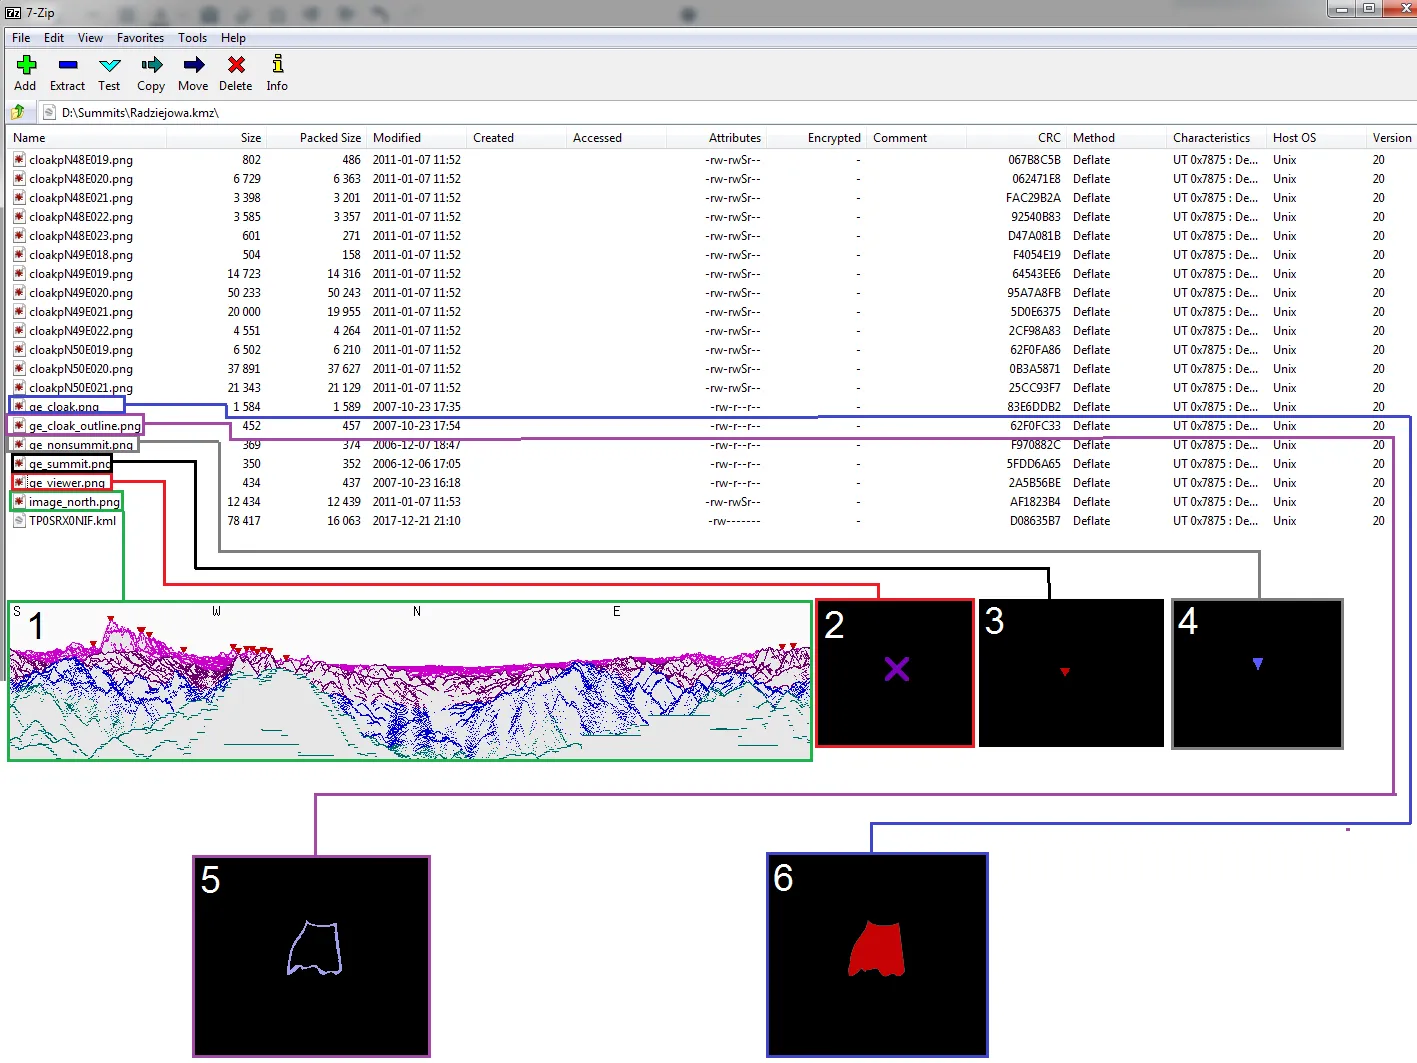
Pic. 7 The PNG files included in the “Radziejowa.kmz” file: 1 – “image north.png” – the summit panorama (to be displayed in Google Earth), 2 – “ge_viewer.png” – cross, that roughly indicate your summit, 3 – “ge_summit.png” – an upside-down red triangle, that shows other prominent summit seen from your summit, 4 – “ge_nonsummit.png” – a blue upside-down triangle, that shows other places near to your summit, 5 – “ge_cloak_outline” – the line, that delineates the horizon at the top of your summit (this file is to be changed directly in the Google Earth also), 6 – “ge_cloak.png” – the color of the visibility cloak provided by heywhatsthat.com for your summit.
Pic. 8 The PNG files included in the “Radziejowa.kmz” file: red marked – files, that should be considered when changing the visibility cloak layer, green marked – an example of part of the visibility cloak provided by heywhatsthat.com for the Radziejowa summit.
I have been using the IrfanView software hence the background is each file opened. Basically, those files represent the vector graphics, that allow you to make changes keeping transparency.
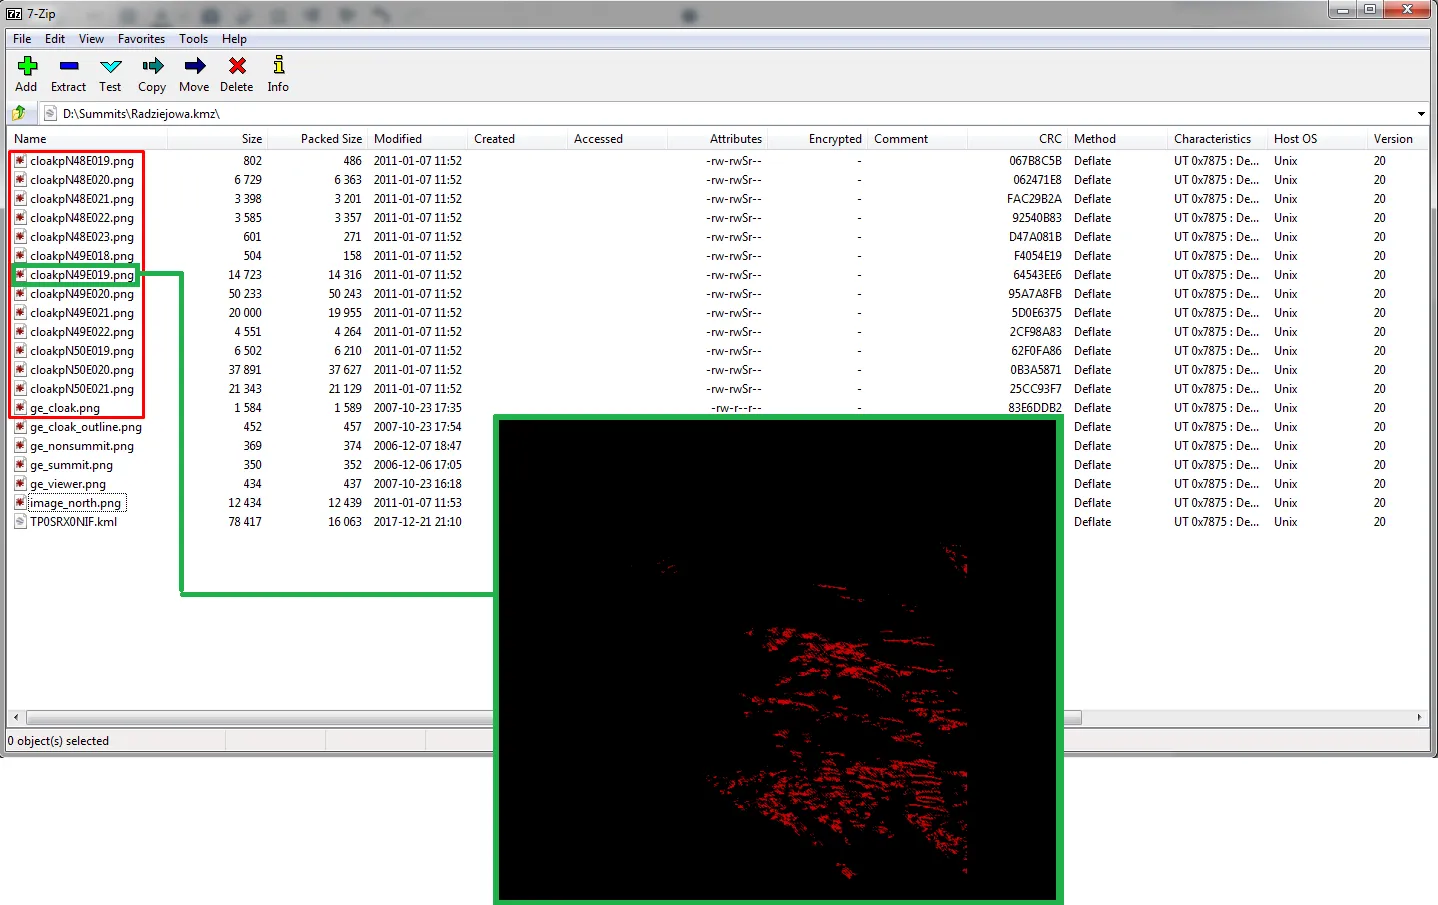
Now, that we know all the graphic files, that build panorama from our summit we can start to make changes. At first, we should extract all .png files outside the .kmz file to make them editable. Select all files marked red (Pic. 7) then copy them into your folder (Pic. 9).
Pic. 9 Extraction of .webp files into the folder.
The best software to open the extracted files is Gimp. This is an open-source graphics software that allows you to change the visibility cloak color easily. If you are not equipped with this software, you can download it free from the main website.
Once you got the Gimp open it and go to the main toolbar, where you click File -> Open -> .webp image from your folder (in our case it will be “Radziejowa”) (Pic. 10).
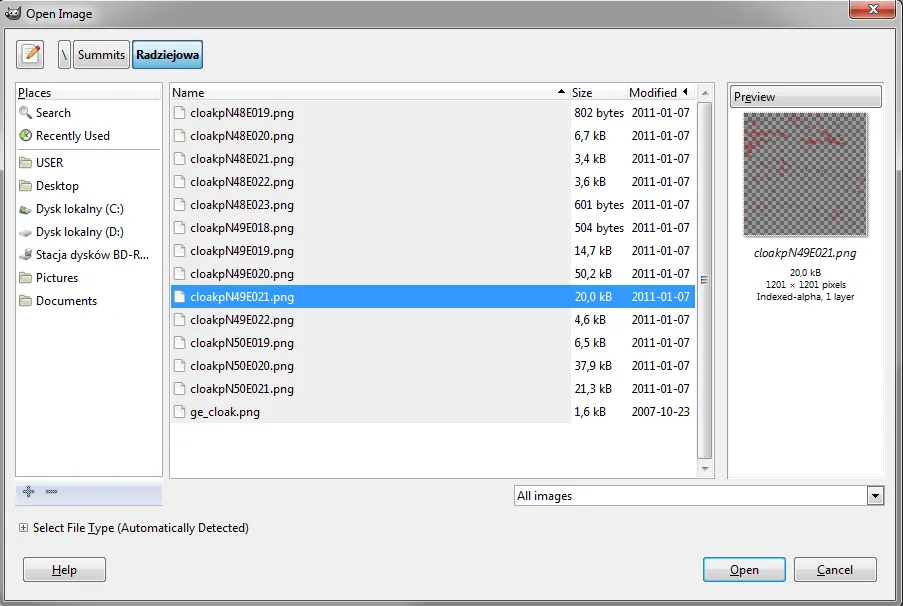
Pic. 10 Opening one of the .webp visibility cloak images in the Gimp software.
You can preview each file on the left when click. At first glance, some files may look empty, but you need to know, that the visibility cloak has been divided into sections (initially by Heywhatsthat.com when you transferred it into Google Earth), that are wide rectangles. Every rectangular represents the visibility cloak coverage in rough longitude and latitude ranges. you can see those ranges in the .webp file names as per above (Pic. 10).
When you have chosen the .webp file, that you are going to edit you should see your image in full size (Pic. 11).
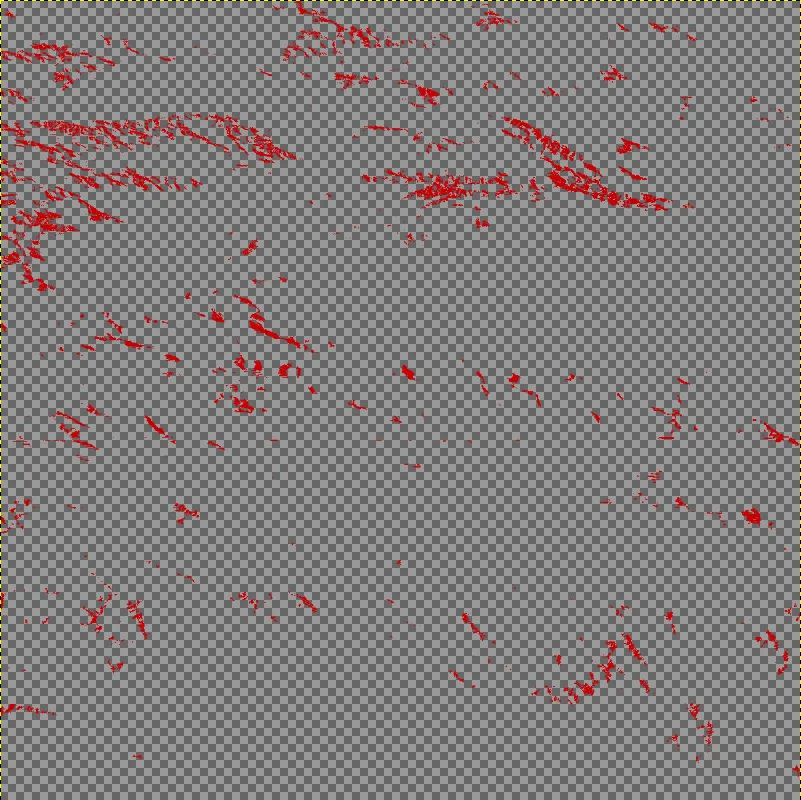
Pic. 11 One of the .webp files opened in the Gimp software.
Now we can start to edit this .png file. We don’t want to have a red color in our visibility cloak. Before you start make sure, that your image mode is not indexed! (as a default). You have to change it into RGB mode (Pic. 12).
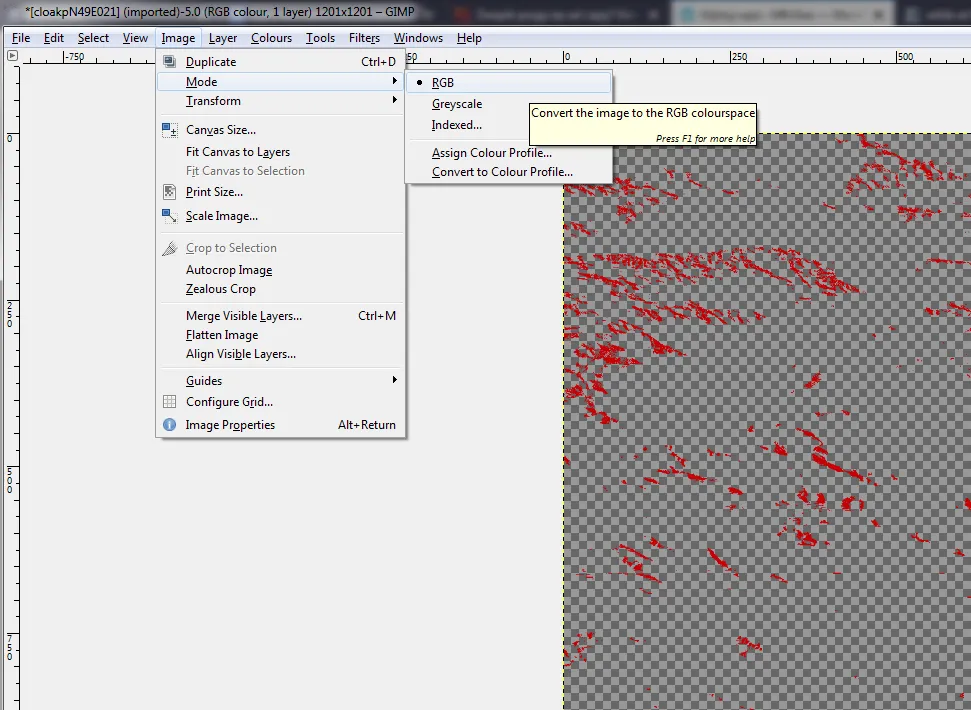
Pic. 12 Changing your Gimp image mode – select RGB rather than Indexed (default).
After this small step, you can start to edit your image. One thing, that you should aim at is colorizing. Any other options from the toolbox are not recommended! To change the default color go to the ‘Colours” section in the main toolbar and select the “Colourise” option as per below (Pic. 13).
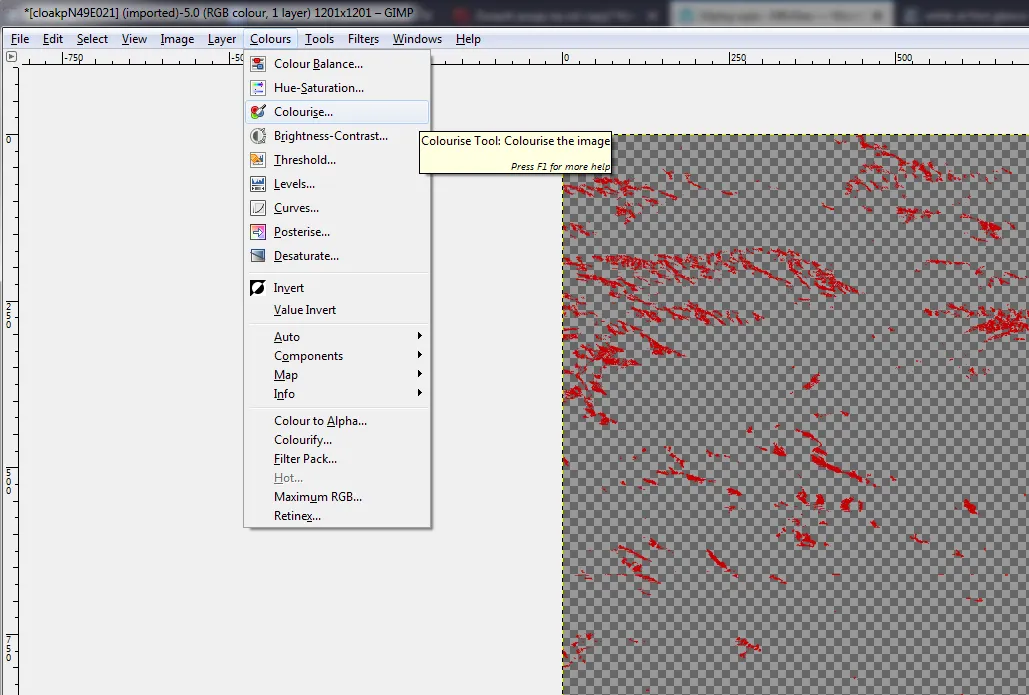
Pic. 13 The location of the “Colourise tool” in the Gimp 2.8 software.
You should have a small window open (Pic. 14) with 3 parameters to change:
– Hue (0 – 360), where basically you can set your color e.g. 0, 360 is orange, 70 is yellow, 210 is blue, etc.;
– Saturation (0 – 100) with 50 [%] as a default value. I do not recommend you to set a value near 0 because finally, you will gain your color in greyscale only. See below, how it may work.;
– Lightness (-100 – 100) with 0 as a default value. I do not recommend you put extreme values, because finally, you will gain a black (-100) or white (100) color only.
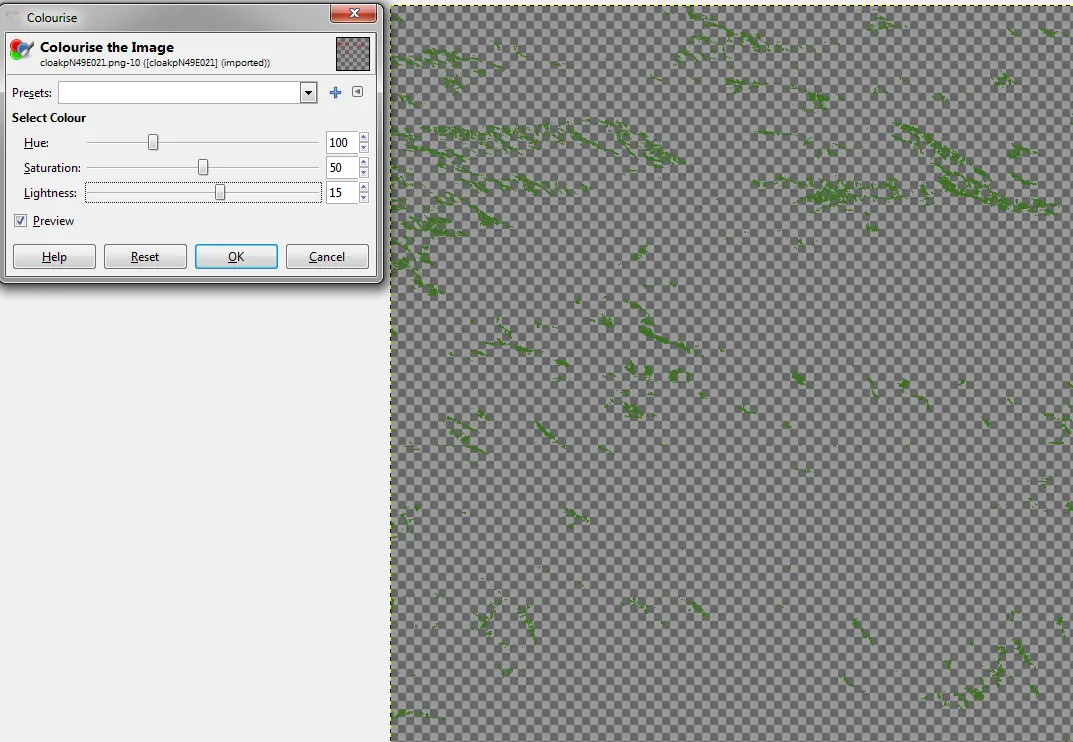
Pic. 14 The image colorize options with example values, that have turned your .png image into green.


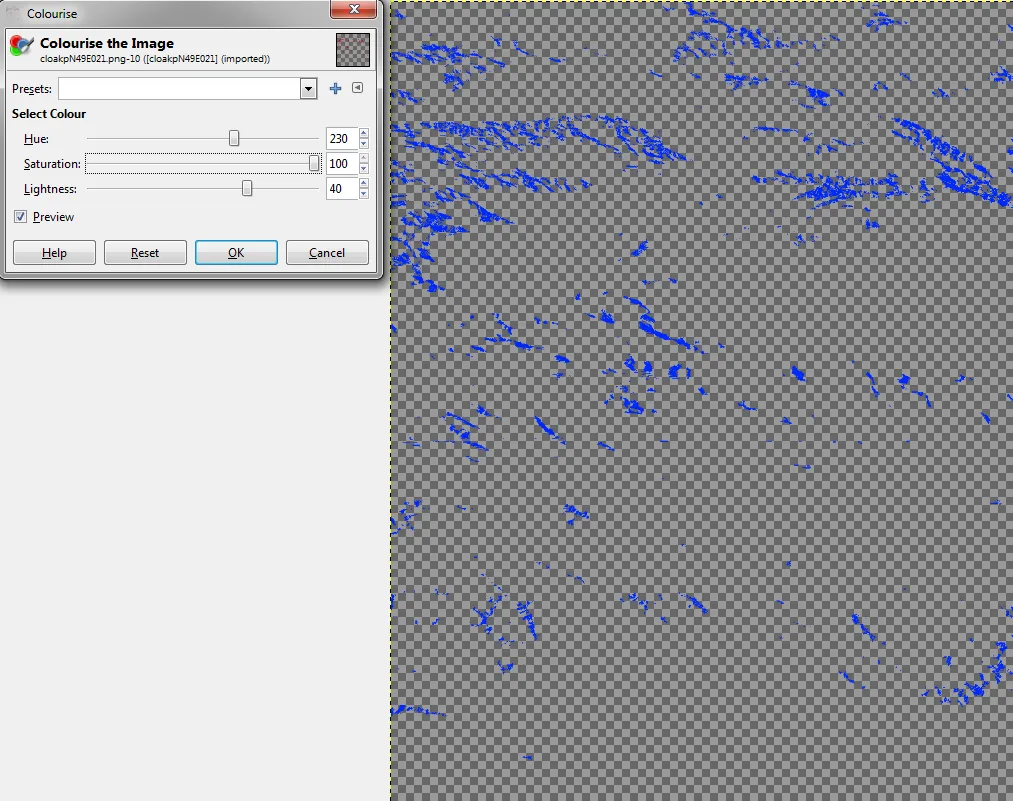
Pic. 15 – 18 The color examples for one part of the “Radziejowa” visibility cloak: 15 – blue, 16 – dark blue, 17 – fair blue, 18 – fair blue with max. saturation.
When you have set your color properties remember to add your settings to your favorites (Pic. 19, 20). Due to this issue, you can save a little bit of time in the near future.

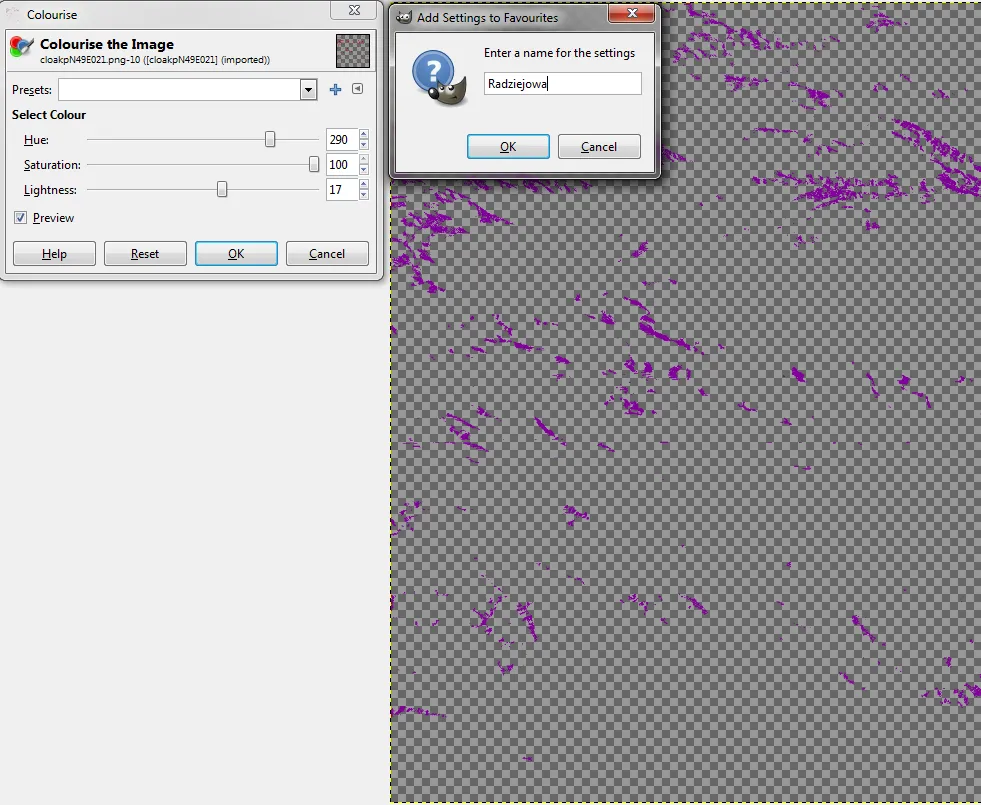
Pic. 19,20 Add your color settings to favorites.
Your last step is saving. The quickest way to do it is overwriting the file (Pic. 21). Otherwise, you save the file in the .xcf extension or export the image with the risk of losing the quality. Overwriting the file is the quickest and safest way in this case.
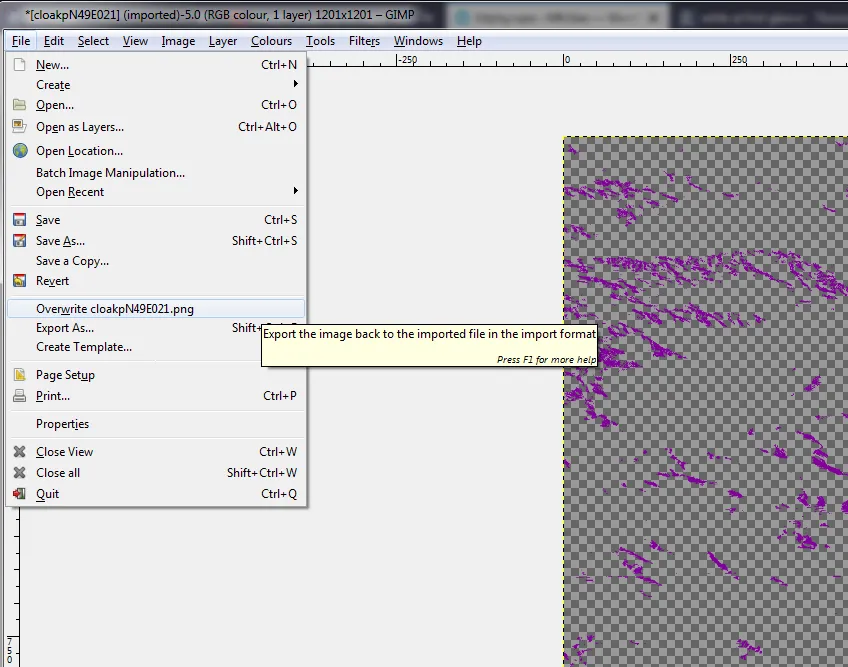
Pic. 21 The overwriting file option in Gimp 2.8 software.
This is not only one file to edit. As I have shown you above there are several files in your folder that need to be kept in the same color. You have to repeat this process for every file. It doesn’t look optimistically, however, you can do it much quicker than the first one, choosing your recently saved favorite color values (Pic. 22).
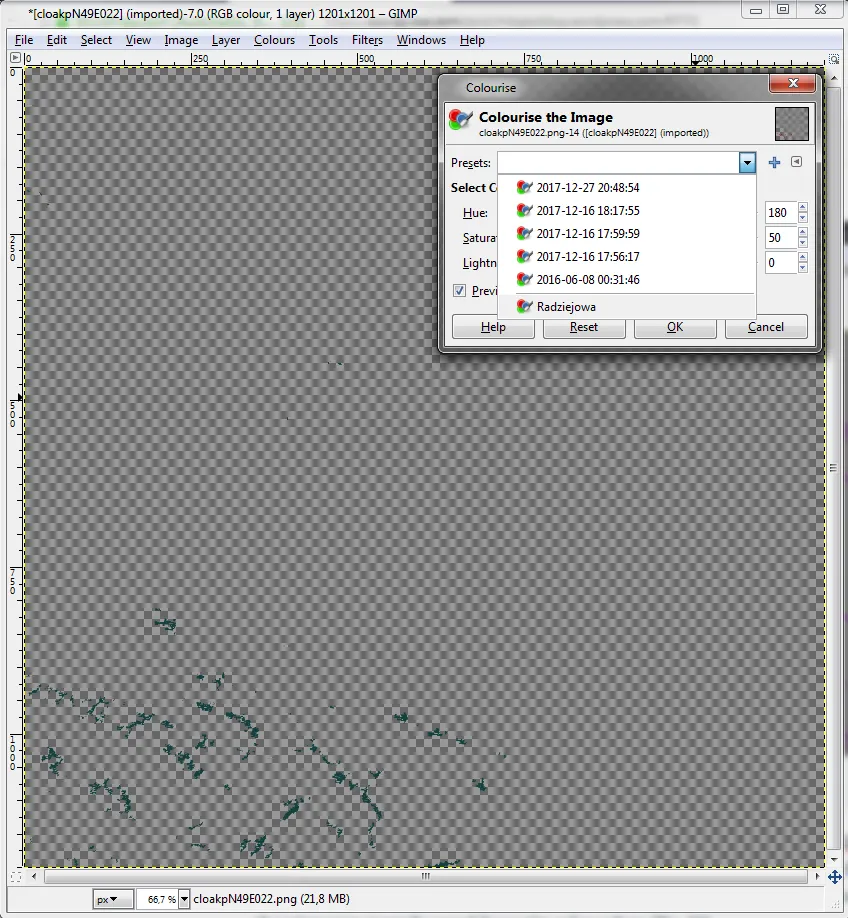
Pic. 22 Selecting recently saved color settings in Gimp from the favorites list.
Our last .png file is “ge_cloak” situated usually at the bottom of the list. This image (Pic. 23) with RGB mode default should be changed too, although you can use it as it was. When you decide to leave it with a red color it may be misleading so better to change this image also (Pic. 24).

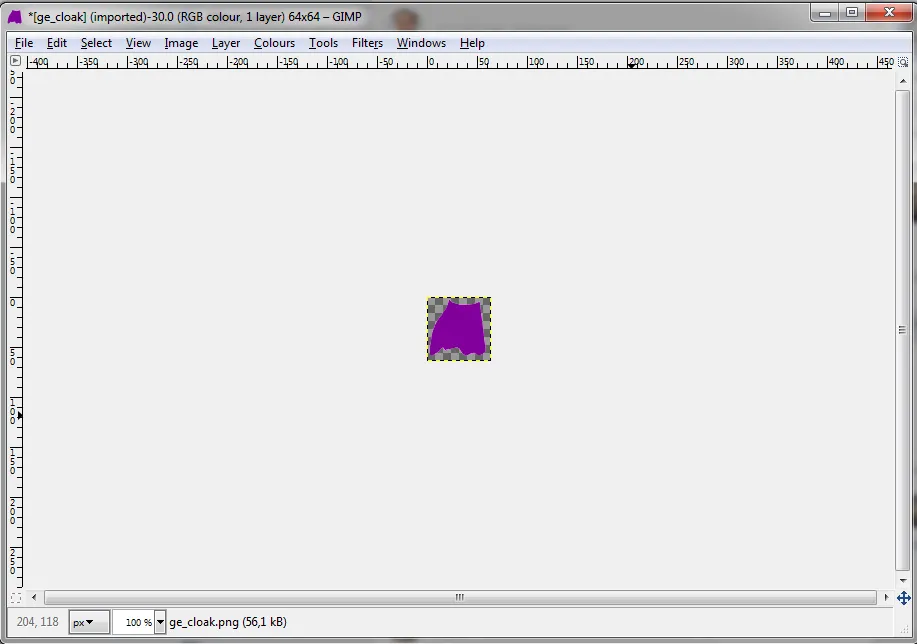
Pic. 23, 24 Changing the “ge_cloak.png” file in Gimp.
All done! To see it in Google Earth you need to copy all overwritten .png files back into the .kmz main file when you have 7-Zip File Manager open (Pic. 25).
Pic. 25 Copying and overwriting the .webp visibility cloak parts in the main .kmz file.
Now, we can enjoy the view in Google Earth (Pic. 26). Make sure, that you have copied all parts properly. Bear in mind, that your .kmz file is now slightly bigger, so opening all visibility cloak layers may take a little bit longer, especially for the first time.
Pic. 26 The Radziejowa summit purple visibility cloak displayed on Google Earth.
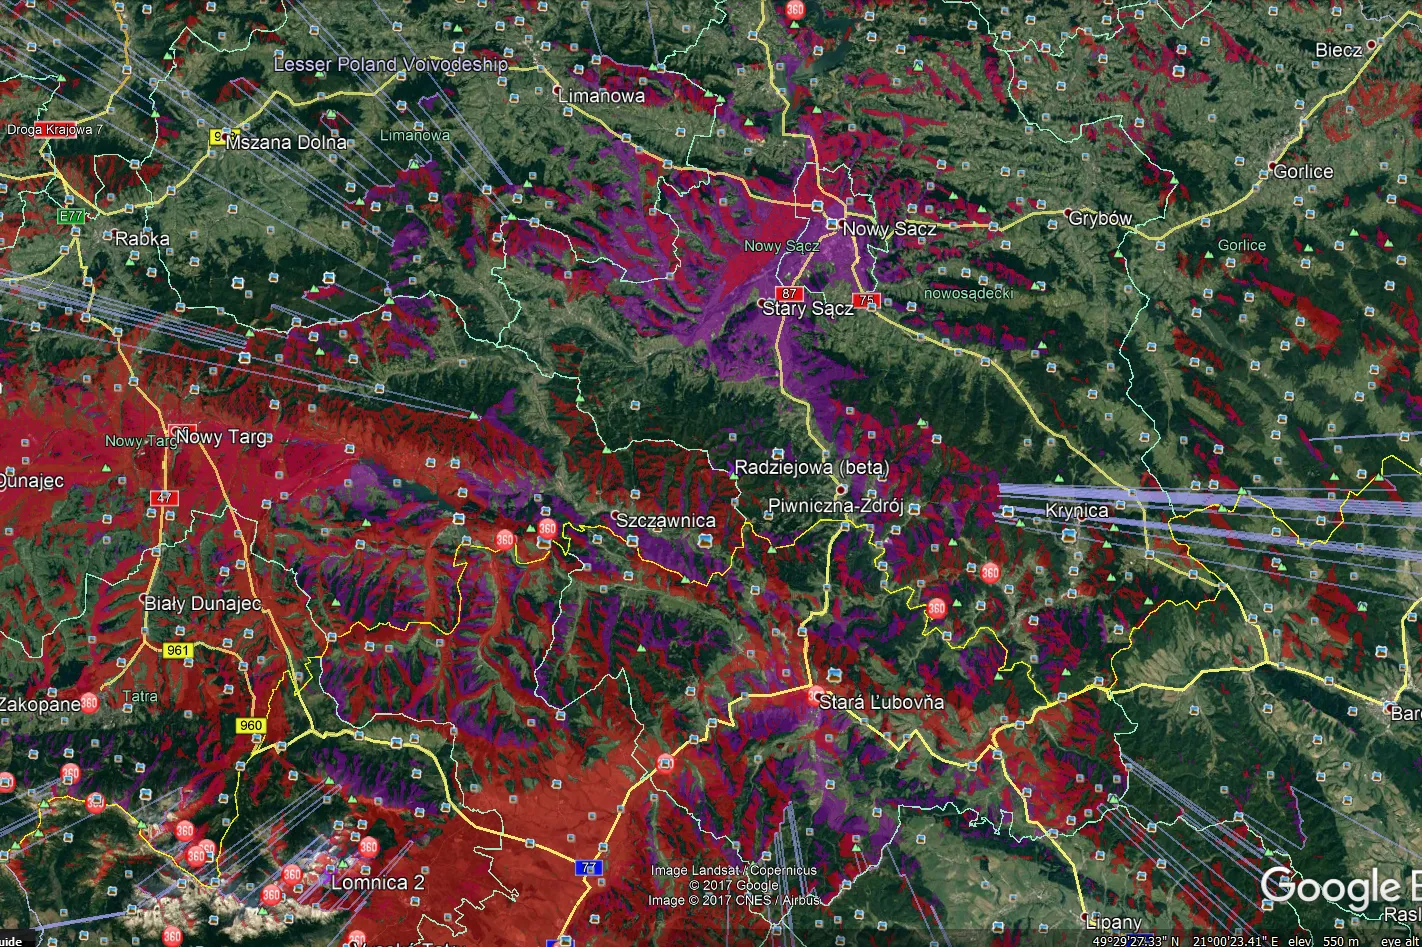
Pic. 27 The Radziejowa and Łomnica summit visibility cloaks on the one snap. Now you can distinguish both cloaks easily!
Gimp provides also another option to change the color of your visibility cloak only when you have a Batch Image Manipulation plugin installed.
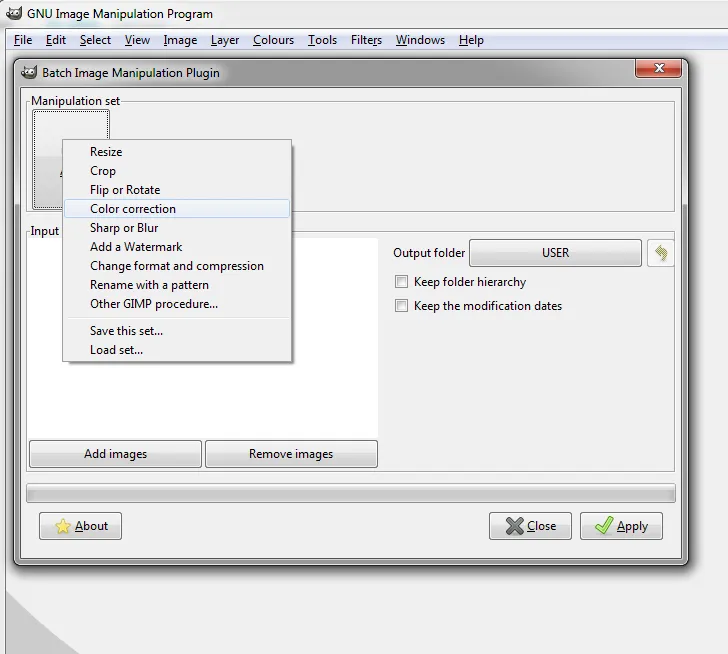
If yes open it (Pic. 28), launch it (Pic. 29), and pick up the process, that you want to take. In our case it will be:
– Color correction (Pic. 30, 34): You can change the brightness and contrast of your image or convert it into greyscale. It may be helpful when you need to modify a color that already exists. Some similar things can be done also by using Google Earth.
– Other GIMP procedure (Pic. 31): includes a long list of processes, that can be taken in the batch procedure. From this list, you should pick up “gimp-convert-RGB” (Pic. 35) as a first and “gimp-colorize” (Pic. 36) as a second. To find them quicker you can use a researcher on the left top (Pic. 35, 36).

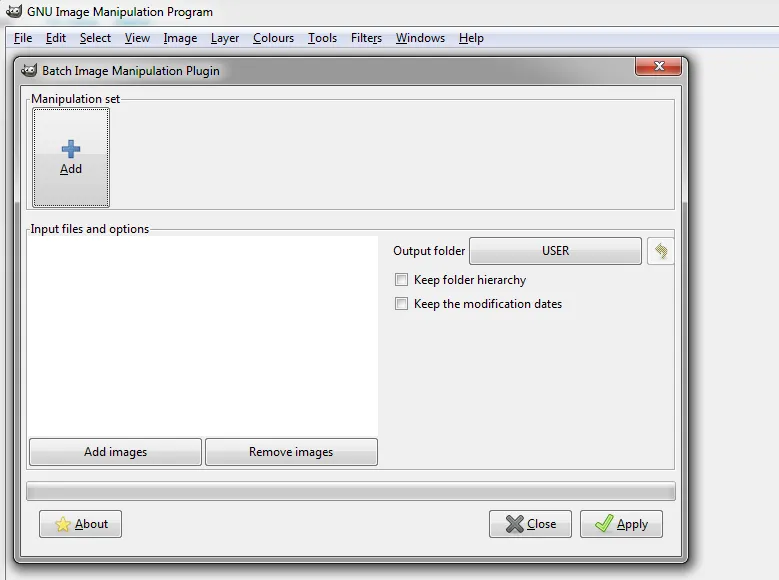
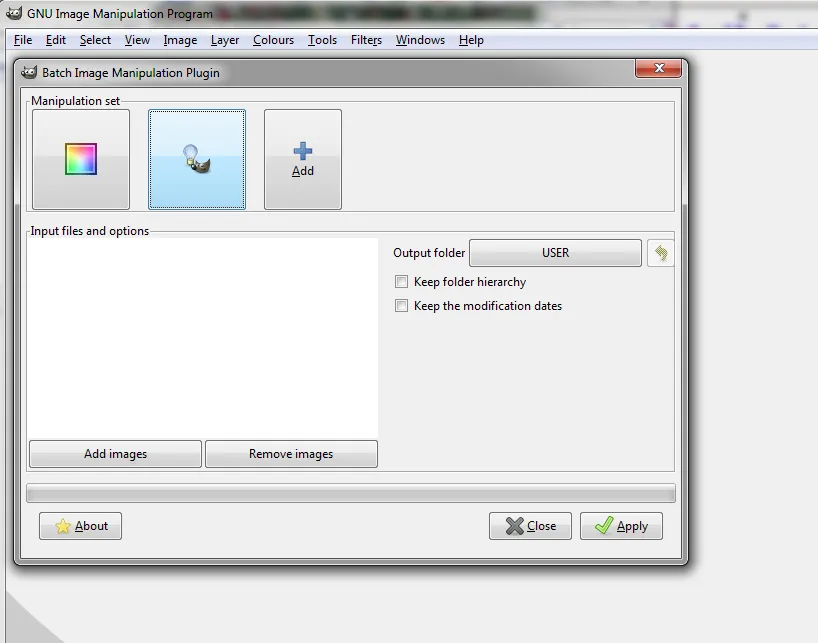
Pic. 28, 29 The “Batch Image Manipulation” option in Gimp software.
Pic. 30 The “Batch Image Manipulation” drop-down option list in Gimp software.
Pic. 31 Both “Color correction” and “Other gimp procedure” options have been added to our batch conversion.

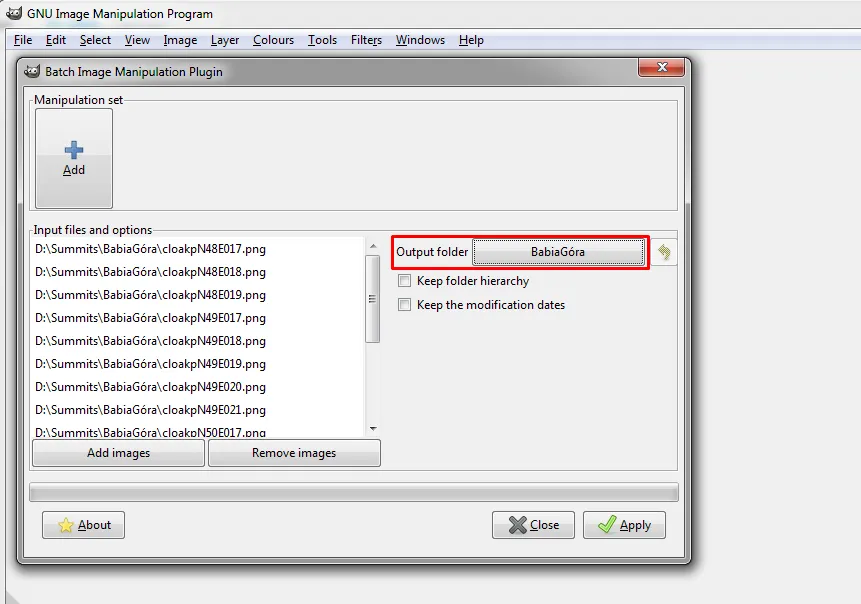
Pic. 32, 33 Selecting the images for batch conversion.
Make sure, that your output folder and current summit folder are the same! Gimp is going to rewrite all files automatically.
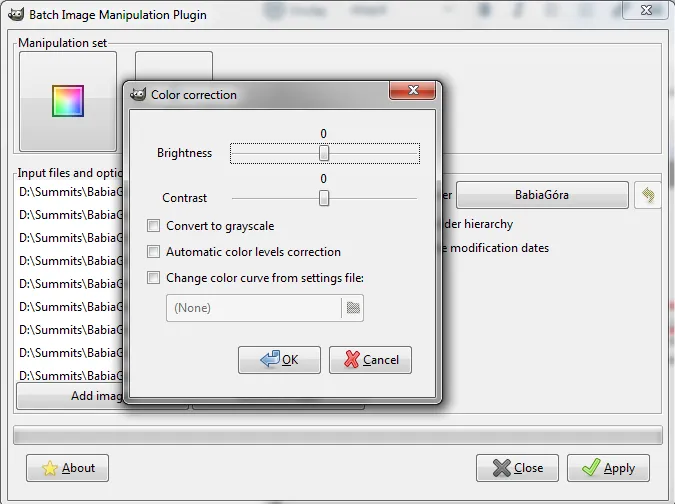
Pic. 34 The “Color correction” with all options provided.

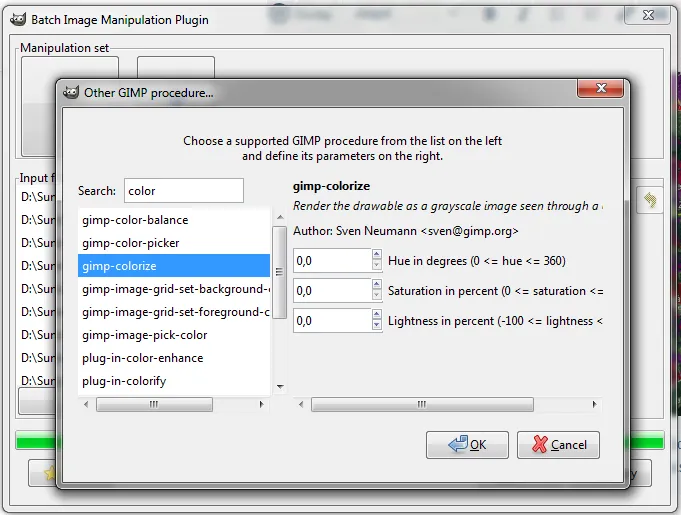
Pic. 35, 36 The Batch Image Manipulation options in Gimp 2.8 software: change image mode to RGB and image colorize.
The aforementioned snap shows the values, that can be changed in the “gimp-colorize” option. There is no visual color information. You need to be more or less clued up in the RGB scale (I described it a bit earlier) and put the correct values.
Once you have done everything alright click OK, and next to “Apply” to carry out the whole batch procedure.
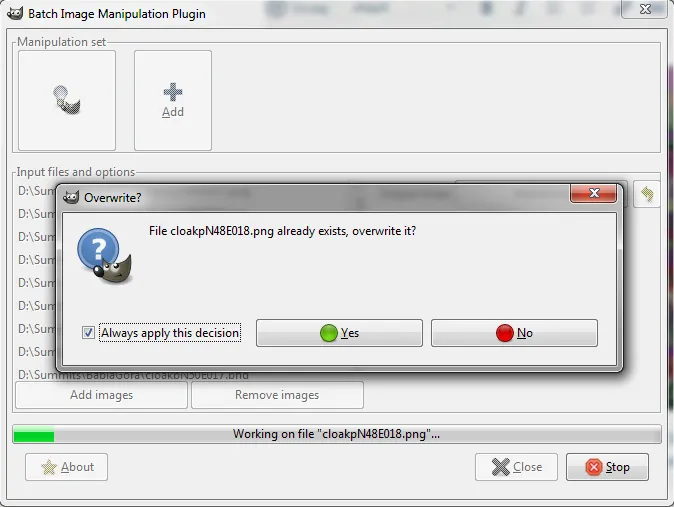
Pic. 37 When this communication is displayed always click “Yes”.
After all, you can do the same as in the previous examples. Copy all .png files into the .kmz file and enjoy a new color of the visibility cloak (Pic. 38).
Pic. 38 The Babia Góra summit visibility cloak in terms of the previous ones (Łomnica and Radziejowa).
Now, when you follow my steps you should have 3 visibility cloaks overlapped on your Google Earth, each in different colors. Remember to change the color of the horizon pattern (I haven’t done it yet) otherwise you will get lost.
I prepared another 4 summits for myself, so I will repeat those steps and put them all together on Google Earth.
As an outcome I have gained a colorful map of the Polish Carpathians, see below:
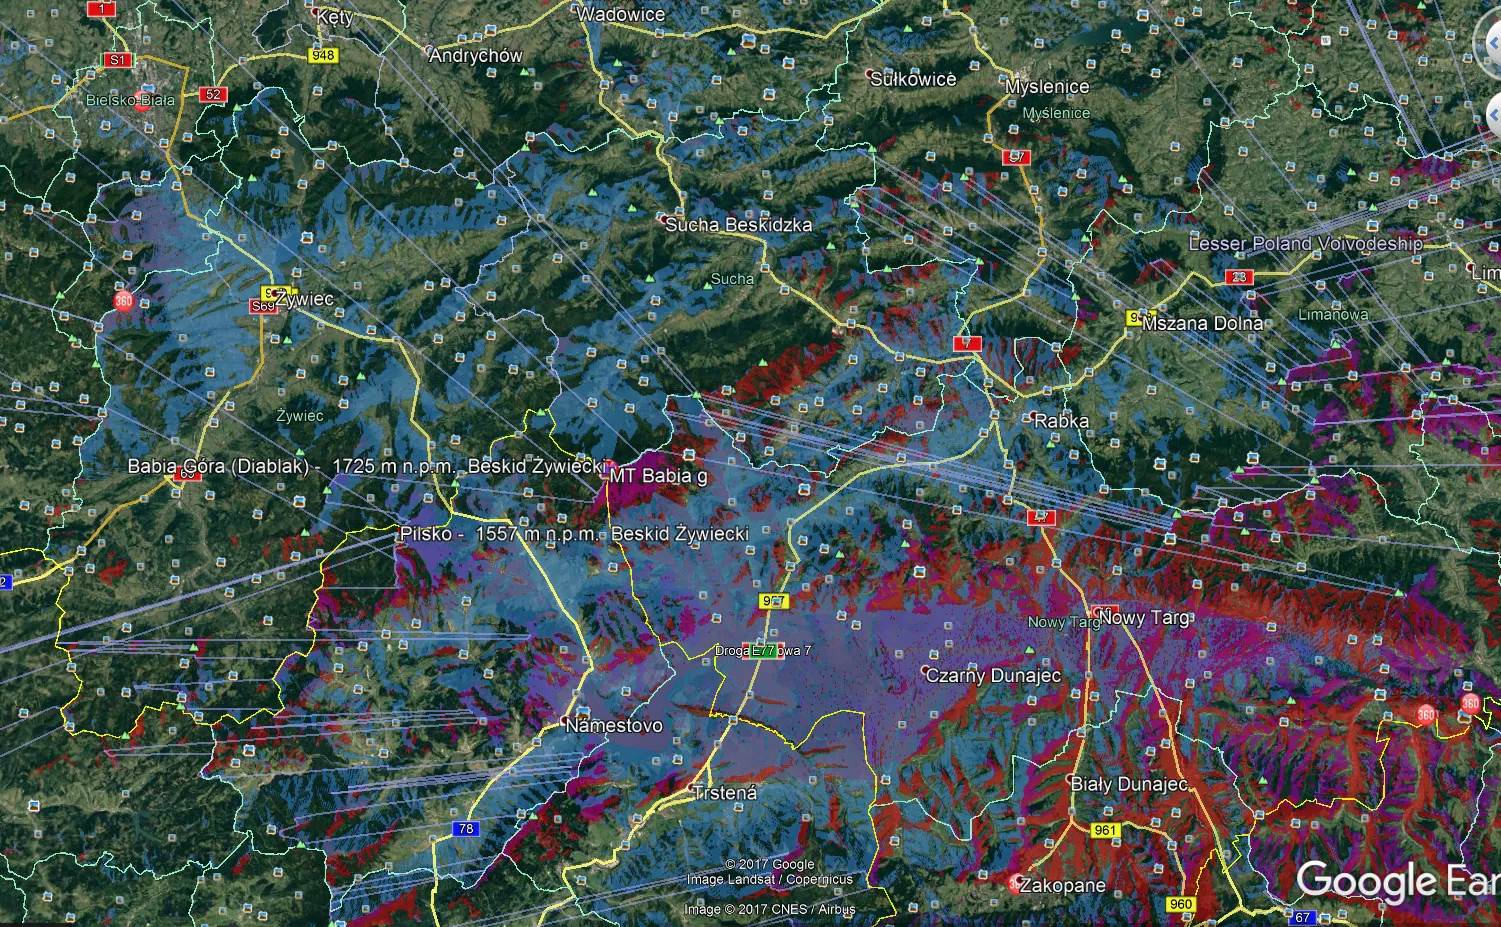
Pic. 39 Visibility cloaks overlapped on each other: green – Pilsko, blue – Babia Góra, red – Łomnica, purple – Radziejowa, orange – Jaworzyna Konieczniańska.
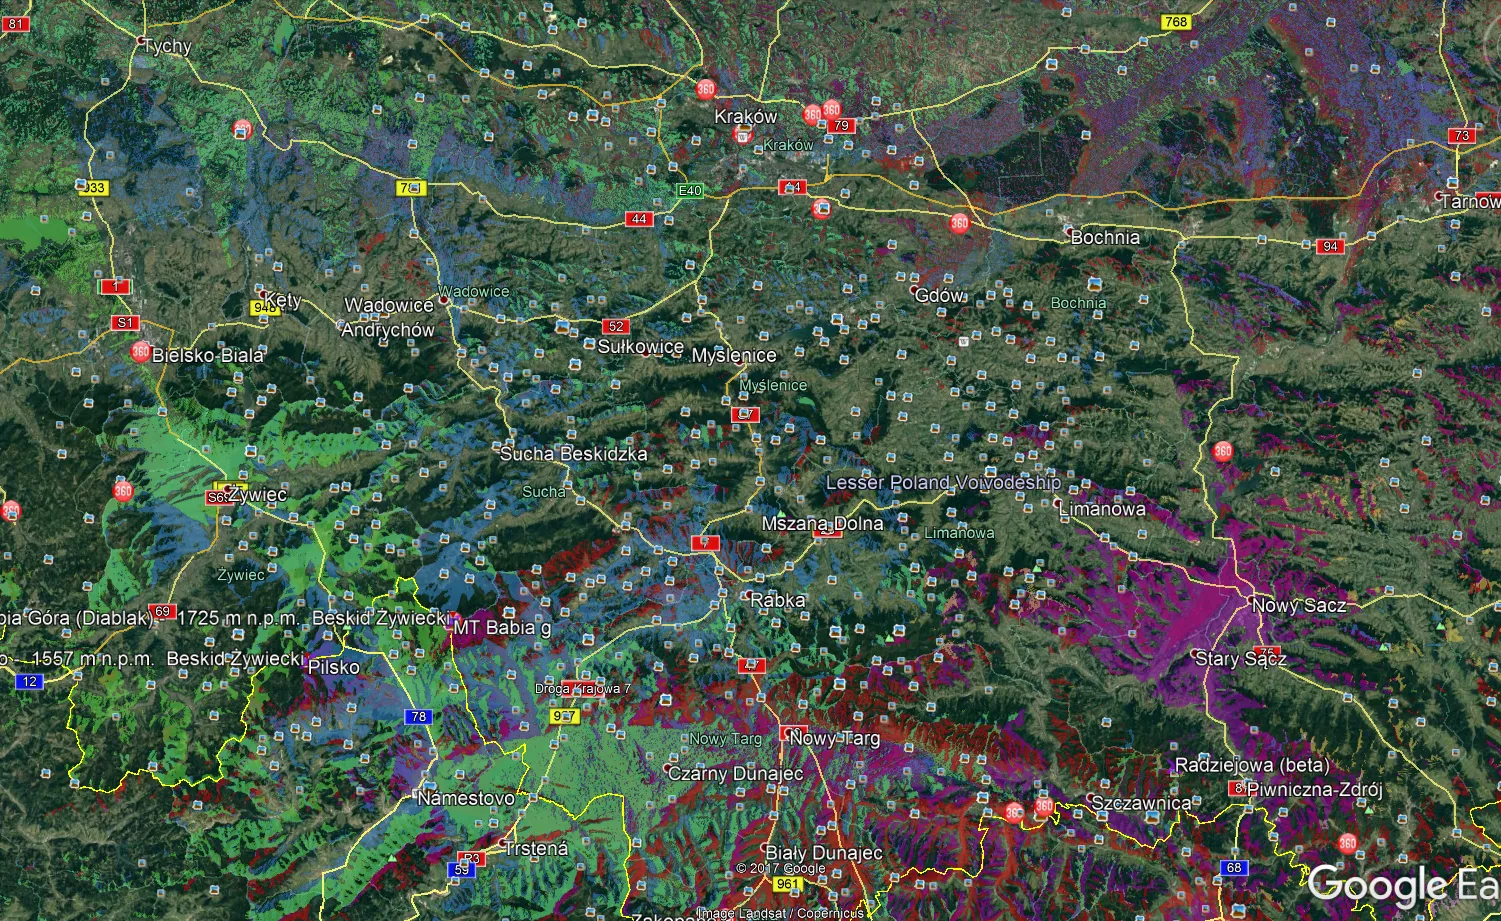
Pic. 40 Visibility cloaks overlapped on each other: red – Łomnica, blue – Babia Góra, purple – Radziejowa, orange – Jaworzyna Konieczniańska, pink – Smerek, grey – Tarnica.
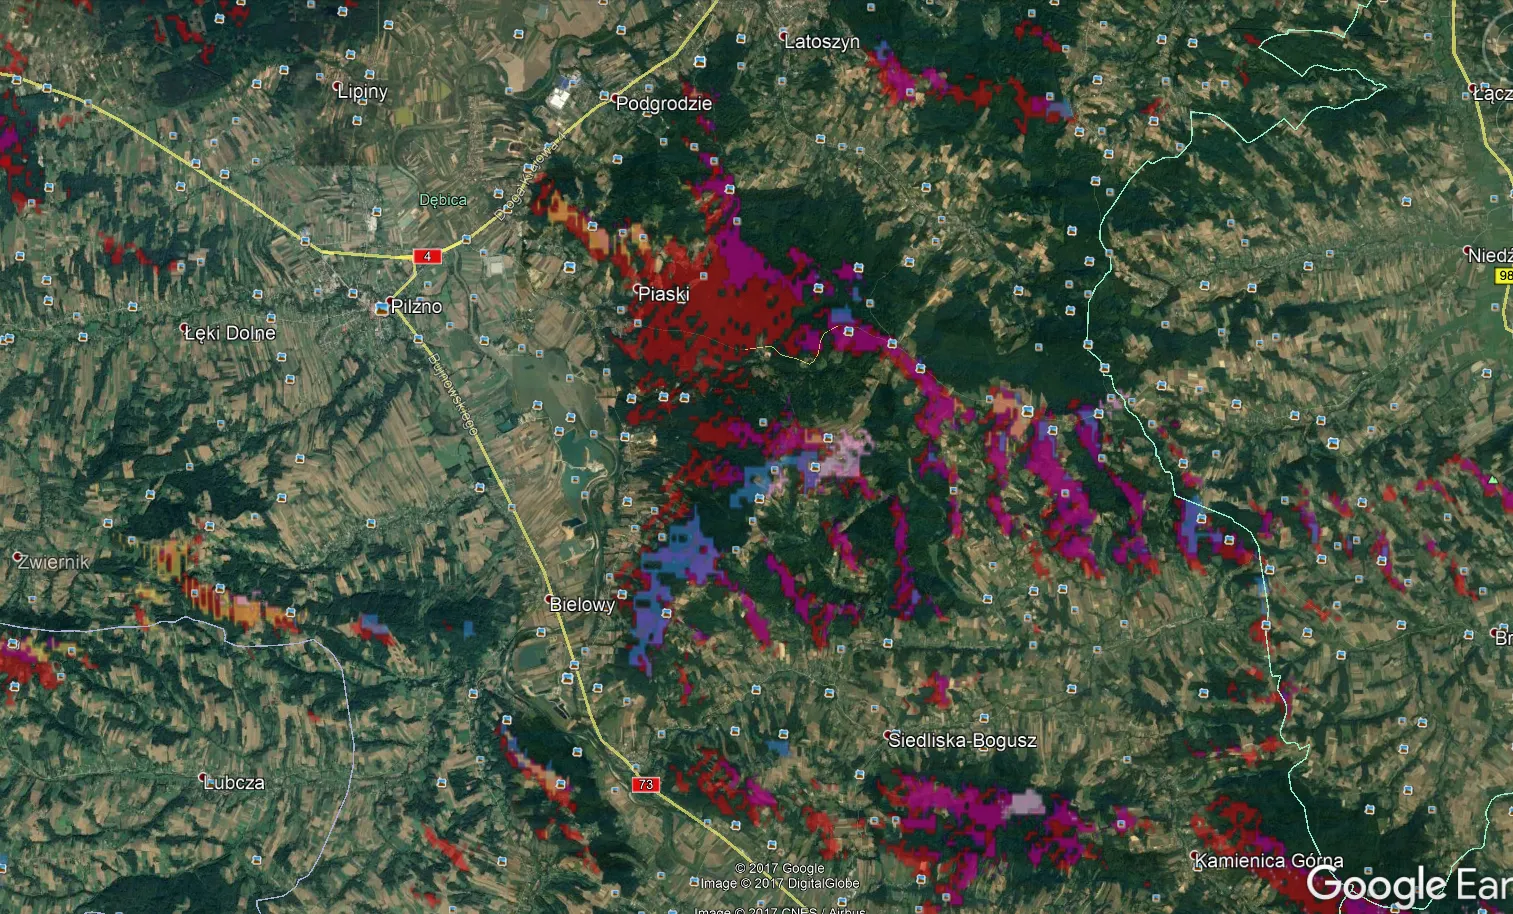
Pic. 41 The mountain communities, that are to be seen from Strzyzowskie Foothills near Pilzno town: blue – Babia Góra (Beskid Żywiecki), red – Łomnica (Tatras), orange – Jaworzyna Konieczniańska (Beskid Niski), pink – Smerek (Bieszczady), purple – Radziejowa (Beskid Sądecki).
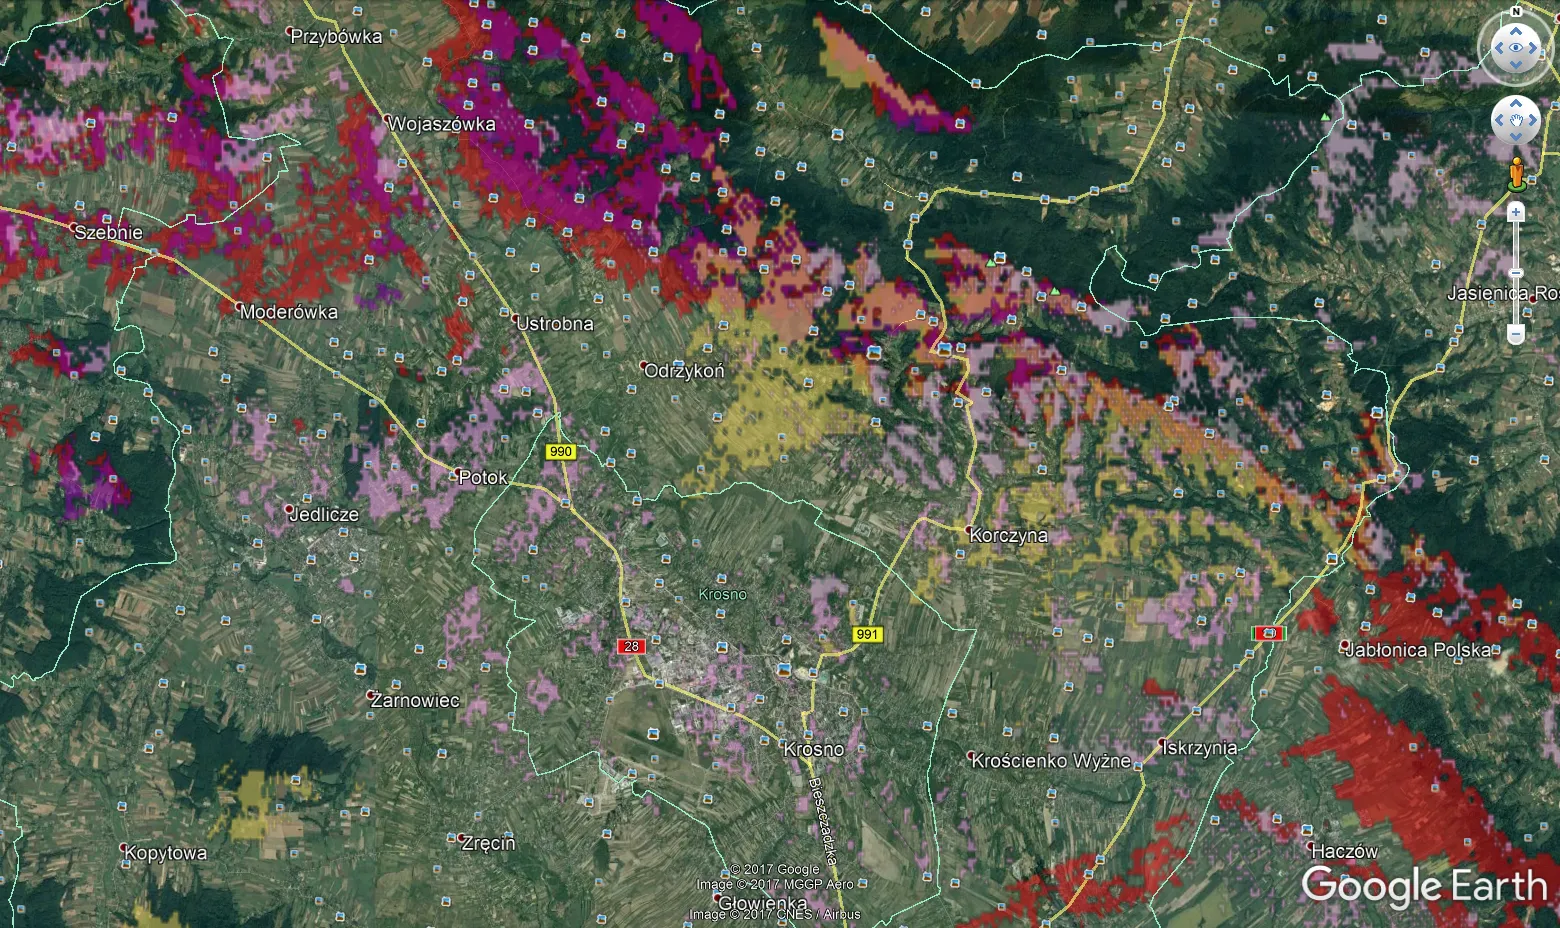
Pic. 42 The mountain communities, that are to be seen from Dynowskie Foothills near Krosno: red – Łomnica (Tatras), orange – Jaworzyna Konieczniańska (Beskid Niski), purple – Radziejowa (Beskid Sądecki), pink – Smerek, grey – Tarnica (Bieszczady).
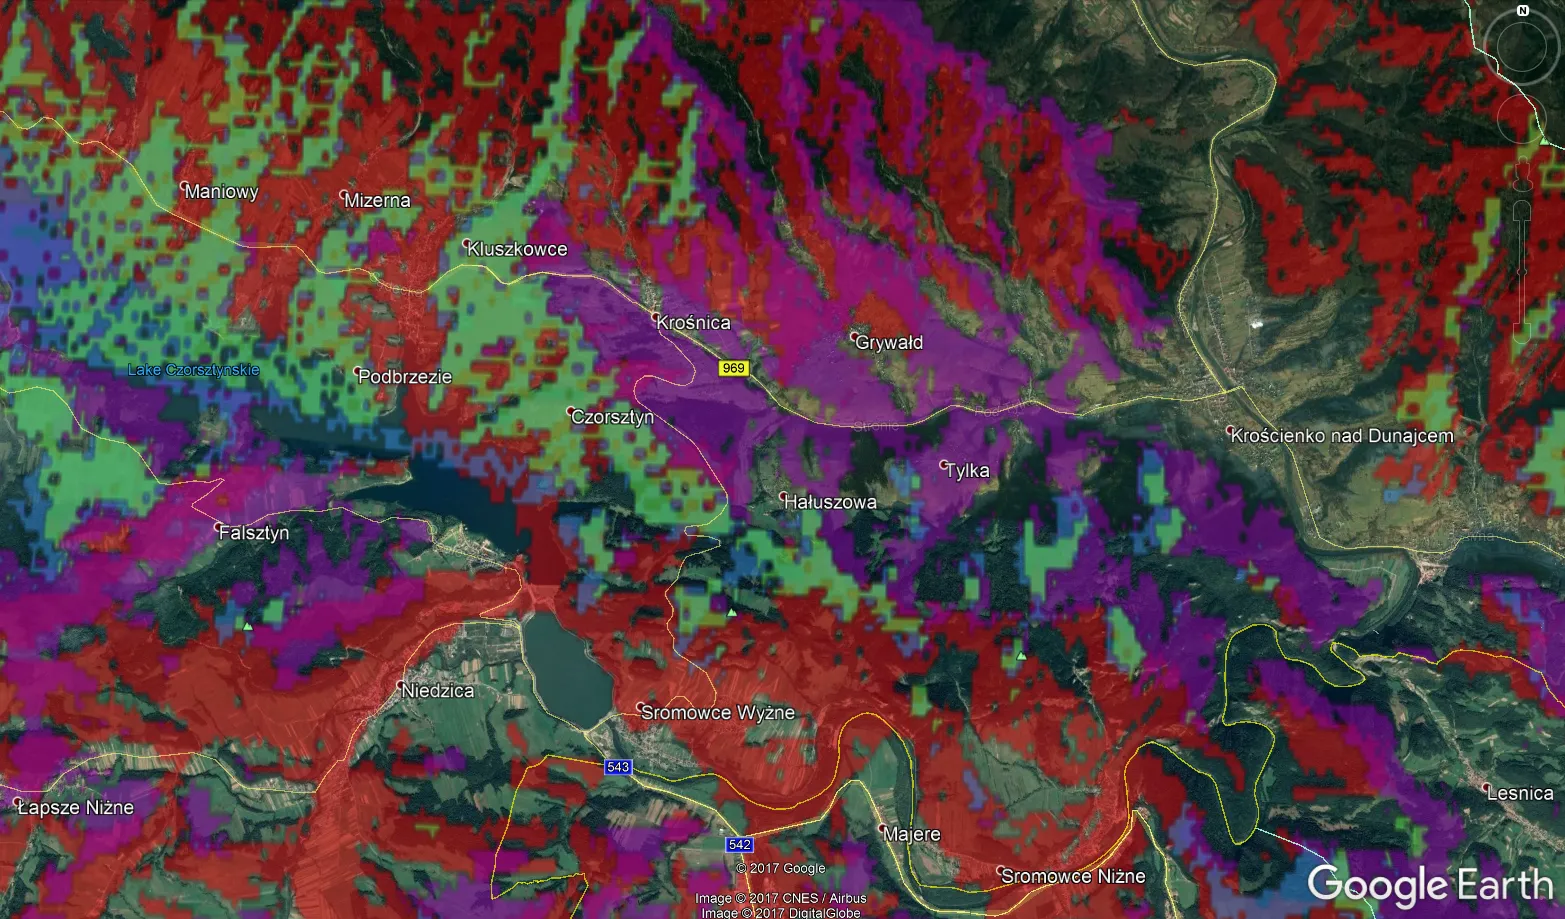
Pic. 43 The summits, that are to be seen from Pieniny mountains: red – Łomnica, green – Pilsko, blue – Babia Góra, purple – Radziejowa.
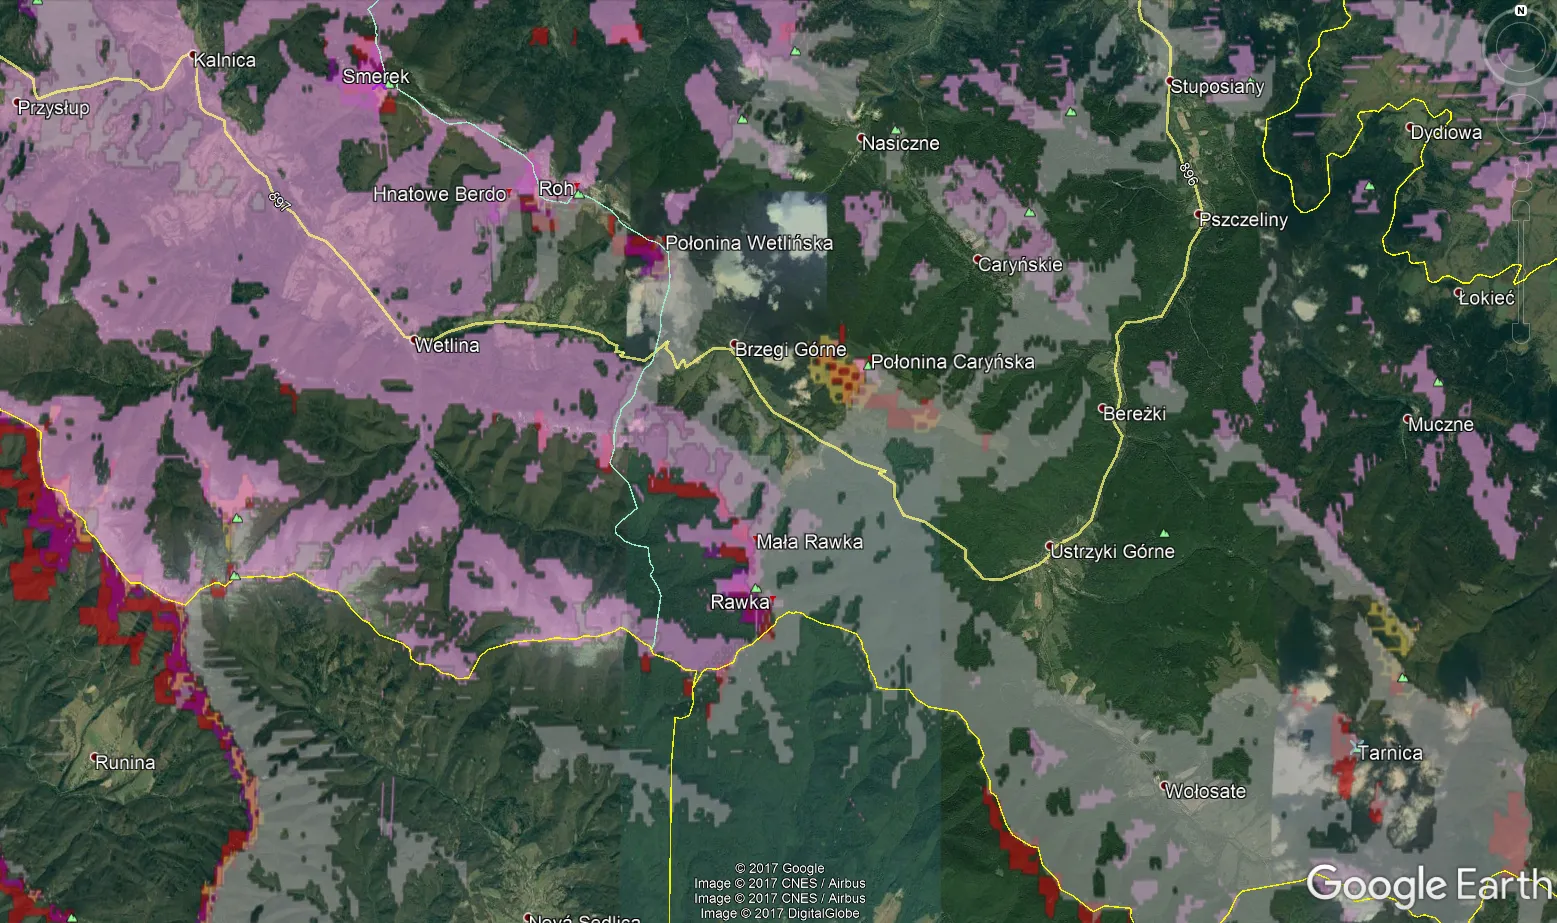
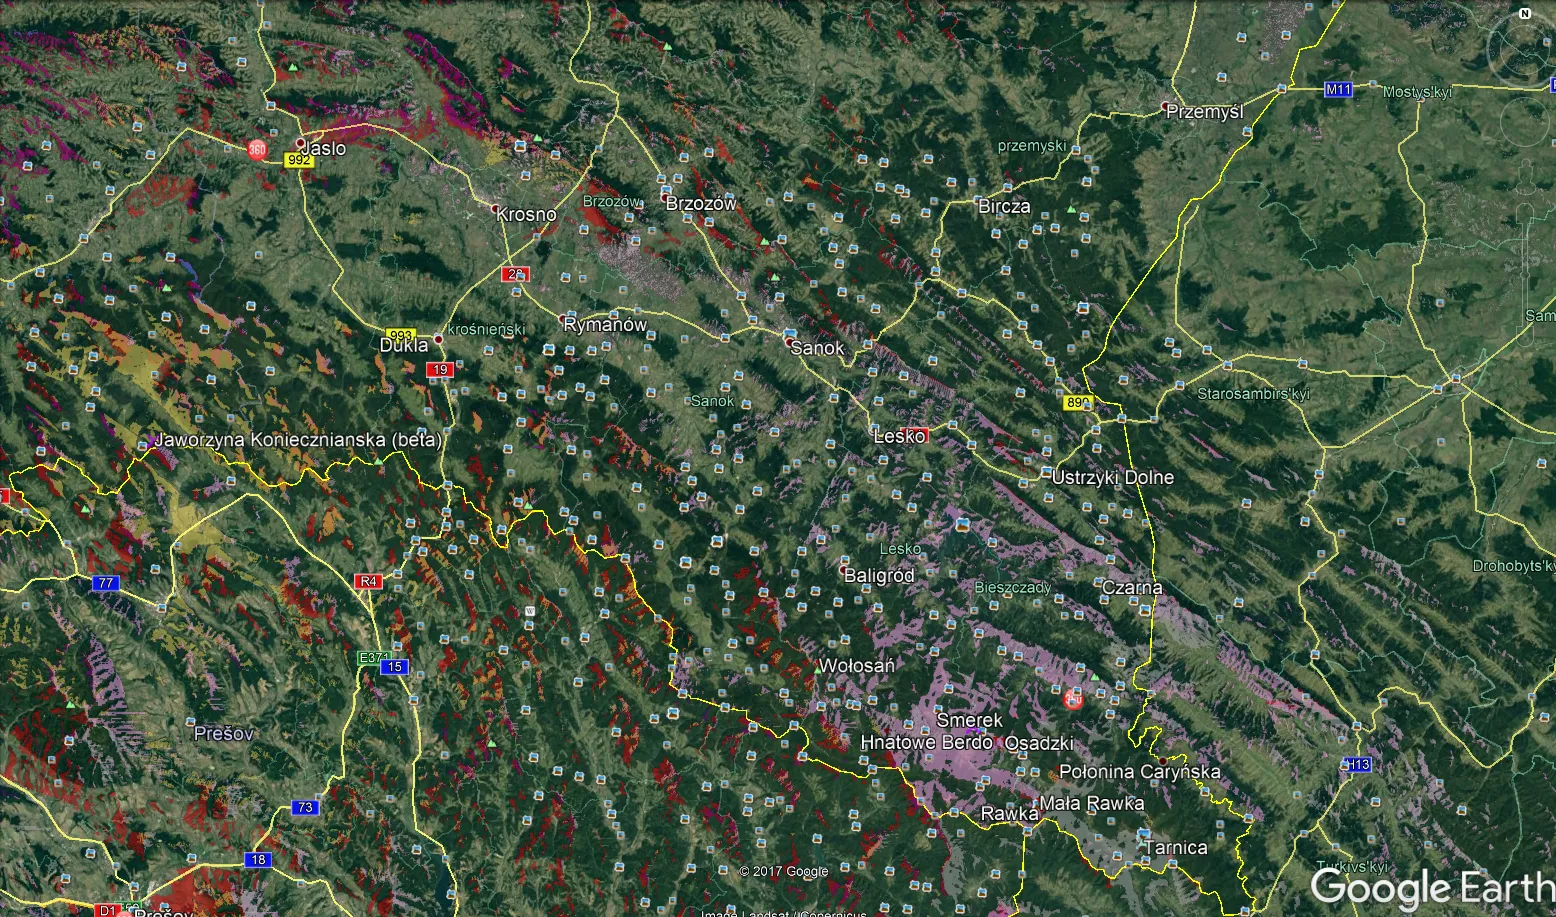
Pic. 44 The summits, that are to be seen from Bieszczady mountains: grey – Tarnica, pink – Smerek, orange – Jaworzyna Konieczniańska, purple – Radziejowa, red – Łomnica.
One suggestion at the end – don’t put too fair and grey colors. The Tarnica summit visibility cloak example shows, that it is easy to merge into another visibility cloak layer.
Take into account also:
– order of visibility cloaks attaching to Google Earth (it may cause, that your first visibility cloak will be covered by the latter and less visible)
– layers opacity (when you have problems with distinguishing the visibility cloaks try to change the layer opacity in Google Earth,
– try to avoid similar colors,
– put not more than 7 or 8 summits (however it depends on the conditions, visibility cloak range, and terrain features),
– switch off the horizon patterns for each summit,
– if you have any problems or suggestions please don’t hesitate to contact me: mariusz.krukar@gmail.com
Mariusz Krukar
Videos:
Links:
1. Gimp – GNU Image Manipulation Program – main page.
2. GIMP – Tips & Tricks
3. KMZ and KML files
4. All about KMZ files
5. Packaging content in KMZ file
6. KML files in ArcGIS