
Google Earth has been widely used in geography and GIS. Previously I showed you how to simulate a flood and total solar eclipse path in this tool. There are not only things, that I am going to show you over the forthcoming months. First of all, Google Earth is one of the programs, that I have been using at work so every time when I open and work on this instrument new ideas come.
The aim of this article is a demonstration of the multiple summit-perspective views in Google Earth. Those long-distance views are to be created in the Heywhatsthat.com panorama generator. If you are interested in mountain hiking, long-distance views, land surveying, or spherical astronomy you may have known, that panoramas, that are generated in the Heywhatsthat server can be used in Google Earth also.
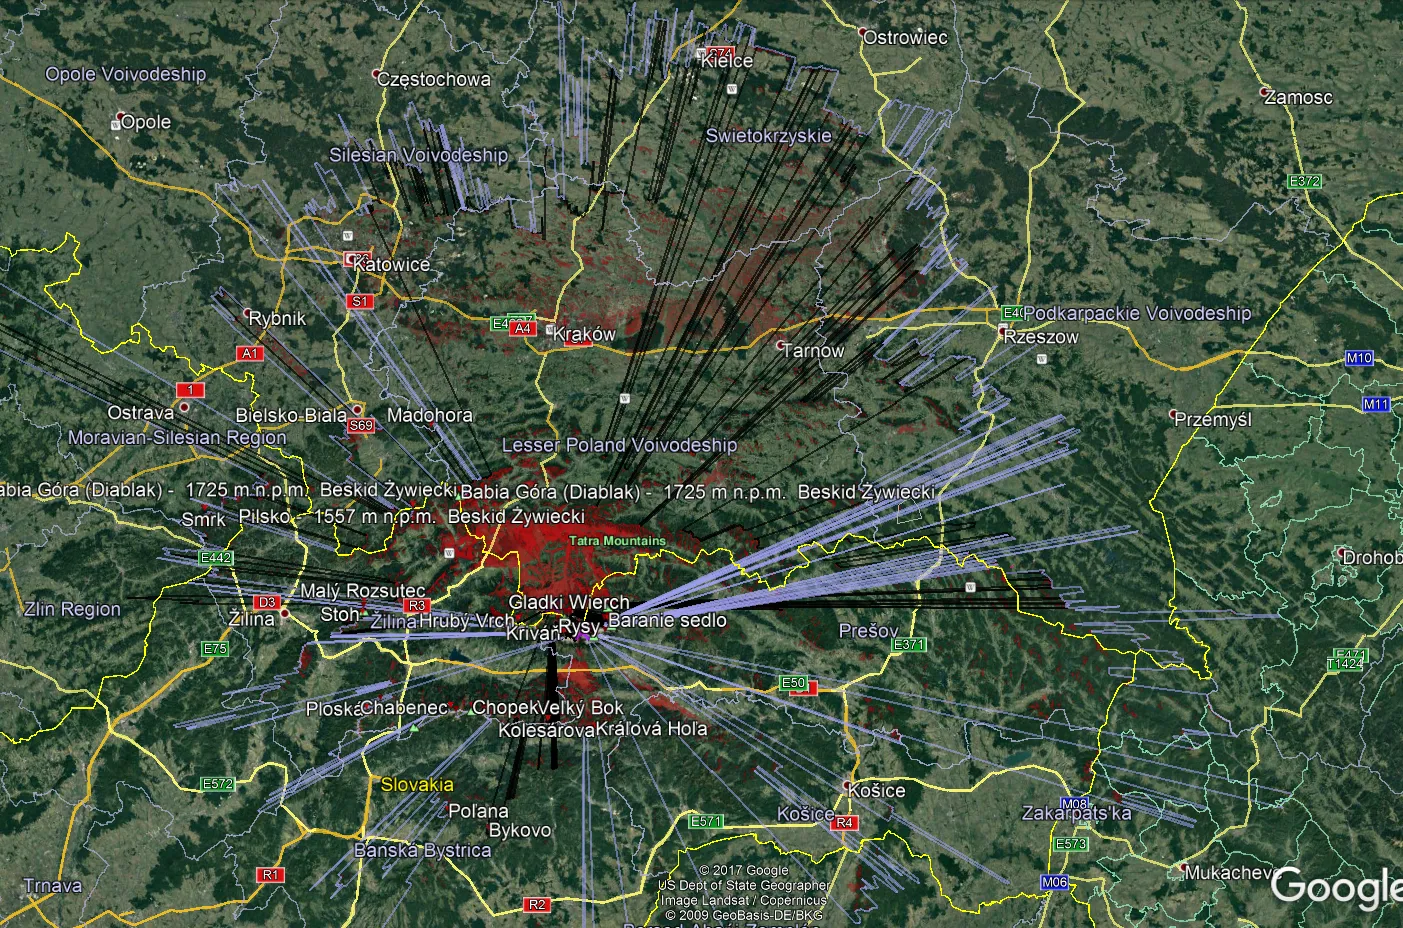
You have already found probably some on the web some articles about this, however, I can show this process roughly step by step for you. Moreover, following the main topics I am able to show you how to show more than one summit-perspective view using the Google Earth tool. I will provide examples from the Tatra Mountains (Carpathian range, Central Europe)). There are mountains, that I am familiar with.
Heywhatsthat.com can provide the map with a visibility cloak feature, that enables users to find out exactly which areas would be seen from a summit during the best conditions. It also allows us to set the refraction value.
Getting the panorama in Heywhatsthat.com
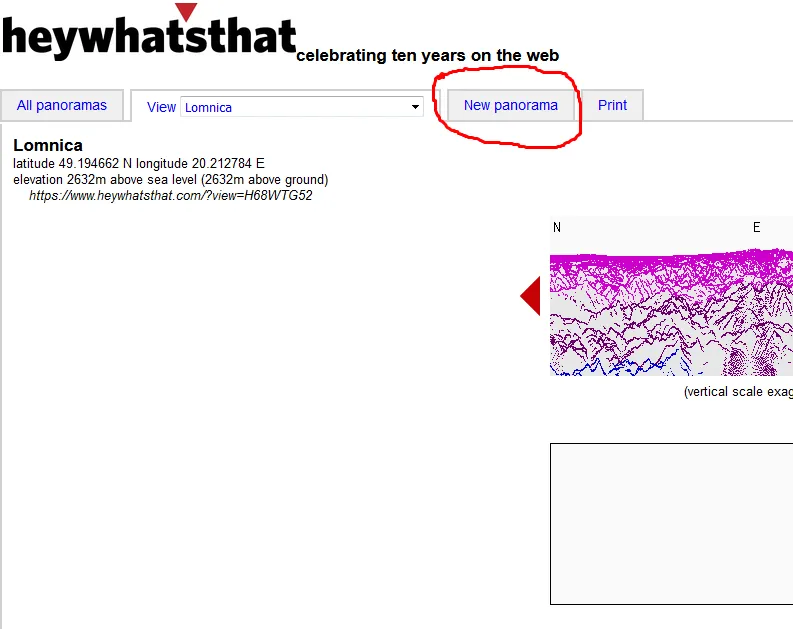
Generating the panoramas on Heywhatsthat.com is quite straightforward. Once you open the website you must look at the top bar, where the very basic options are to be found. To generate your own panorama from the summit, that you are interested in select the “New Panorama” button (Pic.1).
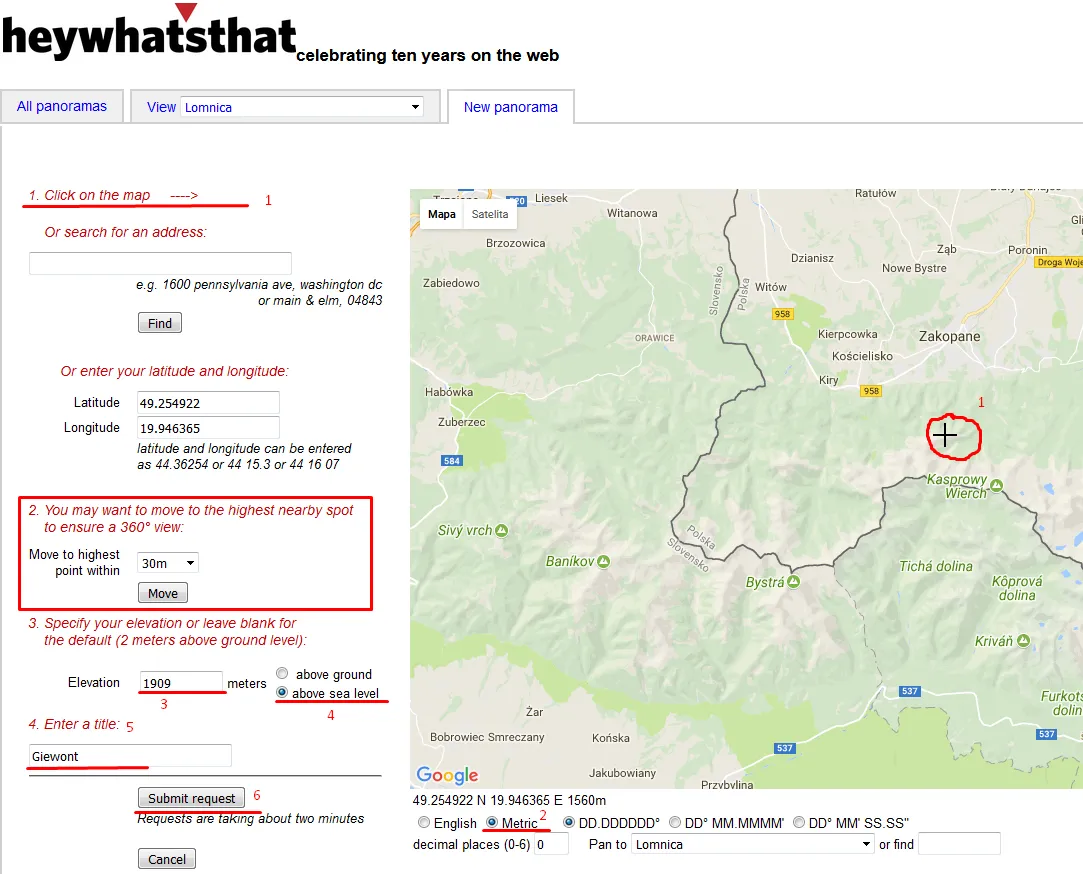
Your next step should be marking the rough place (summit) on the map (Pic. 2, No 1) and filling up the brackets on the left of course (Pic. 2 No 2 – 5). It is always better to put a metric scale rather than English when you are not clued up with a feet scale. You can change it at the foot of the screen under the map. The website will remember this option when you open it again. Point 2nd on your left has been set automatically so you shouldn’t worry about it. Basically, it allows you to move to the highest nearby point to ensure a 360-degree view. This option is good, because not always you will be able to pinpoint your summit correctly.
Now is the time to specify your elevation. In my case, it was a Giewont summit – the highest summit in Western Tatras, that whole lies in Poland. The Giewont peak rises up to 1909 m.a.s.l. After the value, it’s good to put the name of your panorama in point 4 brackets, although you don’t need to.
When you are sure, that all details have been correctly put in the brackets you must click the “Submit” button (Pic. 2, no 6) and wait for a while.
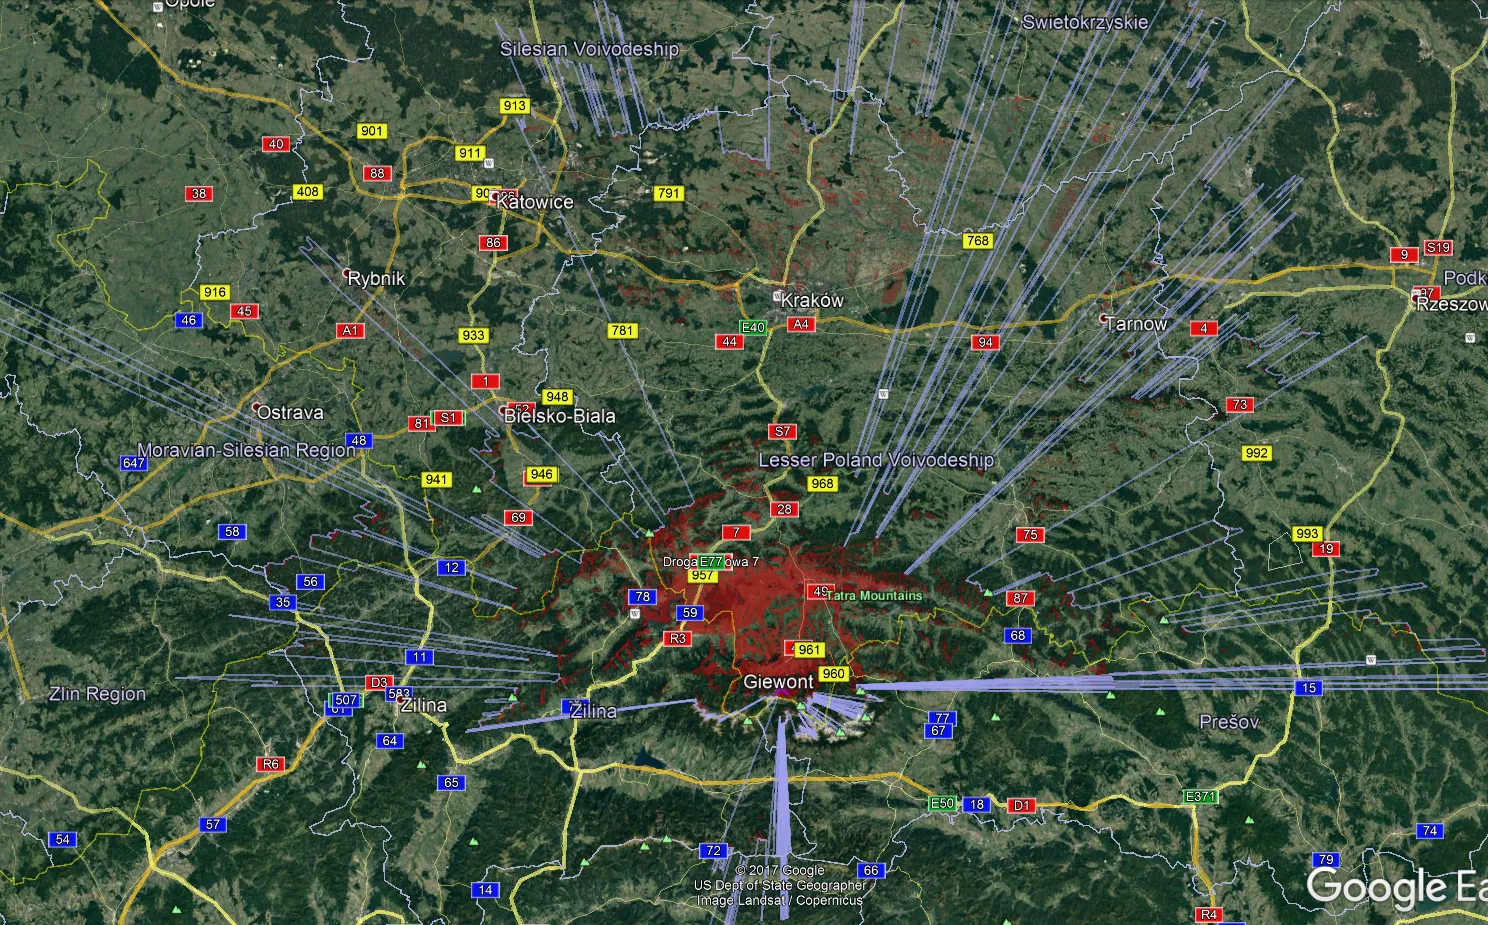
Excellent! Our panorama has been generated after tens of seconds. Now we can see our red visibility cloak, that spreads far out from the summit (Pic. 3,4). On your right, you are able to see the most prominent peaks, which can be covered when you are on the top (Pic. 3).
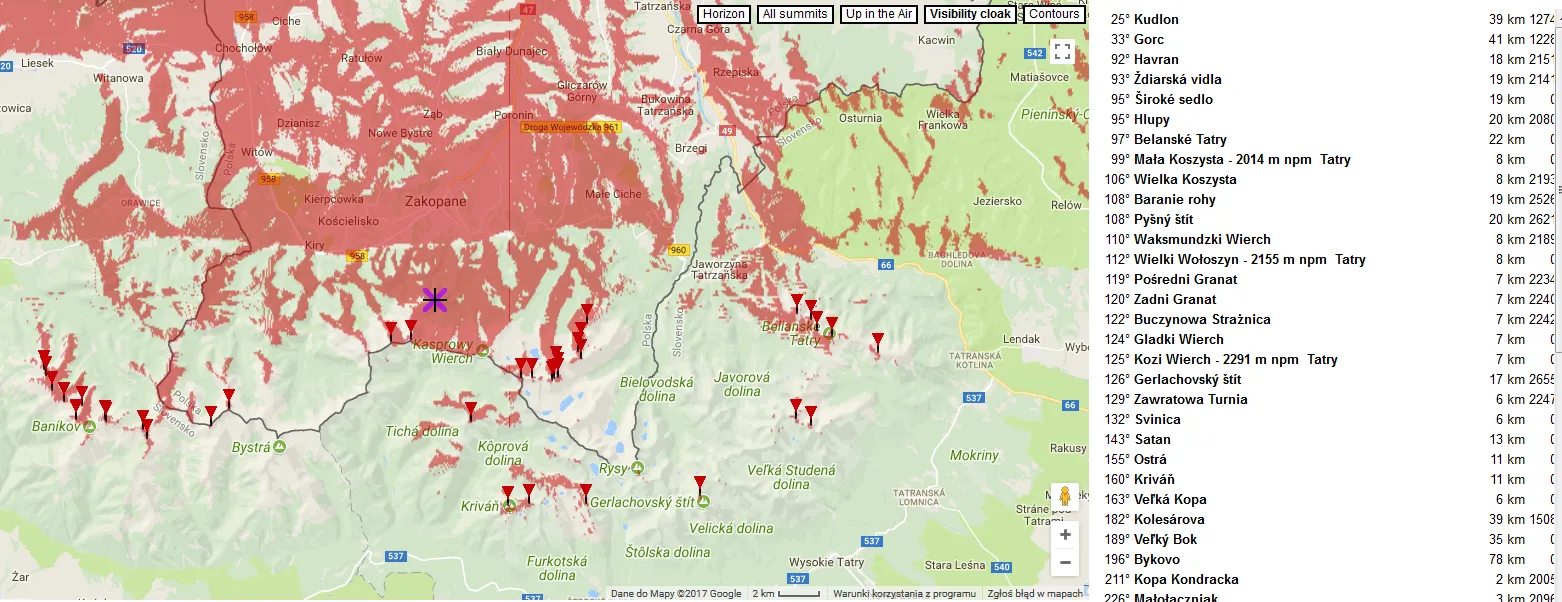
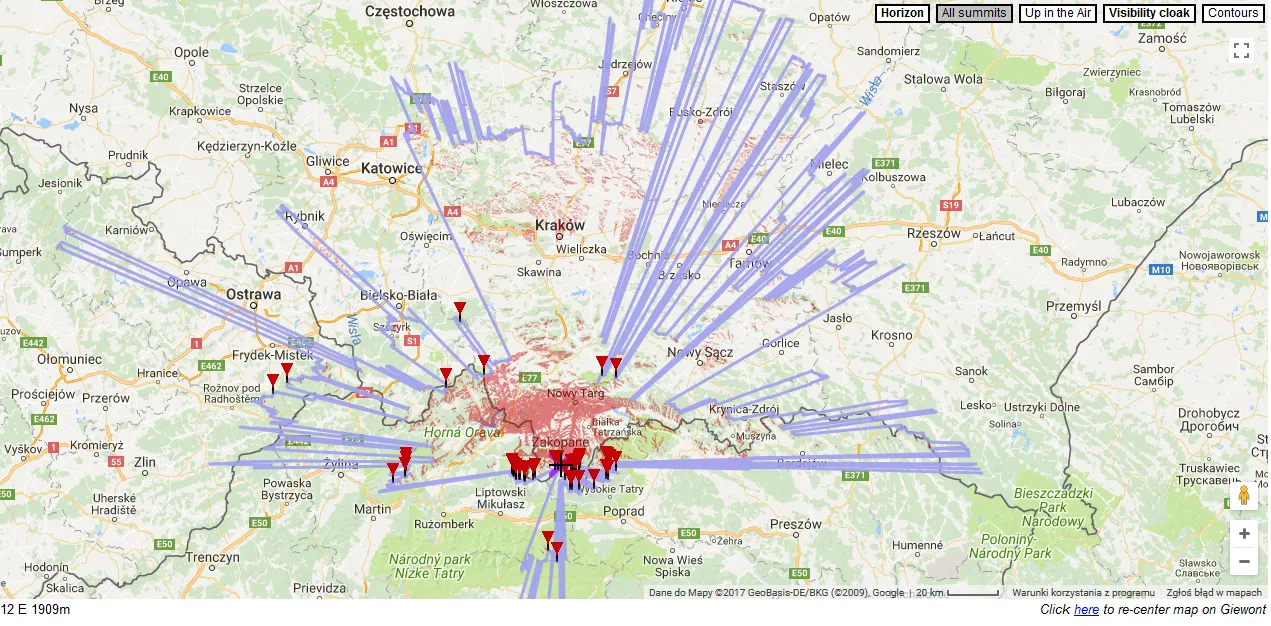
Having this panorama ready you can zoom in & out to gain the perspective you want. Taking into account the buttons on your top right you are able to adjust this panorama for your needs. I always choose 3 of 5 buttons: “Horizon”, “All summits” and “Visibility cloak”. You can follow me, making them active. Finally, You will gain a view as per as above (Pic. 4). As you may have noticed the “Horizon” button can help you to determine the furthest possible view, whilst the visibility cloak seems to be really faint.
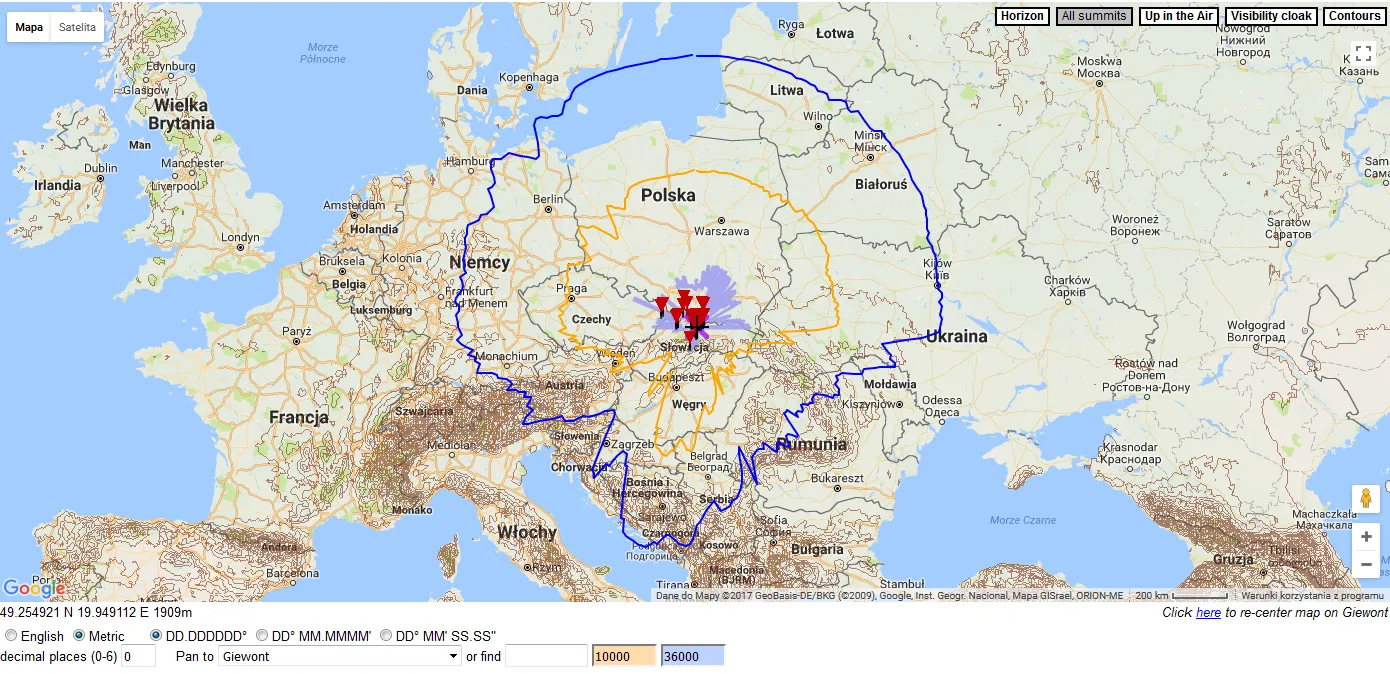
To make all buttons active you must be aware of a lot of details of your new panorama (Pic. 5). For instance, when select “Contours” you will see the main contour levels, that display you the local land features. I think, that the more important button is “Up in the air”, which can calculate how far your summit would be visible when you are hunged up in the air. It may be useful in flightseeing, to check the probability of seeing your summit from a certain flight route. There are 2 variables, that you can set manually. I put 10000 m for one (orange) and 36000 m for another (blue) (Pic. 5). The first case represents the view range for the typical plane altitude (10 km above ground), the second one represents the view range for 36 km altitude in terms of the meteorological balloon maximum altitude. In general, looks interesting (Pic. 5).
Transfer the panorama to Google Earth
Let’s go to the main issue in this topic, namely how to manage the Heywhatsthat long-distance views in the Google Earth tool.
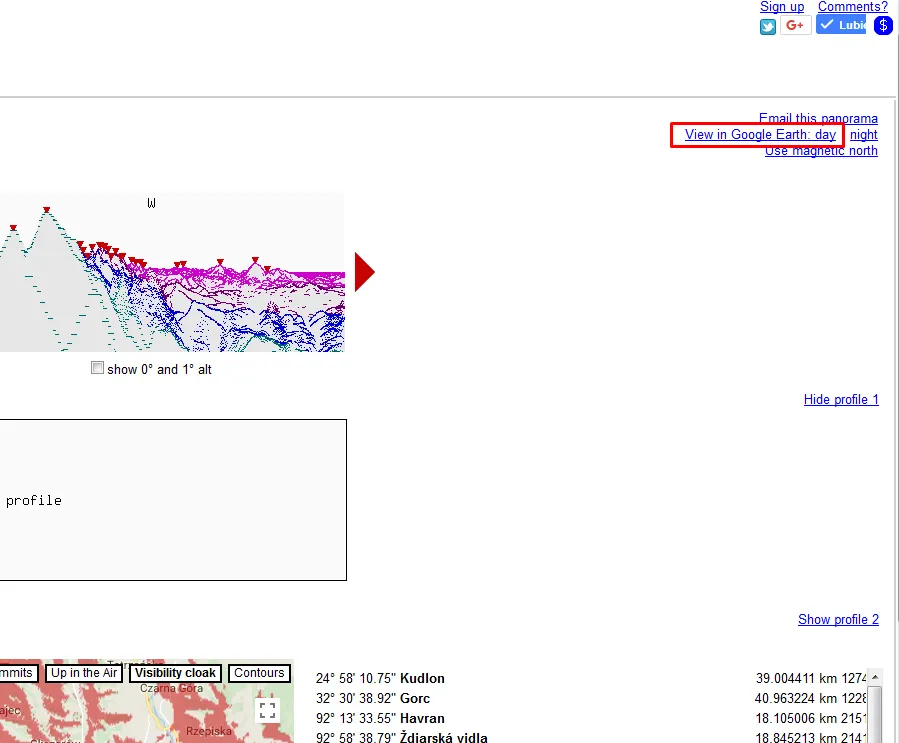
First of all, once you generate your panorama on the top right you have a few options, that allow you to manage your generated view (Pic. 6). To receive it as a .kmz file you have to select the “View in Google Earth” option. Remember, that it works for the “day” version (Pic. 7). Don’t put the “night” version, because your Google Earth will change into sky mode.

Click on it and should be enough. Now you see the window, that allows you to save a file or open it directly in Google Earth. Better to choose the 2nd option, however, if you wish to rename your file you can save it first.
Now we can enjoy a great view on Google Earth (Pic. 8). Everything has been literally moved from Heywhatsthat map (that is obviously Google map) to your Google Earth.

At first glance, everything looks quite messy. We have all layers active (Pic.9), which finally is to be adjusted for our needs.
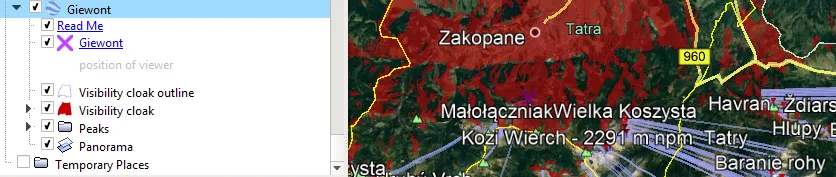
For your panorama you will need only 3 layers:
– a purple cross, that displays your summit,
– visibility cloak outline, that draws the horizon pattern for you (fair purple line)
– visibility cloak, which is displayed as a red layer.
Eventually, a whole panorama should look as below (Pic. 10):
At the finish of this issue one thing. Personally, I would rather change the visibility cloak outline color for another one. Initially, the fair purple is nice because it remains clearly visible against the satellite imagery.
To make simple amendments to your panorama you need to refer to the left toolbar again (Pic. 11). Find the “Visibility cloak outline” layer, right-click to pop up the command list, and next select the “Properties“.

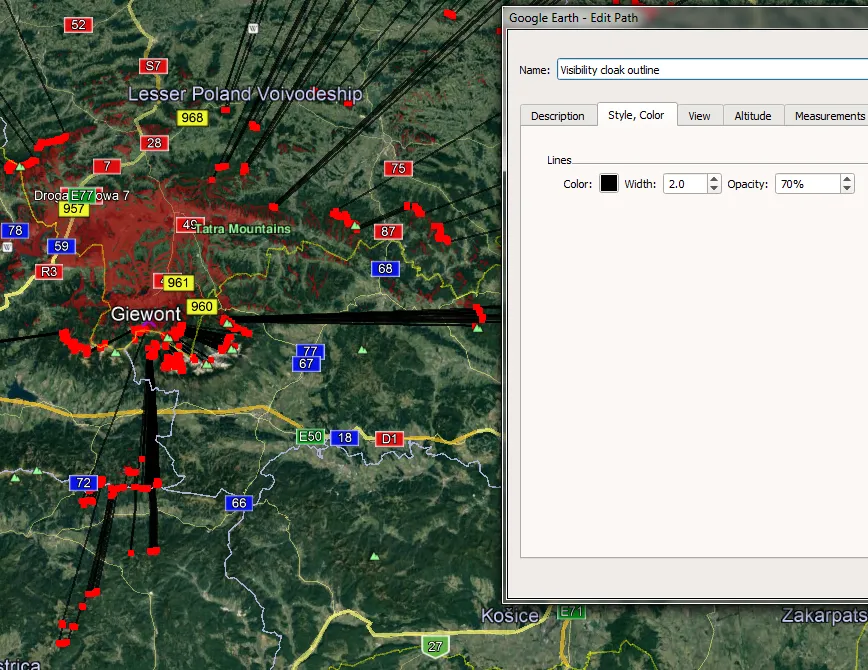
In the picture above you can see all the properties of the “visibility cloak outline” layer. You are able to add some descriptions, change the name, etc. The most relevant for you is the “Style, Color” section, where you can change 3 things:
– color,
– width (2.0 is a default value, however, I do not recommend you change it, because it will make your horizon pattern less readable),
– opacity (55% is a default value, to make your line strong put a higher value e.g. 70%).
As you have noticed red squares are located at the edges of the horizon line. They are visible when the “properties” window is switched and enable you to change their position of them. This is not recommended! Otherwise, your horizon pattern will not be valid anymore.
There you go!

Multiple summit views on Google Earth
Now, that everybody knows how to put Heywhatsthat.com into Google Earth with making some alterations we can proceed to a more advanced step, which is multiplying the panoramas.
The aforementioned solution has shown us how to put one summit panorama into Google Earth, though sometimes you need more than 1 summit located in the area of your study or check the visual opportunities to see some peas from a remote place.
Let’s back to the heywhatsthat.com website again. It remembers our Giewont summit panorama when opens again. We are creating a new panorama now, so there are exactly the same steps to encounter with another summit only.
Let’s take into consideration the Rysy peak this time. Rysy is the highest summit of Poland, situated in the southeast Polish corner of High Tatras. In general, the main Rysy summit is located just outside the Polish border and counts 4 m more, than on the Polish side – 2503m.a.s.l. We are going to consider it now.
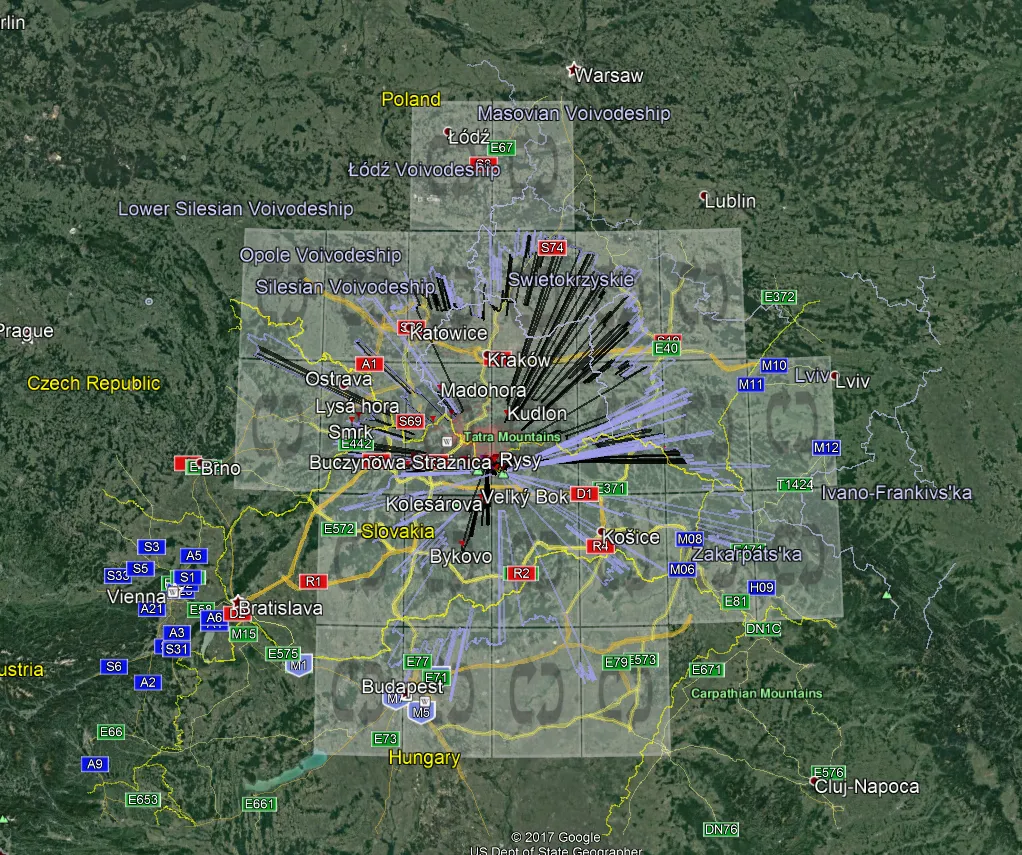
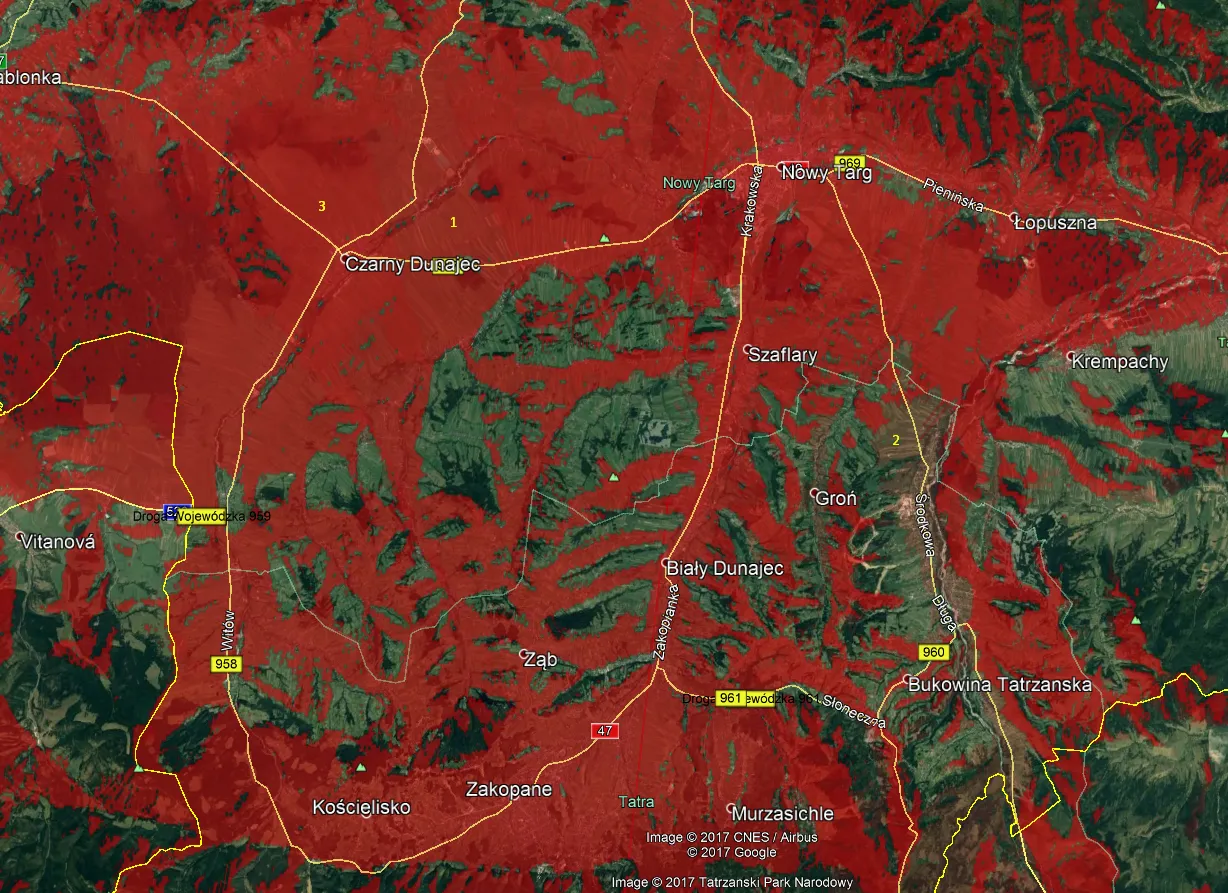
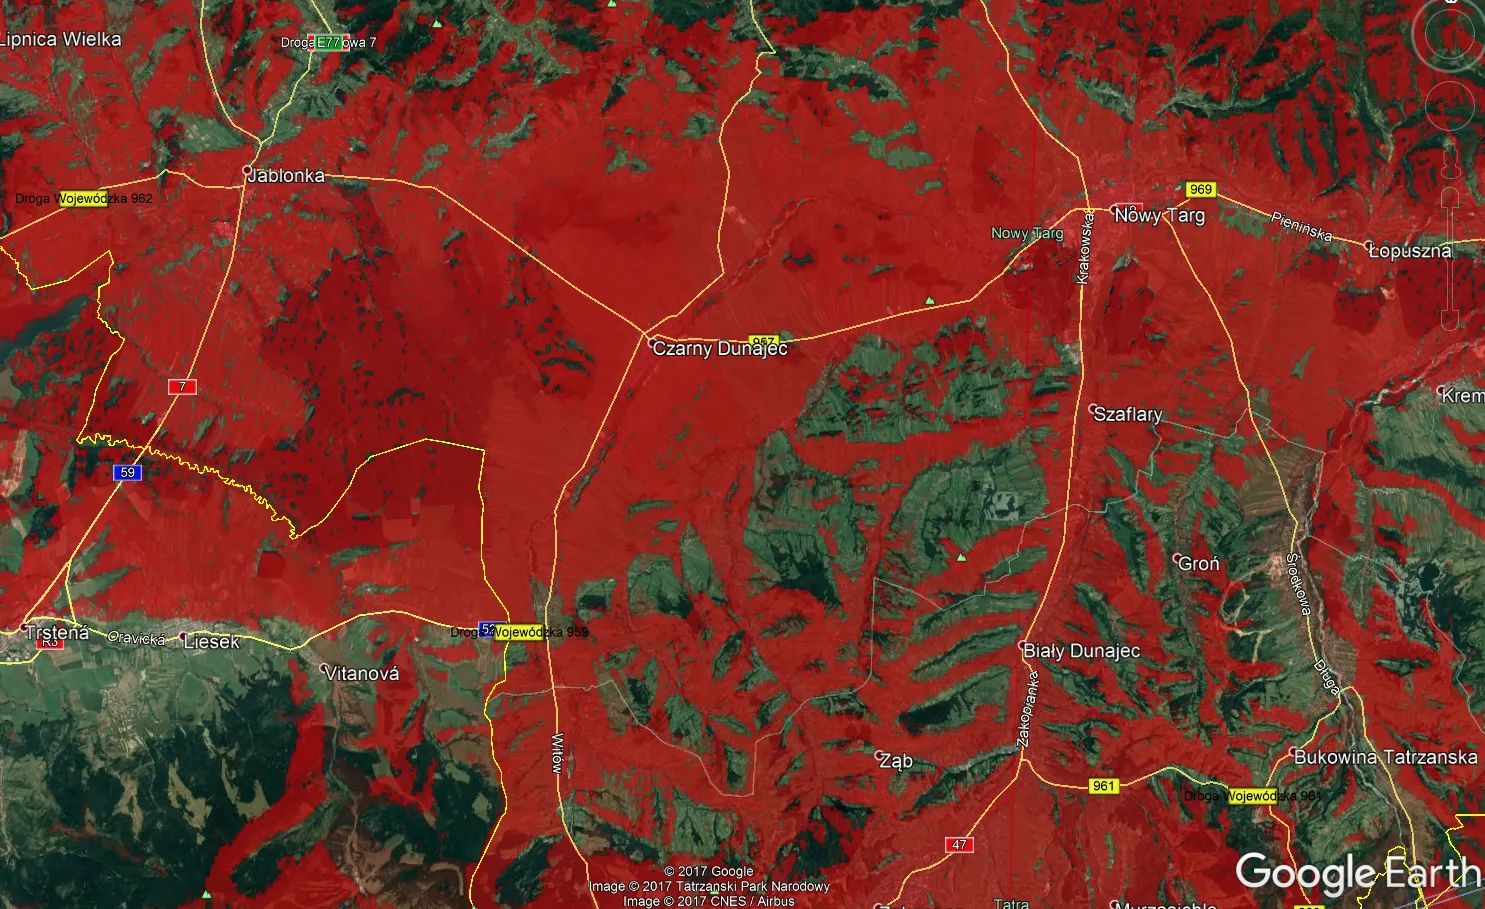
Once you put another summit view into Google Earth you will have unfortunately a terrible mess in your area (Pic. 14,15).

Fortunately, previously I decided to change the “visibility cloak outline” color, hence now both horizon patterns are quite recognizable. Nevertheless, the observer still would have problems with delimitation visibility of the nearer places, mountains, or summits.
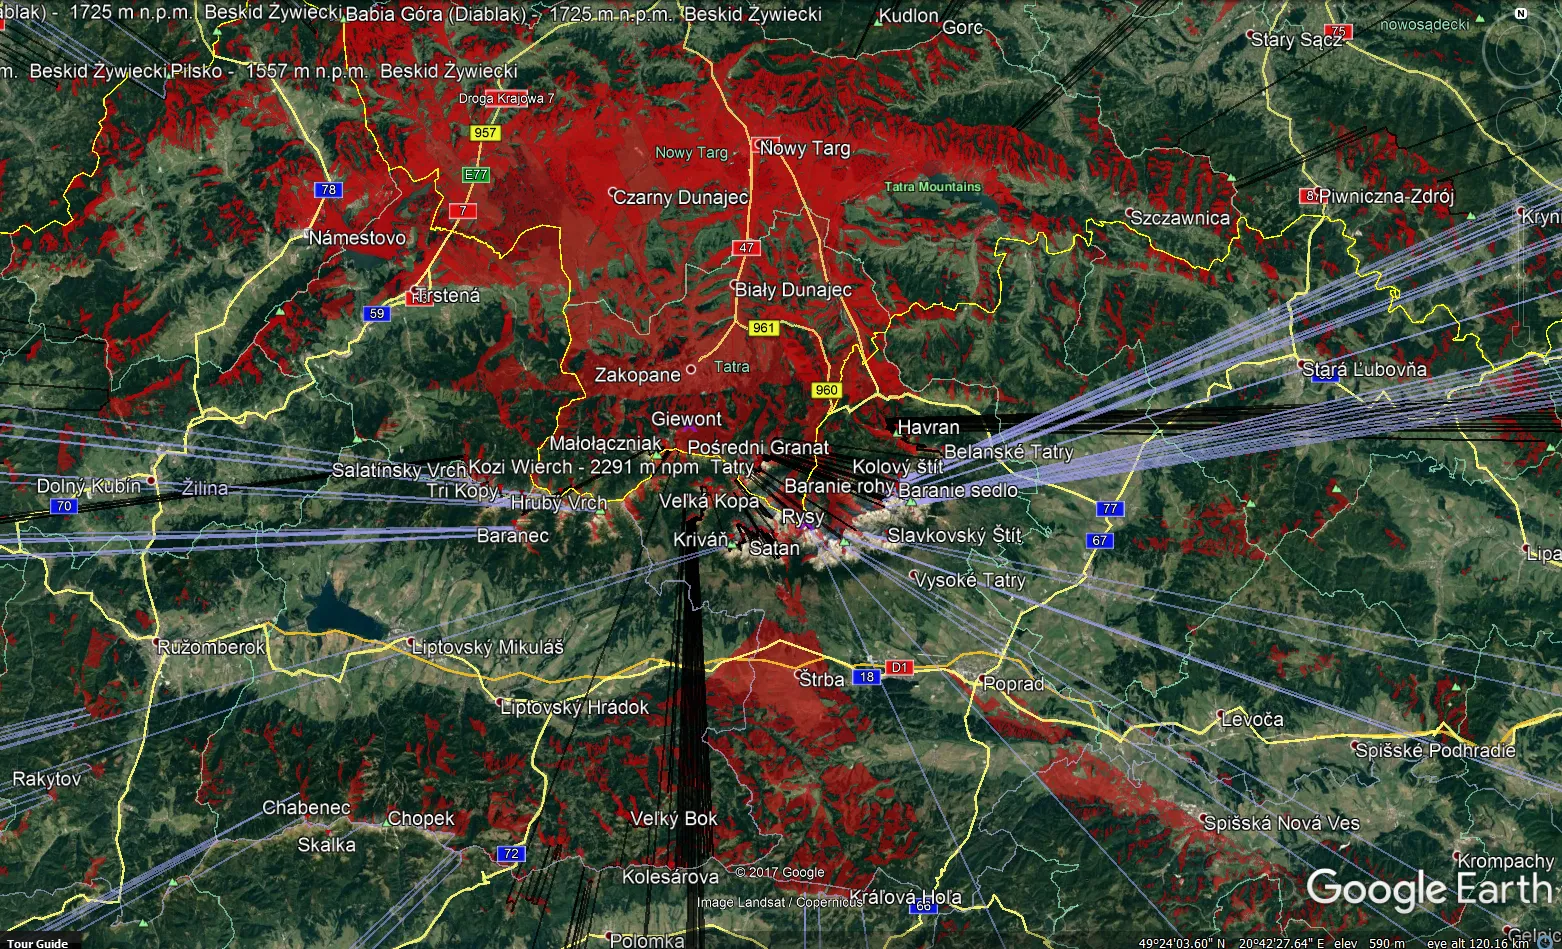
Pic. 15 clearly shows the visibility cloak overlapping, where both marked red are almost completely merged. Due to some transparency feature, we can try to point the areas, from where both peaks are clearly visible (stronger red) or only one is to be seen (fainter red), but we don’t really know which one, right!?
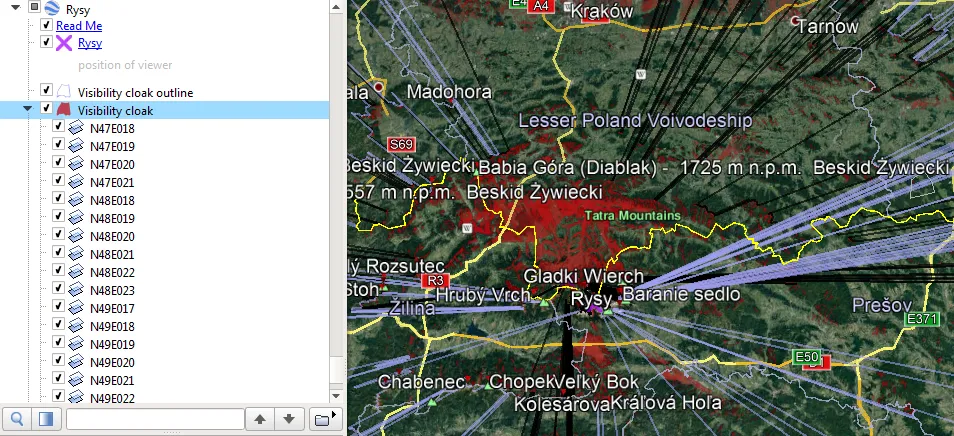
To enhance our multi-summit panorama we need to make some amendments to Google Earth. Let’s open the “Visibility cloak” layer in the left toolbar again (Pic. 16).
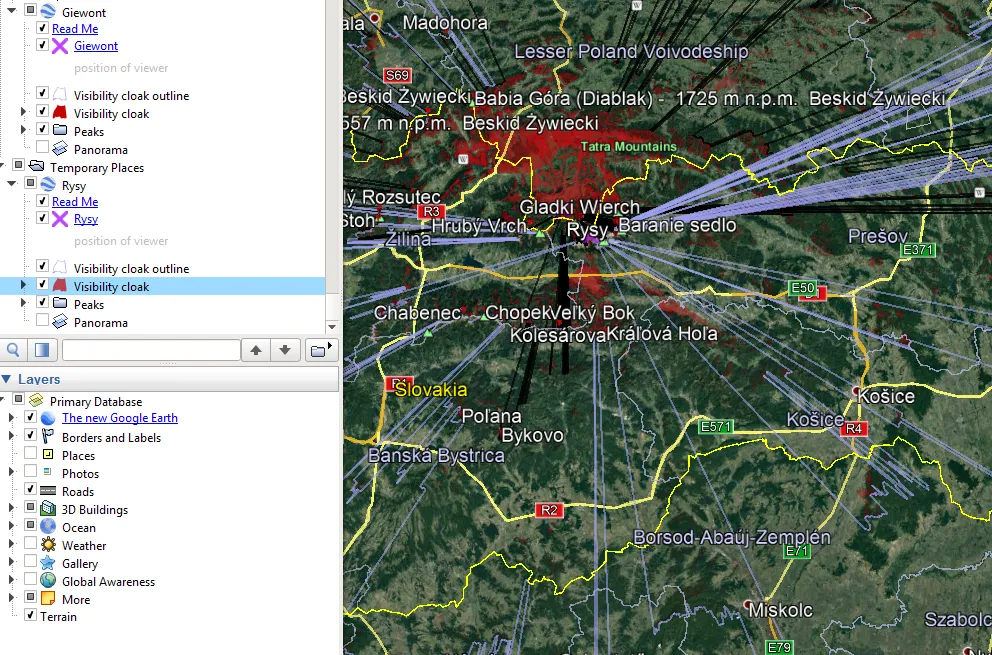
Select this layer and develop the leftmost triangle to see all separate sections, that are included in the whole “Visibility cloak” layer (Pic. 17).
Now we need to right-click one by one and choose the “Properties” section (Pic. 18).
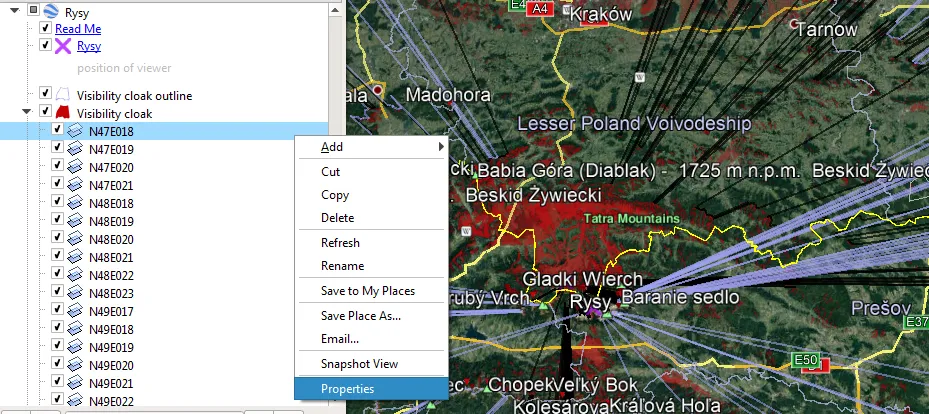
The “Properties” includes a few options (Pic. 19). However, you do have not a wide spectrum of things to change. Even if you can make some amendments like rotating view or stuff like that, they are not recommended. One option, that should bother you is a transparency level, located just under the link. Initially, this bar features around 60% of the opacity level (Pic. 19).
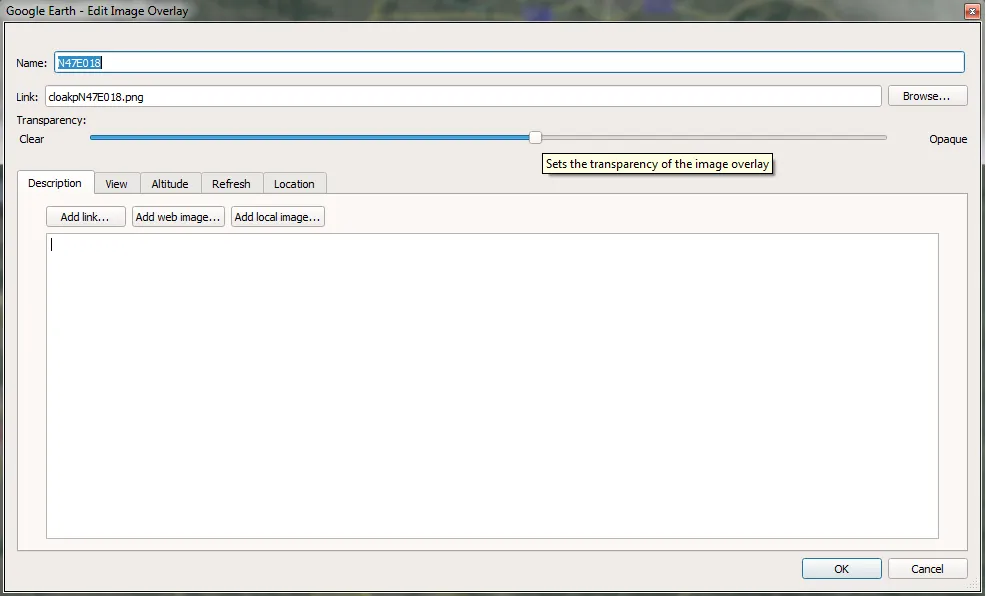
Your exercise is changing this opacity level making the picture more transparent. Move your box then into the left (Pic. 20), and then just go OK.
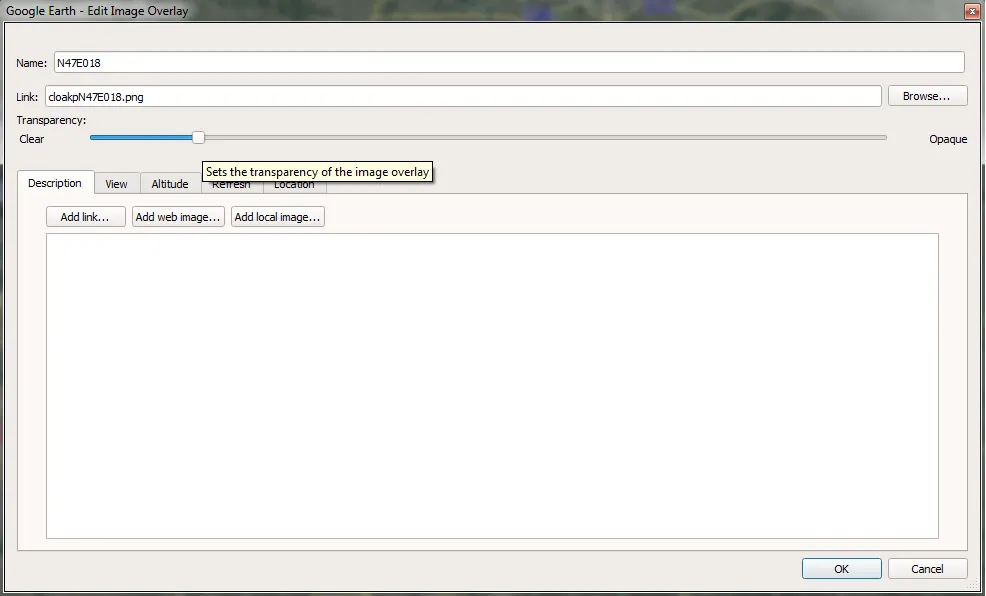
Now you need to repeat this task for every single layer down to the last one or at least for a few. Finally, you should get the whole “Visibility cloak” layer fainter in Google Earth (Pic. 22). Remember, that if your summit rises very high above the surrounding area it may take some time to load all pieces up (Pic. 21).
As you see above this operation may help you to determine the visibility cloak area, nonetheless, the panoramas are still merged. When you put 1 peak more, the situation looks worse (Pic. 23).
Normal conditions against the refraction issue
To be fair the case described above is better to use when we would like to put the visibility cloak of our summit generated for normal conditions against the refraction. Admittedly heywhatsthat.com provides the option to calculate the refraction (Pic. 24), but it refers to the path profile only.
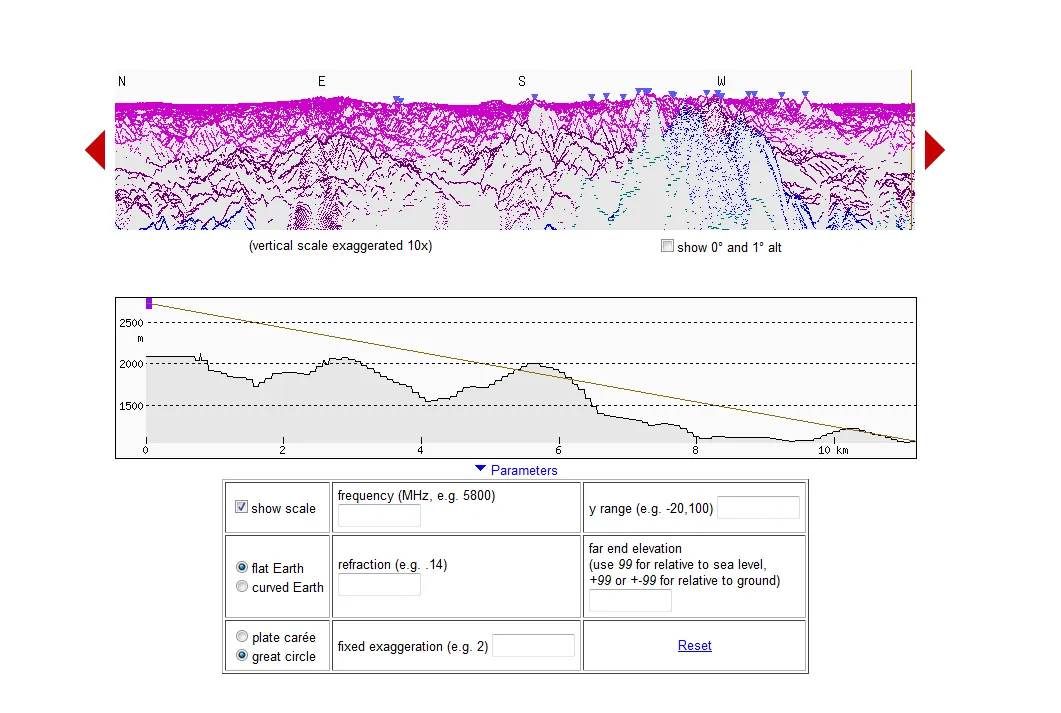
To make a simple calculation of the refraction and show it as another visibility cloak roughly from the same place you need to generate another panorama with the same summit as previously. One difference is, that you have to put a higher value rather than a normal altitude. Don’t exaggerate about it! Average refraction may lift up your summit around 100 m (it happens very rarely, that due to refraction peaks being up to 150 m higher than normal).
Let’s consider the Łomnica peak as an example. This is one of the highest summits in the High Tatras (Slovakia) with excellent viewshed towards the east. I prepared a couple of snips of the Łomnica visibility cloak both in normal conditions and refraction. Let’s see.


In any case, we need to take into consideration the local terrain features like vegetation and buildings likewise the overlaid of the hills situated on a line of sight. To make sure, that your visibility cloak will be more valid add up around 30 m to the initial altitude of your peak.
Writing this advice I would like to round off this article. In the 2nd part, I will show you more options for managing the multi-summit panoramas at Heywhatsthat.com.
Mariusz Krukar
Links:
1. Heywhatsthat.com – probably the oldest virtual panorama generator.
2. Ogleearth.com – a few words about the heywhatsthat.com panoramas
3. Heywhatsthat in GoogleMapsMania.blogspot.co.uk
4. Heywhatsthat – more fun with maps
5. What is the maximum range I can get?
Films:
Heywhatsthat – multimedia guide