
Nikkor 18-105mm f3.5-5.6 VR is it worth to have?
My adventure with Nikkor 18-105mm began when I was rushing to buy a new kit lens for my Nikon D5300 camera. It was around 2 weeks ago. A day earlier my wife hit the Nikkor 18-55mm f3.5-5.6 VR II accidentally making it diagonal on the front part of the lens. In effect, I was not able to adjust the kit to my photos, and one thing, that I could do was take photos manually.
Knowing that repairing the old one cost 60 GBP (at least in the Epsilon service shop) I have decided to buy a new one. Being in London that day I popped into the Cex shop in Euston and bought another one. I aimed at Nikkor 18-140 mm to use it in flightseeing without permanently changing the lens during the flight. I saw on board, that they have Nikkor 18-105 mm only. After a short test, I made a quick decision and bought it.
Having 2 days to give it back just in case I decided to test this lens and get to know all the pros and cons of it. As a result, I gave it back to the Cex shop 2 days later. Anyway, in this article, I would like to share my opinions & test results with you.
I took into consideration almost all issues, that have been raised with previous lenses. The 18-105 mm test was more comparable to my previous ones: Nikkor 18-55 mm f3.5-5.6 VR and Nikkor 55-300 mm f4.5-5.6 VR. Because during those days I had both Nikkor 18-105 mm and Nikkor 55-300 mm this test will be more focused on the comparison between those 2 lenses.
Nikkor 18-105mm f3.5-5.6 VR vs Nikkor 18-55mm f3.5-5.6 VR II
The first thing, that I would like to mention is distortion. I have not described it before, because I didn’t realize, that it may influence my pictures a lot. To be honest, making panoramic views by the Nikkor 18-55mm was really pointless (Pic. 1). I would like to mention, that I used to make panoramic views on 18 mm mainly.

Pic. 1 Distortion problem in the Nikkor 18-55 mm f3.5-5.6 VR II (18 mm): Black square – reference points, red ovals – distortion examples. The U.S. Highway No 26, near Riverton, WY, United States.
Let’s see how it looks in Nikkor 18-105 mm f3.5-5.6 VR. I have created 2 panoramic views on 18 mm (Pic. 2,3).

Pic. 2 Distortion problem in the Nikkor 18-105 mm f3.5-5.6 VR (18mm): Grey square – reference points, red ovals – distortion examples. Longstanton, Station Road, United Kingdom.
The aforementioned examples show the panoramic views, that have been stitched near the edges of the picture. In general, in the case of Nikkor 18-105 mm, it seems to be better. In another case, I prepared a view stitching the pictures closer to the middle of the picture. Unfortunately, it looks much worse.

Pic. 3 Distortion problems in the Nikkor 18-105 mm f3.5-5.6 VR (18mm) when stitching photos deeper: Grey square – reference points, yellow ovals – distortion examples. Longstanton, Park & Ride, United Kingdom.
As you can see above the stitched images are not useful at all. Both Nikkor 18-55 mm and Nikkor 18-105 mm are not capable of making good panoramic views without supporting software.
Let’s take a look at another feature – macro. Officially macro in Nikkor 18-55 mm doesn’t exist however I was able to make favorable photos of plants and insects. This issue is open and depends on your needs. you may say, that cropping the picture to make an object bigger is a joke. I can tell you, that they are fine. Everyone will have their own opinion about this. For me, the macro in 18-55 mm really works (Pic. 4).
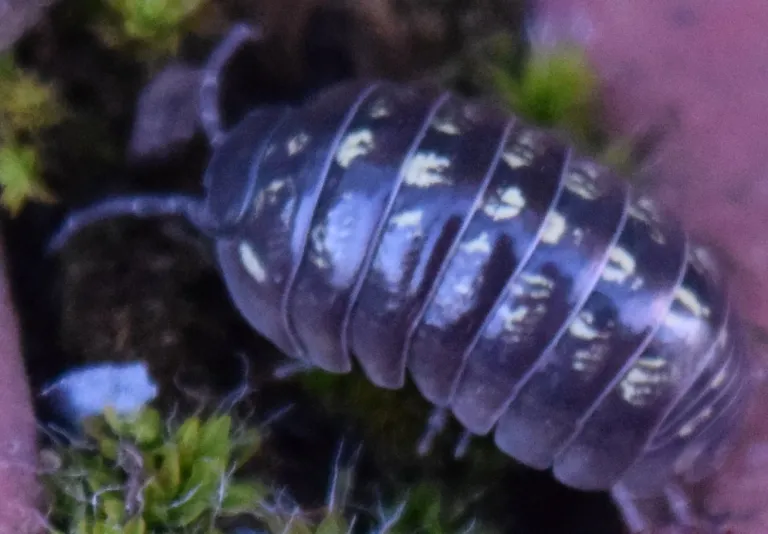
Pic. 4 Porceillo Scaber (17 mm length) crossing the Polytrichum commune “field” between the bricks, 55mm, 25 cm distance, picture cropped. The 25 m distance is the closest as you can gain by Nikkor 18-55 mm.
In contrast to Nikkor 18-55 mm f3.5-5.6 VR II the Nikkor 18-105 mm f3.5-5.6 can’t provide equal results. First of all the closest focus distance is 45 cm rather than 28 cm. In this case, even when using the higher focal length you won’t be able to make a good macro picture (Pic. 5-18).
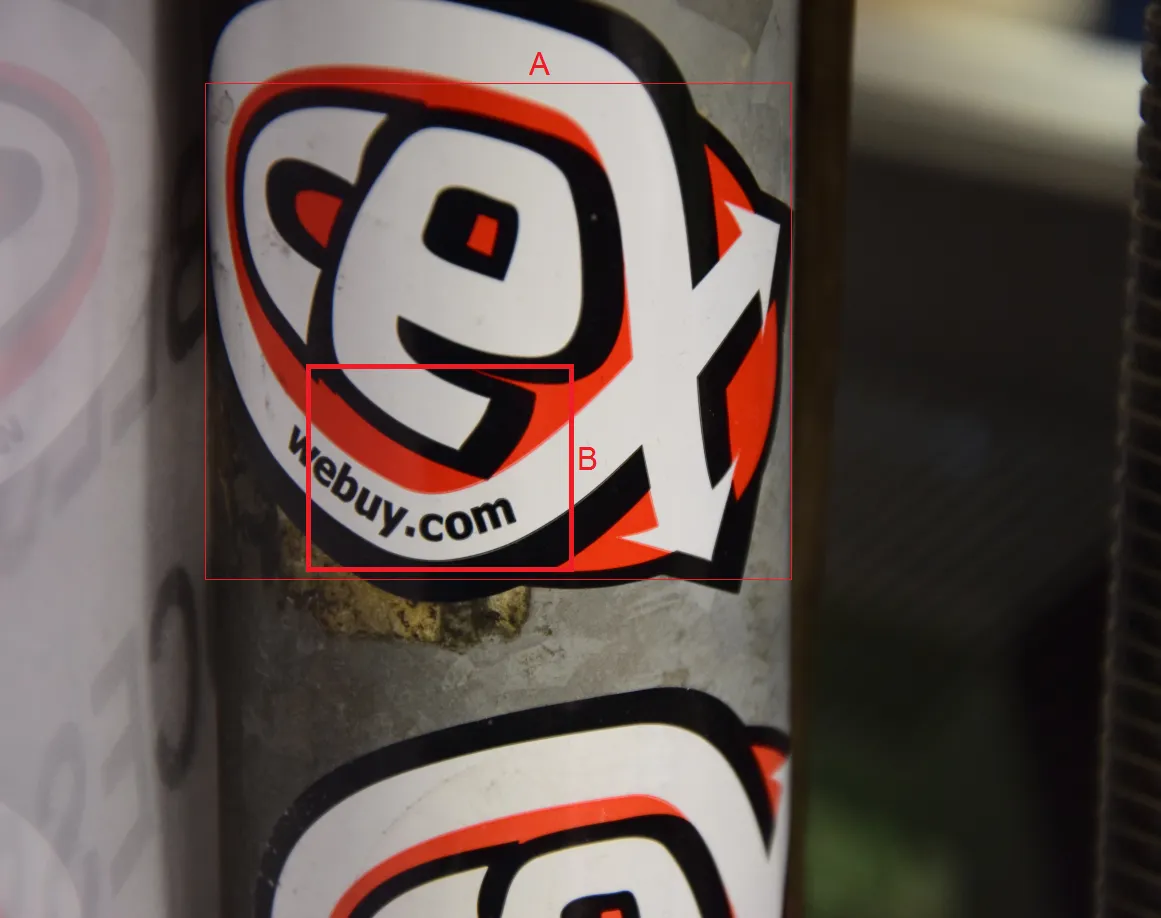

Pic. 5 – 7 Cropping the picture to receive a macro effect: 5 – Webuy.com sticker, 105 mm, distance 45 cm, 6 – A cropped picture, 7 – B cropped picture.


Pic. 8-9 Bella Italia voucher: 8 – 105 mm, distance 45 cm; 9 – Cropped image.
As it worsts the long distance is not the only problem. You may have struggled also with chromatic aberration, which strikingly interferes with your macro photos (Pic. 10-12) during unfavorable light conditions.


Pic. 10-12 Chromatic aberration in the photos made with the closest distance: 10 – normal photo 105mm, distance 45 cm, 11 – A cropped picture, 12 – B – cropped picture.
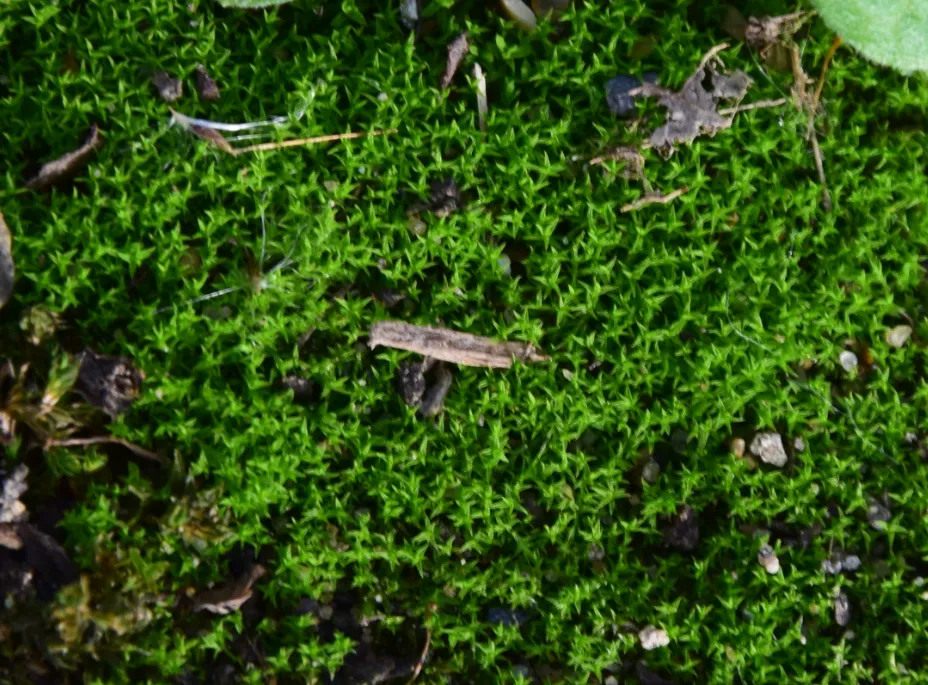
I can bring the best example to compare the macro both in Nikkor 18-55 mm and Nikkor 18-105mm using the pictures below (Pic.13-14). There are photos of Polytrochium Commune moss.

Pic. 14 The Polytrichum commune captured by Nikkor 18-105mm (105 mm, distance 45 cm).
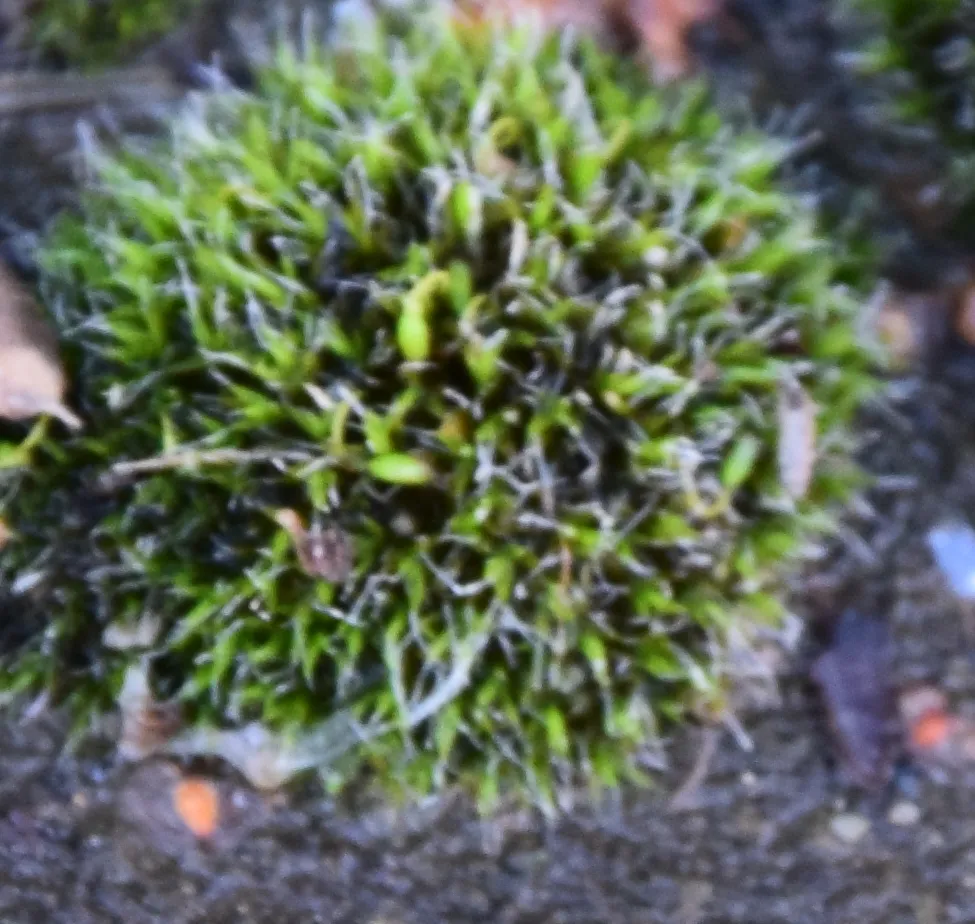
See below also other examples…


…while the wooden plank experiment…

Pic. 18 Macro in Nikkor 18-105 mm for 55 mm,70 mm and 105 mm.
As you may have noticed, the Nikkor 18-55 mm can provide far better macro effects than his cousin 18-105 mm.
In the next step, I focused on the zoom features. I compared the Nikkor 18-105 mm with Nikkor 55-300 mm. In this case, I think, that Nikkor 18-105 mm features slightly better quality than the other one. It can be seen in the photo quality, that has been attached below (Pic. 19-22).

Pic. 19 Comparison between Nikkor 18-105 mm and Nikkor 55-300 mm: upper image – 55 mm, lower image – 70 mm. As you can see, the left images are of better quality. Parameters: 1/125s, F.8-9, ISO 400. Images cropped, London, Gower Street.

Pic. 20 Comparison between Nikkor 18-105 mm and Nikkor 55-300 mm. Parameters: 1/60s, F8, ISO 400 (left) and 1/50s, F8, ISO 400, Images cropped, London, Gower Street.

Pic. 21 Comparison between Nikkor 18-105 mm and Nikkor 55-300 mm: upper image – 55 mm, lower image – 70 mm. Images cropped. Parameters: 1/30s, F7-8, ISO 400. London, Centre Point.

Pic. 22 Comparison between Nikkor 18-105 mm and Nikkor 55-300 mm. Images cropped. Parameters: 1/40s, F7.1, ISO 400. London, Centre Point.
There is an example photo, that led me to compare two Nikkor lenses. The parameters are approximate because photos have been taken in Landscape mode.
In my last step, I will show you how the Nikkor 18-105 mm f3.5-5.6 VR works in night conditions. I compared it with Nikkor 55-300 mm f4.5-5.6 mentioned above. It’s a clue, that Nikkor 18-105 mm should work better because of the aperture. See it in the photos listed below (Pic. 23-25):

Pic. 23 Comparison of Nikkor 18-105 mm and Nikkor 55-300 mm in night conditions. Images cropped. Parameters: left; 1/15s, f5.6, ISO 6400; right; 1/6s, f5.6, ISO 1600. London, Centre Point.

Pic. 24 Comparison between Nikkor 18-105 m and Nikkor 55-300 mm for time 1/40s, ISO 640. London, Oxford Street.
In general, Nikkor 18-105 mm is able to make better shots than Nikkor 55-300 mm (considerating from 55 to 105mm). Nikkor 18-105 mm f3.5-5.6 VR works fine in the night conditions. For smaller focal lengths it provides a better aperture unlike higher aperture, where Nikkor 55-300mm prevails.
See the examples of aperture for a certain focal length listed below:
55 mm – f4.6 (33-500), f4.8 (18-105)
70 mm – f4.6 (33-500), f5.0 (18-105)
105 mm- f4.8 (33-500), f5.6(18-105)
Now is the time for some photo examples taken by Nikkor 18-105 mm f3.5-5.6 VR:

Pic. 25 London, Oxford Street before Christmas; 21 mm, 1/40s, f3.8, ISO 6400.

Pic. 26 Autumn birch (Betula);18 mm, 1/250s, f3.6 ISO 400. Longstanton, Station Road.

Pic. 27 London University College, Gower Street; 18 mm, 1/30, f7.1, ISO 4000.

Pic. 28 London BT Tower seen from the Tottenham Court Road; 42 mm, 1/400s, f11, ISO 400.

Pic. 29 London, the Tottenham Court Road with Centre Point skyscraper in the background; 18 mm, 1/125s, f9, ISO 400.

Pic. 30 London, the Gower Street seen from Torrington Place; 18 mm, 1/40s, f7.1, ISO 400.
In my case, the Nikkor 18-105 mm f3.5-5.6 VR was not sufficient to use. You must make your own decision. I hope, that all the pros and cons, that I have shown in this short article will help you choose a lens, that you think about.
Mariusz Krukar
Links:
- Nikkor 18-105mm f3.5-5.6 VR – Ken Rockwell review
- Nikkor 18-105mm f3.5-5.6 VR – optyczne.pl (Polish)
- Nikkor 18-55mm vs Nikkor 18-105mm
- Nikkor 18-105mm vs Nikkor 55-300mm in Lenshero.com
Your 55-300 looks unusually soft.
While I no longer have the 55-300 I once did, I do recall it being significantly better at all common focal lengths in every aspect, vs the 18-105. And I certainly don’t recall such soft photos at its wide end – maybe at 300, where it is by design [limits] not as good, but definitely not at 55mm, where it’s strongest.
If you haven’t already, check your 55-300 at 55 / 70 / 100 / 200 vs 300. If it’s not substantially sharper at all focal lengths ≤200, than it is at 300, then it might be a bad copy.
Hi, see more details about my Nikkor 55-300 here
https://mkgeoblog.wordpress.com/2017/05/18/nikon-af-s-nikkor-55-300mm-f4-5-5-6g-ed-vr-is-it-worth/
In my case the worst pictures are taken by 200-300mm and I am wondering why.