
Long lens photography from the plane – how it works?
I really like to snap remote objects and mountain outlines. Especially since I got the new telephoto lens – Nikon AF-S Nikkor 55-300mm f4.5-5.6 ED VR. Covering the distant sights from the ground is not only one option, but that may also give you a lot of positive feelings. You can also enjoy a much bigger viewshed from the plane. You need favorable weather conditions and an appropriate position “quite” close to mountains (Pic.1). The airplane altitude, is around 10000 m.a.g.l. gives you a viewshed up to approximately 360 km ahead! (Pic. 1) Taking into account, that some mountains are higher than the surrounding area, some lines of sight may be much more extended (Pic. 2). However, there are only mathematical patterns. Practically atmospherical conditions take hold and calculated viewshed doesn’t guarantee the real possibility of view.
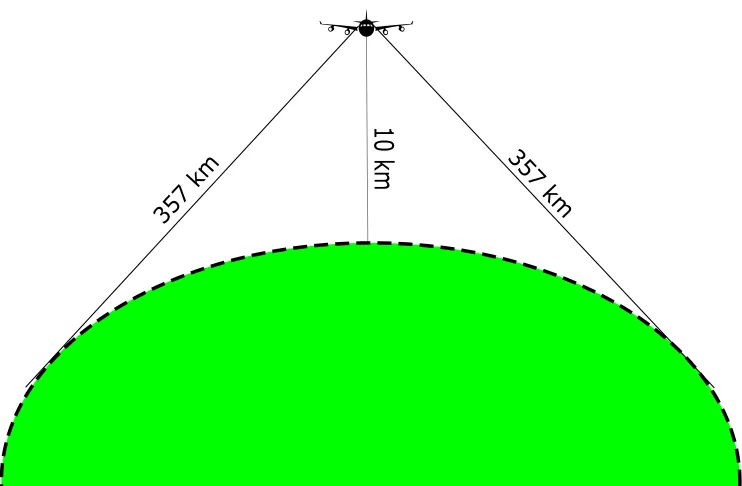
Pic. 1. The typical altitude of flight – 10 km gives you an opportunity to see the area 357 km ahead.
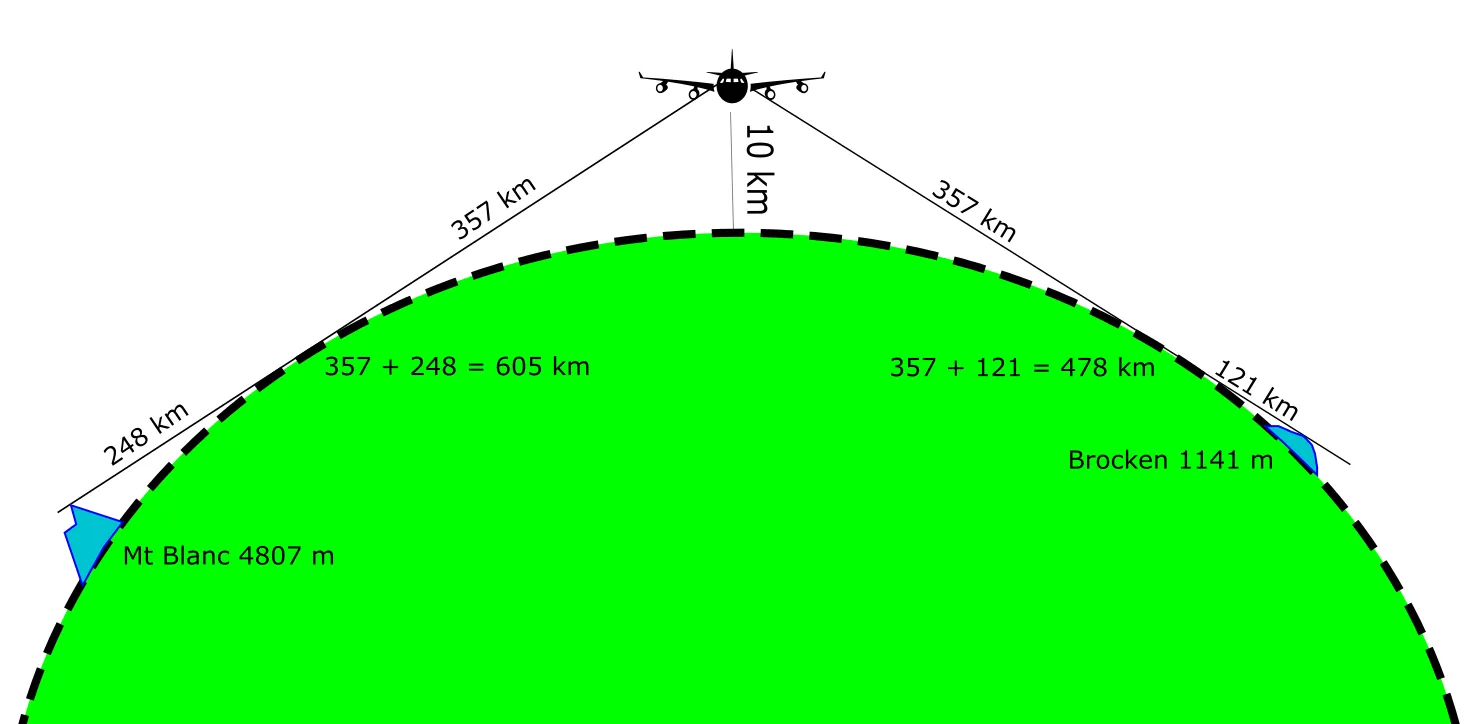
Pic. 2. From the typical altitude of the plane, you can see very far objects, located even a few hundred km from the plane.
Moreover, the pic. 2 represents a simplified pattern only, because not always plane is flying above sea level. Anyway according to this graph as I said above flightseeing gives us a long-range viewshed.
Let’s take a look at the photography conditions when being on the plane. More than a year ago I said a few words about taking the picture from the middle of the plane. However, I took into account only planes like the Boeing 737-800, which is 6 rowing planes. Today I would like to say more about practicing long lens photography from the plane including the photography from the middle of the 9 rowing plane.
First I would like to give the answer for taking the picture in wide-body aircraft with 8 – 11 seats across.
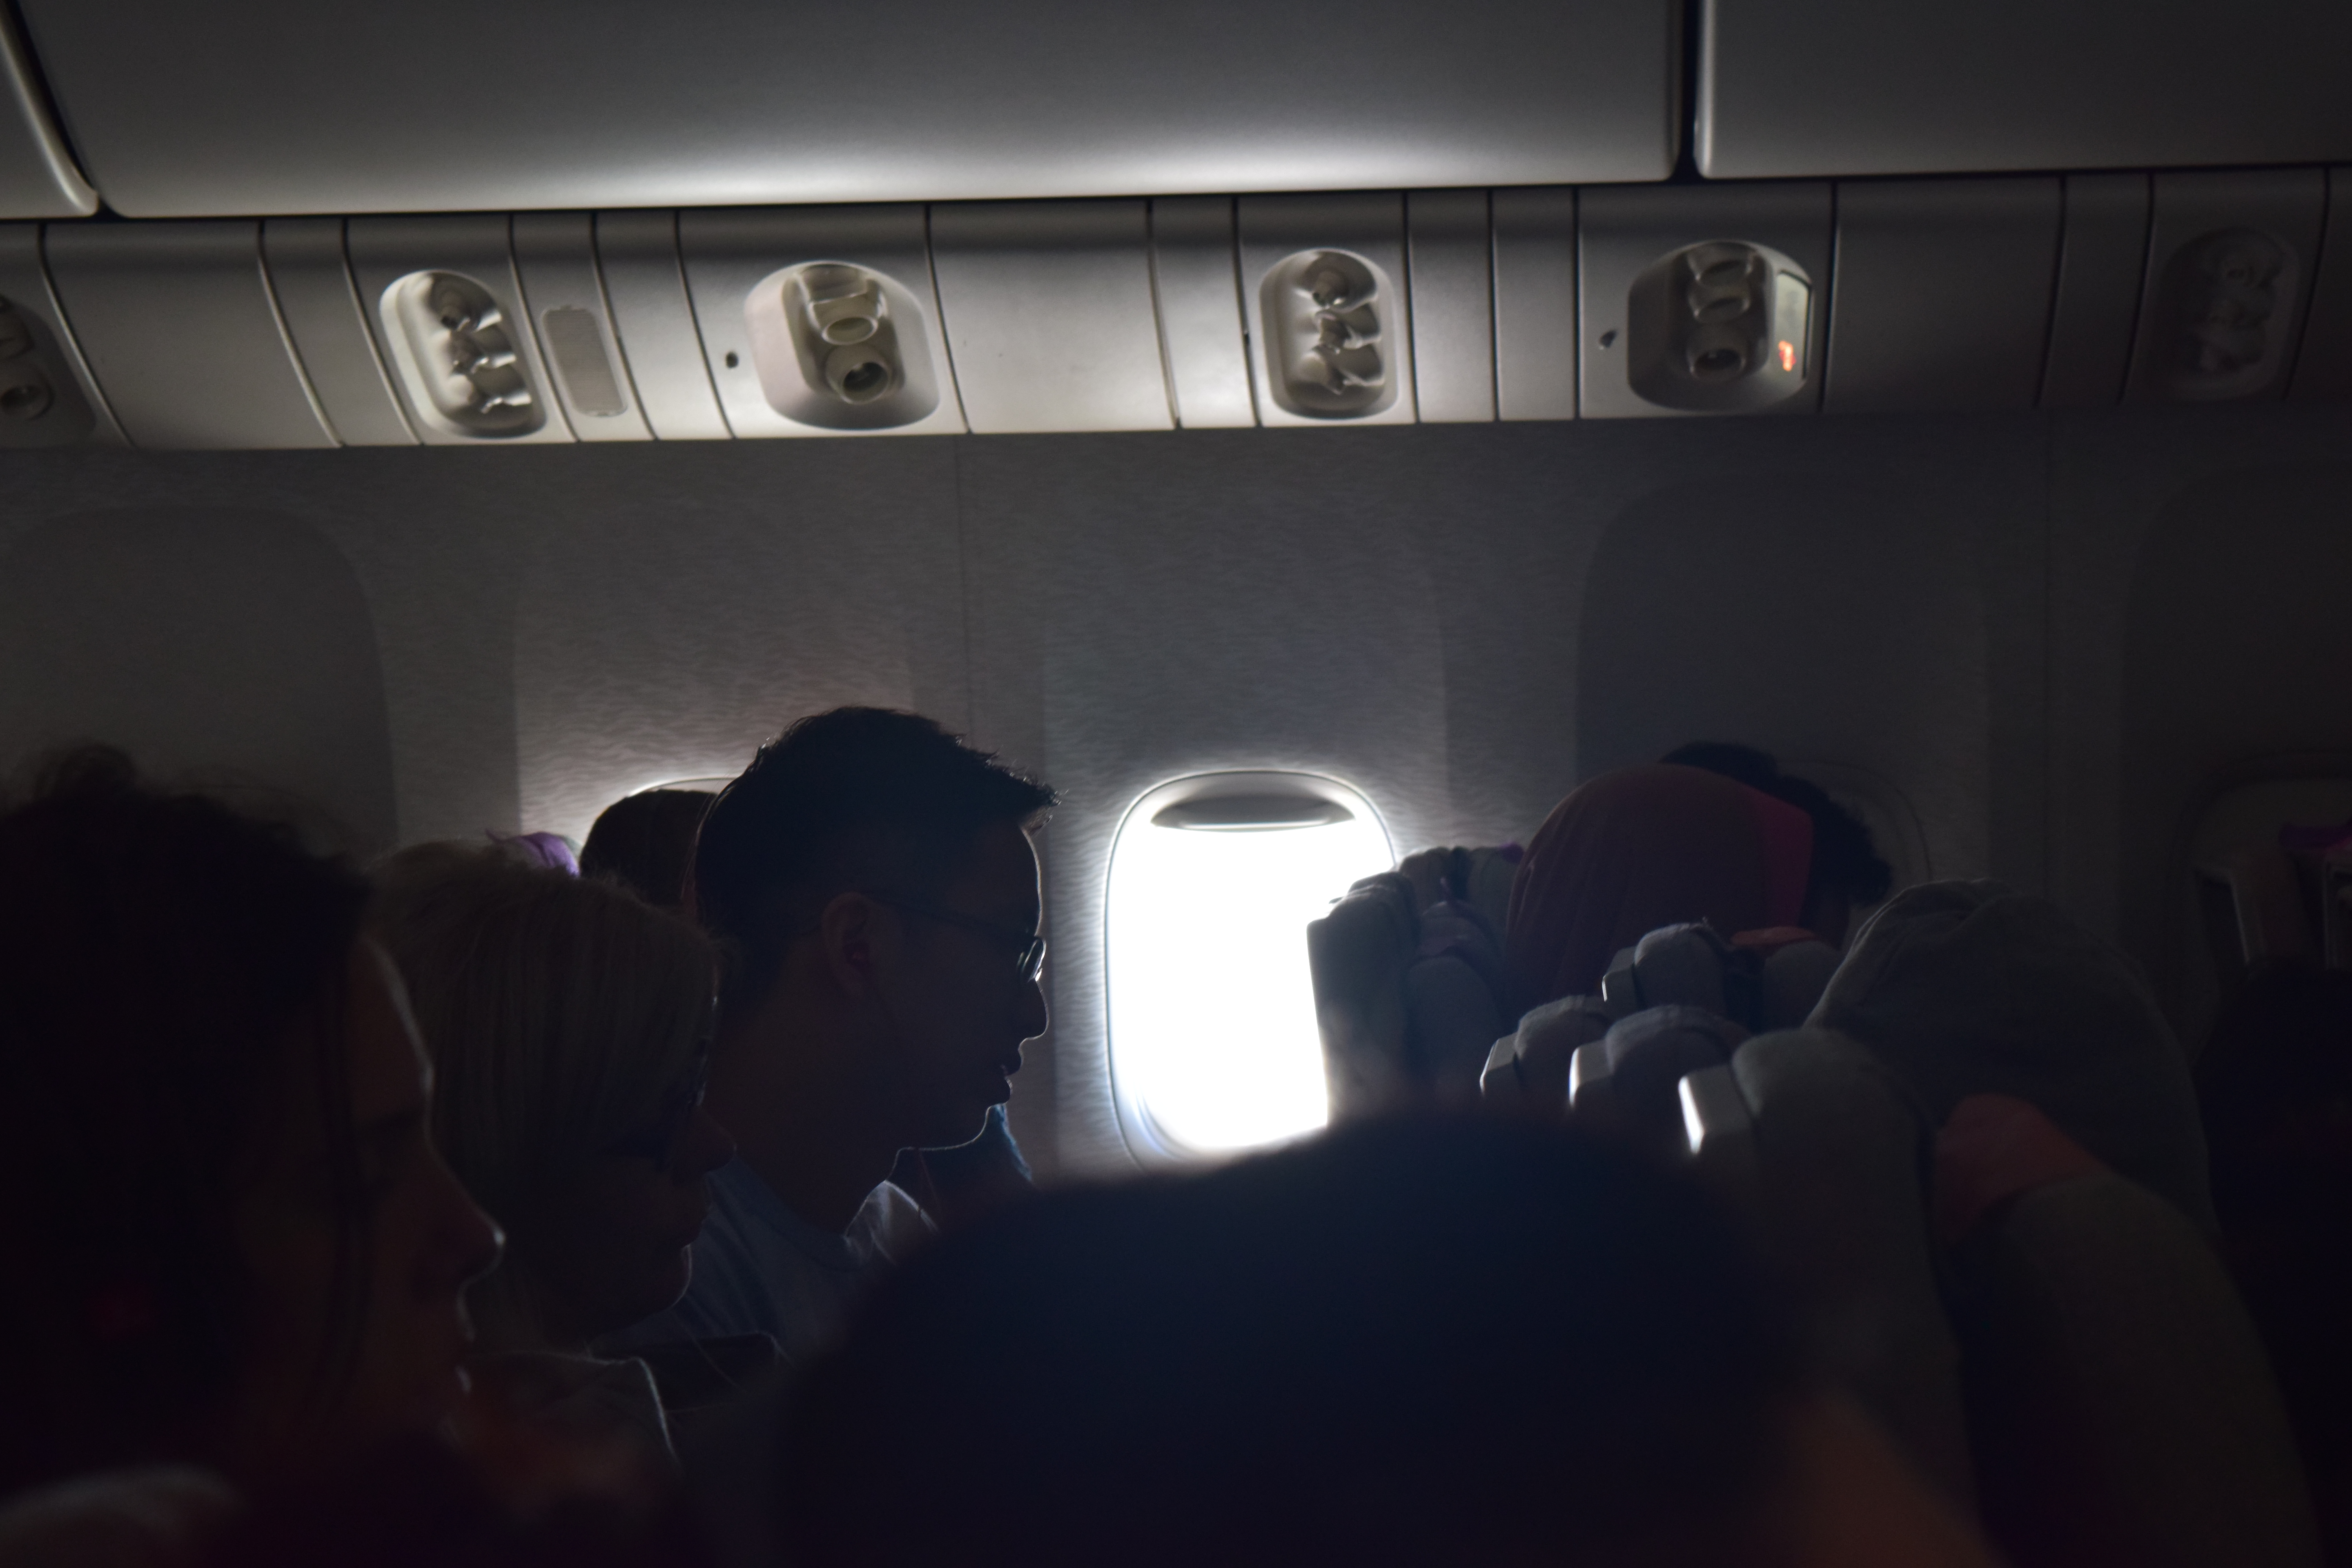
In twin-aisle aircraft is much harder to take a picture from the middle. Your view through the window is confined only to a narrow-angle. In this case, you are not able to see any details outside aside from the closest and the most prominent clouds or aircraft turns (Pic. 3 – 5).

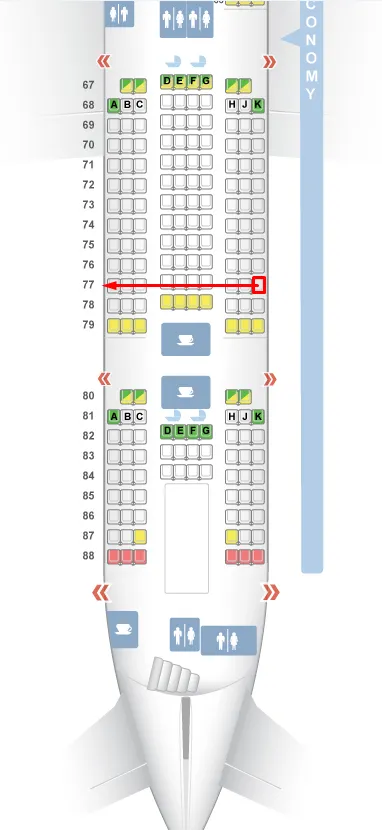
Pic. 3. Opportunites to flightseeing in wide-body aircraft: A (red) – view through the window from seats in row A; B (orange) – view from the seat in row B; C (yellow) – view from the seat located in row C; D-E (green) – view from the seat in inner row D or E, behind the aisle.
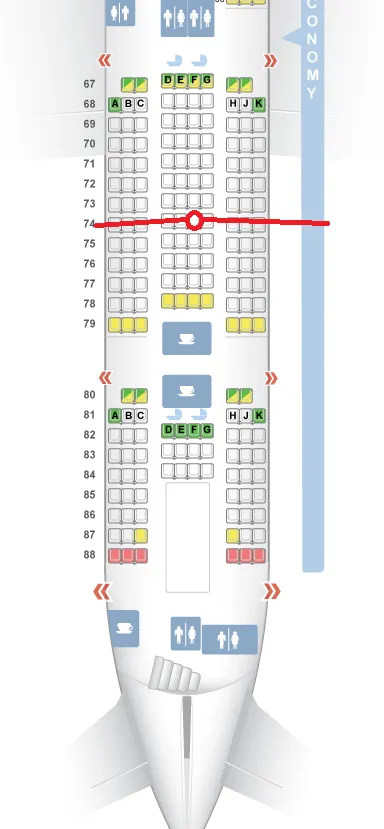
Pic. 4. The example of a seat located in the middle of a wide-body aircraft. The Red line shows one possible angle of view (seatguru.com).
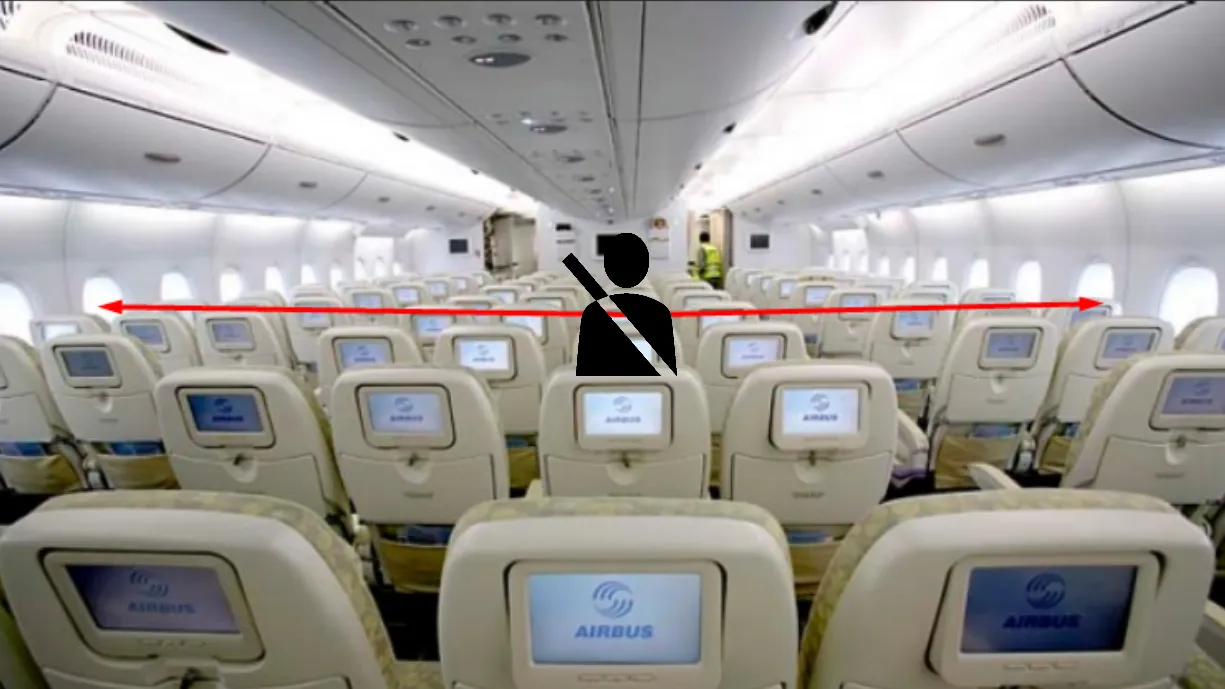
Pic. 5 When sitting in the middle rows flightseeing is not possible. You have only a narrow-angle view (red arrows). Even if some view is possible at all it can be obstructed by other passengers, that are looking through the window or sleeping.
Seats between the aisles are the worst and flightseeing is impossible from there. If some view is available at all, a bare improvement can be done when using long lenses. Let’s consider a few examples below.
First I would like to show you using long lenses in flight for the opposite part of the plane (Pic. 6 – 8).
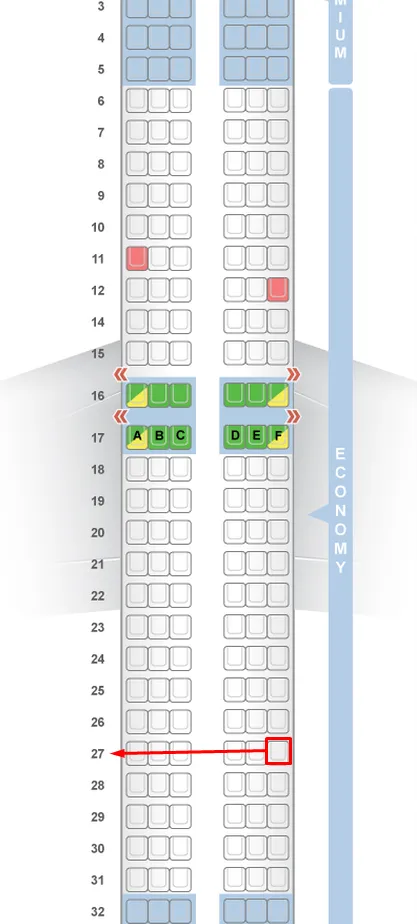
Pic. 6 My seat (red rectangle) during the flight from London (STN) to Toulouse (TLS) by Ryanair, FR 295. The red arrow shows the direction of my flightseeing (opposite window) (seatguru.com).

Pic. 7,8 View in the opposite window. 7 – normal, 55mm, 8 – cropped picture.
As you may have noticed in the cropped picture 8 the sharpness is not very good. This is an important thing, that we need to work out doing this kind of photography. Bear in mind, that this is hard. After a few attempts, I got a quite sharp photo (Pic. 9 – 10). Unfortunately, this sharpness will never be perfect, but I will tell you later about it.

Pic. 9,10 – View in the opposite window: 9 – normal, 200mm; 10 – cropped picture.
Once the opposite window is clear you are very lucky! Most of the time those windows are obstructed by passengers, who are watching something, sitting, or sleeping. However, It doesn’t sound, like you will not achieve your goal! Especially when using a longer lens (Pic. 11, 12).

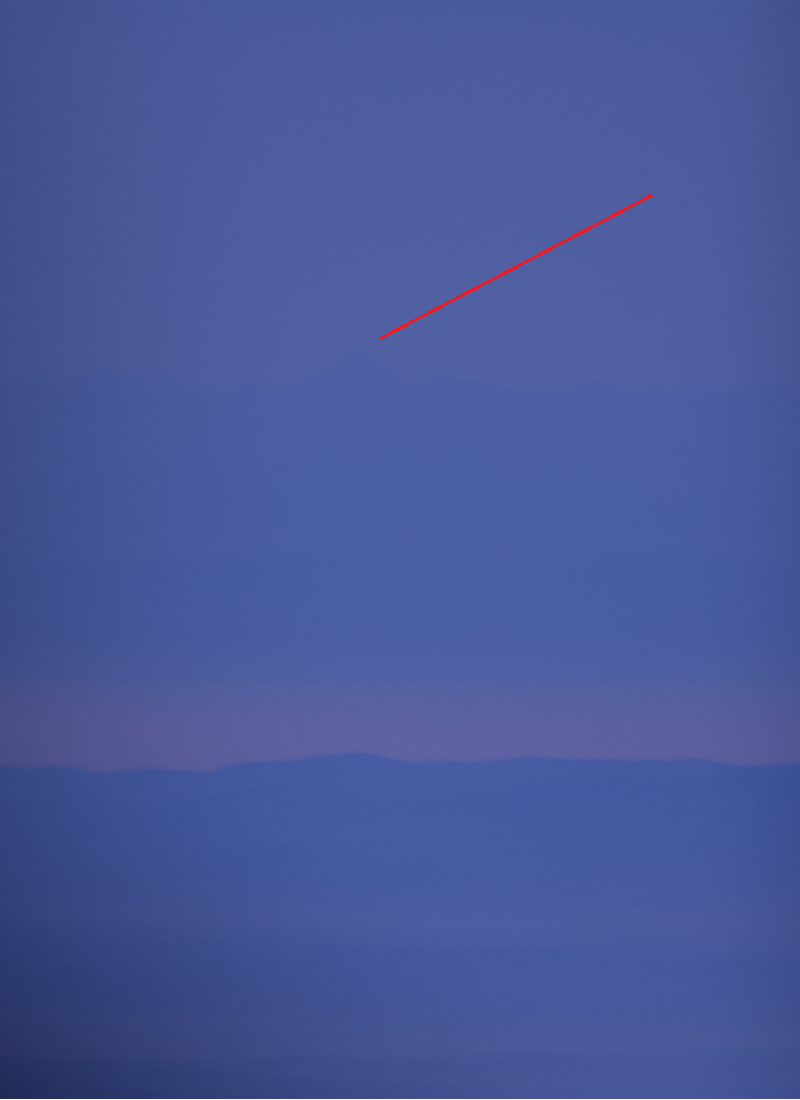
Pic. 11, 12 The Puy de Dome volcano in the Massif Central seen from the aircraft (FR 295 flight STN-TLS): 11 – normal, 300mm, 12 – a cropped picture with the red line, that shows the Puy de Dome volcano (1465m.a.s.l.) peak from around 160km distance.
When I was traveling by Airbus A380-800 from Kuala Lumpur to Dubai flightseeing through the opposite windows was not possible at all. Even when I used a long lens (Pic. 13 – 17).
Pic. 13 My seat during flight EK 345 (KUL-DXB) and attempts to shoot the view from the opposite window (seatguru.com).
Pic. 14 First attempt – the picture is too bright. I can’t see any details in the window, 55 mm.
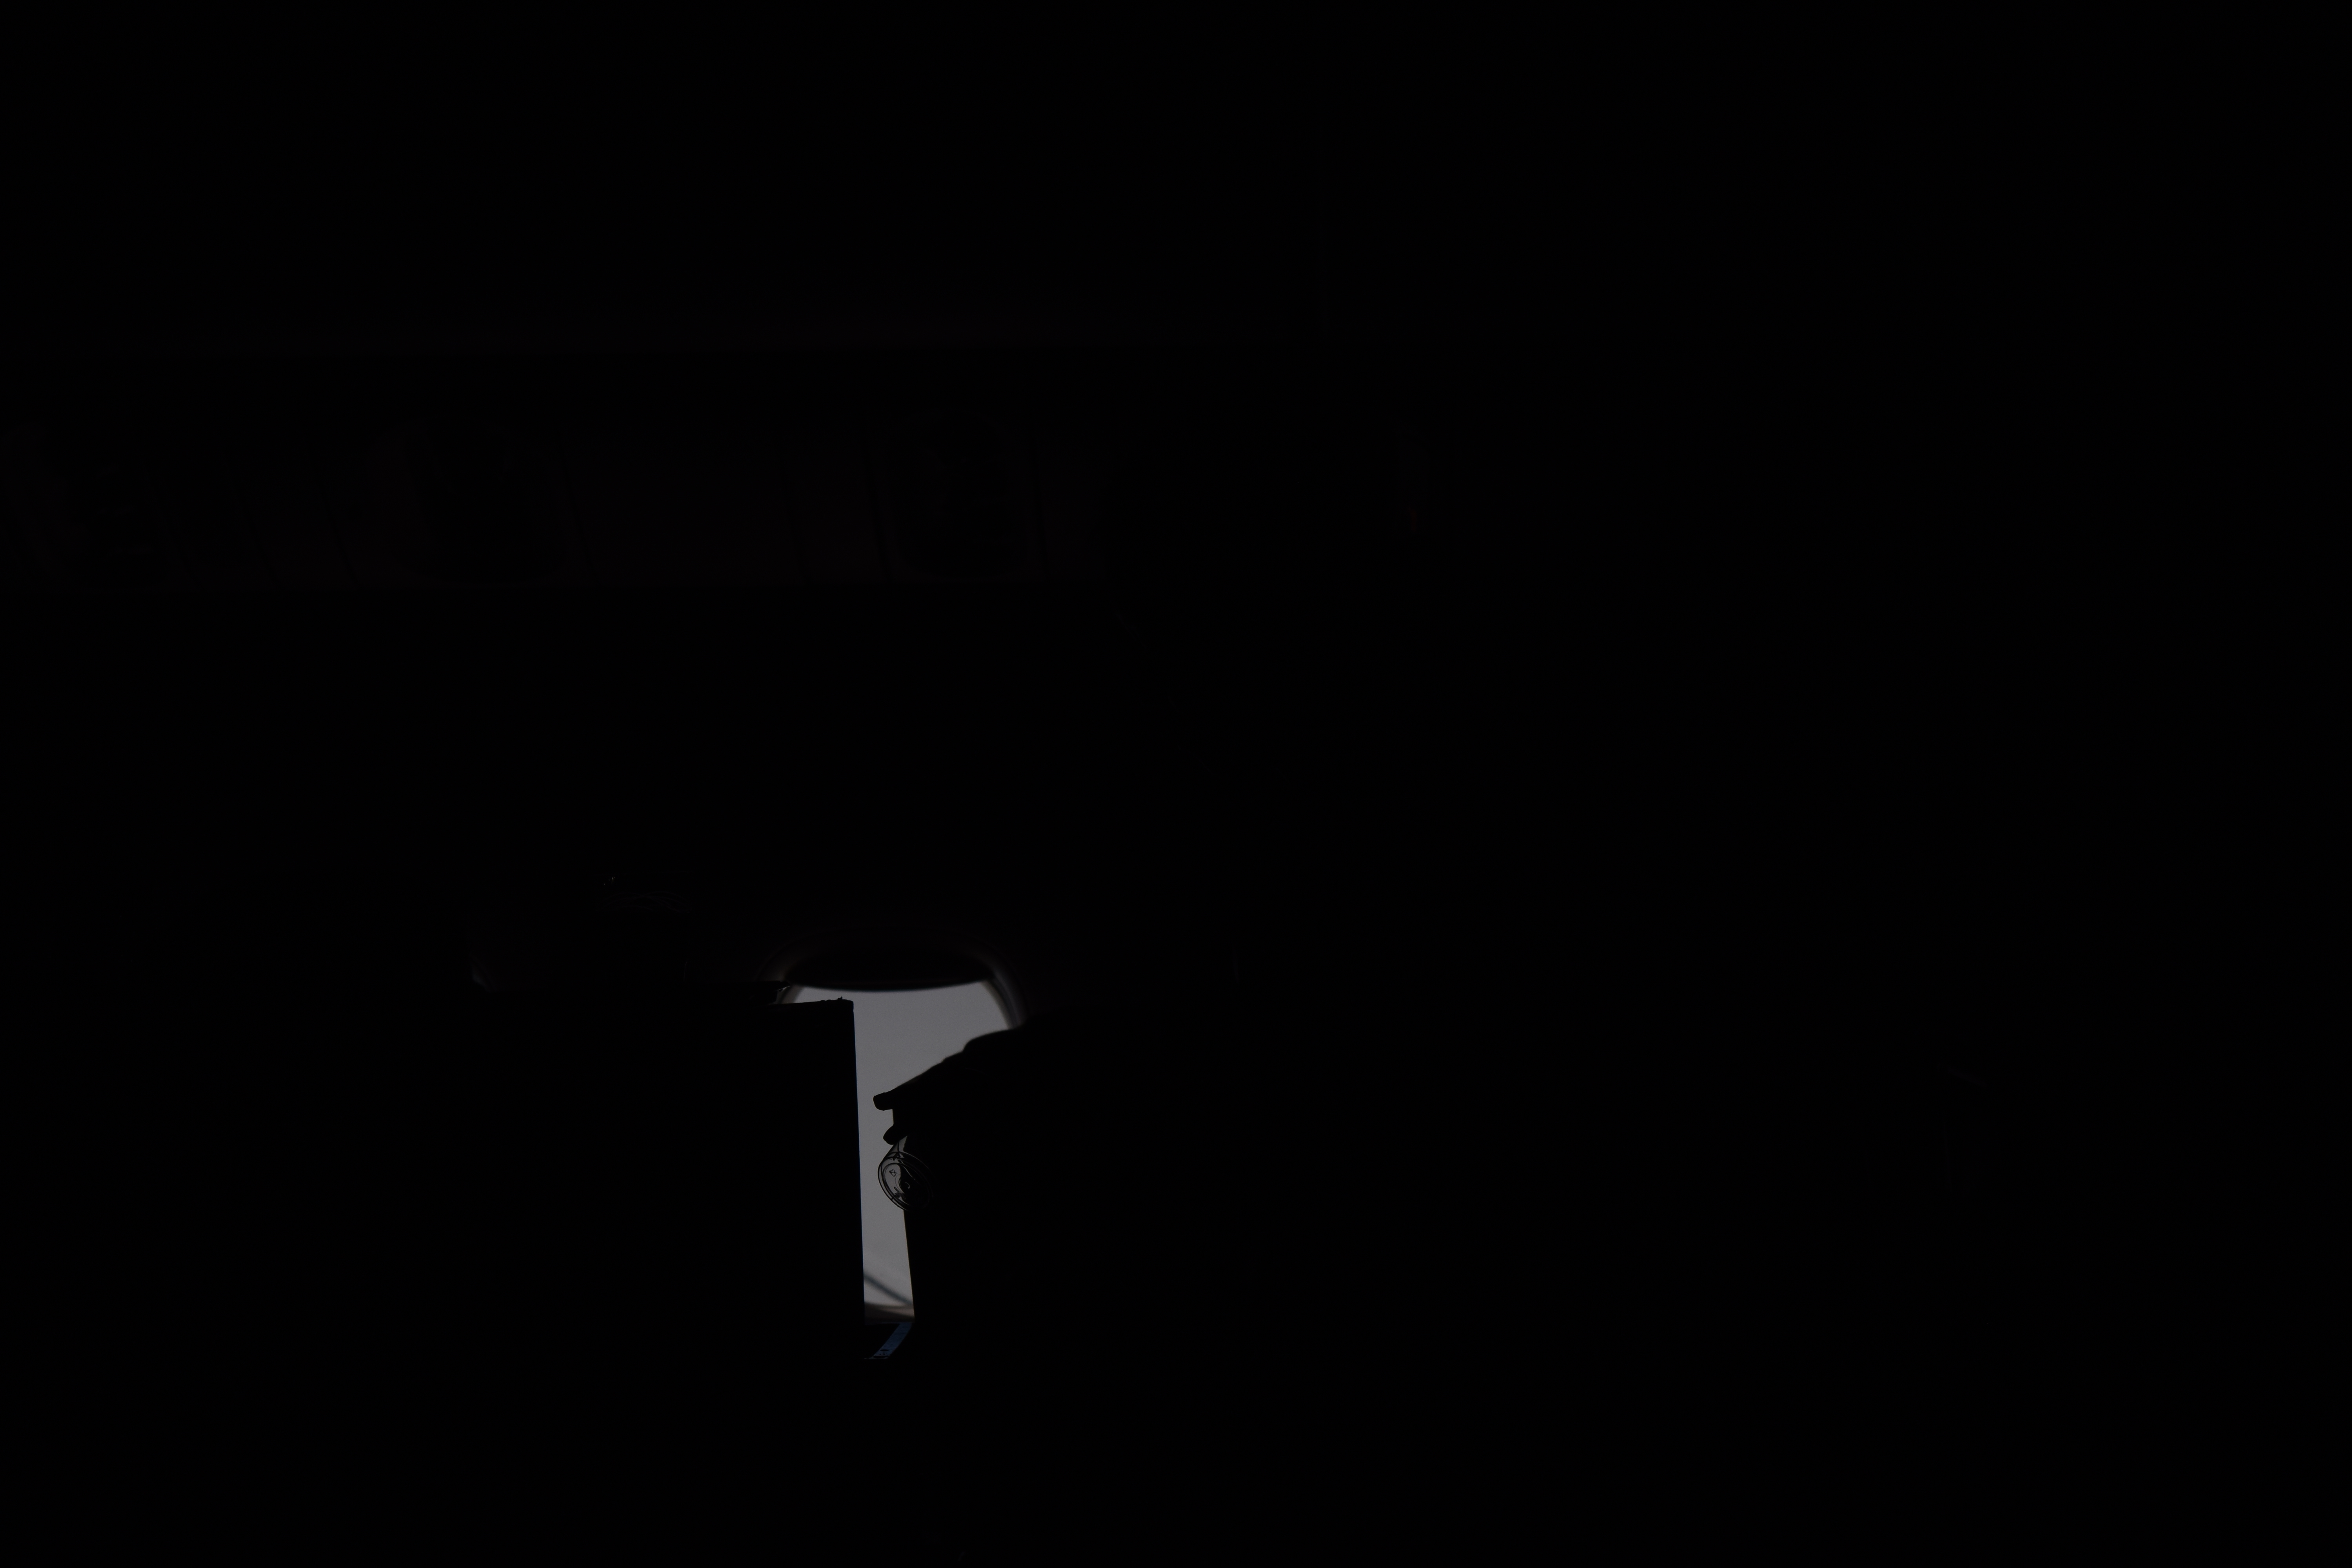
Pic. 15 Second attempt – I have got proper picture parameters, however, the zoom is too small; 55mm, 1/4000s, f5.6, ISO 160. Moreover, the opposite window is mostly obstructed.

Pic. 16, 17; 16 – Third, last attempt. I used the 200mm lens to shoot the view from the opposite window. Unfortunately, I’ve got nothing. Possibly due to clouds. The mostly obstructed window didn’t give a lot of views and thereby a space for cropping the picture; 17 – cropped picture – a very faint and featureless view with very poor sharpness.
Pic. 15 – 17 shows exactly the issues, that I raised earlier for Pic. 3 – 5. In the case of wide-body aircraft, you have only one line of sight, that almost always can be blocked by others. On top of that, you have to adjust the brightness of your picture. To distinguish the external view from the fuselage is good to make your picture as dark as possible. In general, everything says, that flightseeing in this way is not possible even when you are sitting in the middle of a wide-body aircraft.
In another part of this article, I would like to say more about the long lens photography from the plane itself. I found, that the longest zoom lens cannot be used in flightseeing. The reason lies in the window glass’s quality.
Basically, the aircraft windows are made from plexiglass. This material is light and relatively strong and you can see clearly through it. However, the major drawback of this is crazing (hairline cracks on the surface of the material), which is caused by temperature, stress, dirt, and UV exposure. Those cracks are the best visible with frost when flying at high altitudes (Pic. 18).
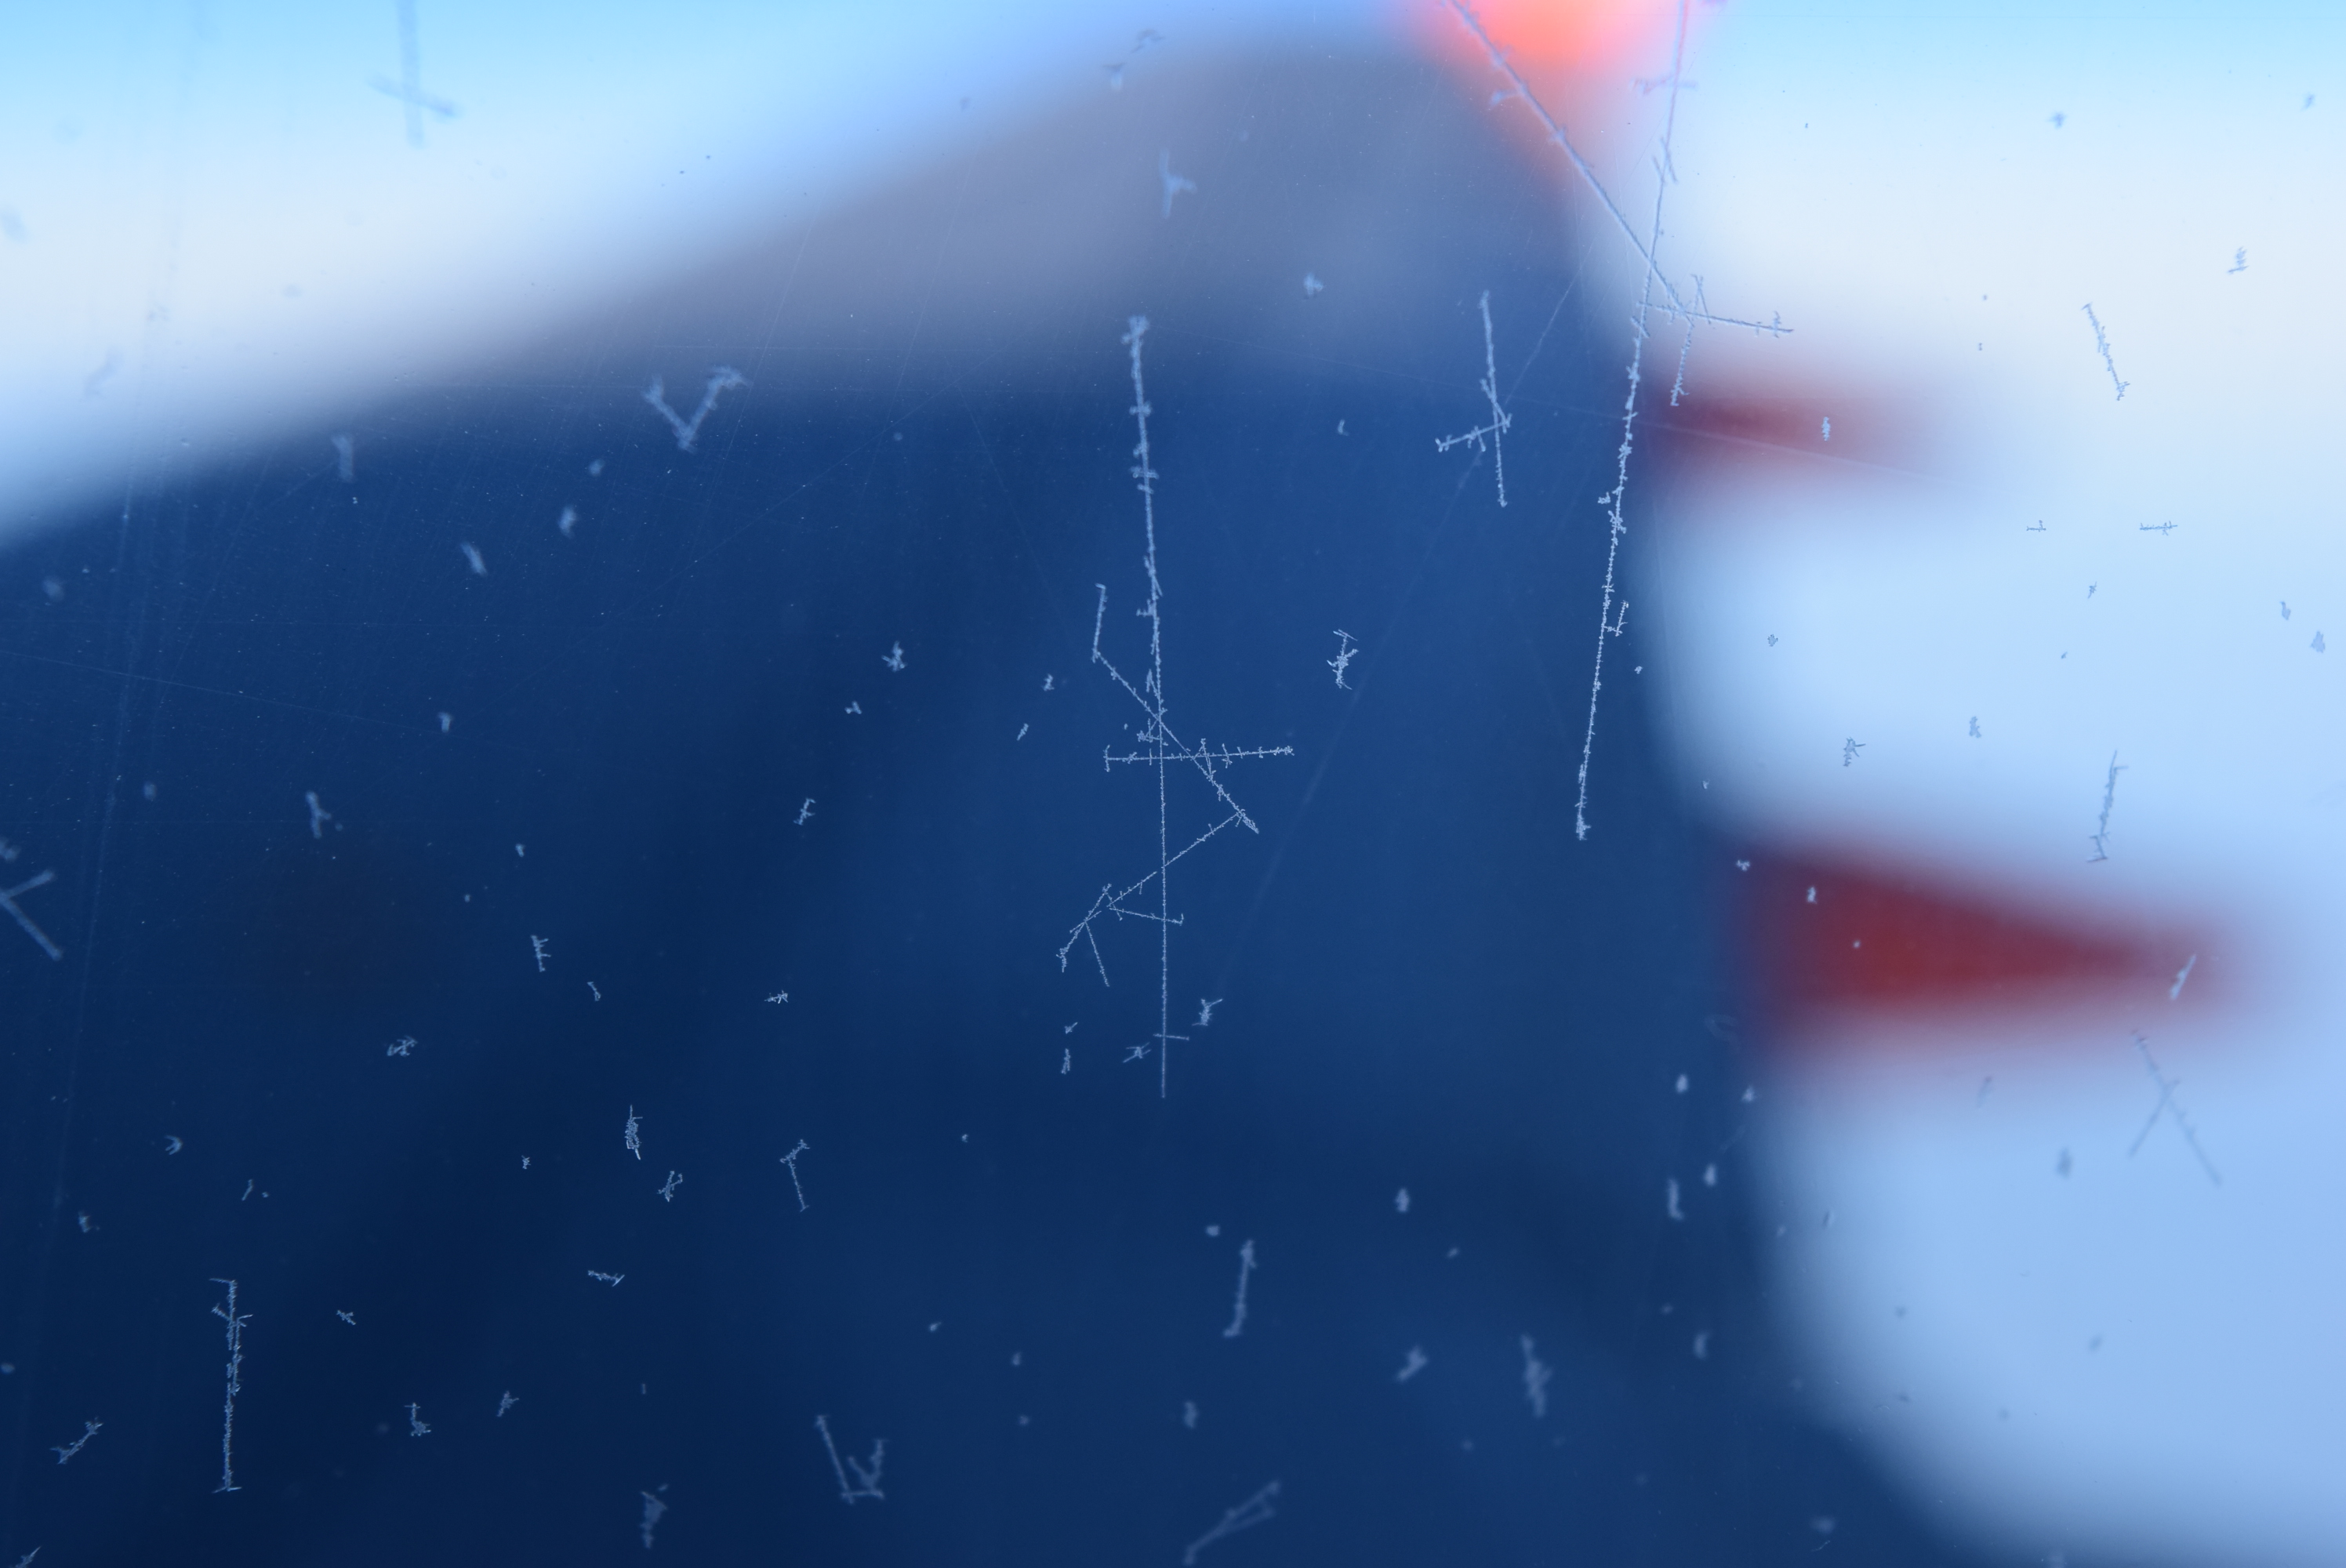
Pic. 18 Plexiglass, which is a basic element in the aircraft window. Due to long exploitation, some cracks are visible. Many of them are frosted during the flight.
This is one of the reasons, that interfere with the long lens photography during the flight. Those plexiglasses are featured with decent optic properties, but a lot of crazings bring the photo sharpness down.
Another one arises out also from the window design. The aircraft windows are multiple layers thick (Pic. 19).
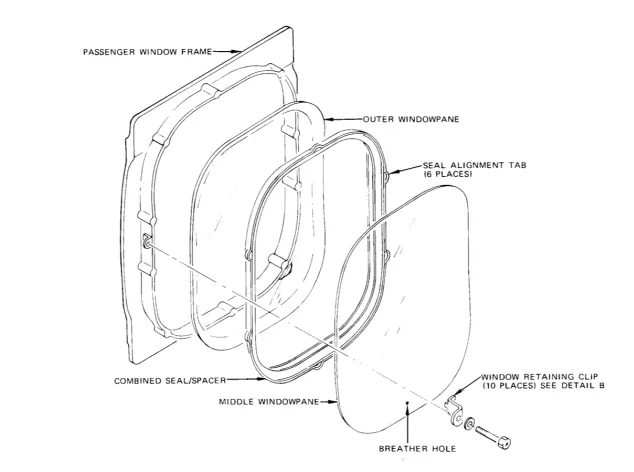
Pic. 19 Typical aircraft window elements graph (aviation.stakexchange.com).
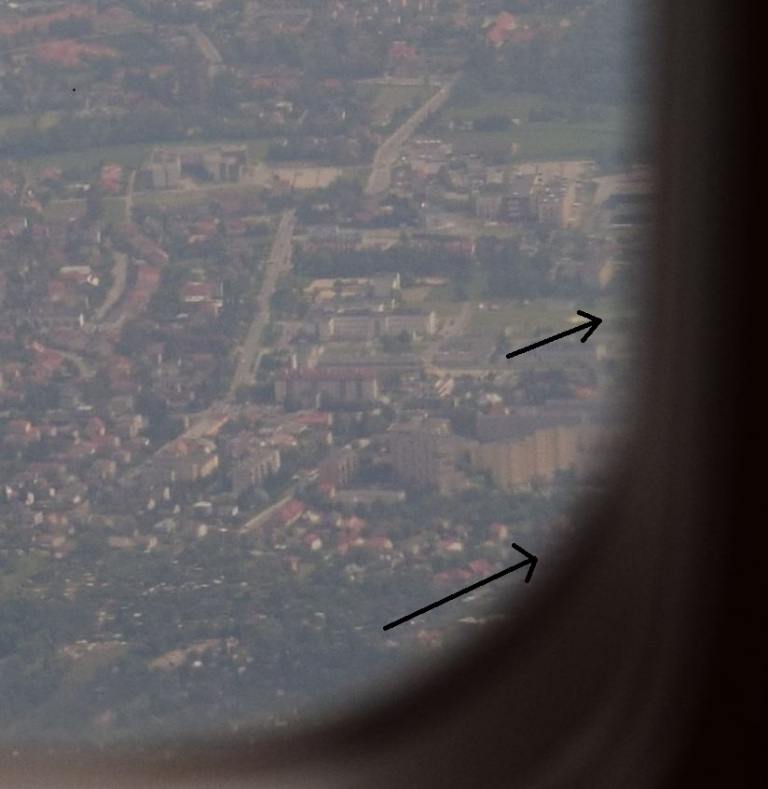
The side facing the passengers is a plastic sheet with the lowest optic quality. Moreover, this sheet is not uniform, and somewhere on the window, there are “lines” or even “areas”, where this window layer has been integrated (Pic. 20, 21).
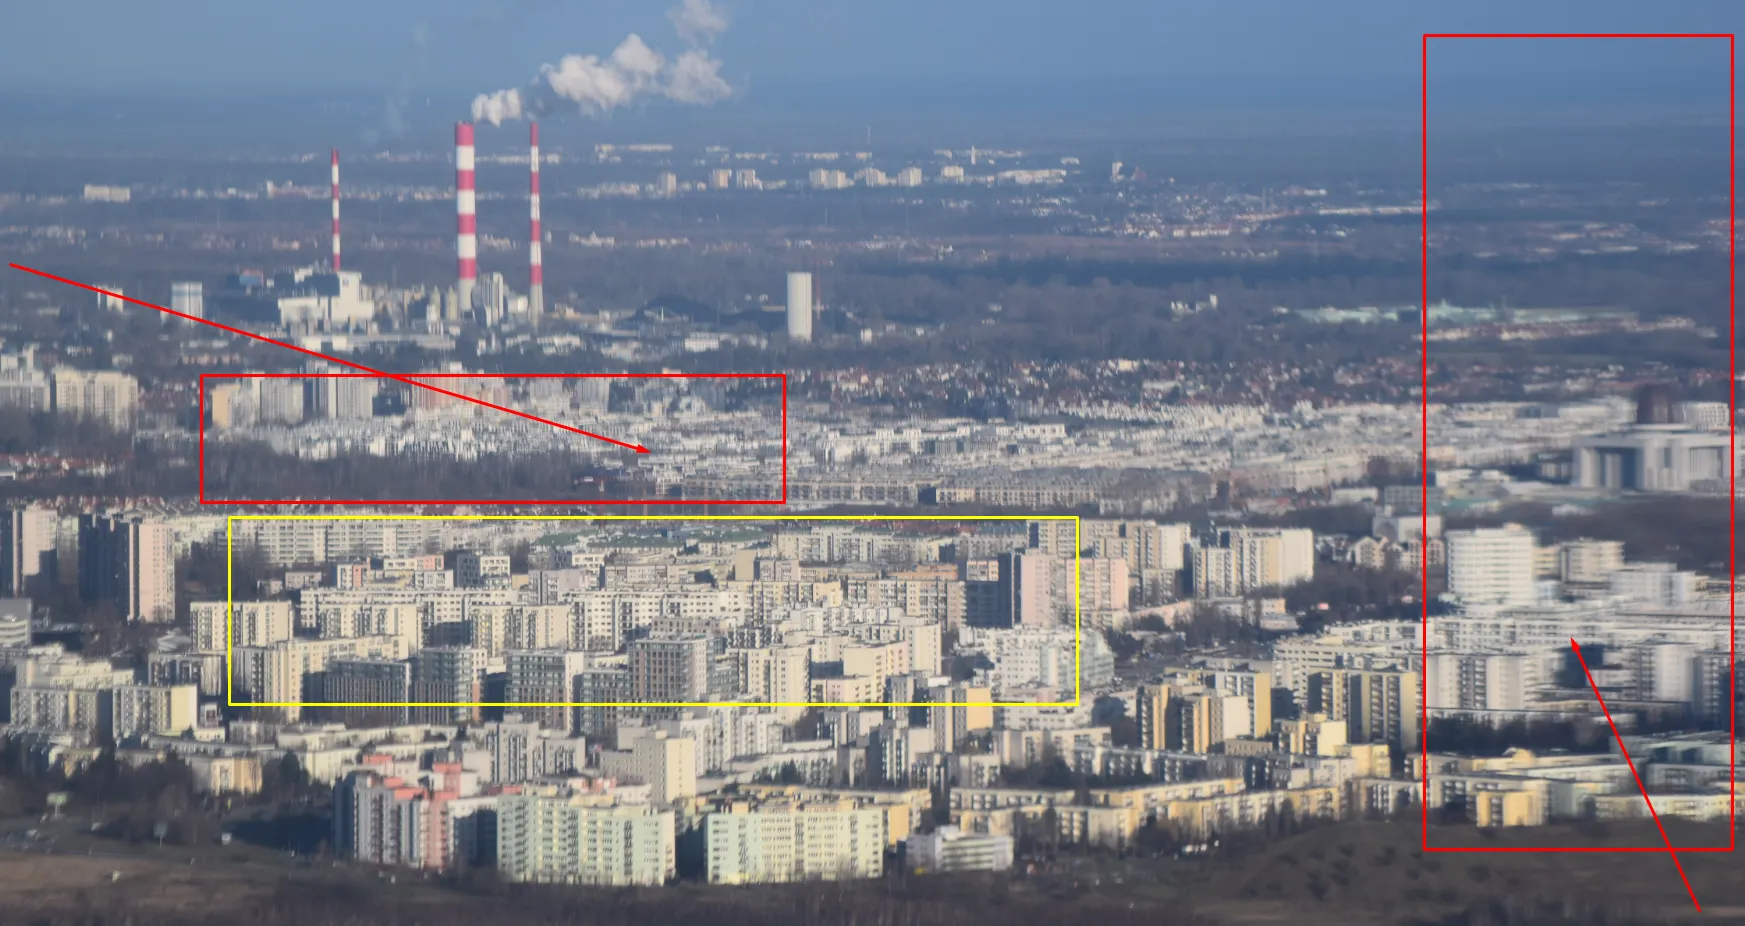
Pic. 20 A good example of nonuniformity is the optic quality in the aircraft window. Red rectangle areas are the worst and those parts of the image are really noisy unlike to yellow marked area, which is the sharpest in the picture, Warsaw, Poland.
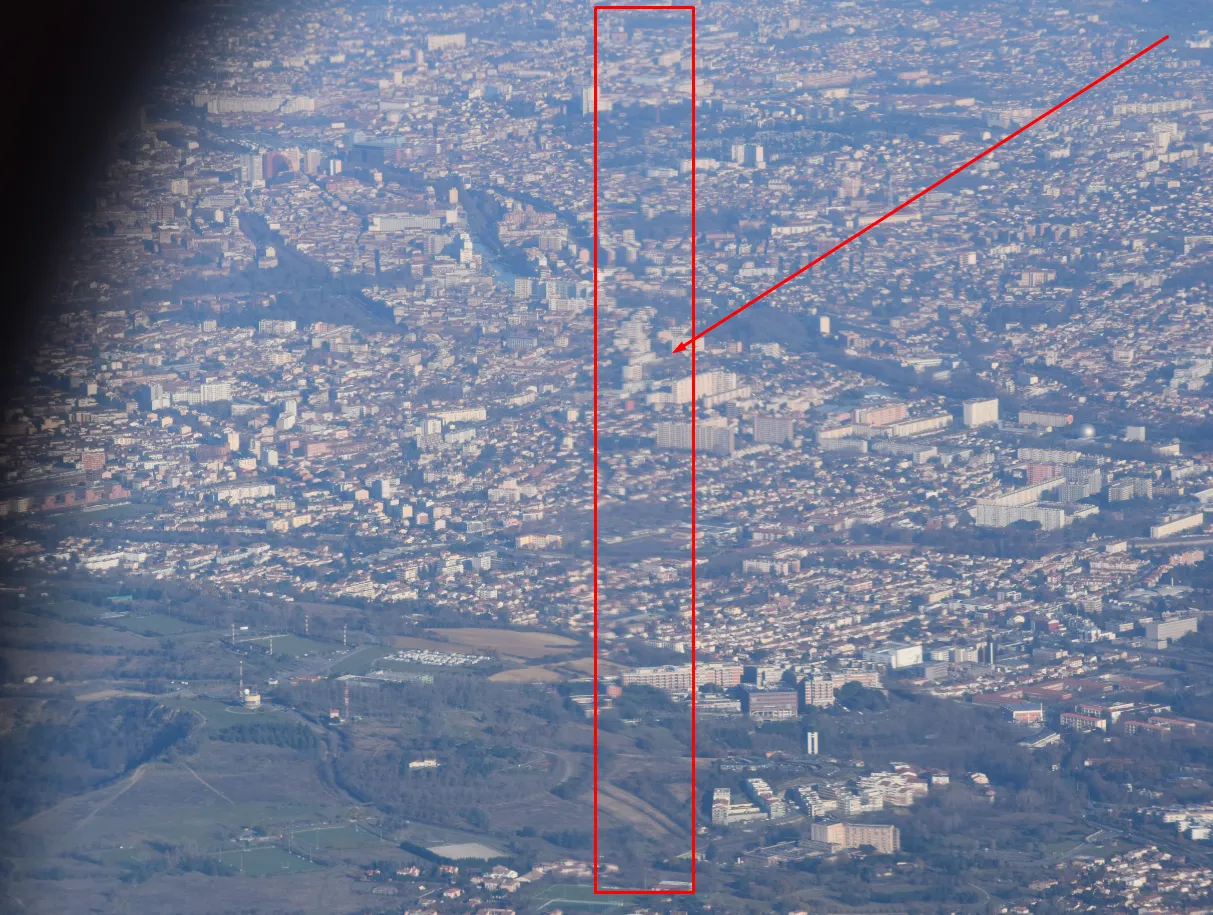
Pic. 21 Another “line of distortion” seen in the window after using the zoom lens (marked red), Toulouse, France.
A separate case applies to the Dreamliner 787 windows. I experienced it when I was flying from Oslo to San Francisco on Norwegian Airlines. The Boeing 787 Dreamliner aircraft has “the best airplane windows ever”, that are equipped with an electronic system responsible for the fast switching light control and gradually diminishing effect from clear to dark (Pic. 22, 23).

Pic. 22 The Boeing 787 Dreamliner window (aviation.stakexchange.com).
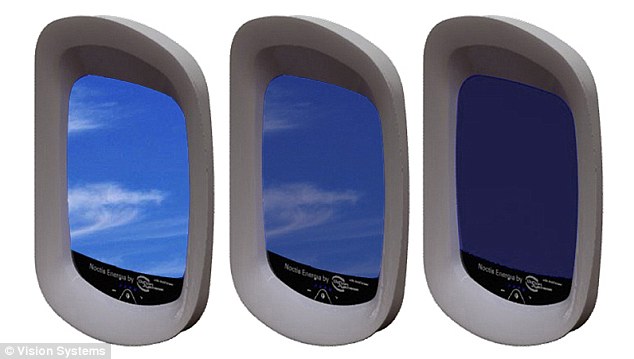
Pic. 23. The gradually diminishing effect in the Boeing 787 Dreamliner window (scale 1 on the left, 3 in the middle, and 5 on the right).
Referring to the pic. 21 you have a button, which you can adjust the diminishing level to your needs. You have 5 levels of brightness, where level 1 means a clear view and level 5 completely dark blue window with no sunlight at all. Unfortunately, as the image shows this is a local controller only! That means, that someone else can do it for you, which is not necessary for photographers and travelers, who love watching the Earth from the top. At least in Norwegian Airlines, the cabin crew after delivering a meal makes all windows darker! They used to turn level 3, whereas you need to have at least level 2 to make your pictures clear! During my journey to the United States, I was facing level 3 above Greenland! What a shame! (Pic. 24 – 26). I am afraid, that all airlines, that owe a Boeing 787 Dreamliner can practice this stupid policy! On a Norwegian flight, passengers were able to make the window clear just before the last meal, around 1.5 hours before landing and nearly 30 minutes after the plane passed above the Rockies in south Canada. Great!

Pic. 24 A continental glacier covering the biggest island in the world – Greenland. Flight by Norwegian OSL-OKL with windows dimmed to level 3.


Pic. 25, 26 A multitude of ice floes and icebergs on the Davis Strait between Greenland and Baffin Island, Norwegian OSL-OKL flight with windows with dark level 3.
In the case of Norwegian (and probably general Boeing 787 Dreamliner) long-haul flights, where the flight personnel makes your window darker without your consent photography is barely possible. You can get over a little bit of this blueness using a higher ISO value or longer exposure, although it doesn’t really work because the plane is moving fast. Even when you are at the top of the troposphere using a longer exposure will reduce the sharpness of your picture similarily to the ISO value, which will make it noisy. There is definitely no option for long-lens photography in this case.
Returning to the aircraft window optics quality we need to know, that it will definitely affect our long-lens pictures. Every crack and distortion on the window is going to be multiplied. As an outcome, the sharpness of your picture will be dramatically reduced. I have been doing long lens pictures for more than 1 year and I came to some conclusions on how to make the photos as sharp as possible.
1. First of all, even if you are going to take normal pictures without zoom you have to clear your window! Always, when you enter the plane and take your seat the window is quite dirty after the previous passenger. The window can be made dirty by yourself, especially before landing, when you wake up (Pic. 27). Only 1 clean tissue can make it tidy again.
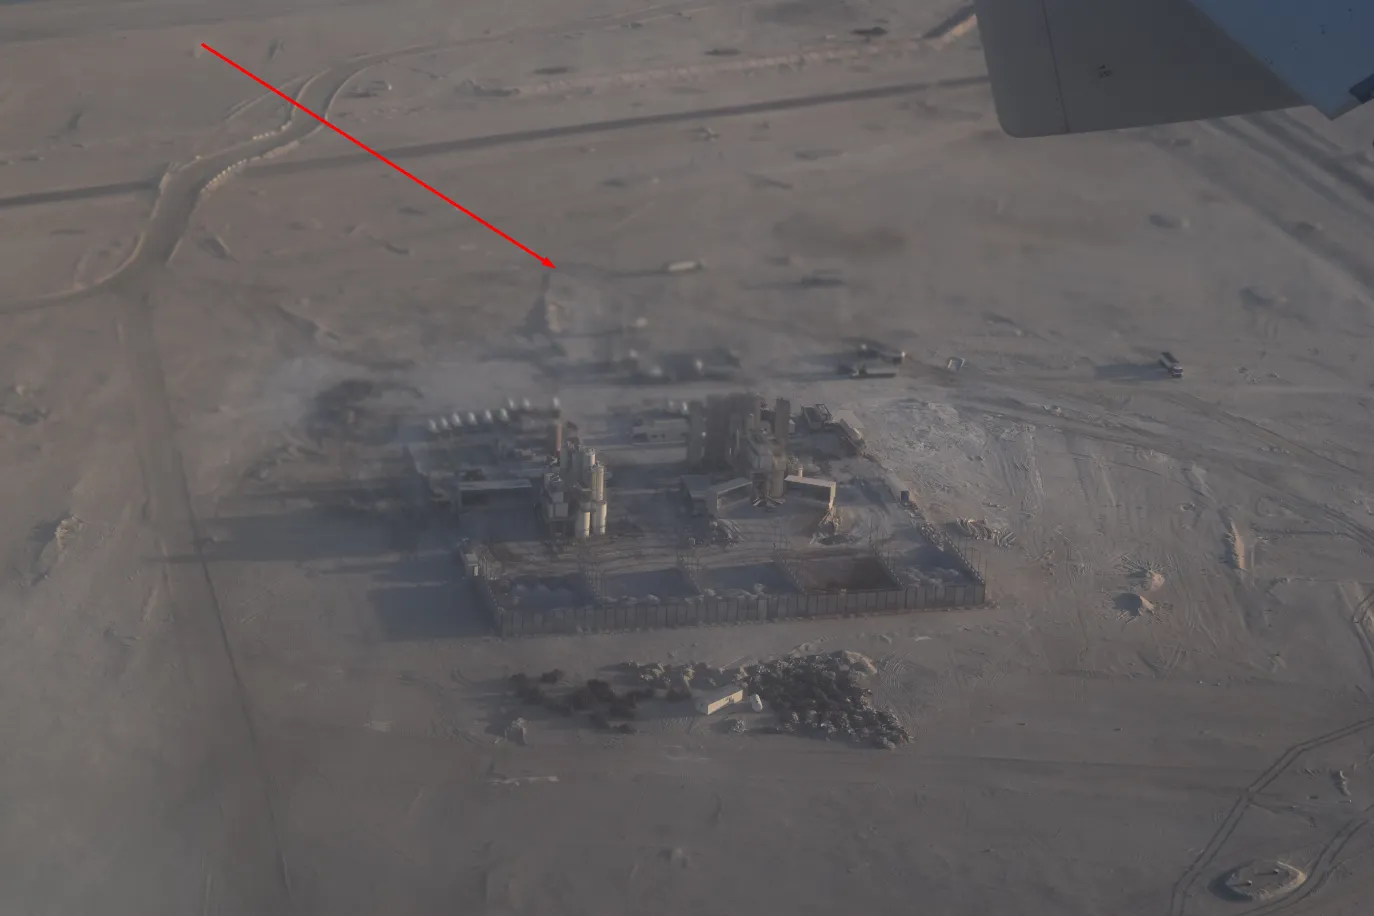
Pic. 27. The dirt on the plexiglass (marked red), partially reduces the photo sharpness, Dubai, United Arab Emirates.
2. Avoid the sunlight, because the sunlight may cause ghost images. Light is to be reflected on the glass and finally, you will see your portrait rather than the landscape outside (Pic. 28). When you have got a seat a front of the sun try to capture the landscape not affected by sunlight.
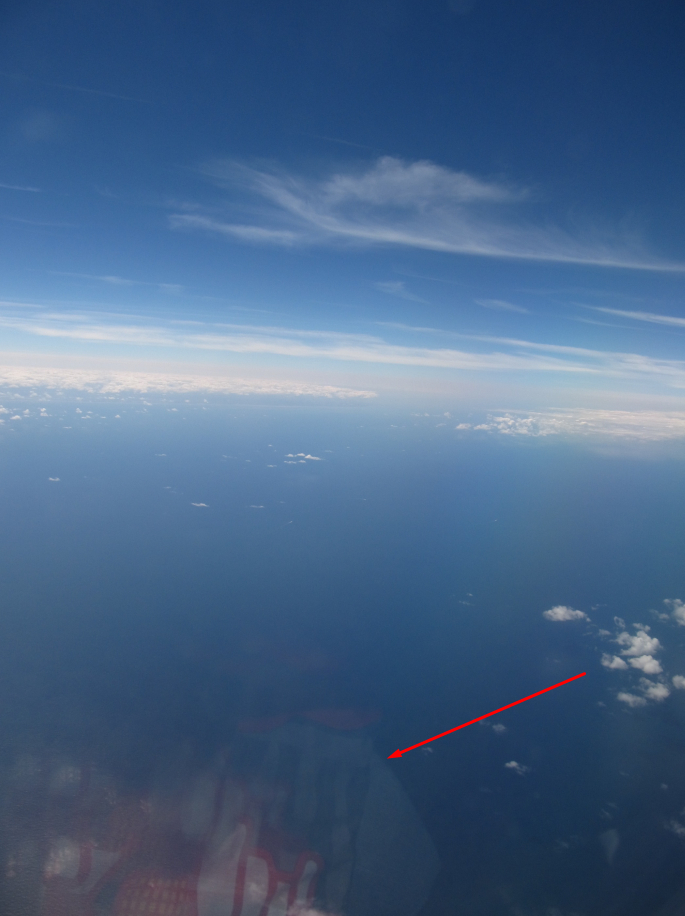
Pic. 28 Ghost image caused by sunlight reflected on the plexiglass, flight Ryanair FR 2137 above the North Sea.
3. Avoid the window edges, where distortion is much bigger than anywhere! (Pic. 29) and also other “lines” or “areas” of distortion when possible (Pic.20, 21).
Pic. 29. Shooting very close to the window edge will strongly impact the sharpness of your picture, Rzeszów, Poland.
4. Use as fast exposure as possible, because in the long lens photography, even the highest-flying altitude may help you to make a sharp picture (Pic. 30).
Pic. 30 This picture has been taken with a 100mm lens. Unfortunately is not sharp, because the aperture was too slow for the conditions, Dubai, United Arab Emirates.
When you use the zoom lenses you have to remember, that the parallax is also zoomed in (multiplied). For instance, 10x zoom causes a 10x higher probability, that your photo will not be clear due to the aperture.
5. Remember, that the longest zoom lens, that you can use in the plane is 135mm! I am not kidding. I took a few hundred photos through the aircraft window and trust me only in a few cases the quality of the pictures zoomed in more than 135mm was sufficient. Mostly the plexiglass reduces the sharpness dramatically for values higher than 135mm. Sometimes even lower value may bring insufficient effect, however, taking pictures with a zoom lens up to 70mm in 95% of cases gives a guarantee of good quality.
Now I would like to bring you a few live examples of this:

Pic. 31, 32 Chaura Island (The Nicobar Islands) cropped pictures: 31 – 98mm sharp picture; 32 – 200mm fuzzy image.


Pic. 33, 34, 35. Seven Sister Cliffs saw from the plane, flight FR 296 (TLS-STN), all cropped: 33 – 125mm, perfectly sharp; 34 – 200mm, slightly noisy; 35 – 300mm, completely unuseful.
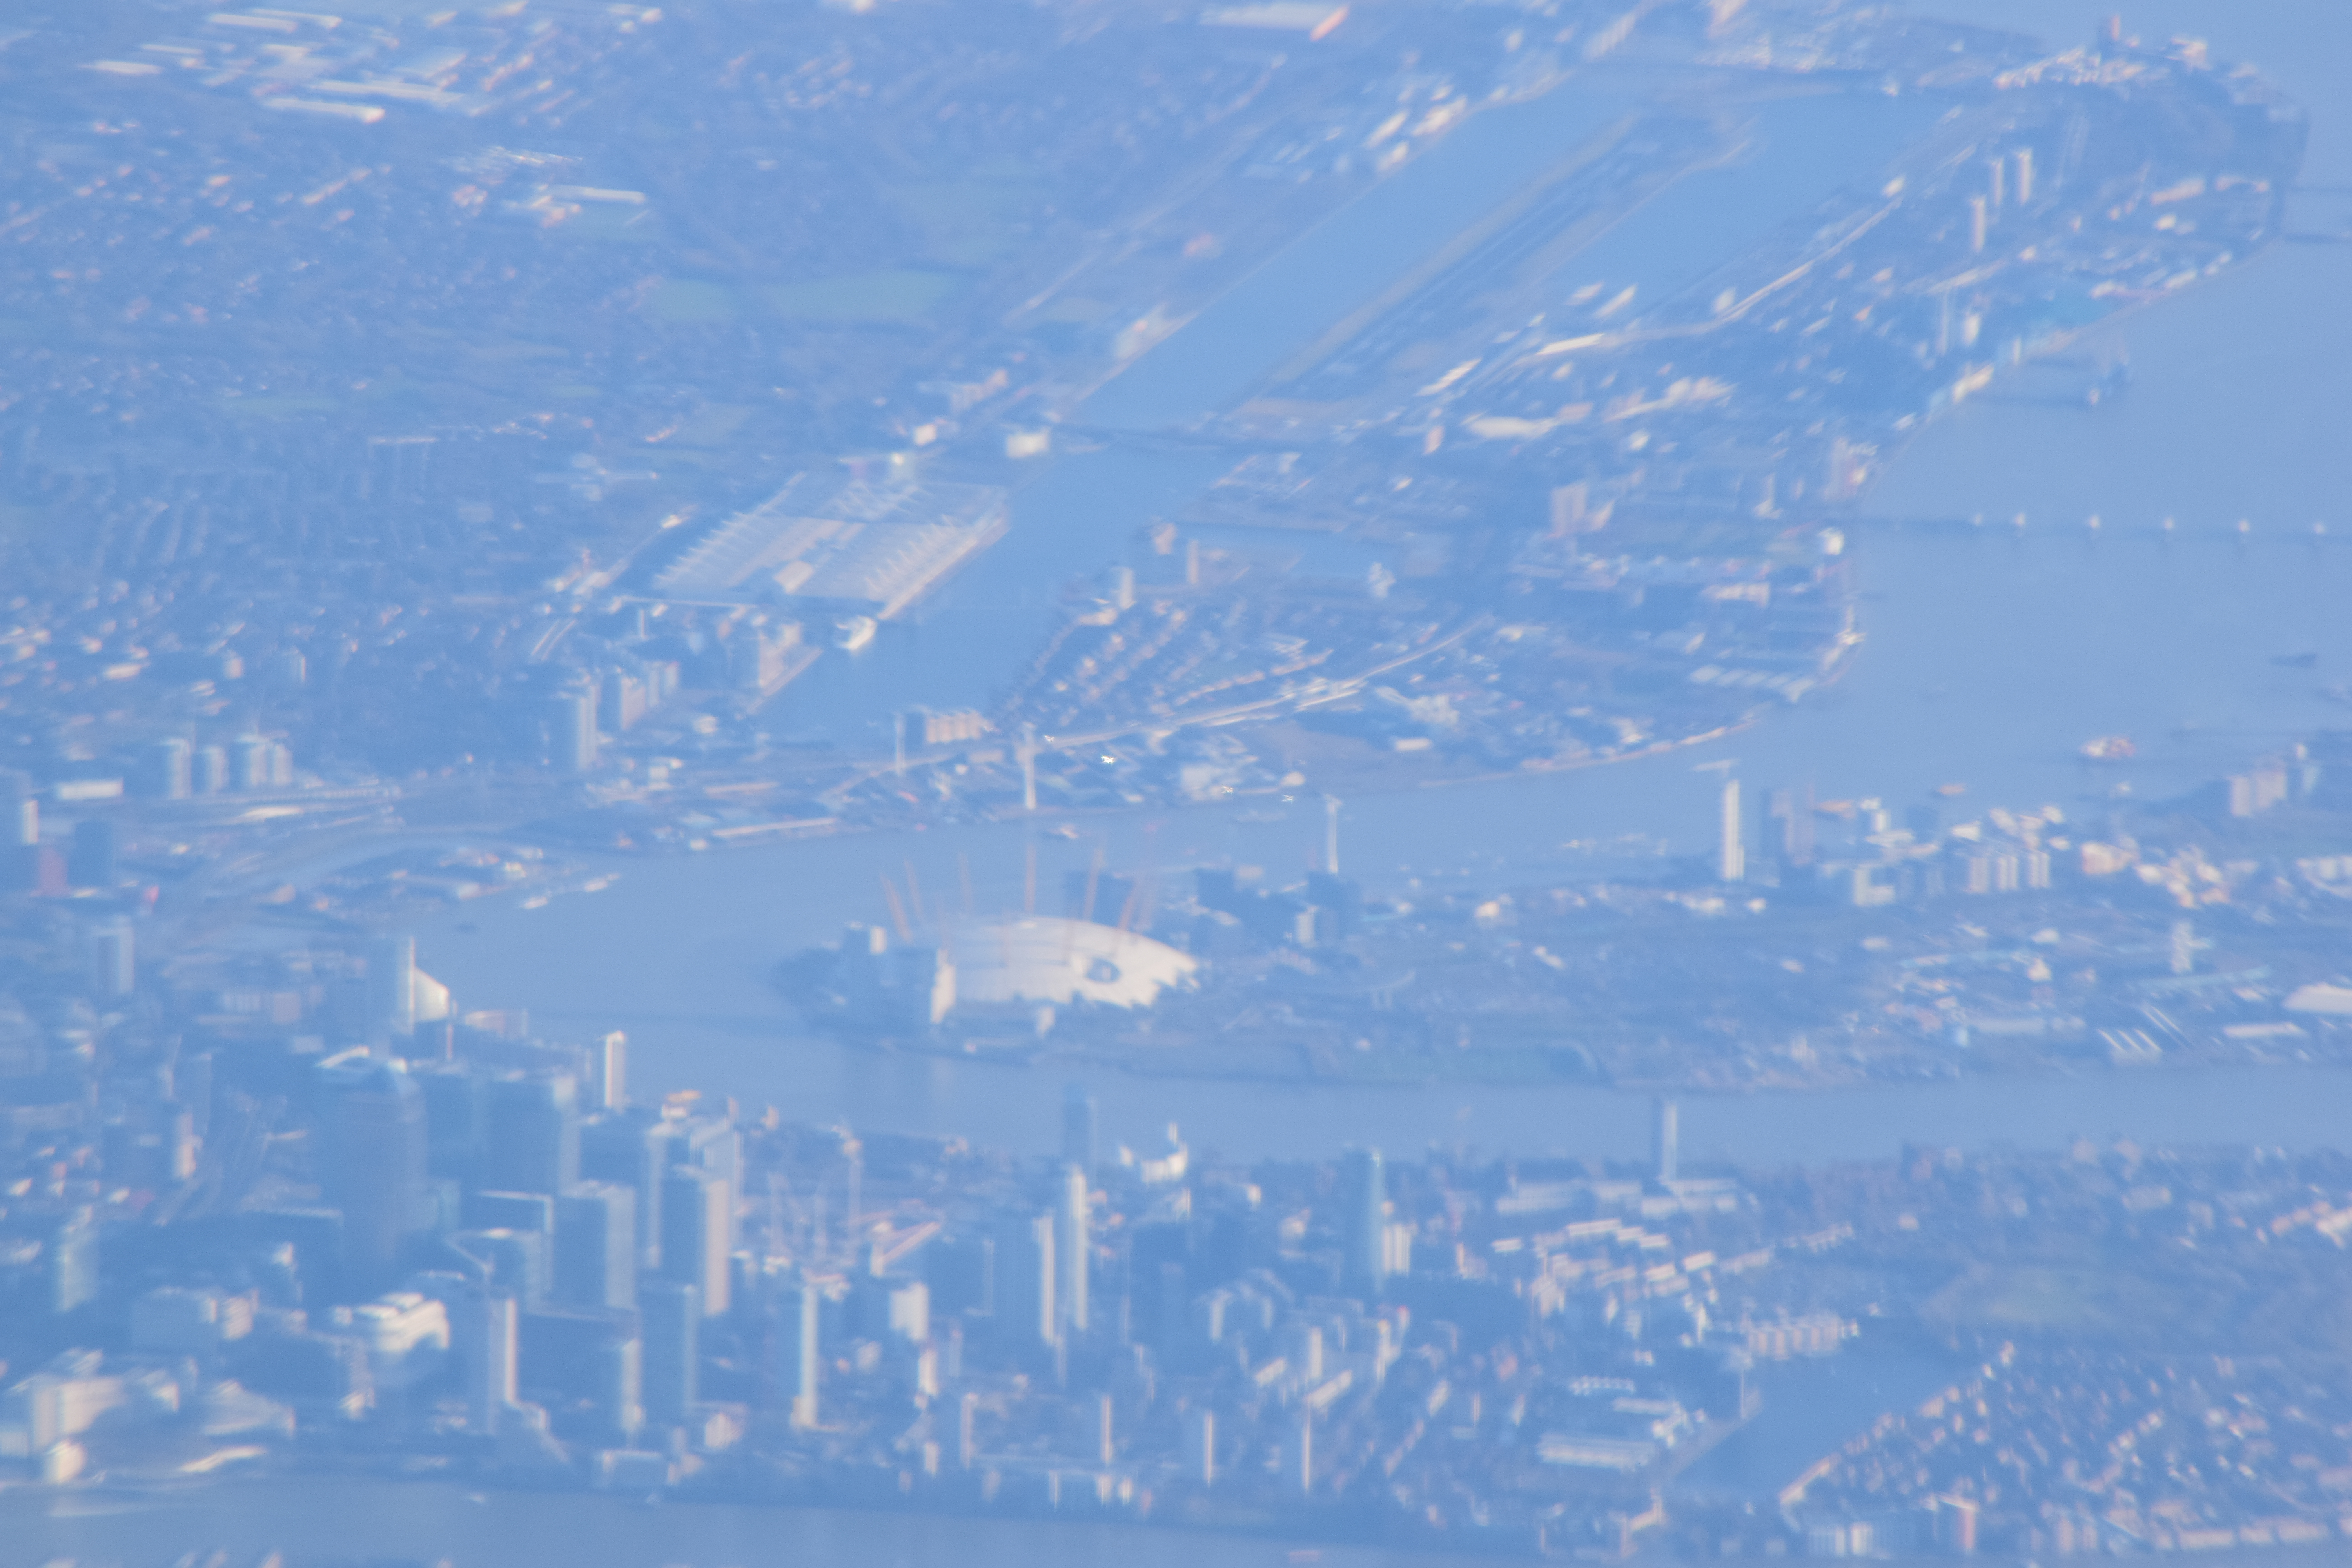
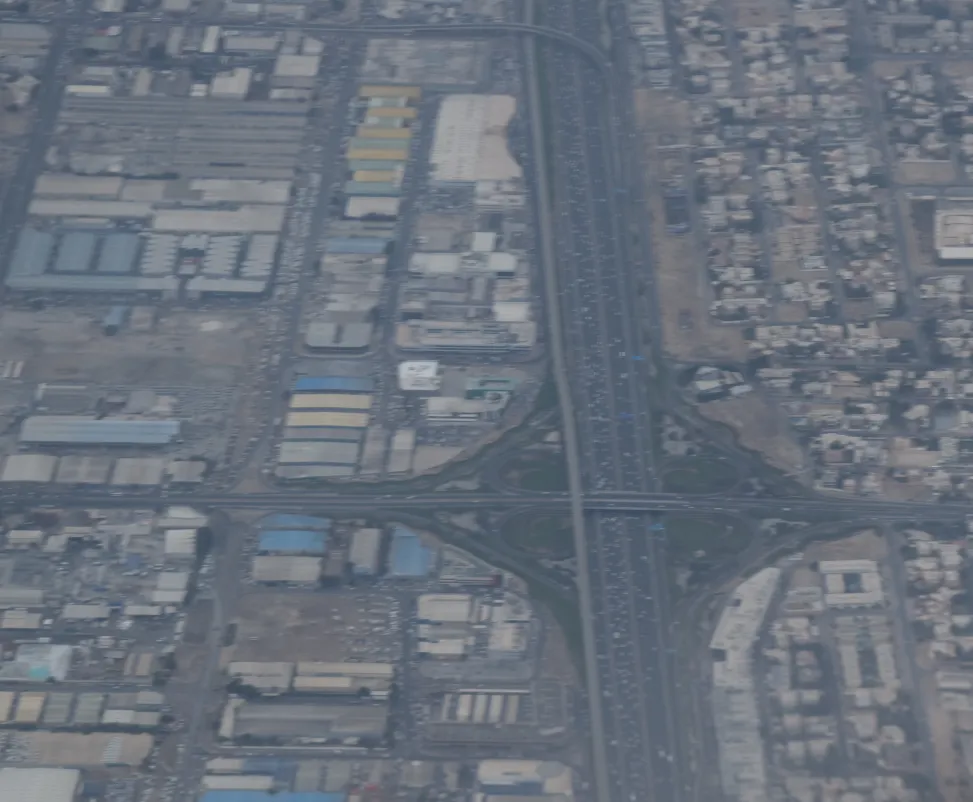
Pic. 36 Greater London from the plane, flight FR 296 (TLS-STN), 300mm.
Pic. 37 Chichester Harbour estuary seen from the plane, 140mm, flight U2 3214 (PMI-STN).

Pic. 38 Ryanair FR 8321 flying from Stansted (STN) to Valencia (VLC) seen from Easyjet U2 3213 flying from Stansted (STN) to Palma de Mallorca (PMI), 300mm and unfortunately fuzzy picture.

Pic. 39 …and cropped one. Not so many details 🙁
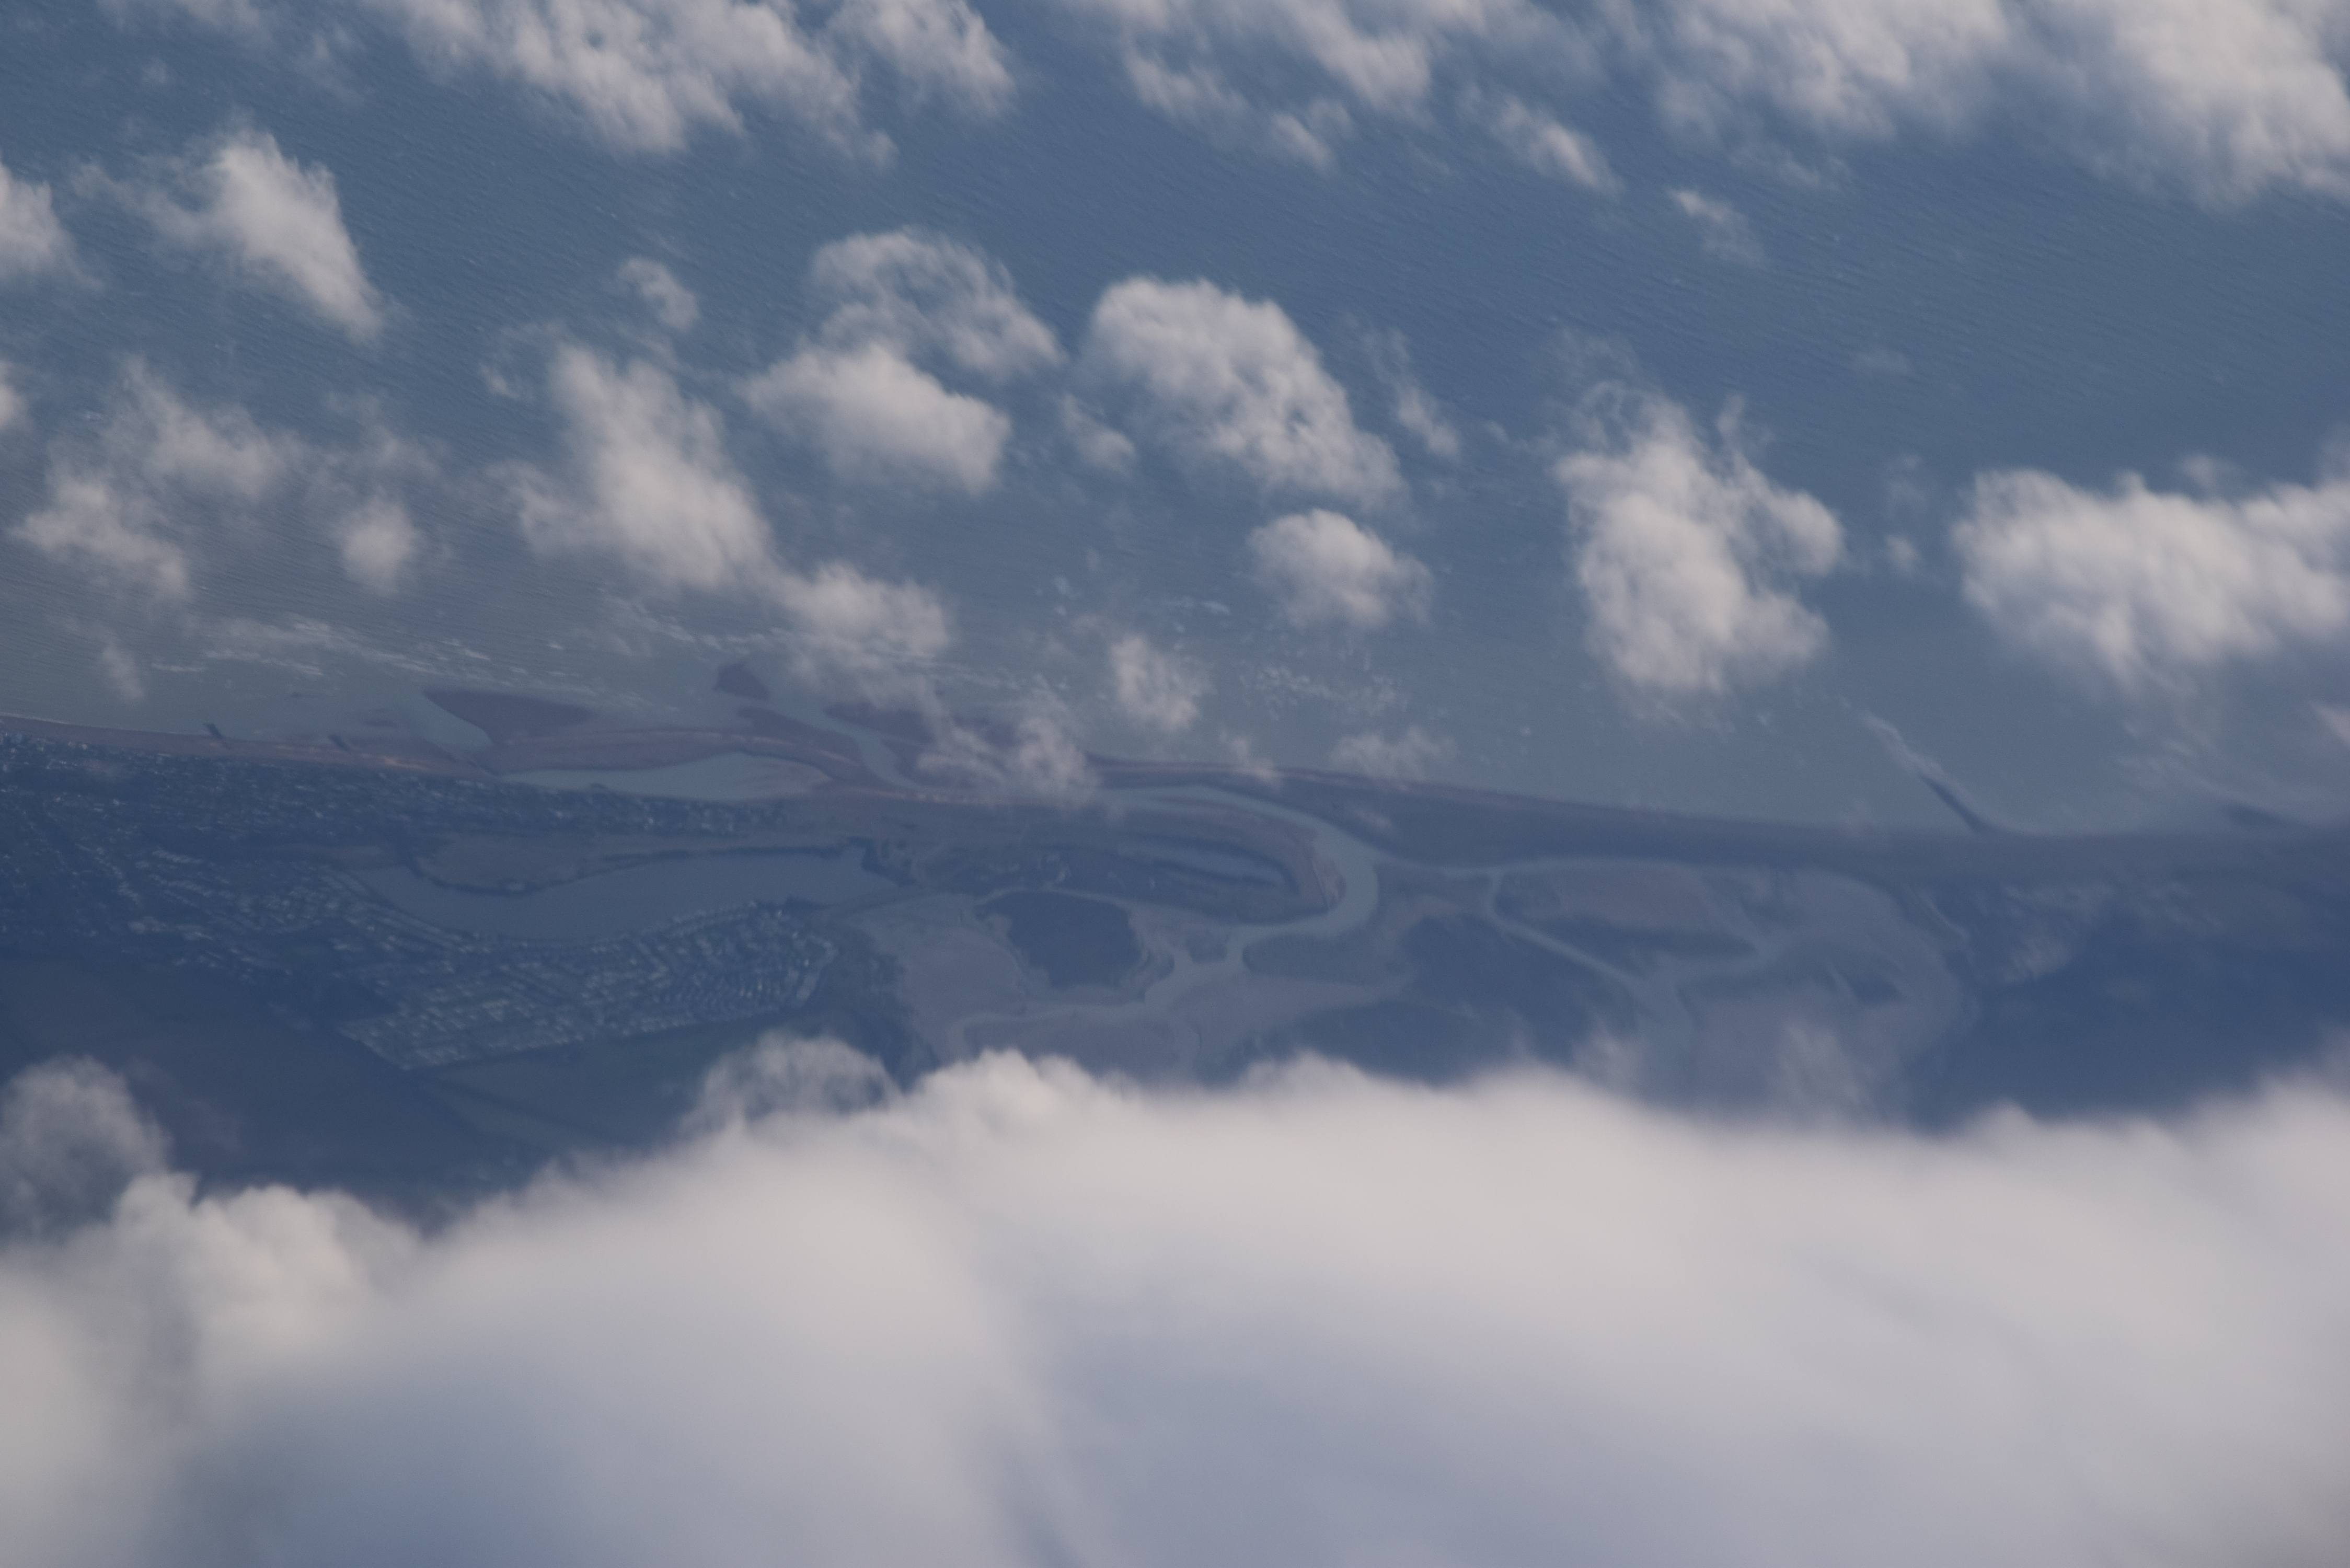
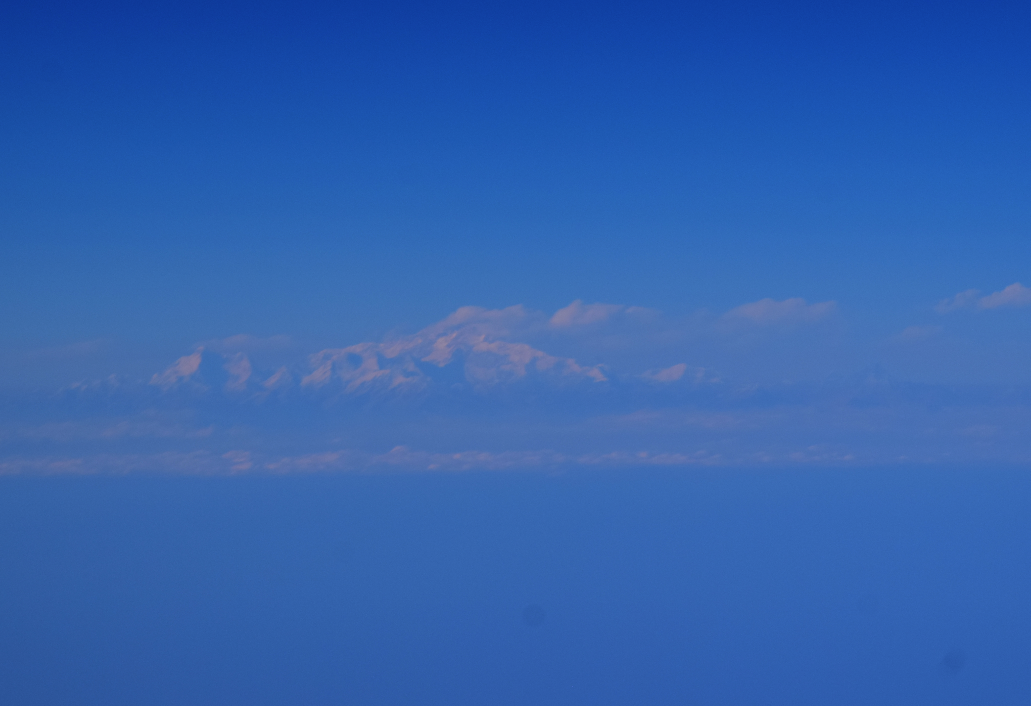
At the finish, I would like to share with you the panoramas issue. Returning to the very top of this article, where I said, that our viewshed should be extended a lot. Knowing, that the plastic layers and plexiglasses in the aircraft windows provided a slightly deformed optic view of the landscape we shouldn’t expect perfect long-distance views. Another factor is obviously the atmosphere. However, there are rare examples, where you can cover some mountains at impressive distances. In that case, you will not see more details than the outline only, but you will enjoy it anyway.
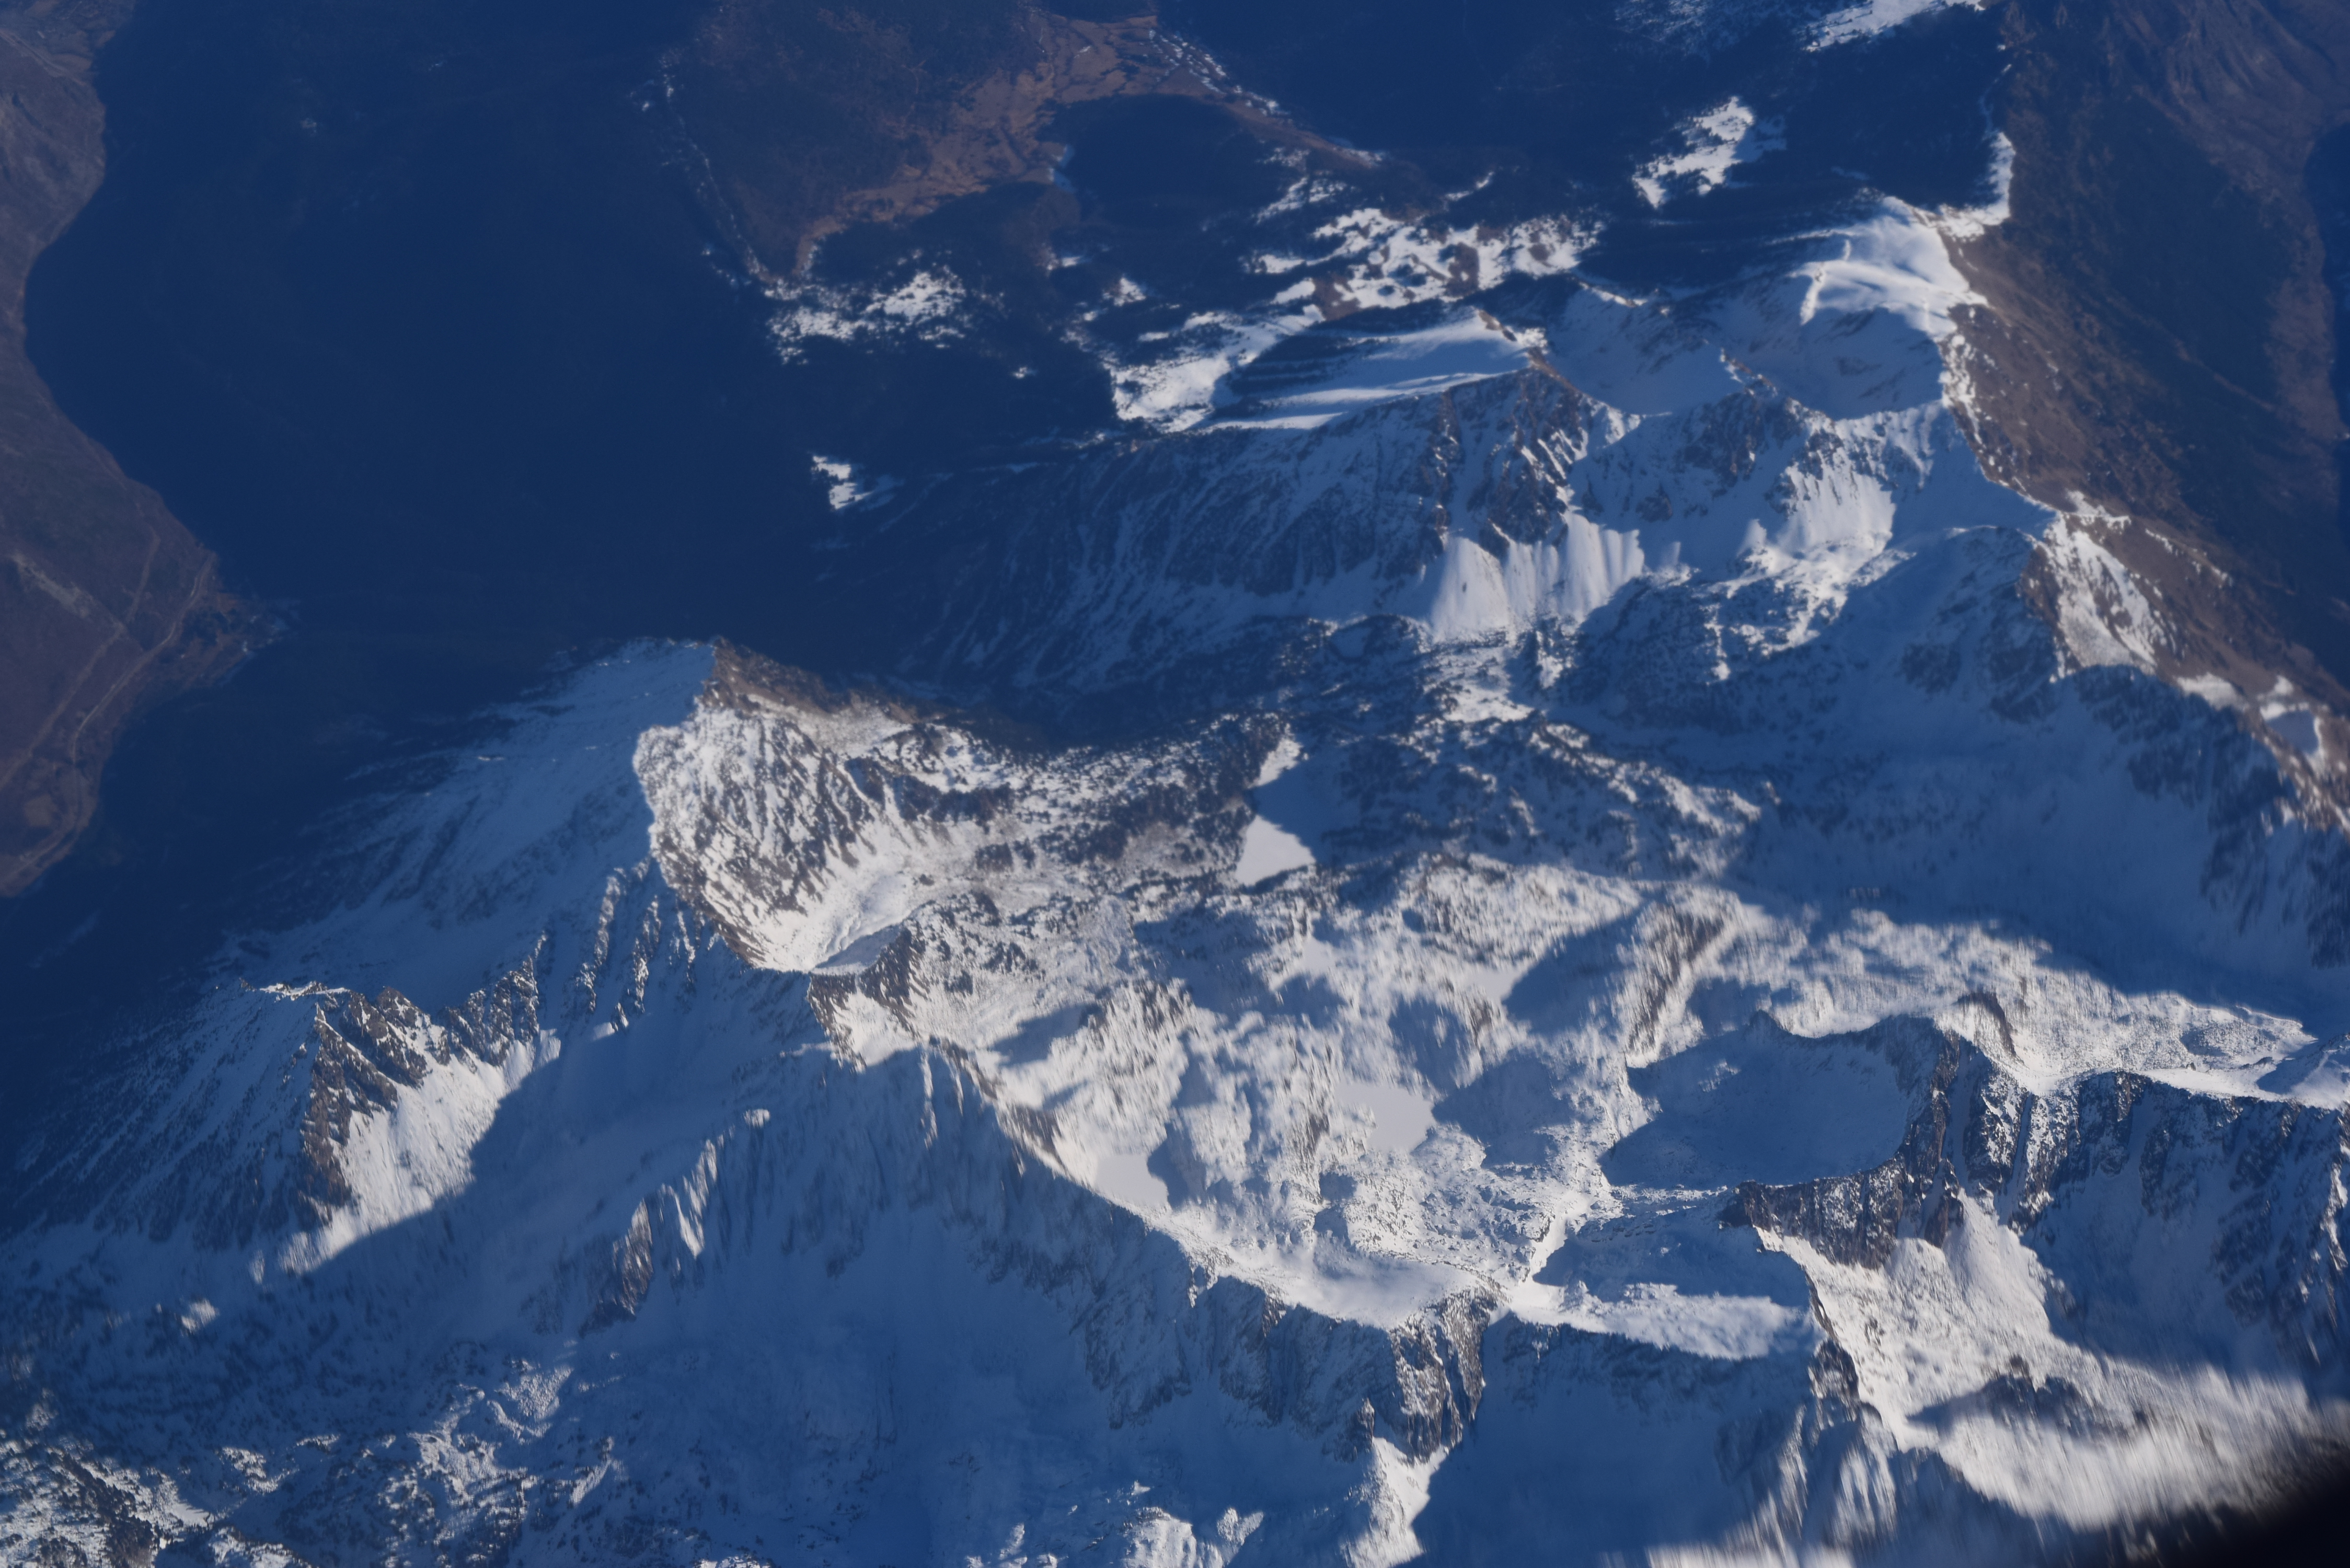
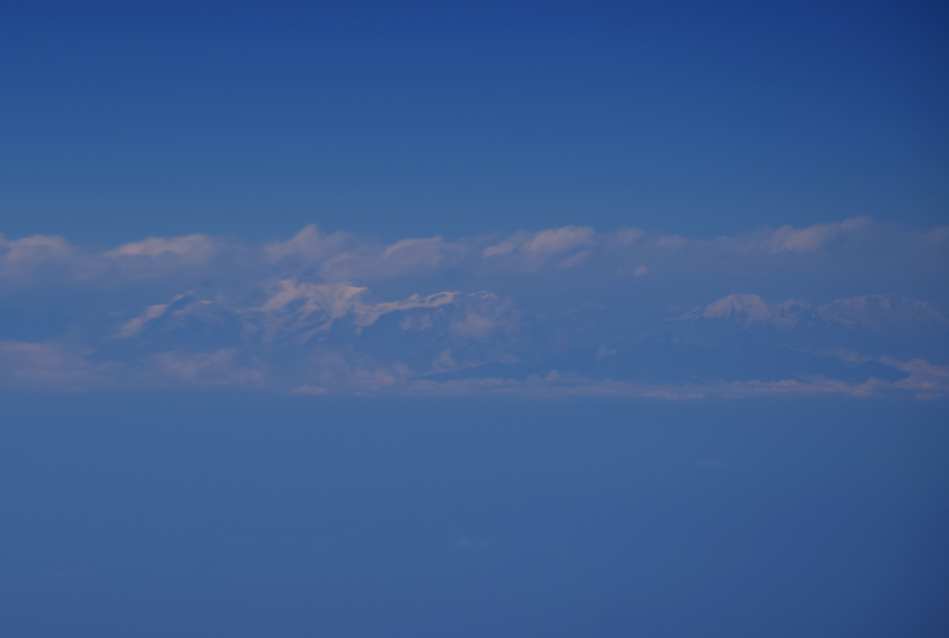
When I was flying from Toulouse to London Stansted in December 2016 I was fortunate to witness the longest visible distance ever! I saw the Alps from around 450 km! (Pic. 40 – 42). Unfortunately, I can’t boost my record, because my observation was not carried out from the surface or the object enduringly associated with the ground (like a tower, TV transmitter, etc.). A current world record of distance landscape photography is 443 km, so my record would be around 7 – 10 km longer (Pic. 40-42).
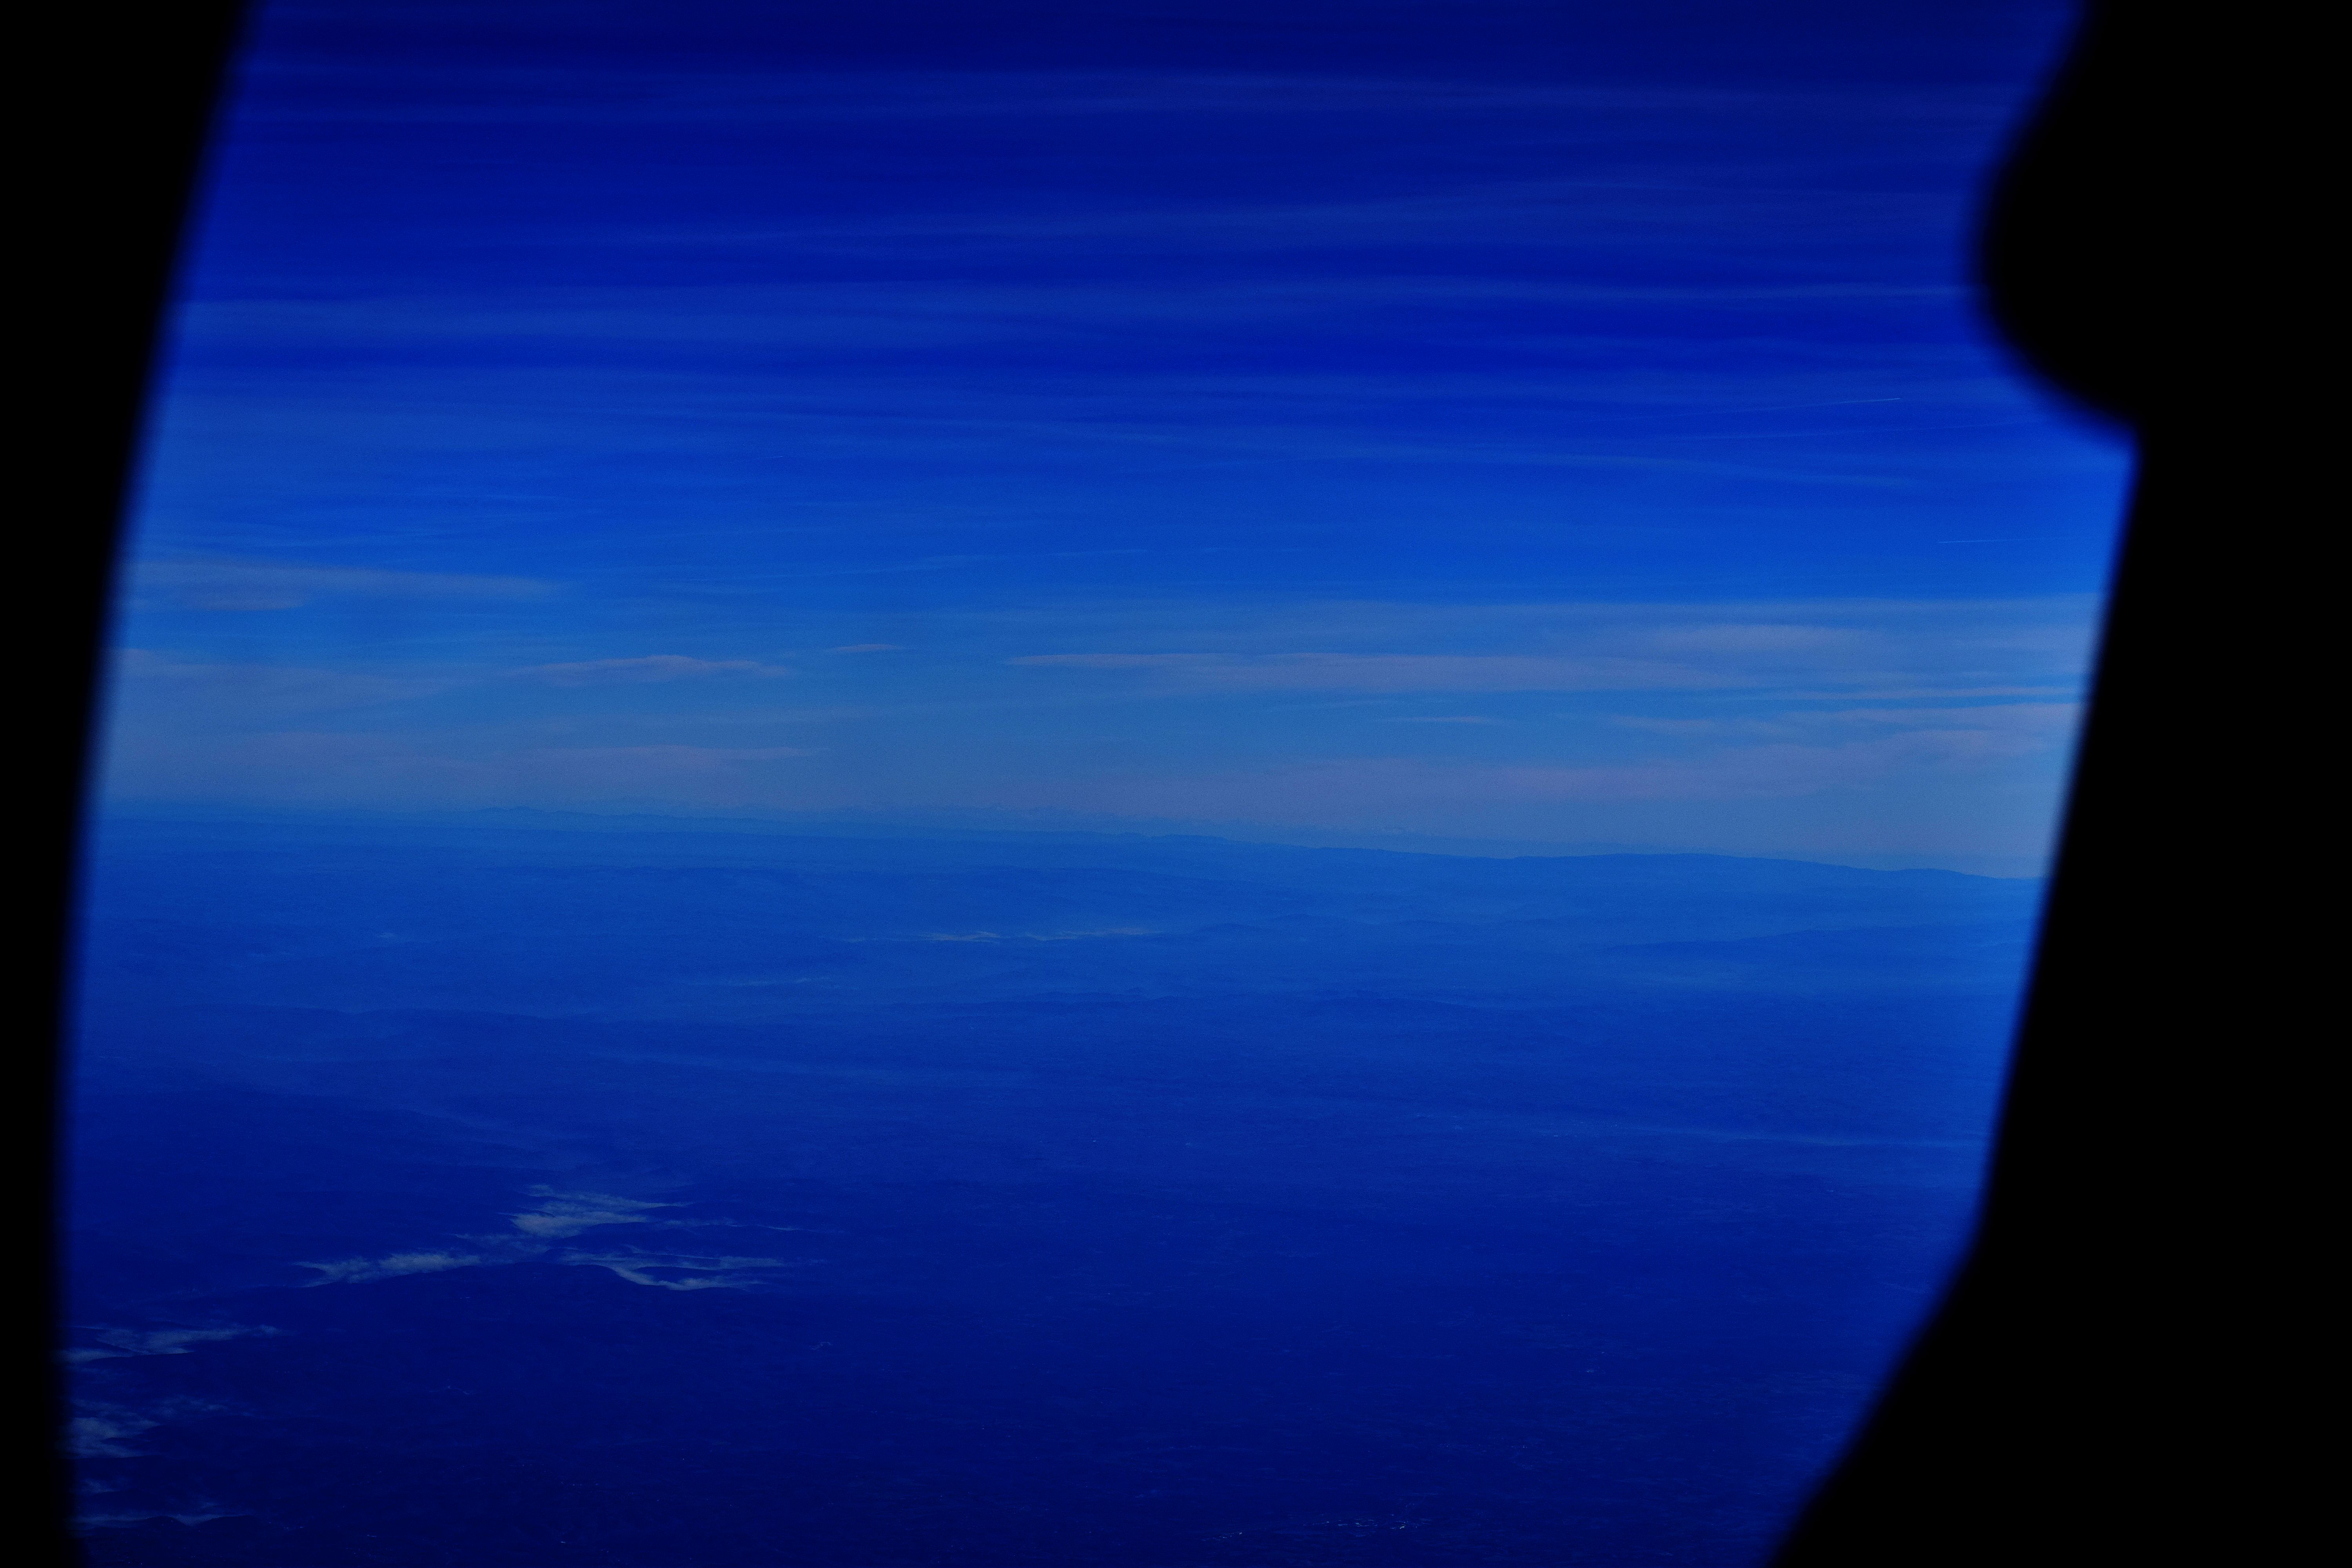
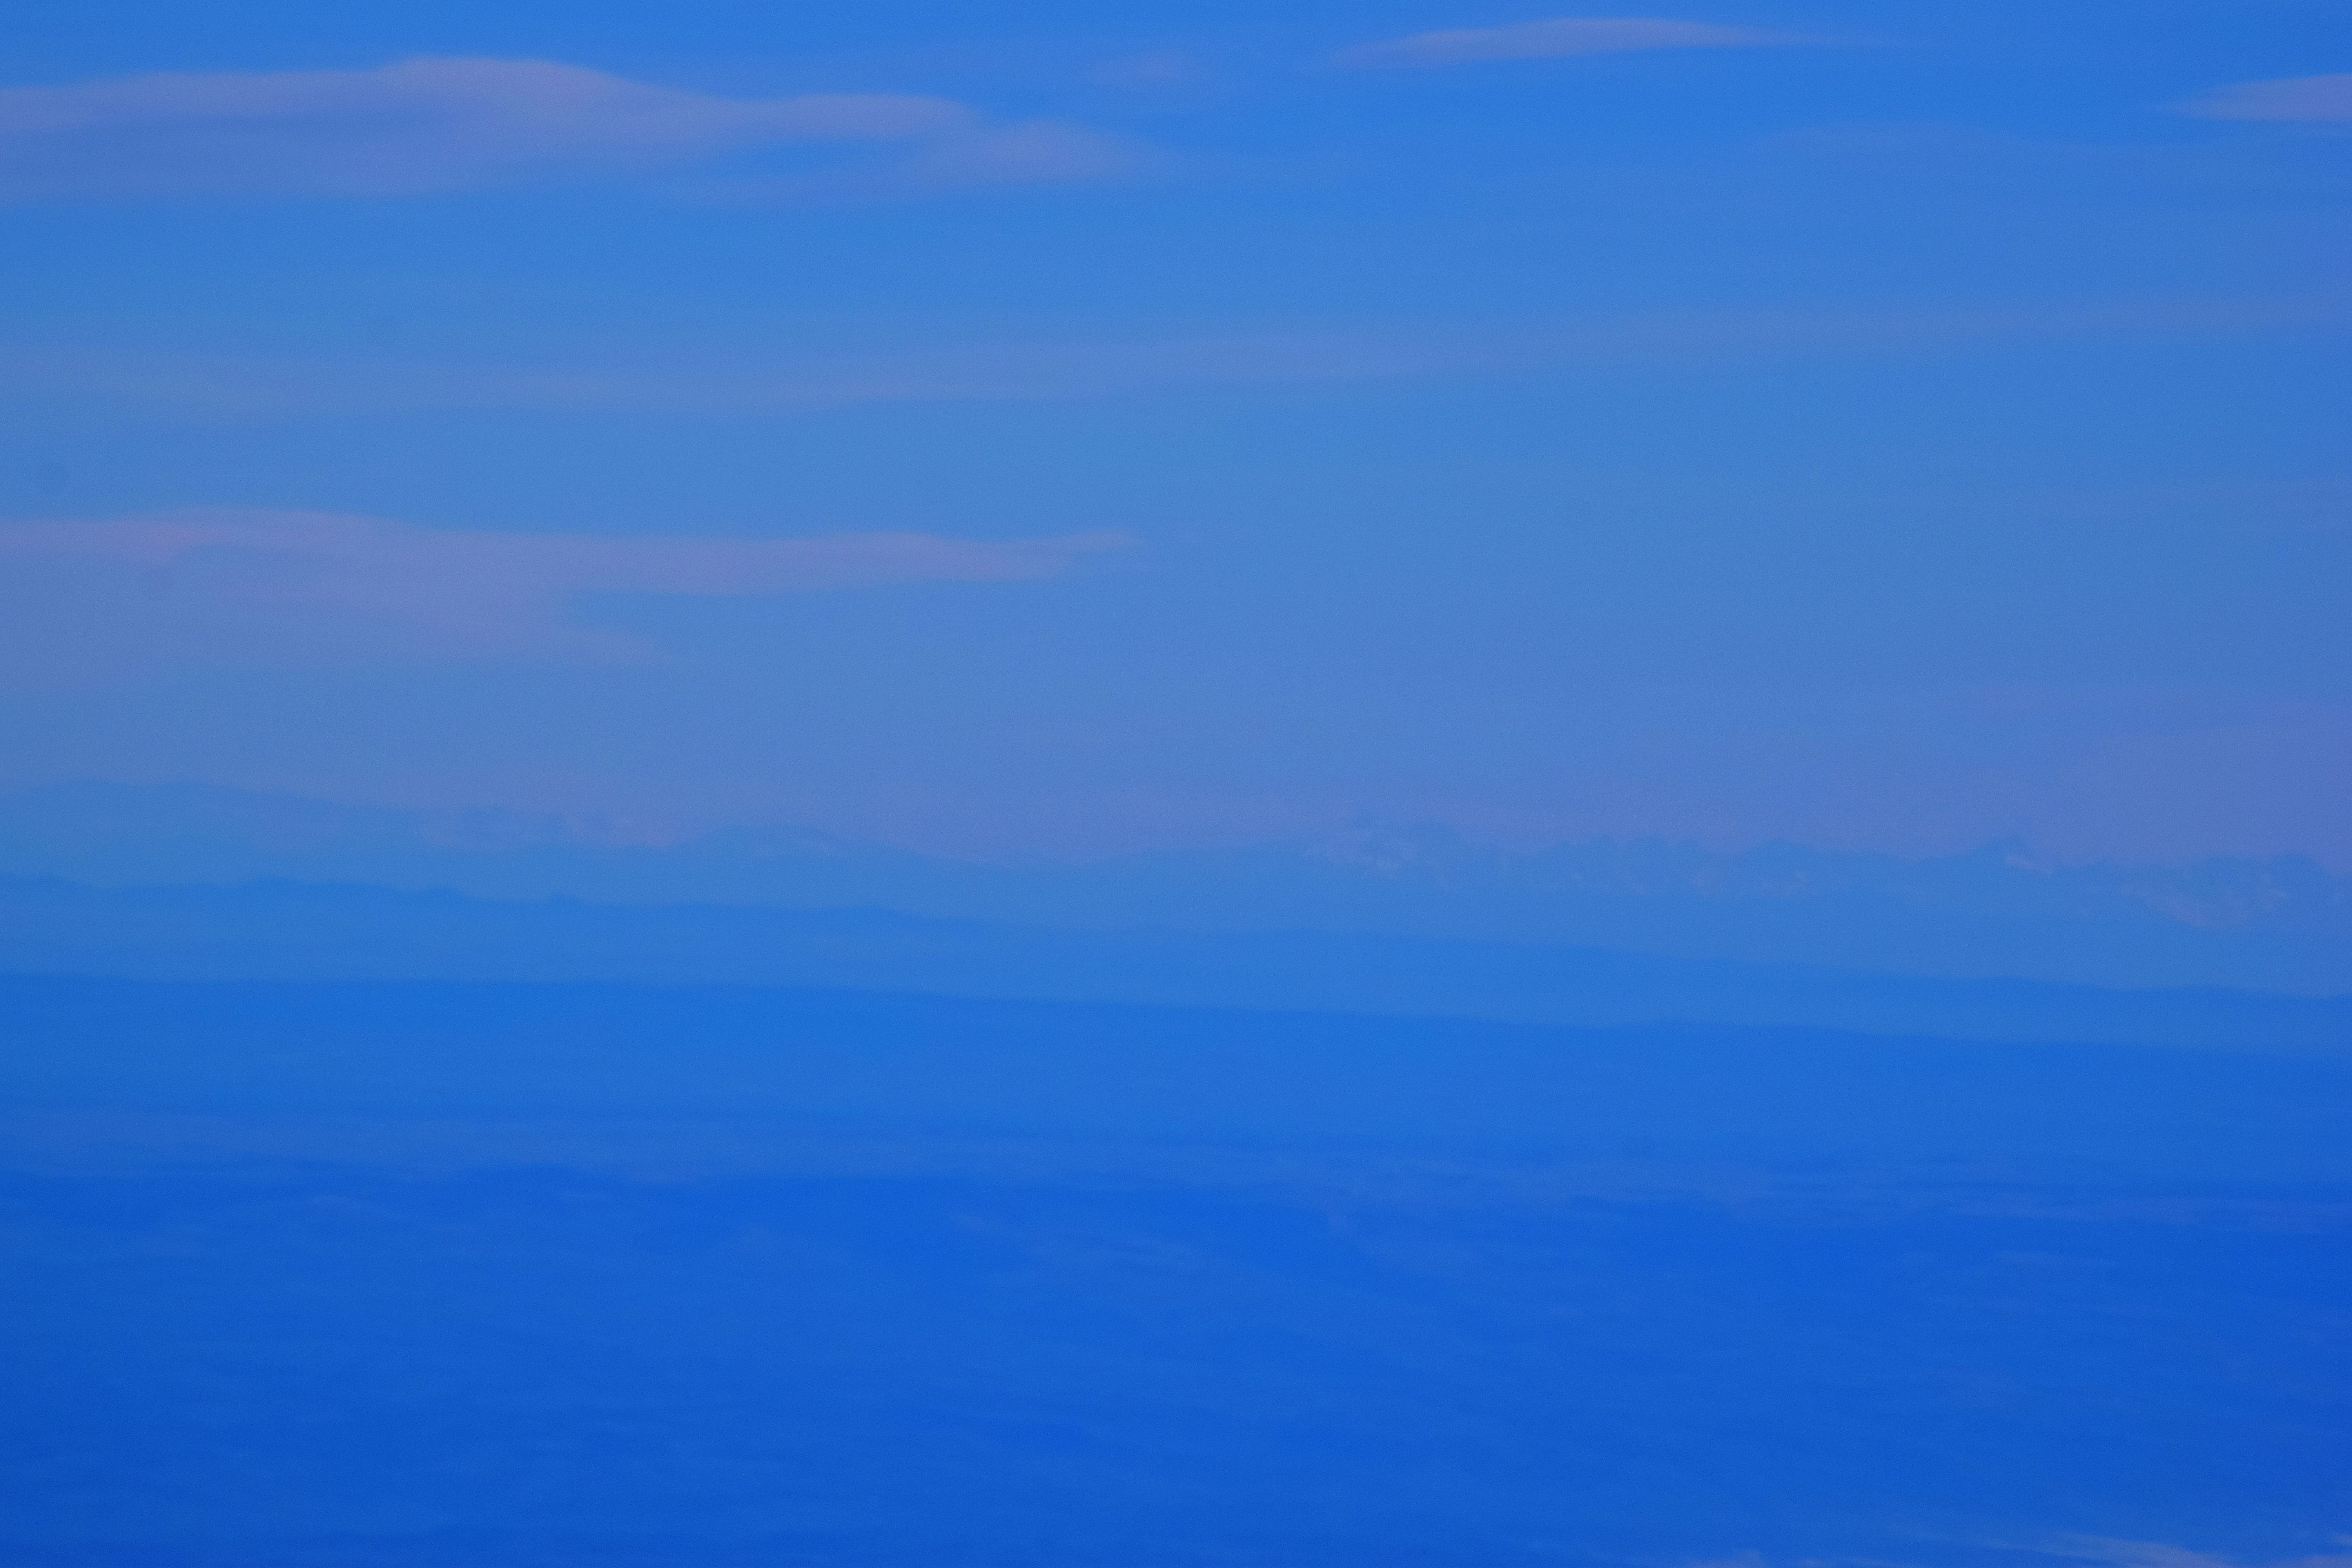

Pic. 40 – 42 The French Alps seen from the aircraft window during the flight FR 296 (TLS-STN), all pictures with modified gamma: 40 – 55mm general picture; 41 – 300mm probably with the Grandes Rousses group (Pic Bayle – 3465m.a.s.l.) on 435-440 km distance; 42 – 300mm with Dauphine Alps (Barre de Ecrins 4102 m.a.s.l. marked blue) on 445 – 454 km distance.
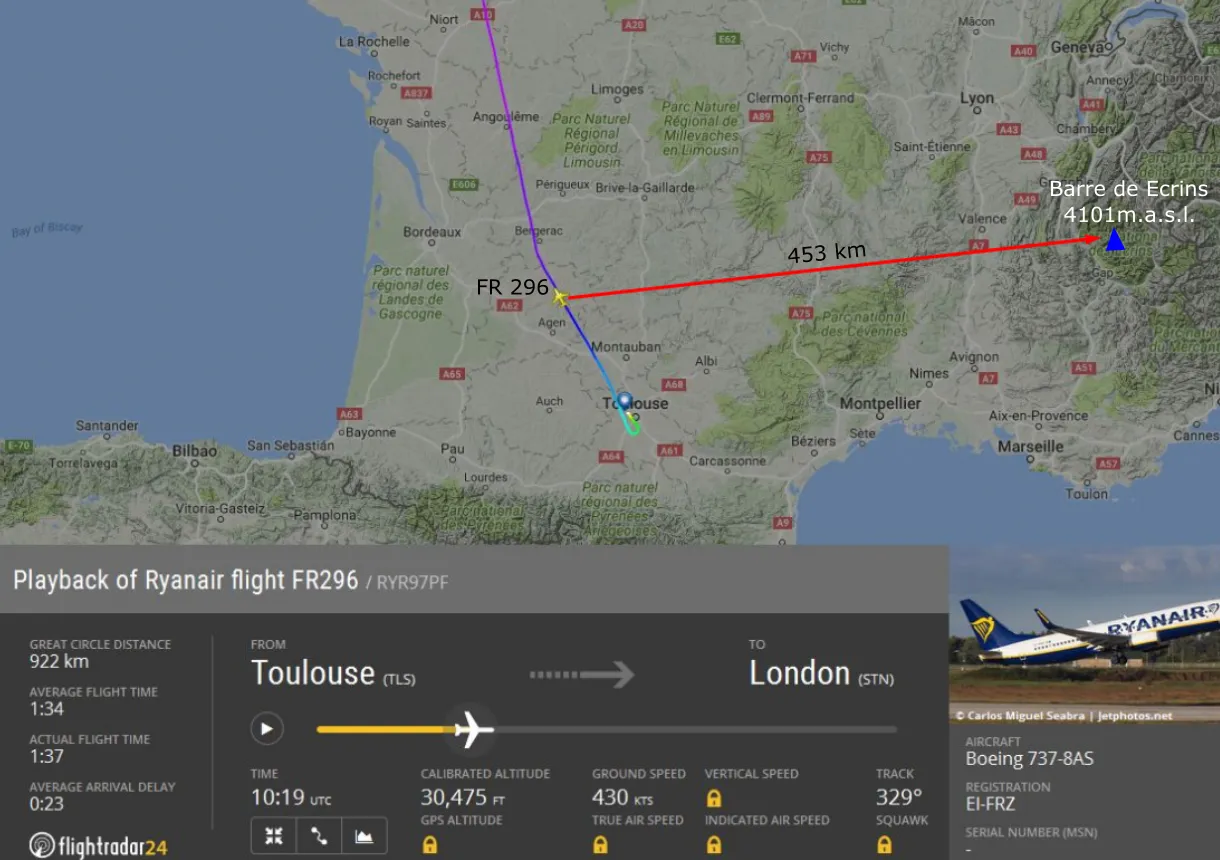
Pic. 43 The proximate position of FR 296 flight (TLS-STN), from which the Dauphine Alps and Grandes Rousses were visible. According to the Udeuschle panorama generator from this position to the highest and the furthest peak at once was 453km!
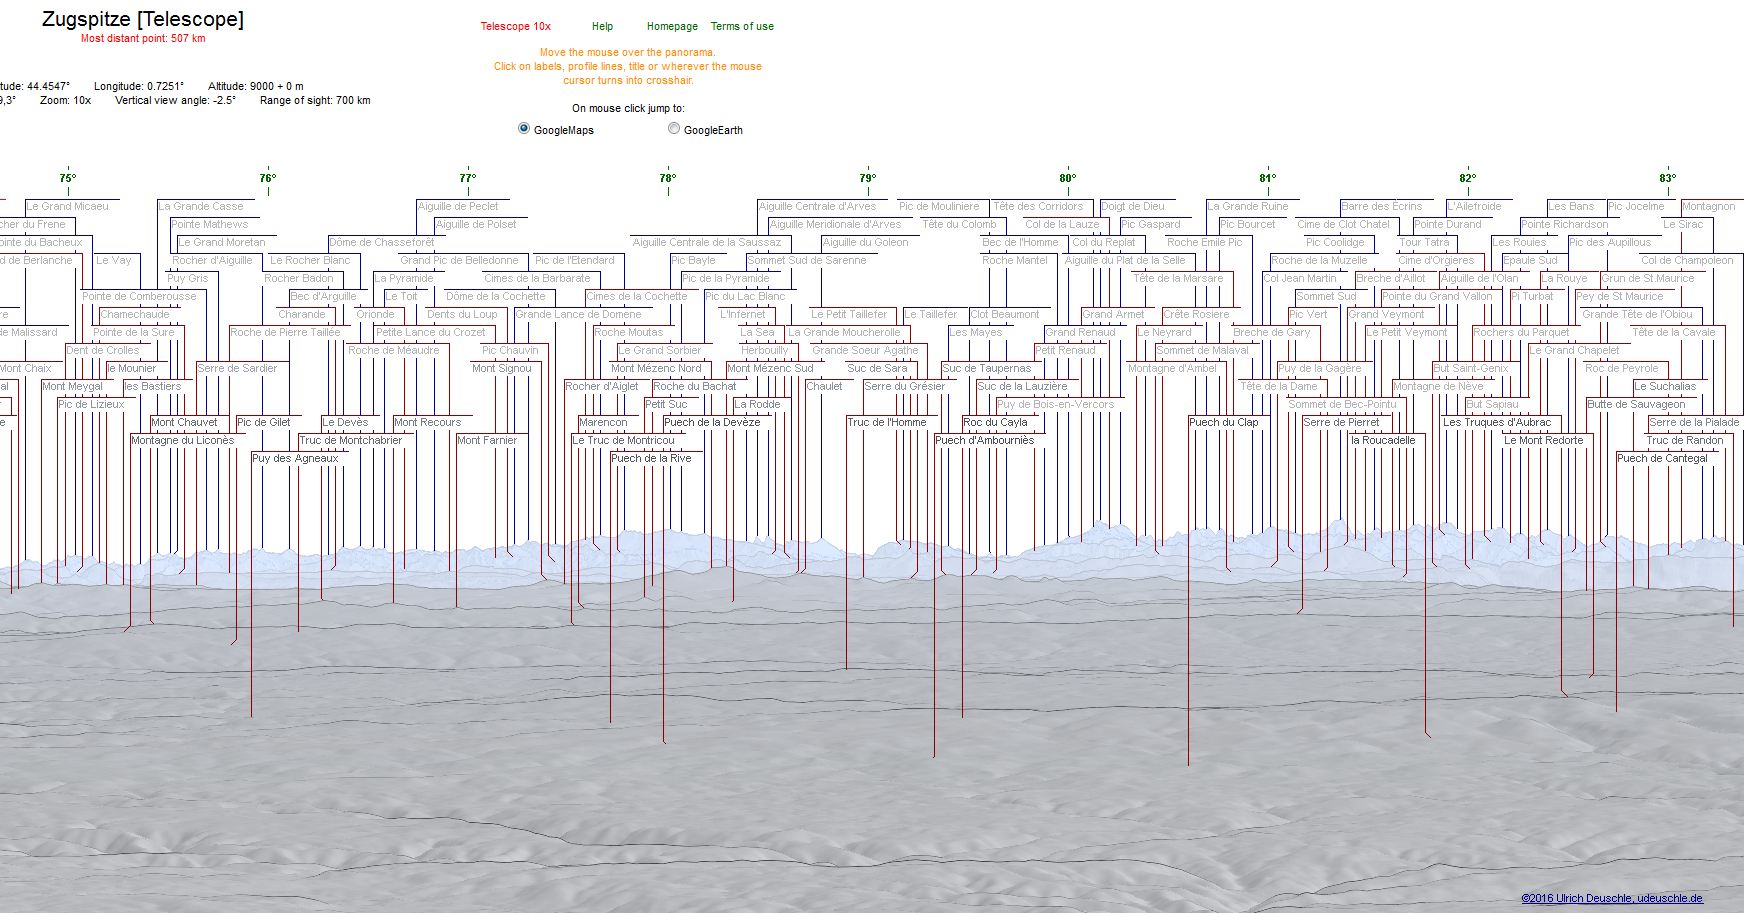
Pic. 44 The general panoramic view (5x zoom factor) from the FR 296 flight towards the French Alps (Grandes Rousses on the left and Dauphine Alps on the right) (udeuschle.selfhost.pro).

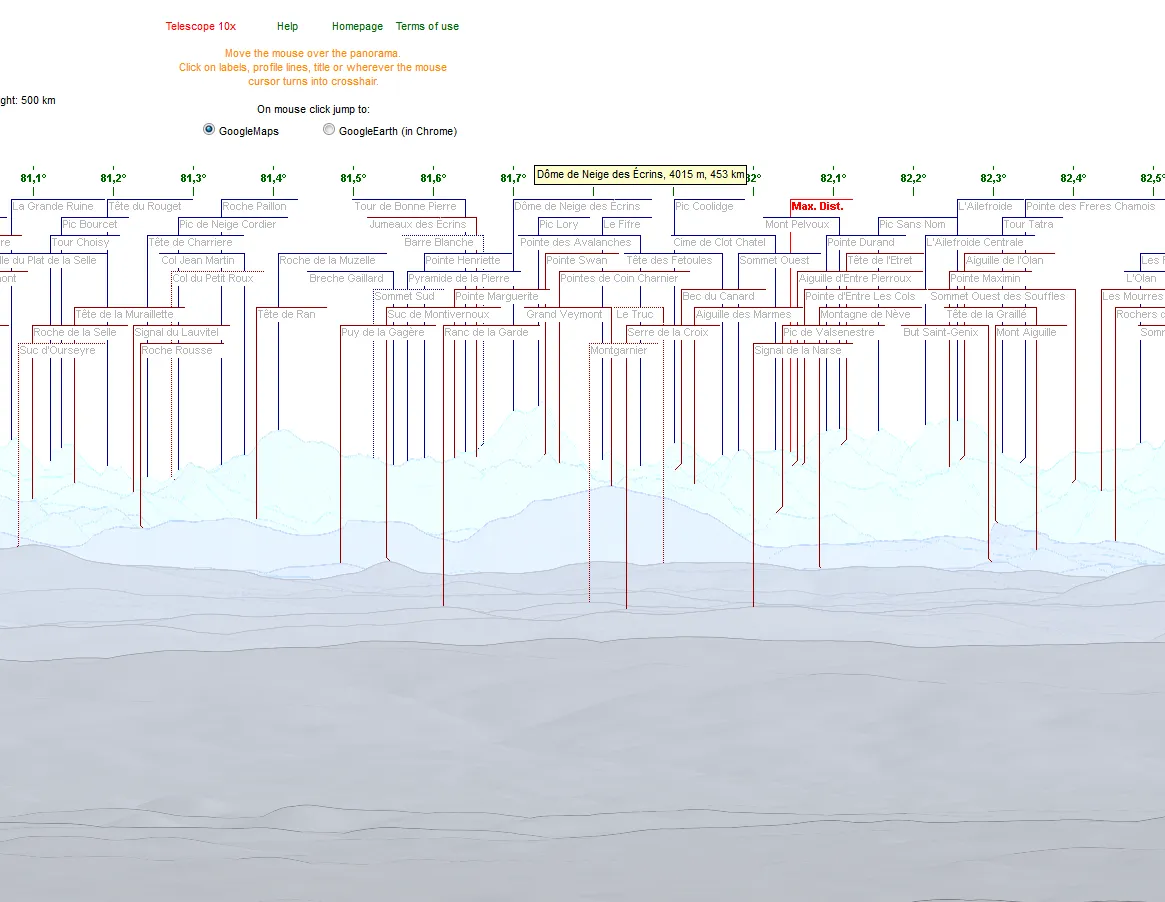
Pic. 45-46 The zoomed view on the French Alps from the FR 296 flight, the most prominent and furthest peaks has been yellow labeled: 45 – The Grandes Rousses with the Pic Bayle 3465m.a.s.l and 438 km distance; 46 – The Dauphine Alps with the highest and the furthest peak Barre de Ecris (4101m.a.s.l) and its slope Dome de Neige des Ecrins (4002m.a.s.l.) from 453 km distance! (udeuschle.selfhost.pro)
This observation was really fortunate at that time. In spite of plexiglass distortions and cracks, I could quite clearly see the mountain outlines and moreover, I was able to see the snow on the top (Pic. 41).
Unfortunately, the plexiglass in the aircraft is not the same. One flight may differ much from another. For instance, during the next time when I was returning from Mallorca, I couldn’t make a similar effect using a 300mm lens (Pic. 47 – 50). I had problems even with a small zoom (Pic. 47-50).


Pic. 47-49 Sierra de Tramuntana seen from flight U2 3214 (PMI-STN) above Barcelona (180 km distance) with the most prominent Puig Major (1415m.a.s.l.) and Puig de Masanella (1364m.a.s.l.), all pictures with gamma & contrast modified: 47 – 300mm, a quite fuzzy outline; 48 – 135mm, relatively sharp; 49 – 55mm – sharp.
Pic. 50 One of the very rare examples, where even a small zoom lens (55mm) can’t provide a good picture quality, because of too many cracks and distortions on the plexiglass, Pyrenees Mts, Tuc de Molieres community and Val de Mollieres.
At the very end of my article, I would like to share the newest flightseeing long lens photography from my last journey from Dubai to Manila, when I was able to see the Himalayas Mountains (Pic. 51 – 54).
Pic. 51 Sishapangma (8027m.a.s.l.) seen from around 310 km distance during the flight EK334 (DXB-MNL), 120mm, cropped with gamma & contrast modifying.

Pic. 52 Himalchuli (7893m.a.s.l.) seen from around 340 km distance during the flight EK334 (DXB-MNL), 98mm, gamma & contrast modified.

Pic. 53 Mount Everest (8848m.a.s.l.), the highest peak in the World was in the clouds, and Tutse (6758m.a.s.l.) on the right seen from around 290 km distance during the flight EK334 (DXB-MNL), 98mm, gamma & contrast modified.
Pic. 54 The Kangchenjunga (8586m.a.s.l.) seen from around 270 km distance during the flight EK334 (DXB-MNL), 240mm, gamma & contrast modified.
And the Ganges river is just under me :).
Pic. 55 The Ganges river with the bridge near Bhagalpur and Raghopur, 55mm. Due to poor visibility conditions in this area, I had to modify the gamma and contrast to enhance this view.
To summarize, the biggest lens, that you can use in the plane is 135mm. It gives you a guarantee to have nice and sharp pictures. This is still a big zoom, that allows you to have around 8x zoom factor compared to the kit lenses (17-18mm).
Mariusz Krukar
Links:
- The dip of the horizon calculator
- The dip of the horizon explanation
- Forbes: Electrochromic Materials Used To Make Smart Glass In Airplane Windows Could Have Widespread Uses
- Aircraft windows
- Why is there a hole in one of the layers of an airplane’s windows?
- Interactive plane windows
- How The Magical Windows in Boeing’s 787 Dreamliner Work
- Current World Record of ground-to-ground distant landscape photography
- Current World Record of distant landscape photography – explanation
Read also: