
Rendering the Heywhatsthat.com horizon in Stellarium
I am very excited to announce to you a brand new tool, which has been developed just after the newest Stellarium edition was released. I mean the Stellarium version 0.2 onwards, which is the reach of new features. One of them is the possibility of loading the polygonal type of horizon, known by many of us from the Cartes du Ciel software. This is exactly the thing, the new tool is related to. Namely, the small application grabs the horizon from Heywhatsthat.com and generates the polygonal horizon for us. I would like to explain to you how it works. Trust me, it’s very useful for someone, who knows how the local horizon corresponds with a celestial object’s ephemera.
So far we know the Peakfinder.org platform & app, which is able to give us the details about the solar and lunar circumstances against the local horizon. The problem is, that we still have nothing besides it. If you want to know how your local horizon would correspond with the set of Jupiter and Venus, the issue becomes tricky. Fortunately, this application is going to sort out all these problems for us. Before we start to seriously use it I want to iron out how it works.
1. BASIC USAGE
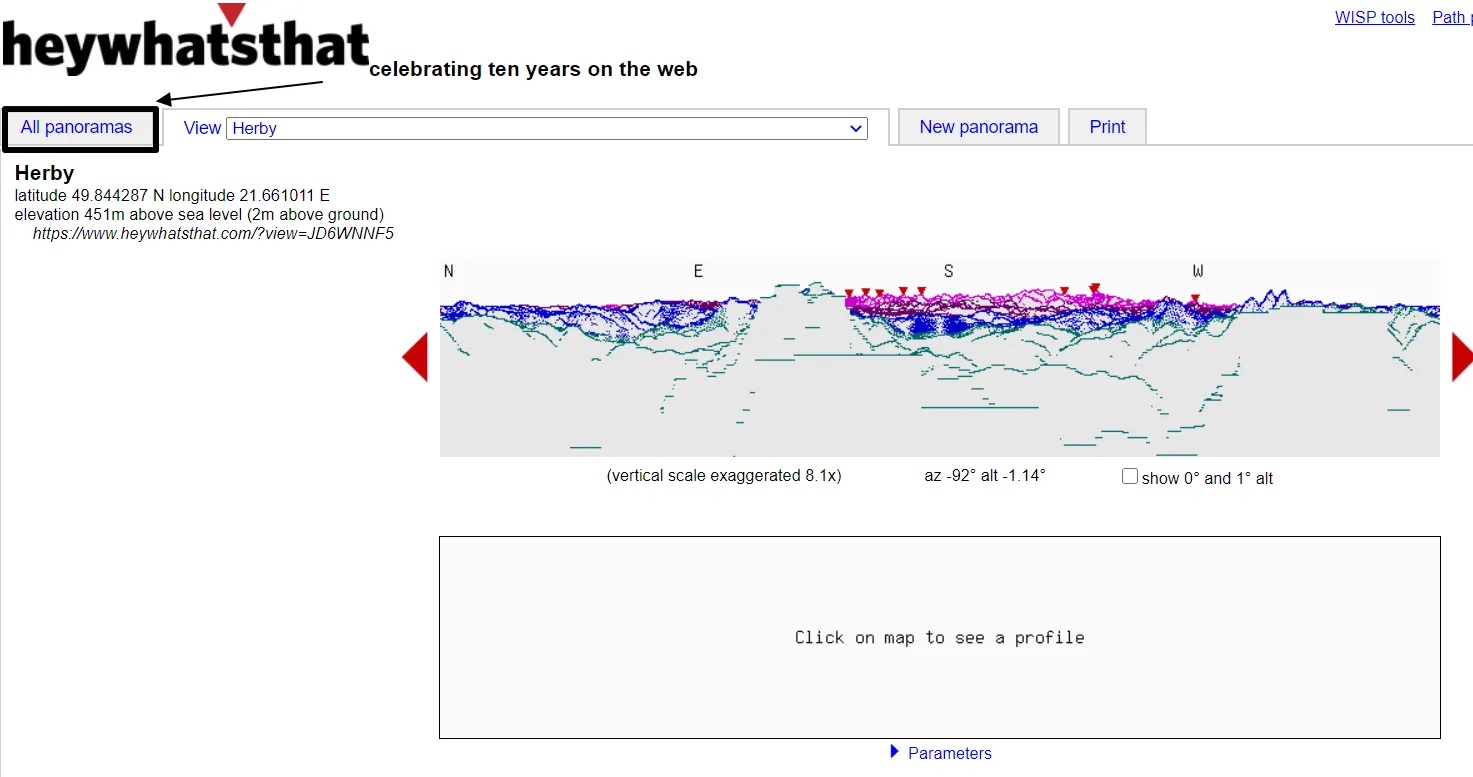
We start from the Heywhatsthat.com website, where we choose one of the panoramas provided (Pic. 1).

Pic. 1 The panorama selection in Heywhatsthat.com
We need just click on the point signature and select “View” in the smallish pop-up window.

Pic. 2 One of the typical panorama generated in the Heywhatsthat.com service.
Next, we should copy the unique ID number of this panorama. The number is located just below the panorama selection in the main toolbar at the top (Pic. 3).
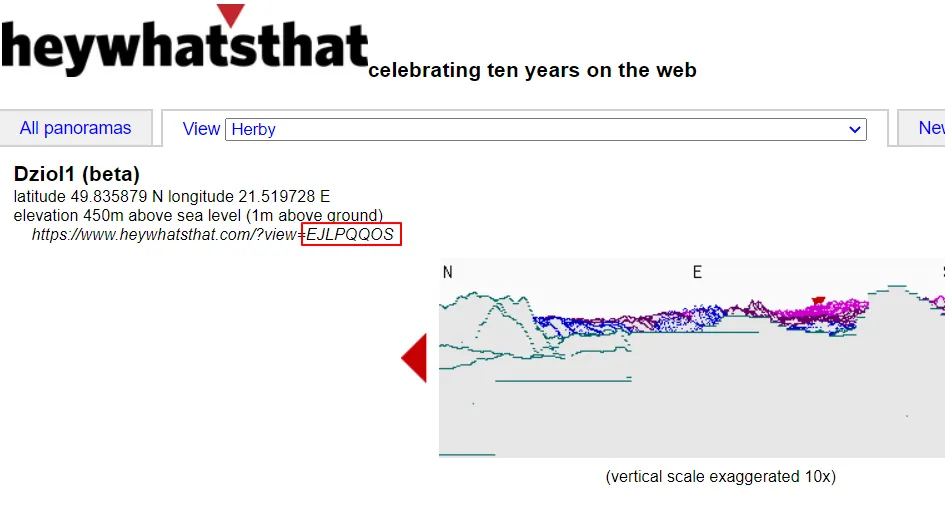
Pic. 3 The unique number of the panorama generated by Heywhatsthat.com.
Now is the time to launch the application, which is based here. The first thing to do here is to paste the ID number, which has been copied from our Heywhatsthat.com panorama (Pic. 4).
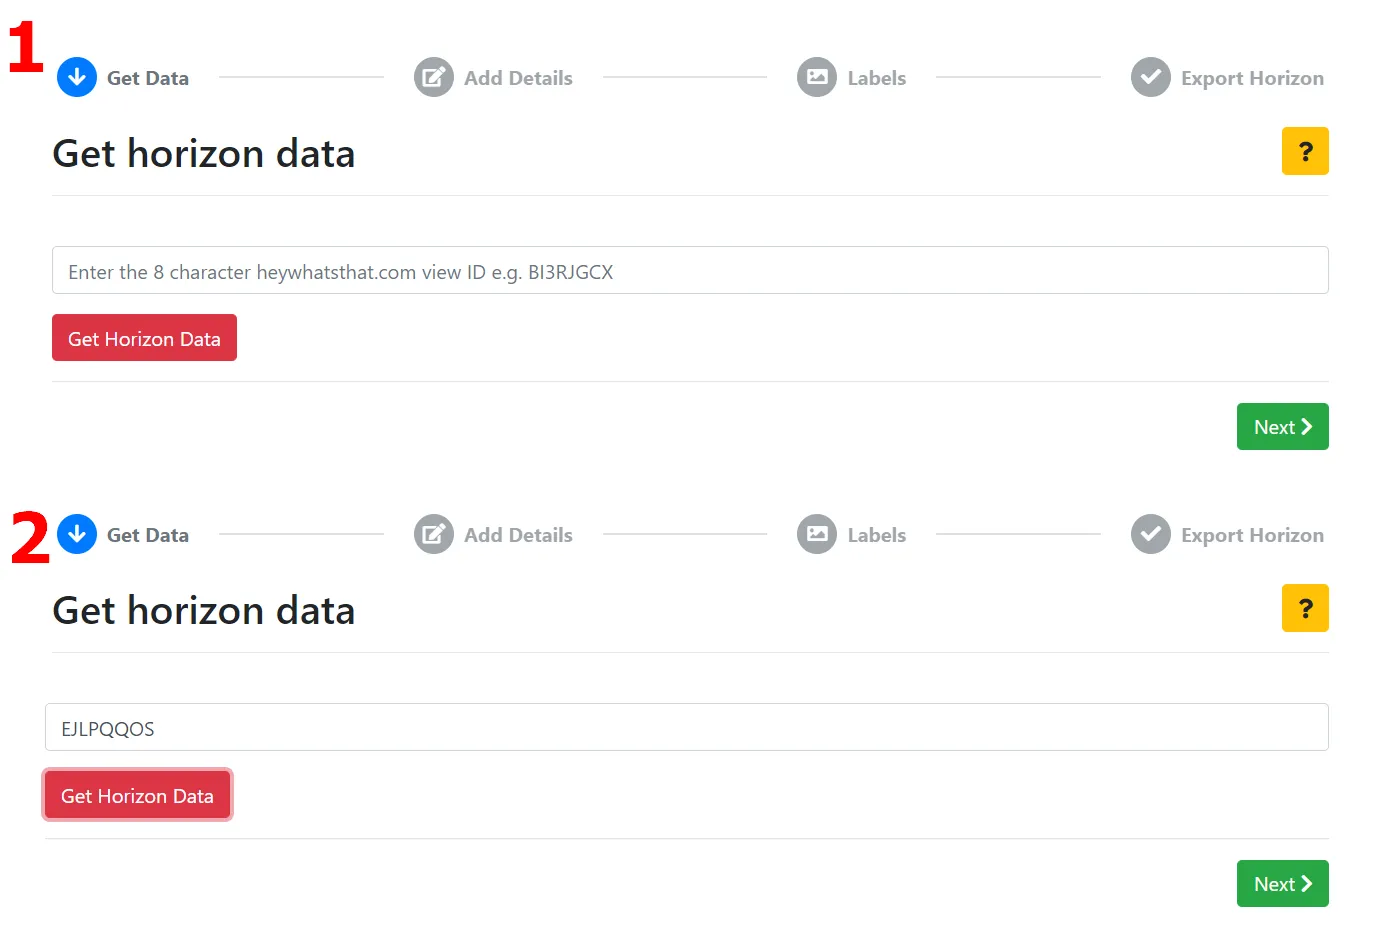
Pic. 4 Getting horizon data for our Heywhatsthat.com panorama.
Next, we should click the red “Get Horizon Data” button and give it a go, by clicking “Next“. If you are still unsure what to do at this step, there is the yellow question mark provided at the top right. Once you click, it will populate all the steps for you.
Since we have the crude calculations of our horizon we need some identification data of it (Pic. 5). It’s up to us, what we would like to have there. It won’t impact the horizon data.
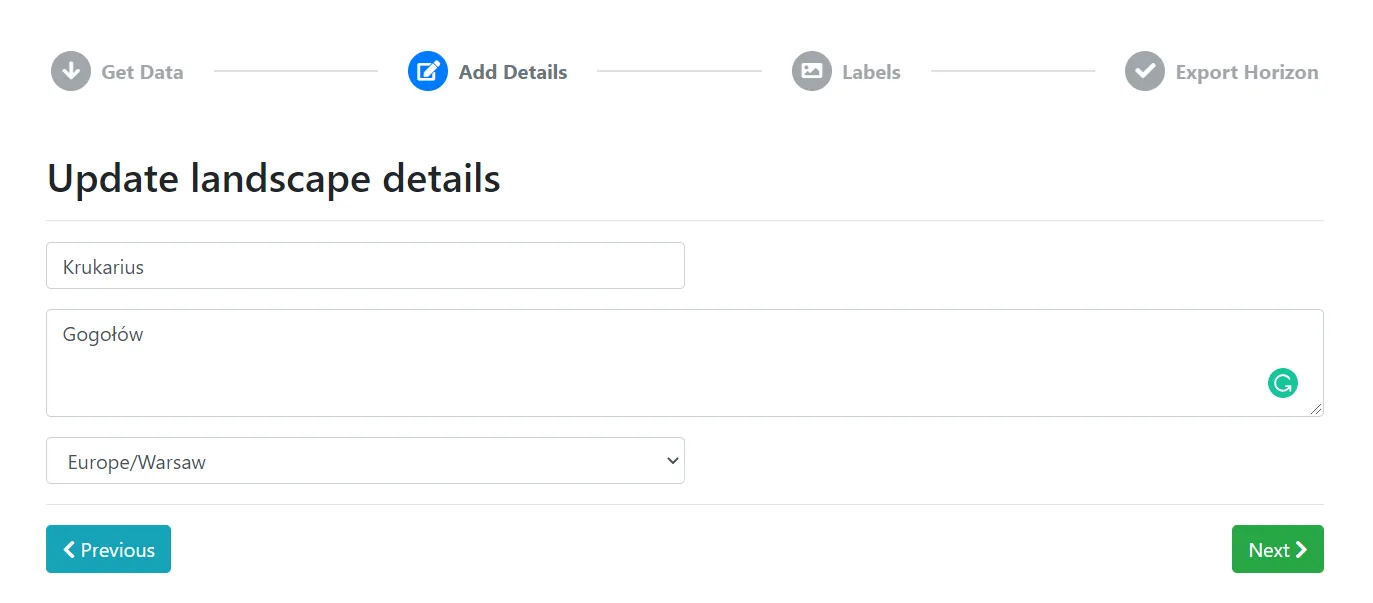
Pic. 5 Adding some detail to our Heywhatsthat.com horizon data.
Another step is very important I think because it defines the description of our horizon. If you have a vista in the mountainous area, then you can get around much easier by having at least a few prominent mountains marked. The standard list of labels comes with a few records usually. However, there is quite an easy way to expand it. You must only follow the rules included in the yellow question mark. The most important of them are:
– decimal places
– distance units (must be metric)
– altitude units (must be decimal)(Pic. 6)
Pic. 6 Adding new labels to our horizon. The most important things, which we must care about are bounded black and they give a result marked red. This result must be copied to our horizon generator.
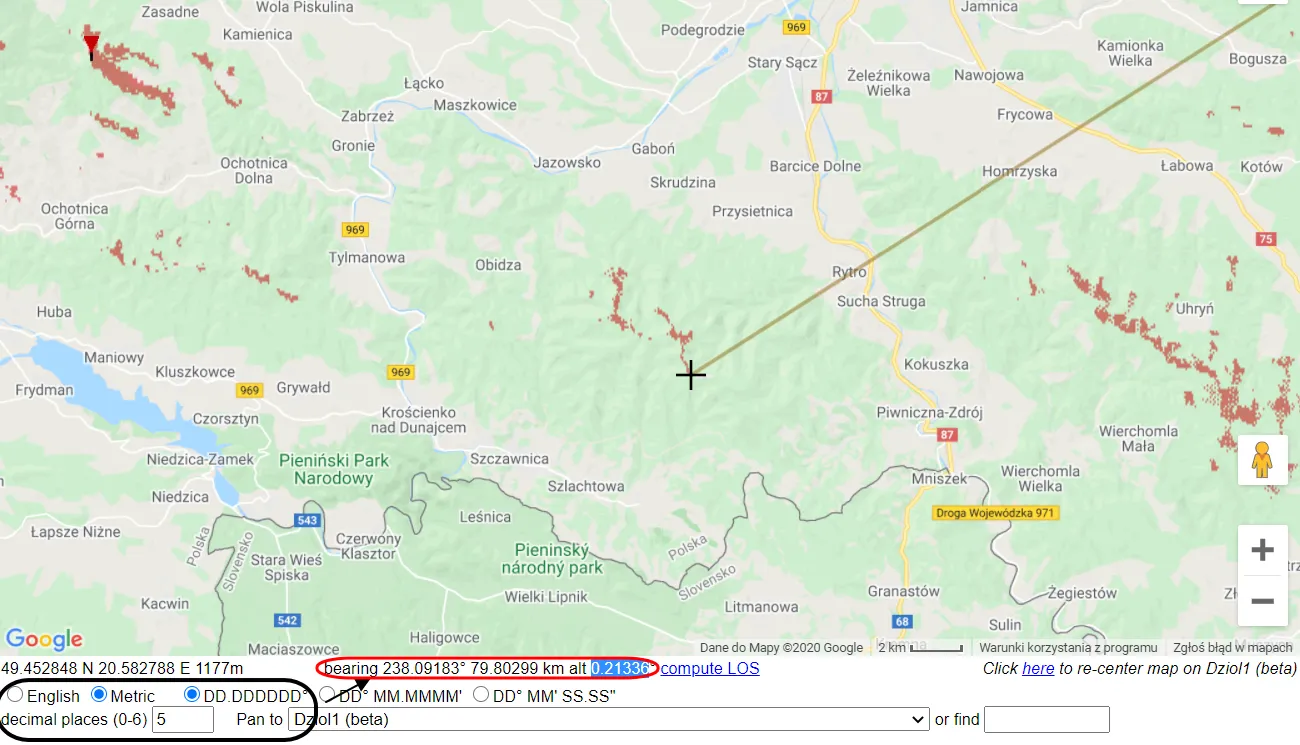
Apart from these 3 elements, you have got also a bearing, which must be true and I believe it’s been set on the website as a default. When your settings are correct, you can select some interesting peaks from your visibility cloak. Once clicked, the black crosshair will be displayed. Along with it, the red-bounded stuff is coming, which corresponds to the point, possible to see by an observer standing at the place, where the panorama was generated. The “bearing” value indicates our azimuth and the “alt” – is altitude against the horizon (it can be negative also). These values must be copied into the table, where our other labels are located (Pic. 7).
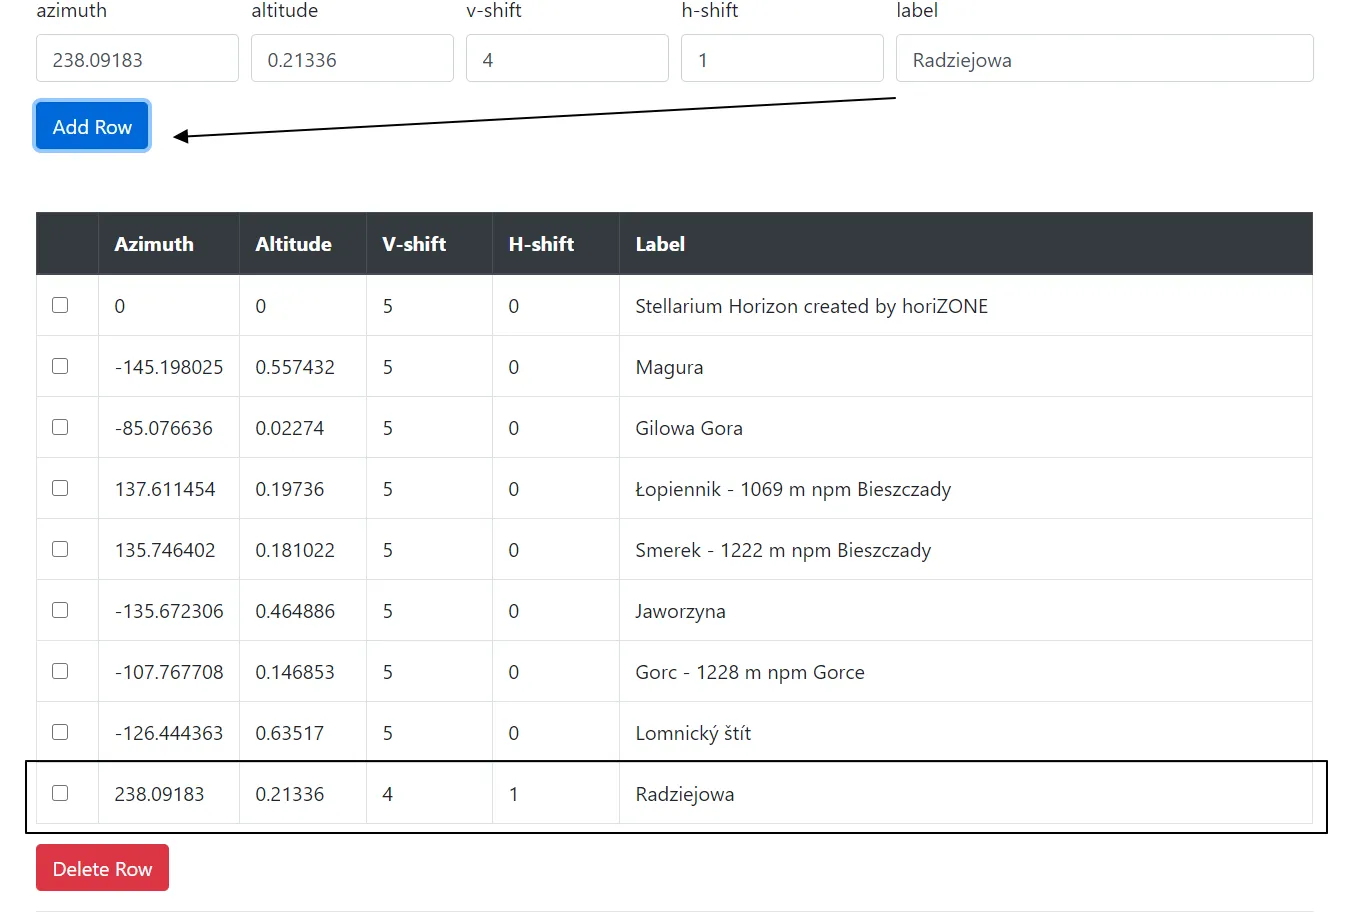
Pic. 7 Adding a new label to our new horizon. Once click “Add row” it becomes visible at the very bottom.
Besides the azimuth and altitude data, you have the v and h-shifts. Their values define the position of our label against the object located at the horizon. The last – label determines our final name (the peak name). When everything is alright, we can proceed to the last step, which is downloading our horizon (Pic. 8).
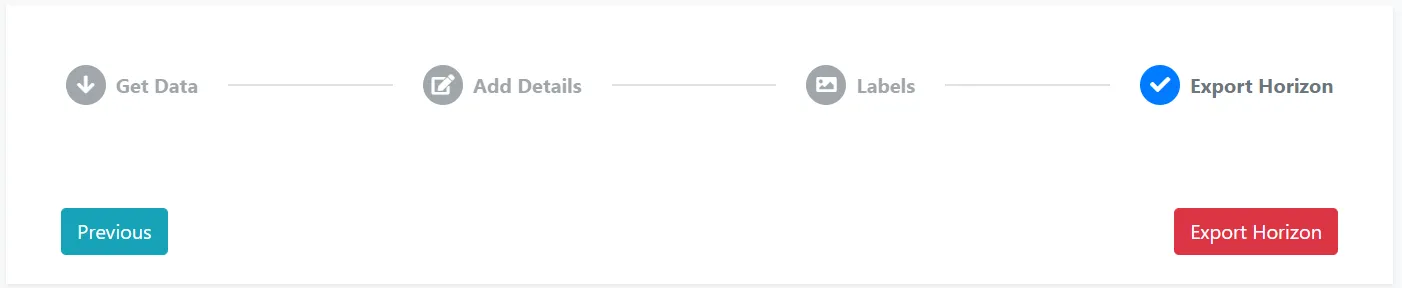
Pic. 8 Export our horizon.
The zipped file should be saved instantly in our “downloads” folder. It includes 3 core files when opened (Pic. 9).
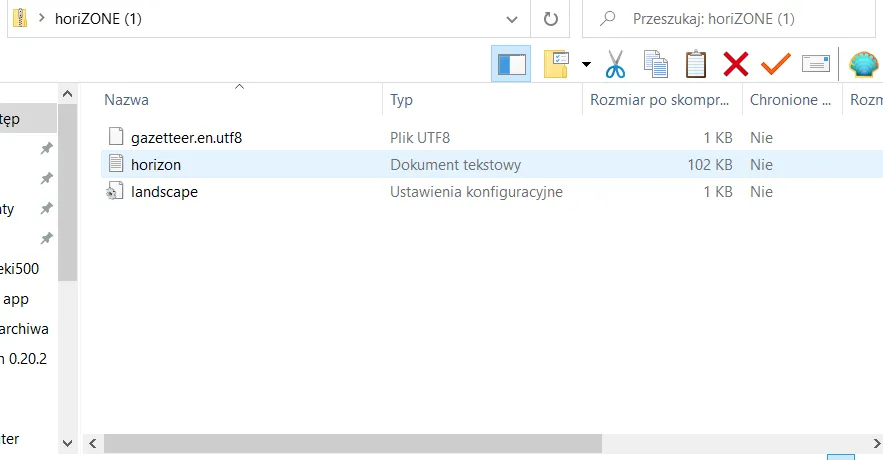
Pic. 9 Our horizon includes 3 core files.
Each of them is important. The first one contains our labelling, the second one includes a whole horizon calculated from the Heywhatsthat.com website, and the last one is the Stellarium system file, which defines all features of our horizon in this software (Pic. 10). Missing any of them means, that our operation will fall through.
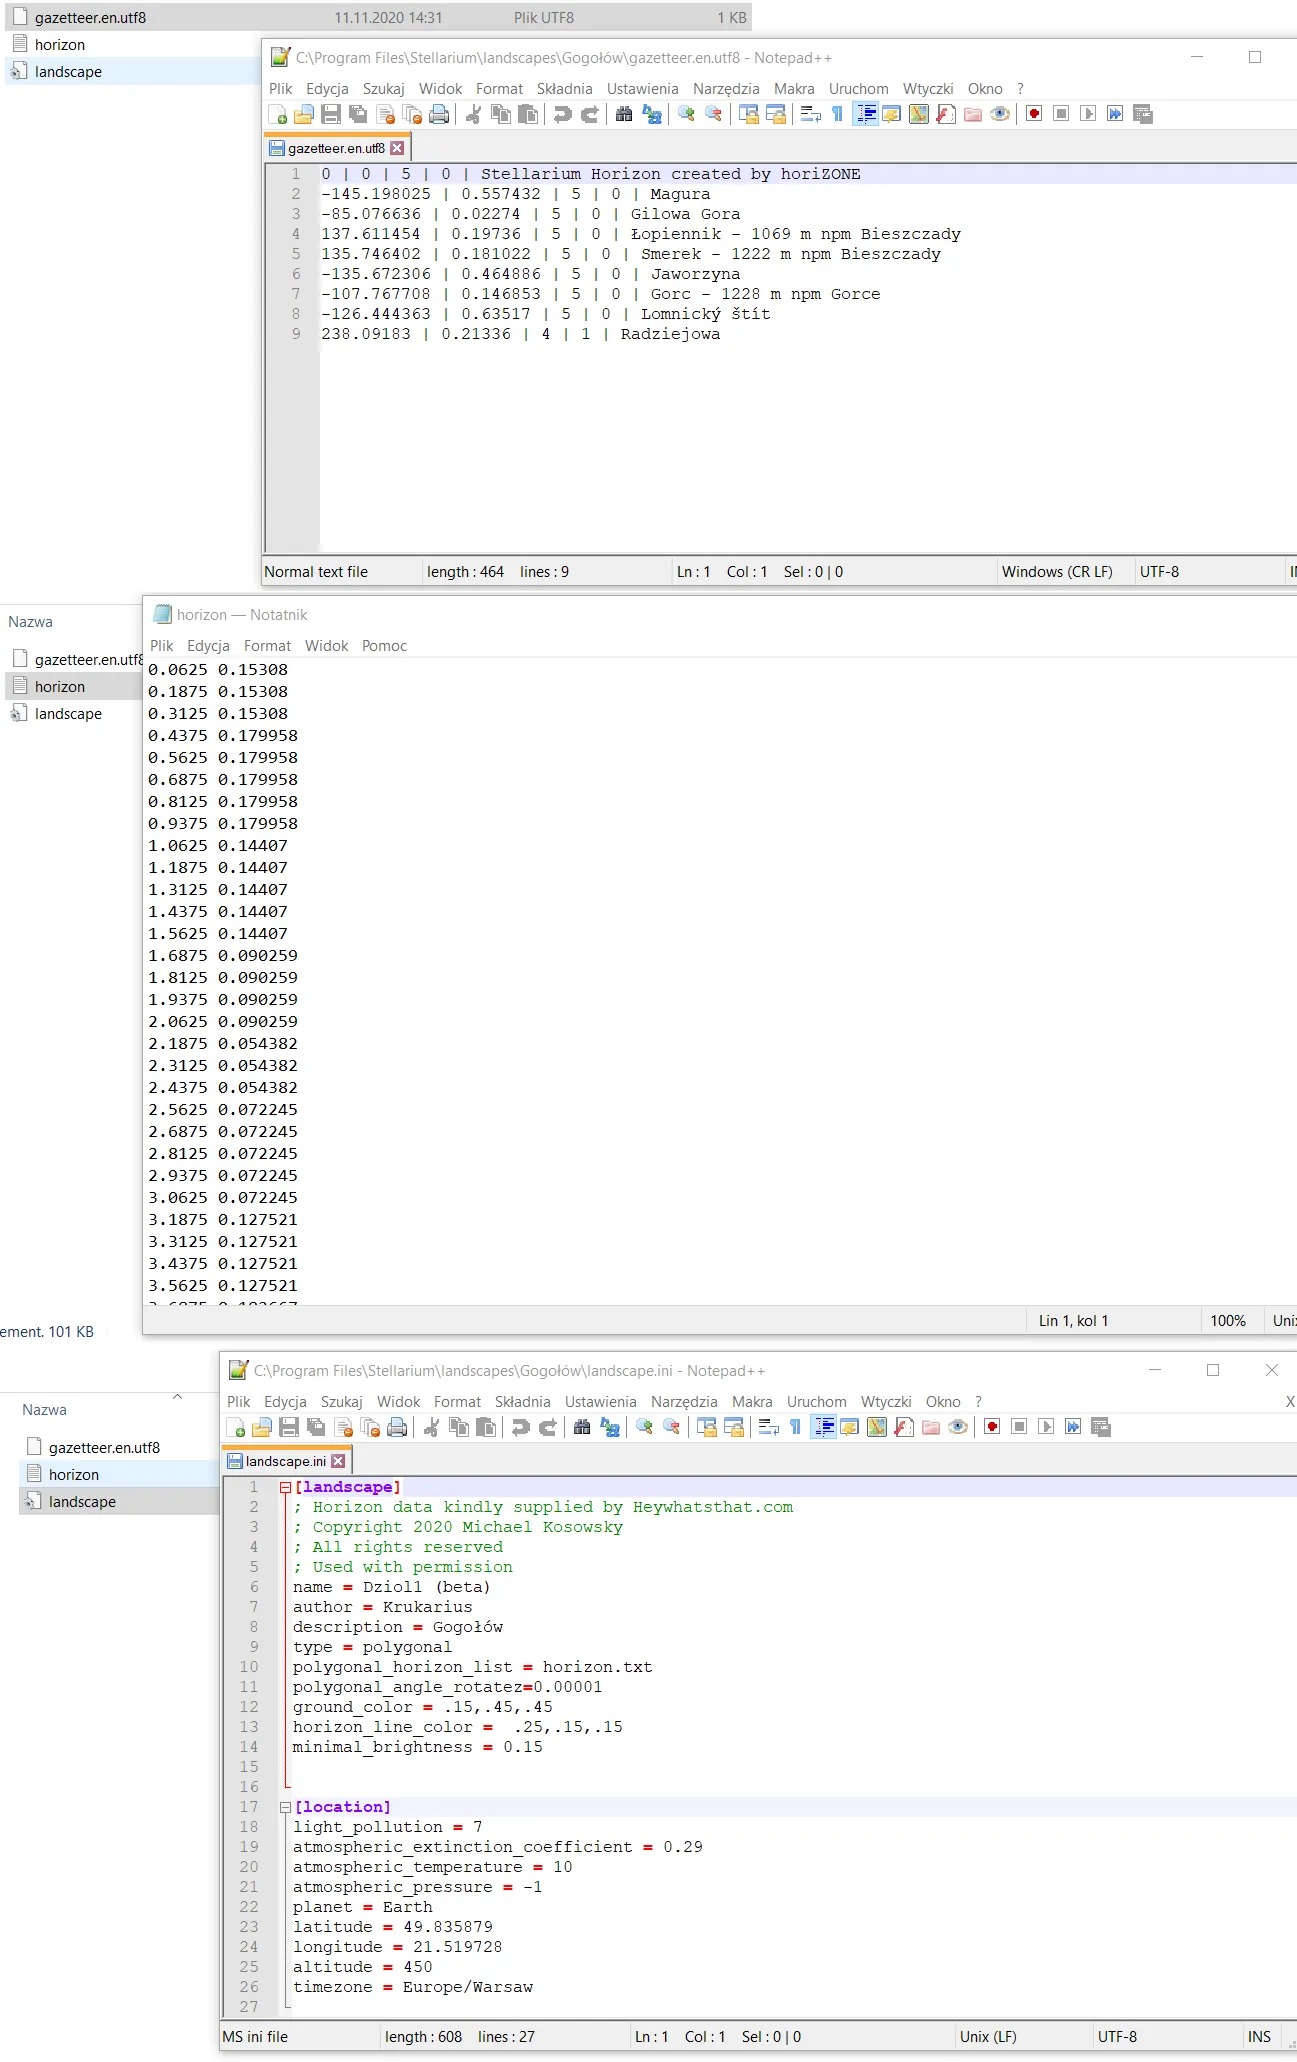
Pic. 10 All files and their content build up our Heywhatsthat.com horizon in Stellarium.
Our last step is to rename the folder (I did it and changed the name from Horizone to Gogołów) and copy it into the Stellarium landscapes directory, which path is: ../Stellarium/Landscapes (Pic. 11).
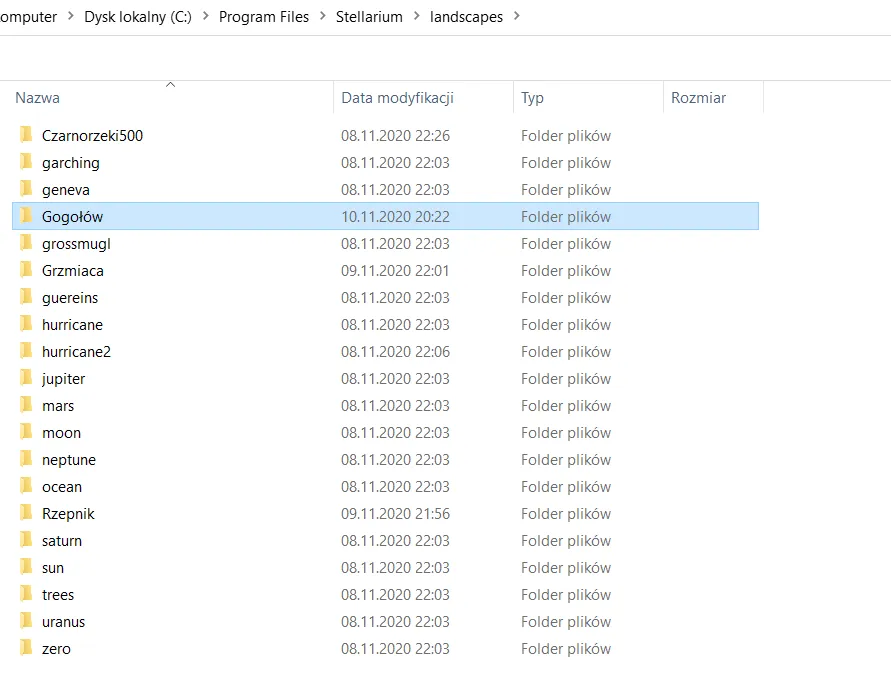
Pic. 11 Our horizon copied to the folder directory in Stellarium.
Now, we can launch the Stellarium software and load our horizon (Pic. 12). Just open the “Sky and viewing options window” and select the horizon stored in the target directory.
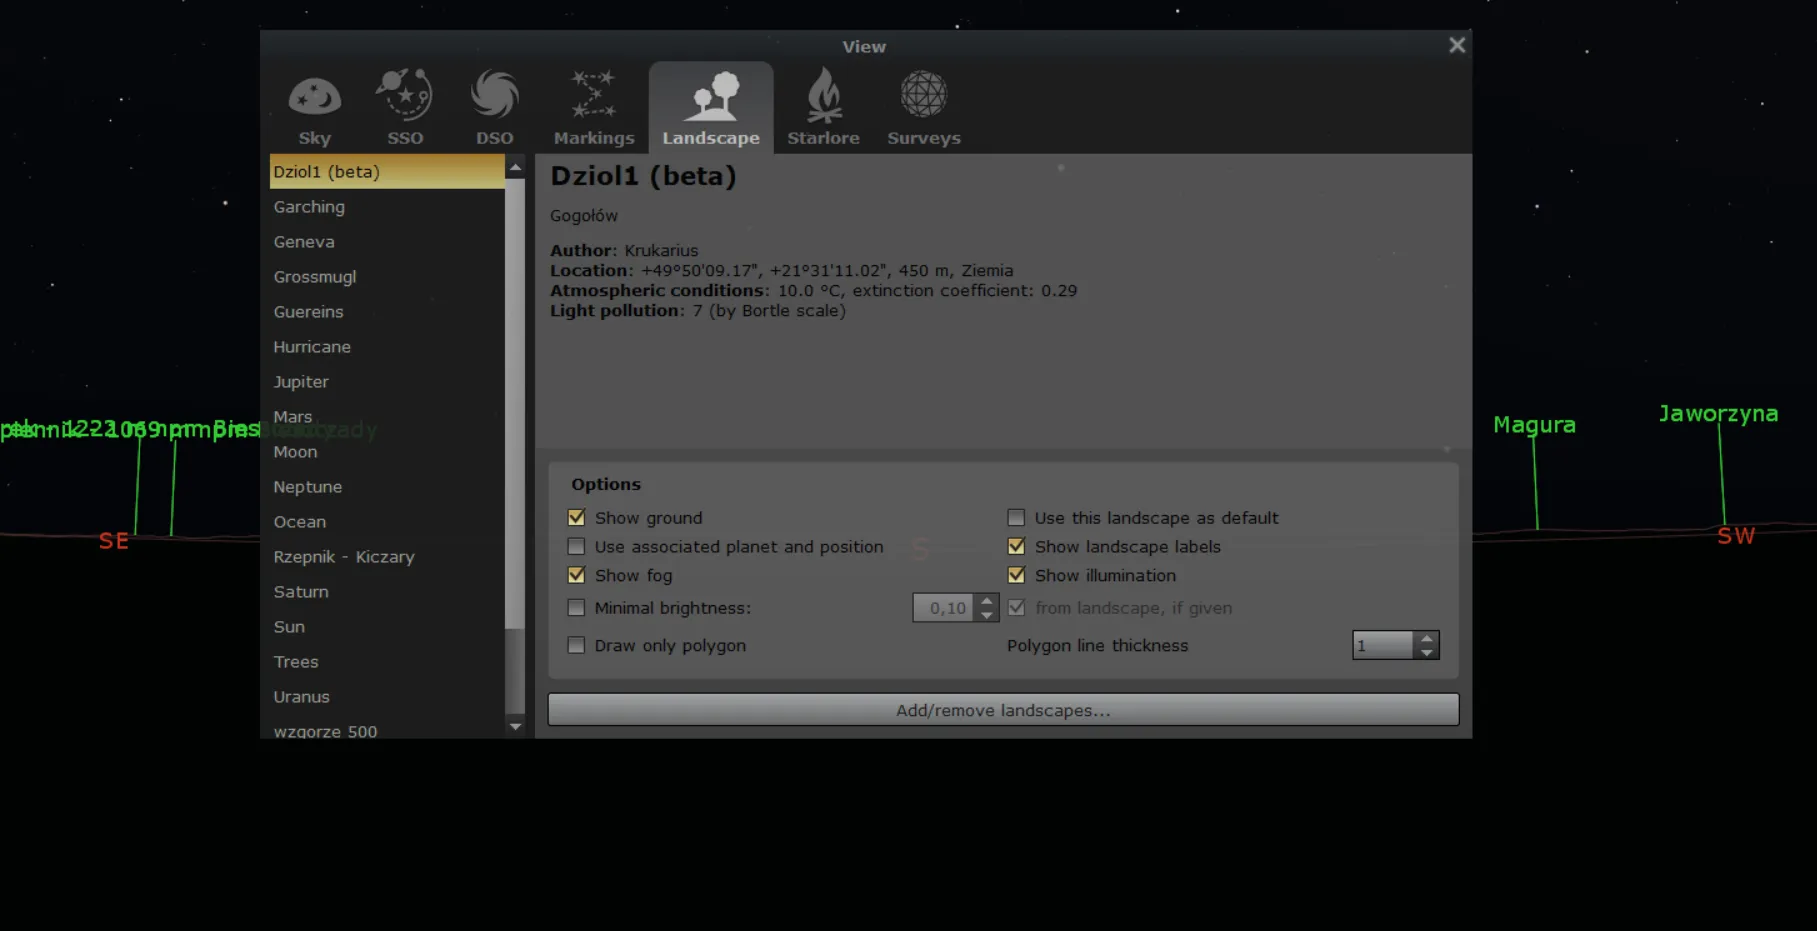
Pic. 12 Our horizon loaded successfully in Stellarium.
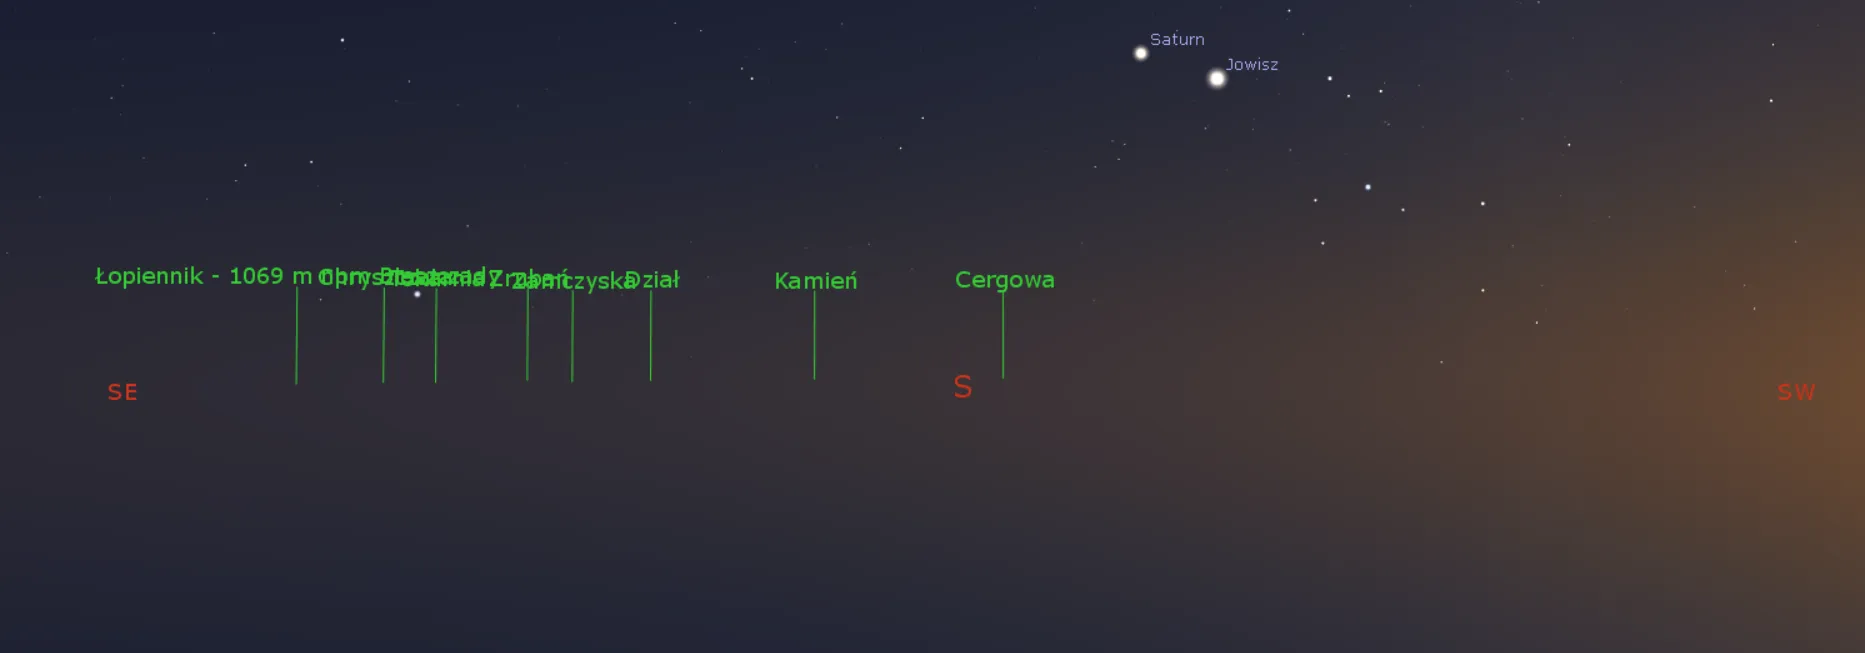
Now, enjoy it! You can see how it looks in the Stellarium. The horizon is plain-coloured without any details, but what is the most important than the final shape?

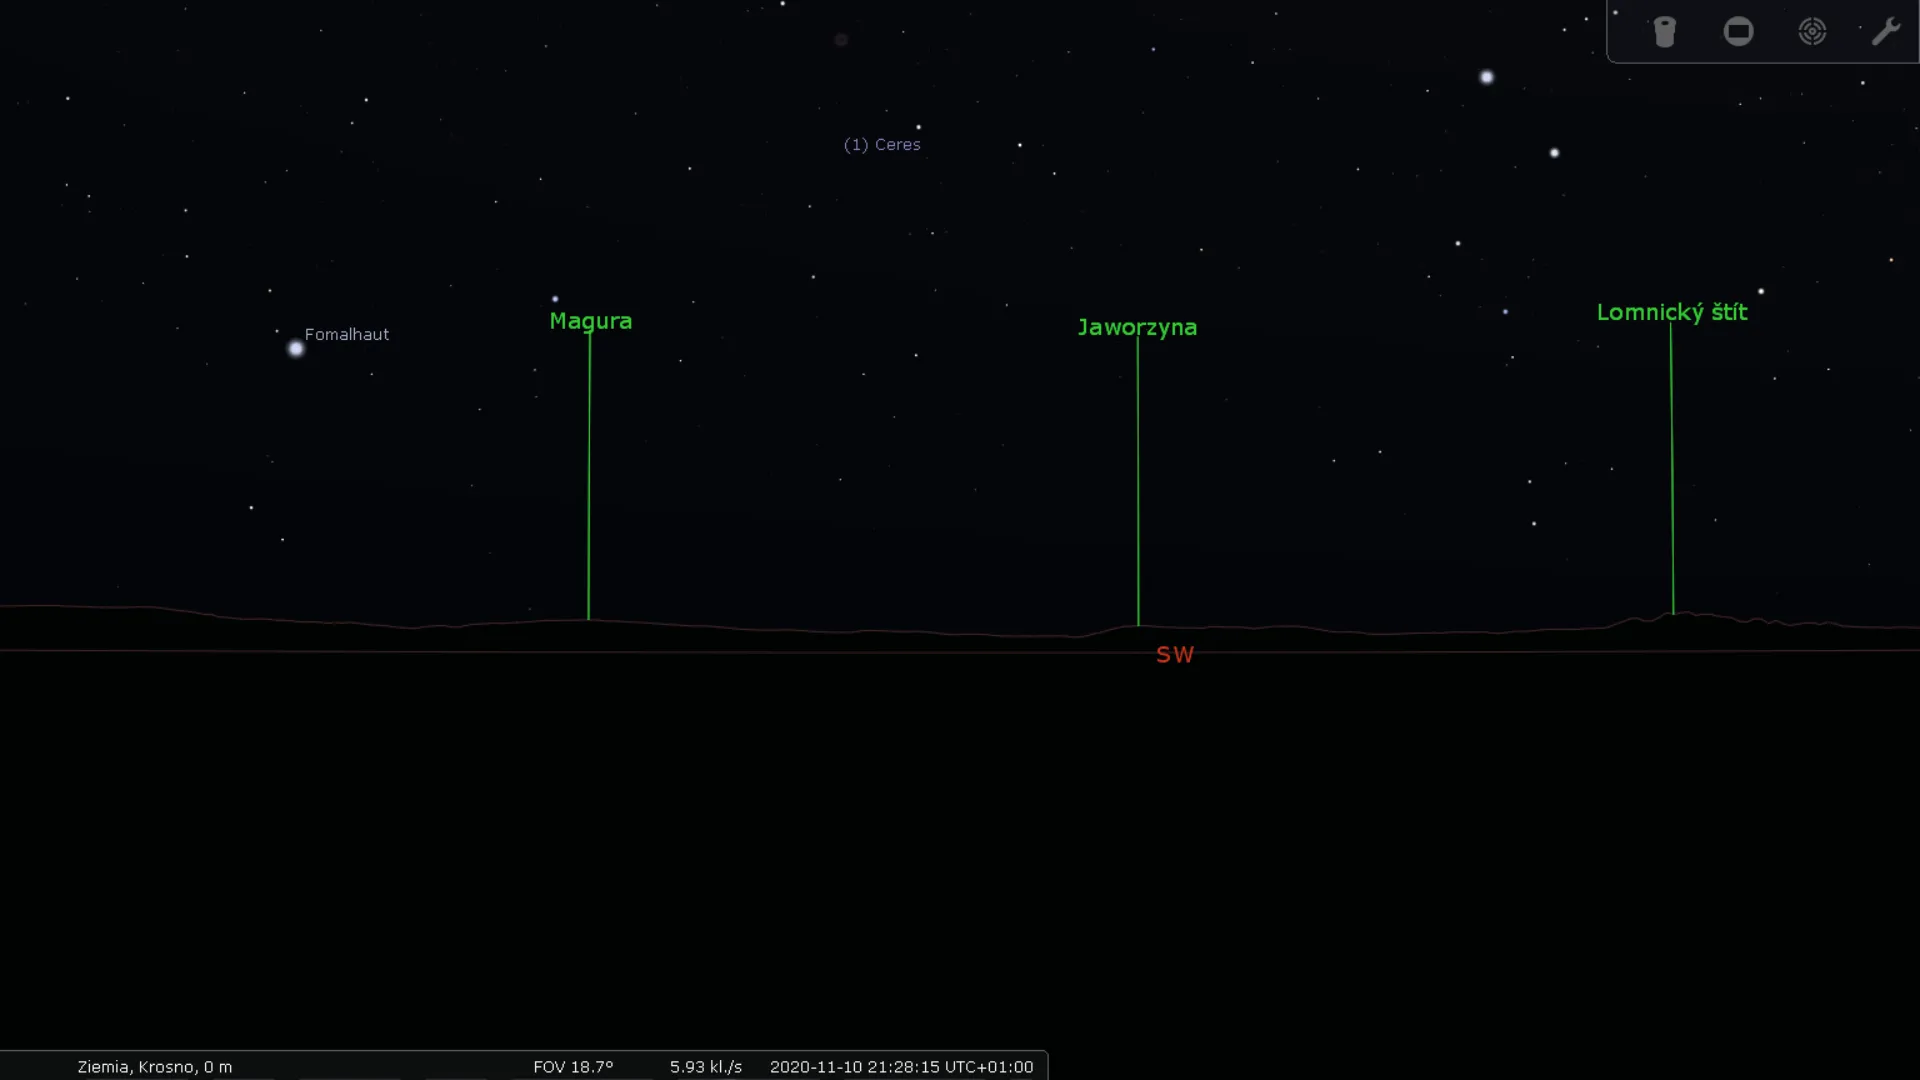
Pic. 13, 14 The Heywhatsthat.com horizon in Stellarium software.
You can also see the label, you created (Pic. 15).
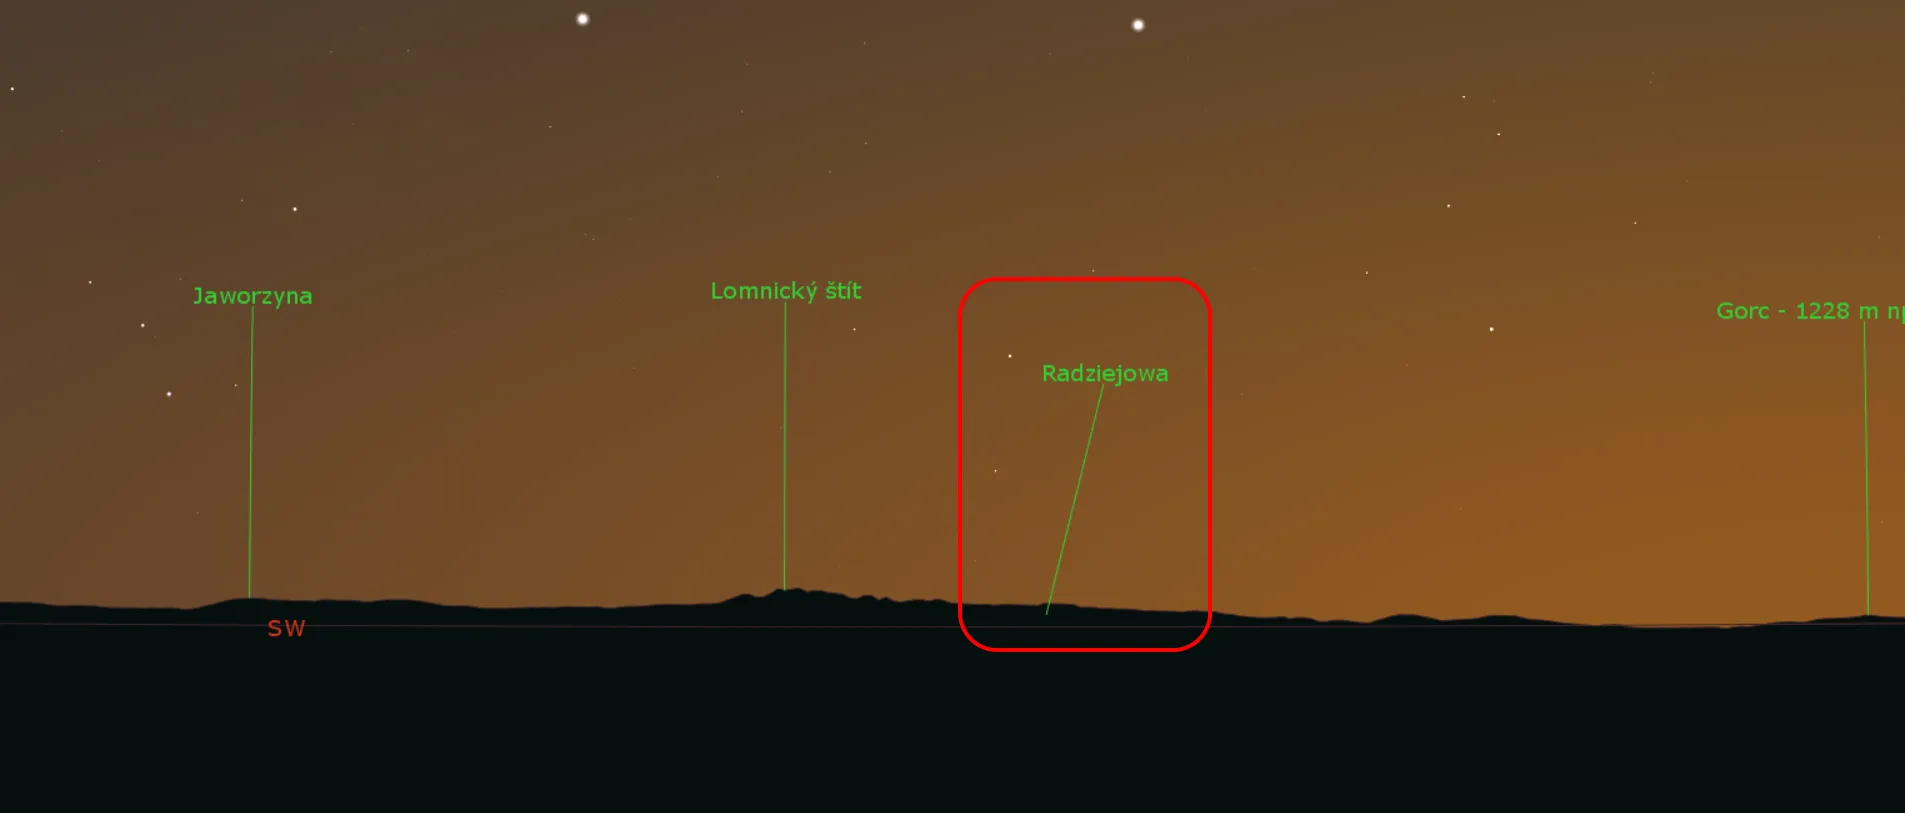
Pic. 15 Heywhatsthat.com horizon in Stellarium with our new label.
Everything is working perfectly! But not always…
2. BUG FIXING
Quite often, we are entering Heywhatsthat.com to generate our own panorama. It’s fine, but the author of this application advises publicizing our panorama first. When our panorama is ready, we must back to “All panoramas” (Pic. 16) and find our panorama.
Pic. 17 “All panoramas” in Heywhatsthat.com
Finding our panorama should be straightforward, as it appears as the red placemark instead of blue, typical for the public, already existing public panoramas (Pic. 18). When our panorama is “made public” the placemark turns its colour into a blue-red appearance.
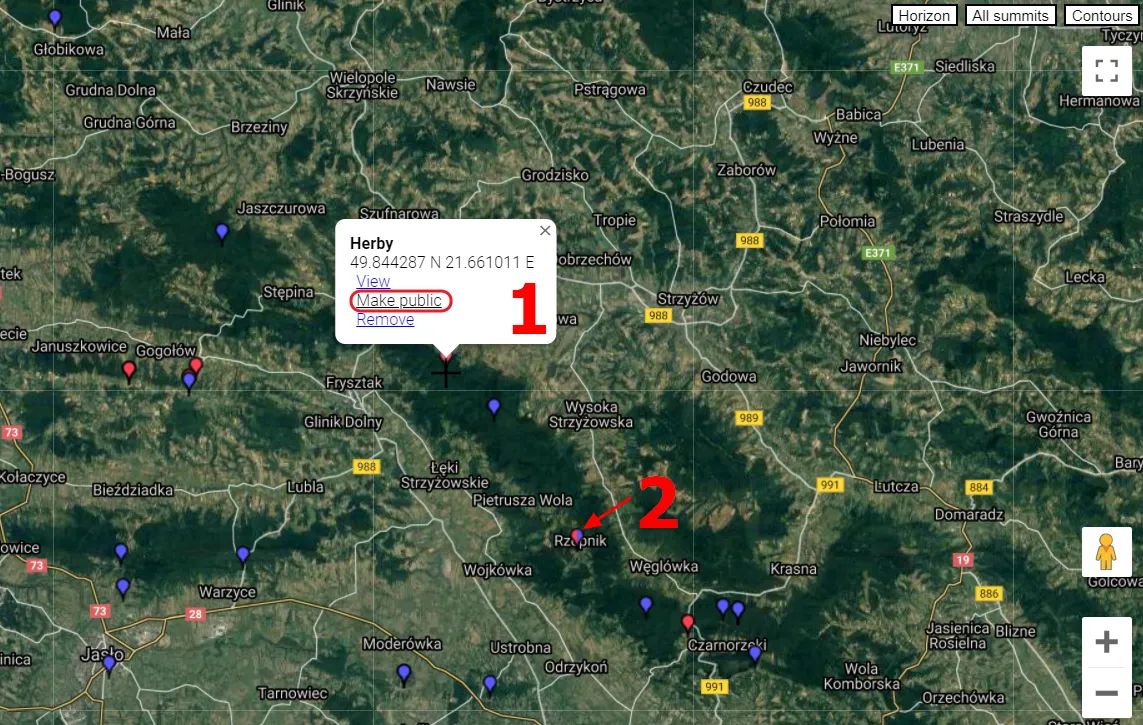
Pic. 18 Making our Heywhatsthat.com panorama public, where: 1 – the “Make a public” option; 2 – the red-blue placemark saying, that our panorama has been publicized.
Next, going through all the next steps we can deem, that everything is fine. When we see the files, we can guess, that it’s not (Pic. 19).
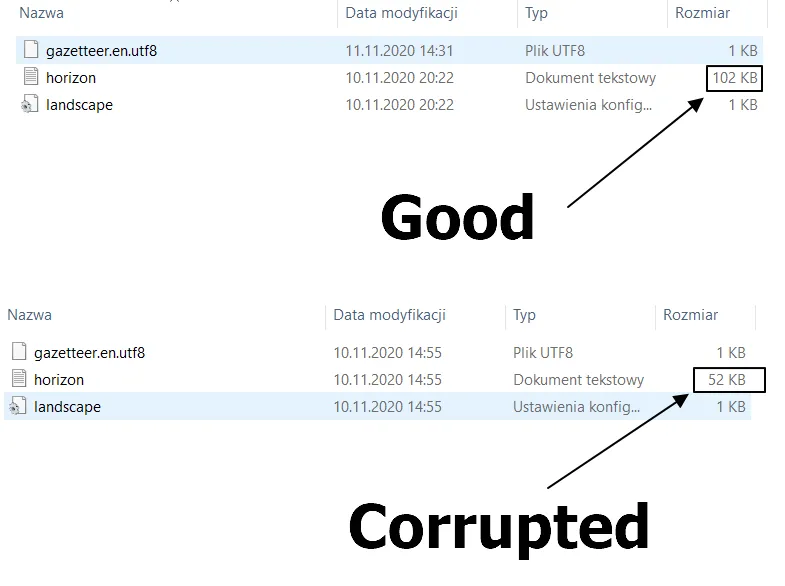
Pic. 19 The difference between good and corrupted horizon.txt file. The good one weighs about twice more.
The good horizon.txt file should weigh over 100kb, whereas the corrupted one is lighter by half. What is the reason behind it? Every horizon.txt file includes the detailed circumstances at the azimuth between 0 and 360 degrees. The good one contains all these calculations doubled, whereas the wrong one doesn’t. If we want to fix this file, we must copy a whole azimuth 0-360 data and simply paste it underneath (Pic. 20).
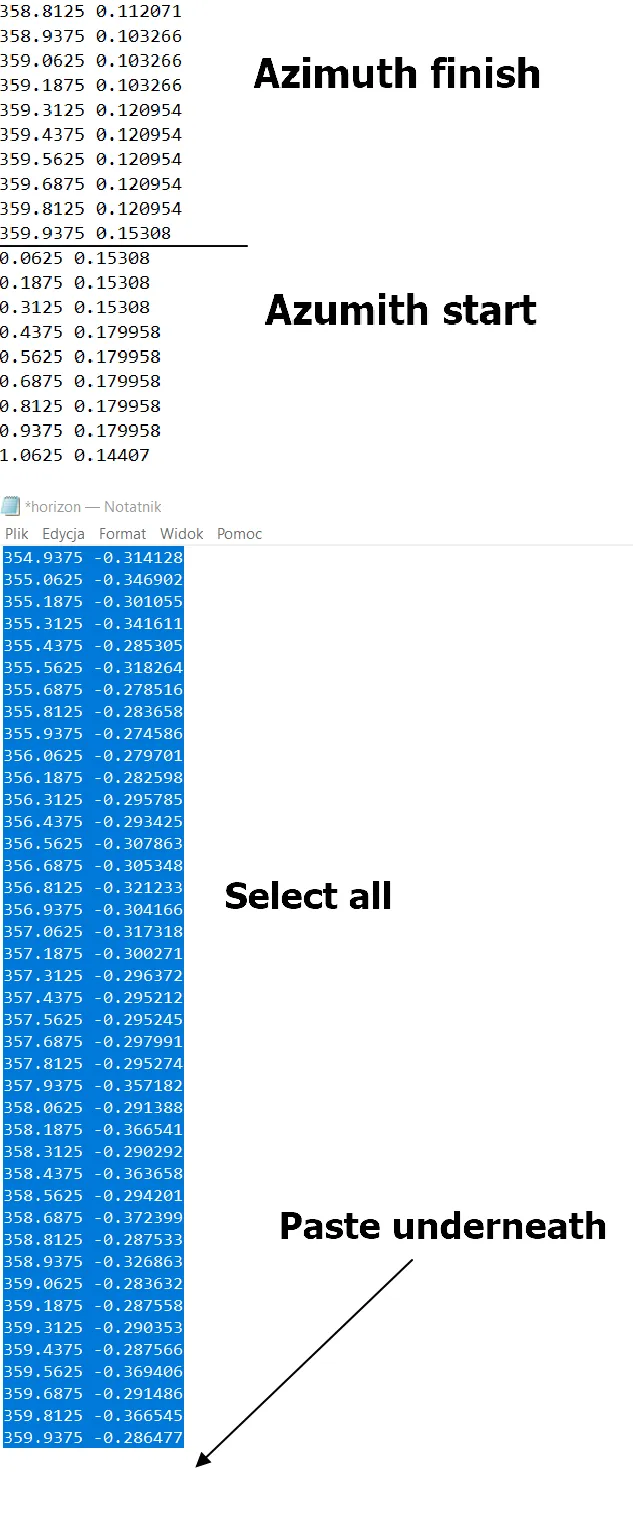
Pic. 20 Fixing the corrupted Horizon file. The upper part shows how it looks in the correct one.
Another thing to fix is in the landscape.ini file, where the following line is required (Pic. 21).
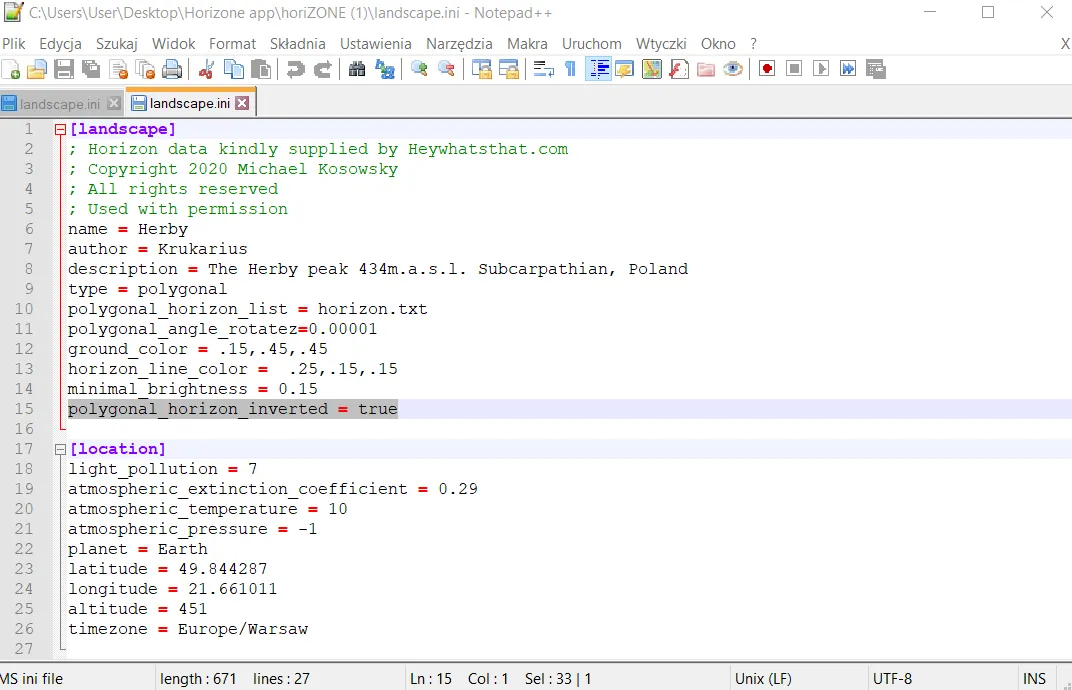
Pic. 21 Landscape.ini polygonal horizons inverted.
These steps are not necessary when you decide to download your panorama i.e. next day. The bug comes because the panorama cannot be published straight away. Even if you click the “Make a public” option it’s still not recognized for this application. This is where this bug comes from.
Pic. 22 The blank horizon is a result of the corrupted file coming from the Horizone application.
The corrupted file will result in a completely blank horizon with the labels only. I hope, that after this modest tutorial, nobody will experience this situation anymore.
3. CONCLUSIONS & COMPARISON WITH GOOGLE EARTH
In general, the application is really useful. It defines the sets of all celestial objects possible to see against the local horizon, not only the Sun and Moon. Now, when you know the local horizon better, you can plan beautiful celestial object sets. I hope, that in the future I will see many more such spectacular images like this below (Pic. 23).
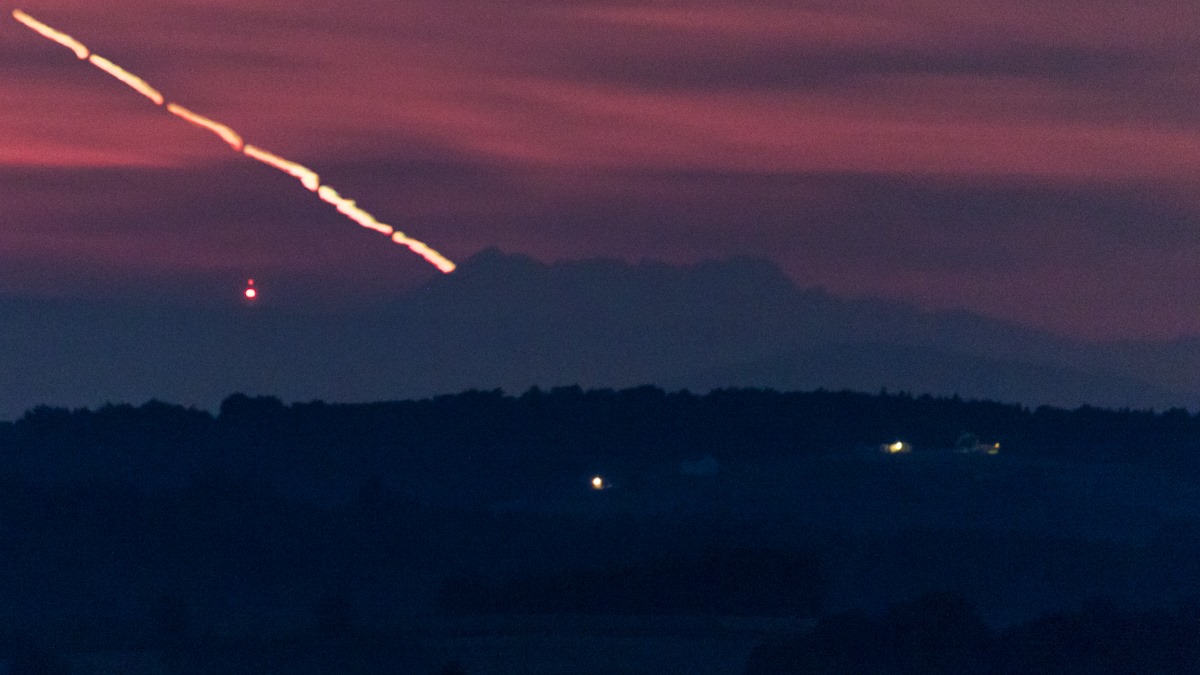
Pic. 23 The Jupiter set behind Tatra Mts (Kozi Wierch) is seen at 141km distance from the Szkodna village in Poland. August 2, 2020, about 3:20 am. Jupiter set just 13 minutes after the Moon, hence the clouds beyond are still illuminated (credits: Tomasz Ziajor).
The final advice sounds – don’t grab the Heywhatsthat.com panorama straight away. Wait for it a bit, please. It will prevent you from the error described above. The panorama submitted to the public might be not always recognized by this tool straight away. In my modest opinion, the Heywhatsthat.com horizon rendered in Stellarium gives us more details, than the spherical horizon generated by Google Earth, where the majority of distant objects are misshapen. On the other hand, the Google one can be more useful in some mountainous areas, making our horizon good-looking as per in the video below:
If you take into account the long-distance views only, then computing the Heywhatsthat.com horizon and transferring it to Stellarium will be a definitely better option, especially since you are able to manage the labelling.
Mariusz Krukar
Links:
- The HoriZONE app
- Google Earth horizon generator for Stellarium software
- https://dalekieobserwacje.eu/zachod-jowisza-i-ksiezyca-za-tatrami-ze-szkodnej/ (Polish)
Read also:
- Using Heywhatsthat.com to generate multiple summit-perspective views in Google Earth – part 1
- Using Heywhatsthat.com to generate multiple summit-perspective views in Google Earth – part 2
- https://astro-geo-gis.com/astrophotography-with-the-peakfinder-org-part-1-sun-moon/
- Astrophotography with the Peakfinder.org, part 2 – solar & lunar eclipses
- How to make the custom Stellarium landscape using Street View?