
Recently I’ve explained to you how to launch Google Street View from any place on the Folium map. Today it’s the time for continuation – styling the on-click marker, which can be applied to any other on-click marker provided to the Folium map.
Let’s get started with the code discussed in the previous article (break lines not included!):
class ClickForOneMarker(folium.ClickForMarker):
_template = Template(u"""
{% macro script(this, kwargs) %}
var new_mark = L.marker();
function newMarker(e){
new_mark.setLatLng(e.latlng).addTo({{this._parent.get_name()}});
new_mark.setZIndexOffset(-1);
new_mark.on('dblclick', function(e){
{{this._parent.get_name()}}.removeLayer(e.target)})
var lat = e.latlng.lat.toFixed(4),
lng = e.latlng.lng.toFixed(4);
new_mark.bindPopup(
"<a href=https://www.google.com/maps?layer=c&cbll=" + lat + "," + lng + " target=blank><img src=img/streetview.svg width=70 title=StreetView class=StreetViewImage></img></a>",{
maxWidth: "auto",
className: 'StreetViewPopup'
});
};
{{this._parent.get_name()}}.on('click', newMarker);
{% endmacro %}
""") # noqa

def __init__(self, popup=None):
super(ClickForOneMarker, self).__init__()
self._name = 'Google Street View'

gsv = ClickForOneMarker()
map.add_child(gsv)
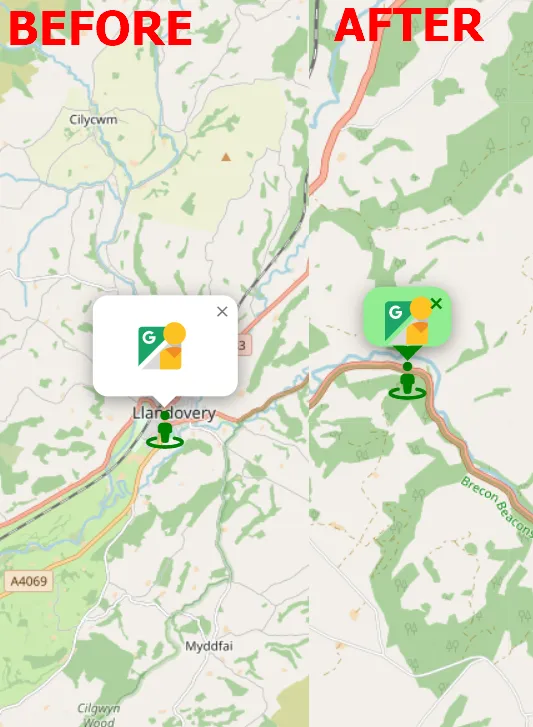
which opens a marker for us when clicked anywhere on the map (Pic. 1).
Now, we are attending to styling both the marker as well as the popup. In this case, we will need to define the separate icon and inject some individual CSS styling for the popup content.
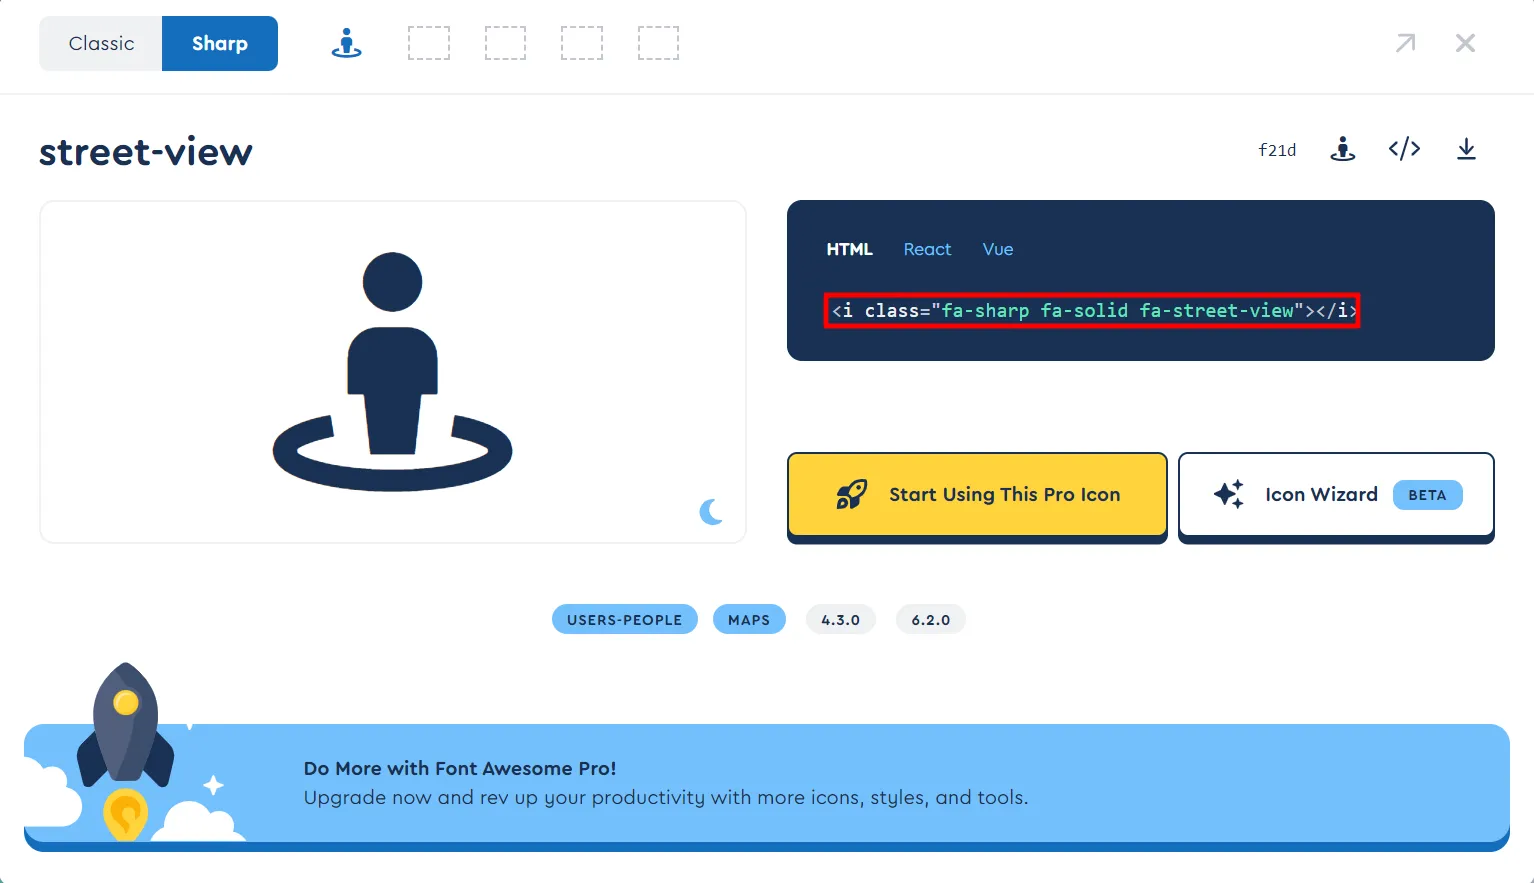
One of the nice ways of changing the default on-click marker icon is using the FontAwesome options, which are indeed available for Leaflet maps. As we know, everything, that happens inside of the jinja2 Template {% macro script(this, kwargs) %} reflects the Leaflet JavaScript code.
Let’s add the Font Awesome icon to our marker:
 _template = Template(u"""
{% macro script(this, kwargs) %}
const fontAwesomeIcon = L.divIcon({
html: '<i class="fa-sharp fa-solid fa-street-view"></i>',
iconSize: [0,0],
iconAnchor: [15,0],
className: 'StreetViewIcon'
});
var new_mark = L.marker();
function newMarker(e){
new_mark.setLatLng(e.latlng).addTo({{this._parent.get_name()}});
new_mark.setZIndexOffset(-1);
new_mark.setIcon(fontAwesomeIcon);
new_mark.on('dblclick', function(e){
{{this._parent.get_name()}}.removeLayer(e.target)})
var lat = e.latlng.lat.toFixed(4),
lng = e.latlng.lng.toFixed(4);
new_mark.bindPopup(
"<a href=https://www.google.com/maps?layer=c&cbll=" + lat + "," + lng + " target=blank><img src=img/streetview.svg width=70 title=StreetView class=StreetViewImage></img></a>",{
maxWidth: "auto",
className: 'StreetViewPopup'
});
};
{{this._parent.get_name()}}.on('click', newMarker);
{% endmacro %}
""") # noqa
by defining a new constant based on the L.divIcon, which provides the lightweight icon for Leaflet markers using the div element instead of an image. By using the html option, we can simply paste the <i> content (Pic. 2) into our code.
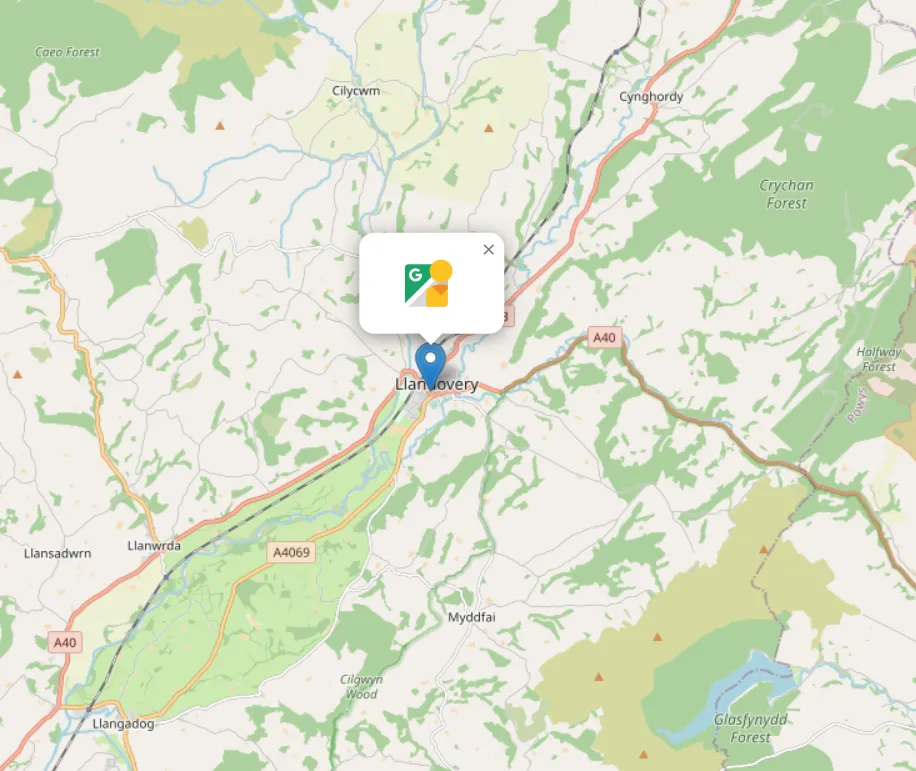
Next, we must use the .setIcon property for our marker in order to make it change. Finally, we should have a result such as this (Pic. 3):
and it’s still wrong, as our icon looks very small here. In this case, we have to increase the size of our icon. There are a few ways, but the simplest is providing the size inside the Font Awesome class as shown in the code below.
_template = Template(u"""
{% macro script(this, kwargs) %}
const fontAwesomeIcon = L.divIcon({
html: '<i class="fa-sharp fa-solid fa-3x fa-street-view"></i>',
iconSize: [0,0],
iconAnchor: [15,0],
className: 'StreetViewIcon'
});
var new_mark = L.marker();
function newMarker(e){
new_mark.setLatLng(e.latlng).addTo({{this._parent.get_name()}});
new_mark.setZIndexOffset(-1);
new_mark.setIcon(fontAwesomeIcon);
new_mark.on('dblclick', function(e){
{{this._parent.get_name()}}.removeLayer(e.target)})
var lat = e.latlng.lat.toFixed(4),
lng = e.latlng.lng.toFixed(4);
new_mark.bindPopup(
"<a href=https://www.google.com/maps?layer=c&cbll=" + lat + "," + lng + " target=blank><img src=img/streetview.svg width=70 title=StreetView class=StreetViewImage></img></a>",{
maxWidth: "auto",
className: 'StreetViewPopup'
})//.openPopup();
};
{{this._parent.get_name()}}.on('click', newMarker);
{% endmacro %}
""") # noqa
Inside our class, we can provide something like fa-3x in order to increase the size of our marker three times (Pic. 4).
Another option, which could be defined here is IconAnchor, where we can provide the correct offset against the mouse click. Don’t play much with the IconSize, because it doesn’t change your icon size! It creates an invisible box around the icon, which might fall too far from the place where the mouse was clicked.
Now, we can start customizing our icons from the CSS side. As you might have noticed, the className: ‘StreetViewIcon’ has been included for this purpose.
In this event, another macro inside the jinja2 Template is required. Our code will look as follows:
_template = Template(u"""
{% macro header(this, kwargs) %}
<style>
.StreetViewIcon{
color: green;
}
</style>
{% endmacro %}
{% macro script(this, kwargs) %}
const fontAwesomeIcon = L.divIcon({
html: '<i class="fa-sharp fa-solid fa-3x fa-street-view"></i>',
iconSize: [0,0],
iconAnchor: [15,0],
className: 'StreetViewIcon'
});
var new_mark = L.marker();
function newMarker(e){
new_mark.setLatLng(e.latlng).addTo({{this._parent.get_name()}});
new_mark.setZIndexOffset(-1);
new_mark.setIcon(fontAwesomeIcon);
new_mark.on('dblclick', function(e){
{{this._parent.get_name()}}.removeLayer(e.target)})
var lat = e.latlng.lat.toFixed(4),
lng = e.latlng.lng.toFixed(4);
new_mark.bindPopup(
"<a href=https://www.google.com/maps?layer=c&cbll=" + lat + "," + lng + " target=blank><img src=img/streetview.svg width=70 title=StreetView class=StreetViewImage></img></a>",{
maxWidth: "auto",
className: 'StreetViewPopup'
});
};
{{this._parent.get_name()}}.on('click', newMarker);
{% endmacro %}
""") # noqa
and the result will be the green marker icon (Pic. 5).
Now is the time for styling the pop-up. For this purpose, we need to expand the <style> section in the macro and override some Leaflet built-in style features. Our final code will look as per below:
_template = Template(u"""
{% macro header(this, kwargs) %}
<style>
.StreetViewIcon{
color: green;
}
.StreetViewPopup .leaflet-popup-content-wrapper {
background-color: lightgreen;
color: green;
border-radius:15px;
height:48px;
width:70px;
}
.StreetViewPopup .leaflet-popup-content {
margin: auto;
display: block;
}
.StreetViewPopup .leaflet-popup-close-button {
color: green!important;
font-weight:bold!important;
}
.StreetViewPopup .leaflet-popup-tip {
border: 8px dashed green;
}
</style>
{% endmacro %}
{% macro script(this, kwargs) %}
const fontAwesomeIcon = L.divIcon({
html: '<i class="fa-sharp fa-solid fa-3x fa-street-view"></i>',
iconSize: [0,0],
iconAnchor: [15,0],
className: 'StreetViewIcon'
});
var new_mark = L.marker();
function newMarker(e){
new_mark.setLatLng(e.latlng).addTo({{this._parent.get_name()}});
new_mark.setZIndexOffset(-1);
new_mark.setIcon(fontAwesomeIcon);
new_mark.on('dblclick', function(e){
{{this._parent.get_name()}}.removeLayer(e.target)})
var lat = e.latlng.lat.toFixed(4),
lng = e.latlng.lng.toFixed(4);
new_mark.bindPopup(
"<a href=https://www.google.com/maps?layer=c&cbll=" + lat + "," + lng + " target=blank><img src=img/streetview.svg width=70 title=StreetView class=StreetViewImage></img></a>",{
maxWidth: "auto",
className: 'StreetViewPopup'
});
};
{{this._parent.get_name()}}.on('click', newMarker);
{% endmacro %}
""") # noqa
bringing our popup a nice look (Pic. 6). Before any built-in Leaflet CSS class we need to provide our own class, which will represent the individual features, as shown in the code above. Without providing our own marker class, all the changes will be applied to any other marker popups, which might not be necessarily desired.

In conclusion, styling the on-click marker in Folium map can be a simple thing since you know how to use the jinja2 MacroElement.
Mariusz Krukar
Links:
- https://fontawesome.com/
- https://leafletjs.com/reference.html#marker
- https://docs.eegeo.com/eegeo.js/v0.1.780/docs/leaflet/L.Icon/
- https://docs.eegeo.com/eegeo.js/v0.1.830/docs/leaflet/L.DivIcon/
Forums:
- https://stackoverflow.com/questions/52136700/how-to-use-font-awesome-as-an-icon-in-leaflet-instead-of-marker
- https://stackoverflow.com/questions/49855062/using-leaflet-awesomemarkers-plugin-with-font-awesome-5
- https://stackoverflow.com/questions/23567203/leaflet-changing-marker-color
- https://stackoverflow.com/questions/31992235/how-do-i-decrease-the-size-of-a-font-awesome-icon
- https://stackoverflow.com/questions/18688630/increase-font-awesome-icons